
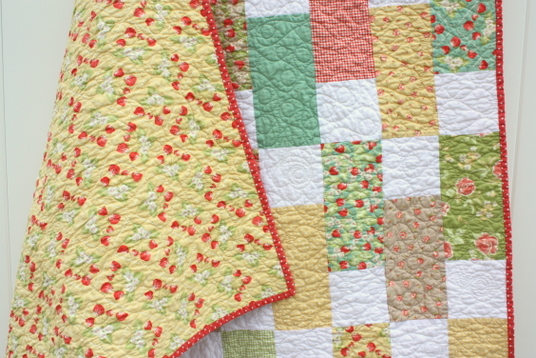
This Easy Bricks Quilt designs is one of my favorite simple quilt tutorials for using 5" Charm Square precuts and 10" x 10" Layer Cake precuts. I love the simplicity of this quilt and using the precut fabric squares makes the quilt come together SO quickly. (This post was updated in 2019.)
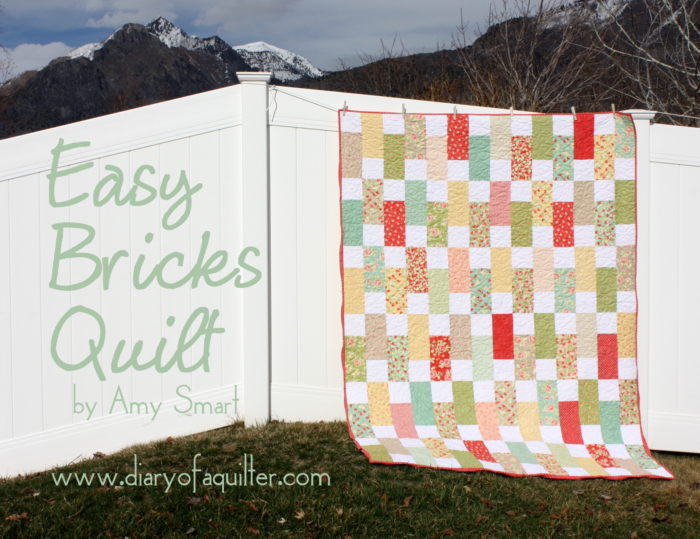
The Easy Bricks Quilt is a perfect quilt for beginners or anyone who needs to make a good-looking quilt, fast. It works well in lots of different types of fabric too. The fabric choice can take this look from traditional to modern.
This quilt finishes at 63" x 84"
Fabric Requirements:
- 2 Solid White Charm Packs (or cut 84 squares 5" x 5" from 1 ⅝ yard of white solid fabric)
- 42 print squares 10" x 10" (or one Layer Cake or 10" Stacker)
- ½ yard binding
- 3 ¾ yards backing
[SIZE OPTION: This would be an easy quilt to make into a twin size quilt by adding a 4" border all the way around. For this adjustment, use 1 yard of additional fabric for the border, cutting it into 8 strips 4 ½" x Width of Fabric. Backing requires 5 ¼ yards and ⅝ yard for binding.]
Take 42 10" squares and cut them in half, creating 84 5" x 10" rectangles.

Sew one Bella Solid 5" square to the top of each of the 84 5" x 10" strips. I like to just chain sew them through.

Press seams toward the print rectangles.
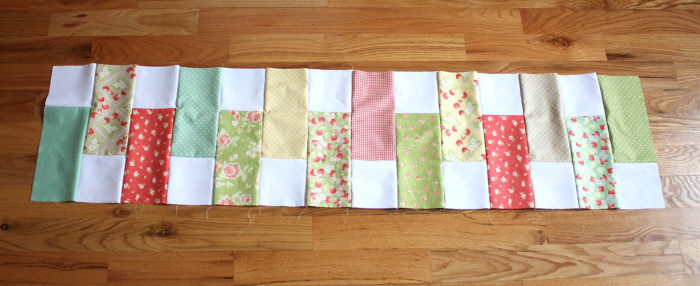
Sew 14 of the new units together, alternating the white square at the top and the bottom. Create 5 more similar rows of 14 units each. (I suggest laying out the whole quilt before assembling these rows.) Press the seams to the left on rows 1, 3, and 5 and press seams toward the right on rows 2, 4, and 6.
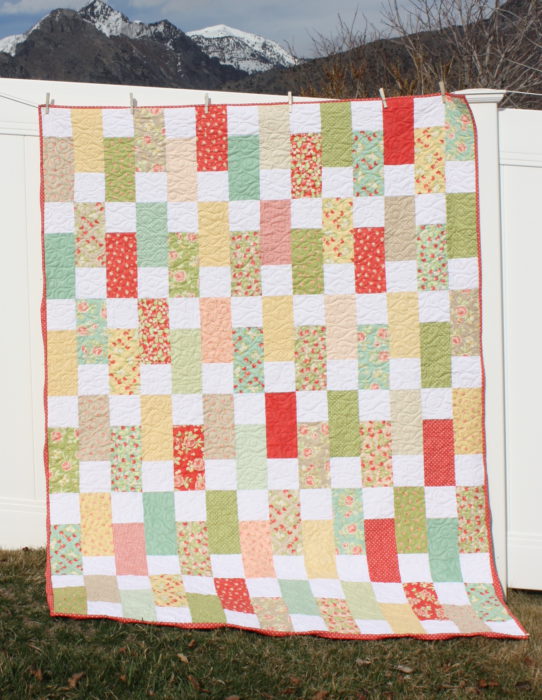
Sew the 6 rows together. Alternating seam directions should help rows line up nicely. Press final seams all one direction.
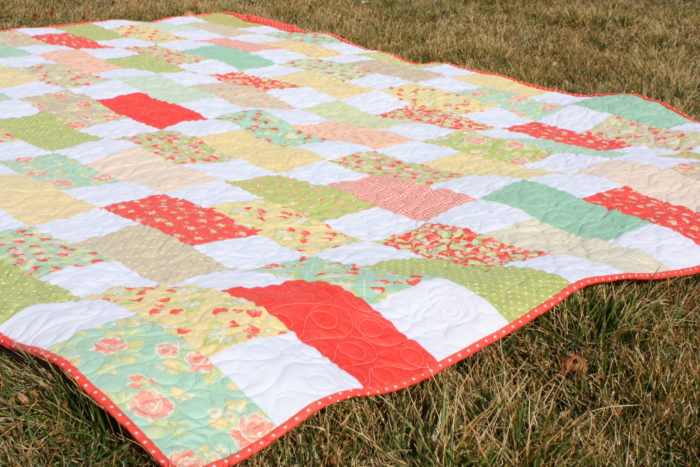
Quilt (mine was quilted by my wonderful friend, Meridee) and bind. You can read how to finish a quilt here.
And there you go! One lovely, quickly assembled 63" x 84" quilt! (If you add the border, the finished quilt will be 71" x 92".)
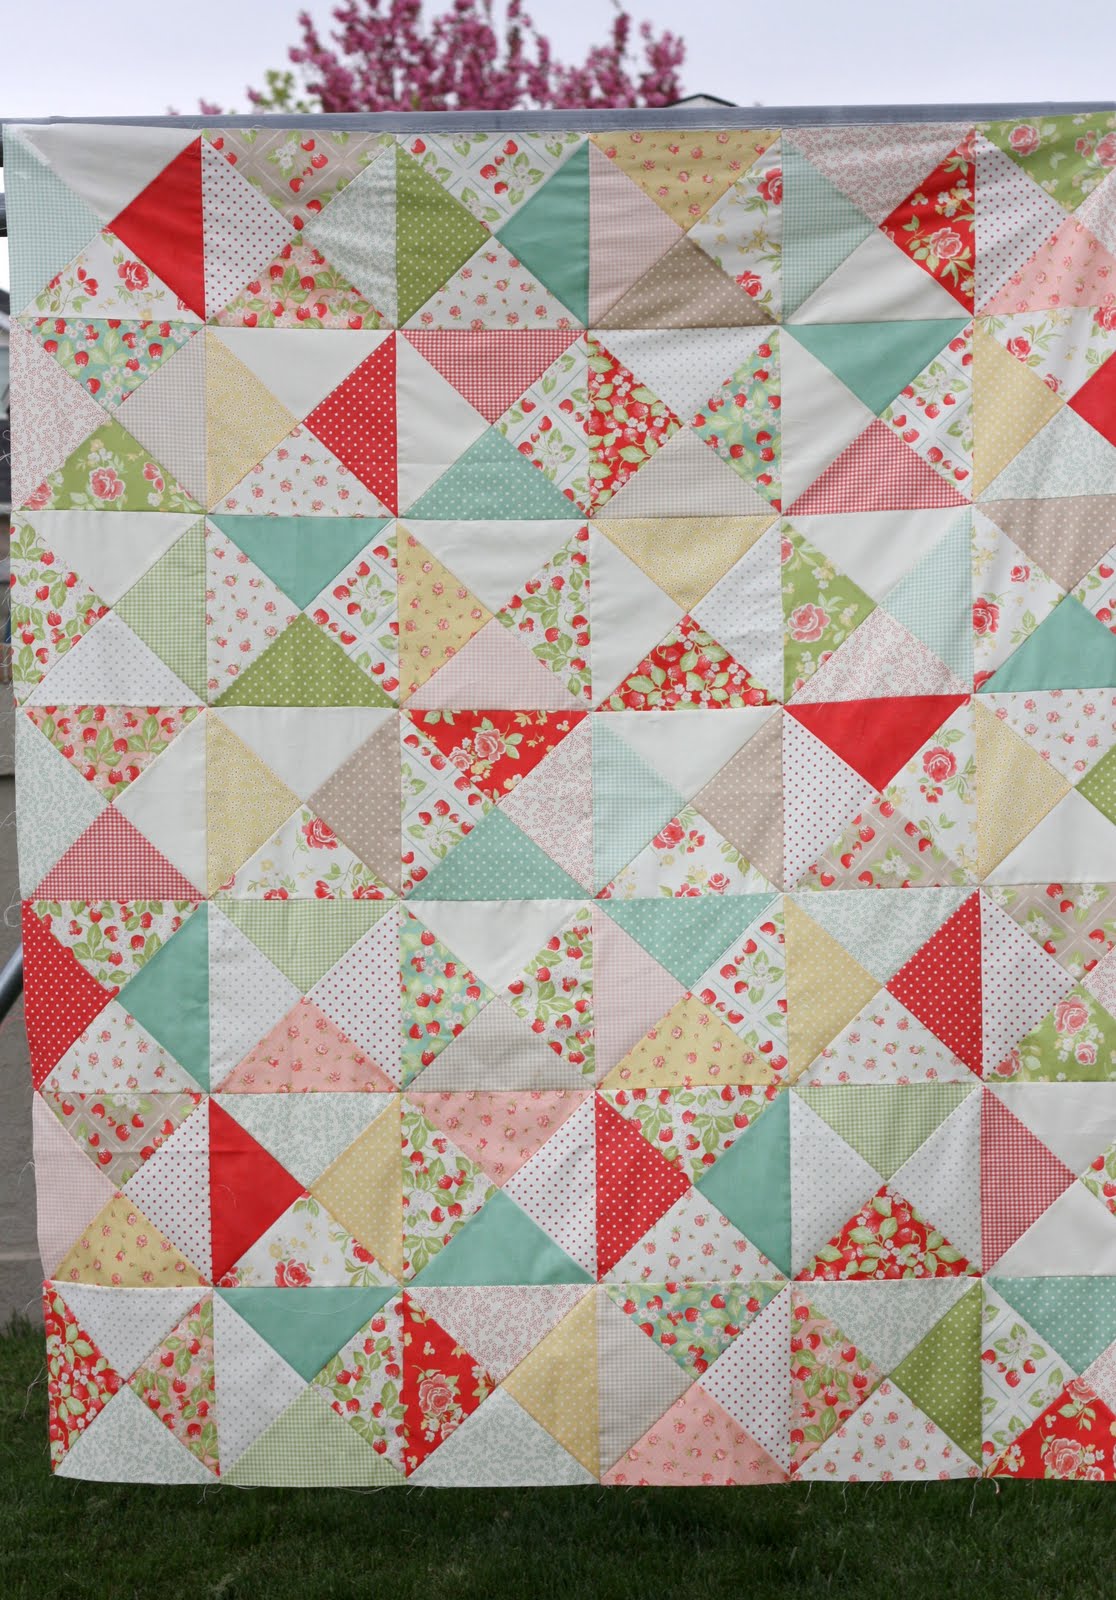
The Bricks quilt only requires 42 10" squares, so technically only 1 Layer Cake, but I used 2 layer cakes for this project because I wanted to only use the prints that would really contrast nicely against the white solid. So what to do with 42 beautiful leftover squares? Make a second quilt! This one is still a work in progress, but I have the top pieced. I just need to add the borders now. I used the Hour Glass Pattern available in my Pattern Shop. (The only modification to that pattern is that I used 42 10" squares instead of 48 - thereby taking off one row of 6 blocks.)
You can see the finished Hour Glass Quilt here.
These two quilts are perfect way to use up a favorite set of 10" x 10" Layer Cake squares that you've been saving for "just the right project." Now's the time use that fabric!
 Looking for other free quilt tutorials - check out over 90 free quilt tutorials here.
 Looking for other free quilt tutorials -


manybooks
What a great tutorial! I love that it is simple in piecing and will show off fabrics really nicely. THANK YOU for the work you put into this and sharing 🙂
prsd4tim2
I love both quilts! And I love the 2 for 1 aspect too. Thanks for the tutorial. Can't wait to try it. And congratulations on being on MBS.<br /><br />It was nice to meet you today at Quilt Market.
Carolyn A Schmitt
Love the brick quilt, I was looking for a quick easy quilt pattern for one of my great grandsons. Thinking of using four basic colors (in prints that read as a solid), Fire trucks, cars, tractors and boats. Then a solid for the charm squares.
Thank you for the tutorial. Can I lay the bricks going right to left? Would it use the same amount of fabric?
Carolyn
Amy
I haven't done it myself, so I can't say for sure. You could sketch it out on paper first, just to check your vision before cutting fabric. Let us know how it goes!
Manda
Fabulous quilt! I will head over to look at the tut!
Kathryn
Awesome tutorials - I love them both!
Sherry
Both quilts are gorgeous. Thanks for sharing!
Caitlin T.
such a gorgeous quilt! i'm definitely adding this to my to-do list!
Live a Colorful Life
You're a very fine baker, Amy!
Lydia
Thank you, Amy! I have it bookmarked for future reference!
Judy
I want to say Thank You. I love so many quilts I see and wonder how many more patterns I need to buy. Thank you very much for your kindness to give us one of your beautiful quilts. I'm looking forward to making that Strawberry Fields quilt that you show there, another favorite!
Funky Kim
I cannot buy one more quilt kit. Not until I finish up a few (HAH!) that are in my sewing room. I am easily distracted. My only downfall!<br /><br />It was fun seeing you today at the meet up! I'll see you again in the fall! Woot!
Paula and Mel
What a great quilt and easy also. I am a new quilter and have a question.. How can I make this queen size?<br />Thanks for the great tutorial.<br />Paula
Maimie
I loved this quilt. Simple, but really eye-catching. I had a Collection for a Cause layer-cake and some cream charms that I am going to use. <br /><br />Must say I do not go to too many blog sites - your's is very interesting - thank you for the tips and great patterns. I will be back - I have saved your blog to my favorites.
Stephanie
Love your blog and this tutorial! I am going to have to make several of these-fast!
Melissa {polkadot chair}
It's so pretty!! I must say I love seeing the snow capped peaks in the background ! I really miss those mountains. <br />Melissa
Trudi
Love the Easy Bricks Pattern Amy, mine went together in an afternoon! Thanks for such clear and great instructions 🙂
Tahel
Hi AMy Thanks for shering those tutorial, i love both! Tahel fromIsrael
Beginning Quilting Now
This is one of the easiest to follow tutorials I have found online. I think this quilt is very pretty and I'm sure that a lot of quilters out there will have a fun and stress-free time in making this quilt. 🙂
Greenstylemom
I made a variation of this quilt as a gift for our kindergarten teacher. I blogged about it today. Come check out what you inspired!
notes of sincerity
Thank you *so* much for this tutorial. I made this quilt with the Sew Cherry fabric line, yesterday, and posted. I will post the quilt in the next day or so. I can hardly wait to order the batting and complete the quilt. :o)<br />I will certainly use this tutorial again! Thanks again!! :o)
Melissa Clifford
I just finished! I'm so geeked I hope my BFF likes it.<br /><br />I wasn't sure where to post that I made this one. I went to the Moda Bake Shop as well.<br /><br />I will try to post a pic in the Flickr group.
Emily Bailey
Would love to feature your picnic quilt on a blog post I'm doing. Can I use your image? I will link back to your page.
Amy
Sure! Thanks for sharing and for linking back. 🙂
Monica
Can I adapt this to a jelly roll? Maybe 2 1/2 x 5 rectangles and a 2 1/2 x 2 1/2 white solid? Is there a different pattern for that?
Amy
Hi! Yes - you can adapt it how ever you like. Those measurements will certainly work, you will just need a lot more blocks as the scale of the blocks is smaller.
I did something similar with a jelly roll, only longer strips, here https://www.diaryofaquilter.com/offshore-crib-quilt-tutorial-for-precuts/