
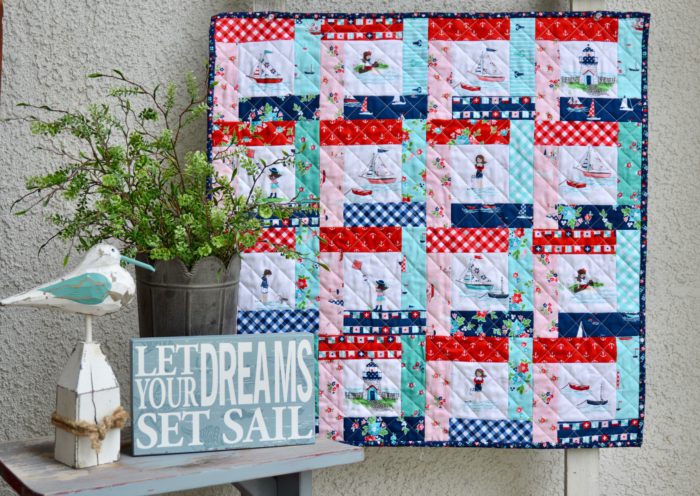
I have a fun guest post today from Amanda of Jedi Craft Girl. It's a darling mini quilt tutorial and she shares some great tips for fussy-cutting cute fabrics (like this adorable Seaside print) as well as how easy it is to sew partial seams! This project is simple and fun - a perfect project for summer months when there's less time for a big finish, but you're still itching to play with fabric. This would also be a great project for scraps!
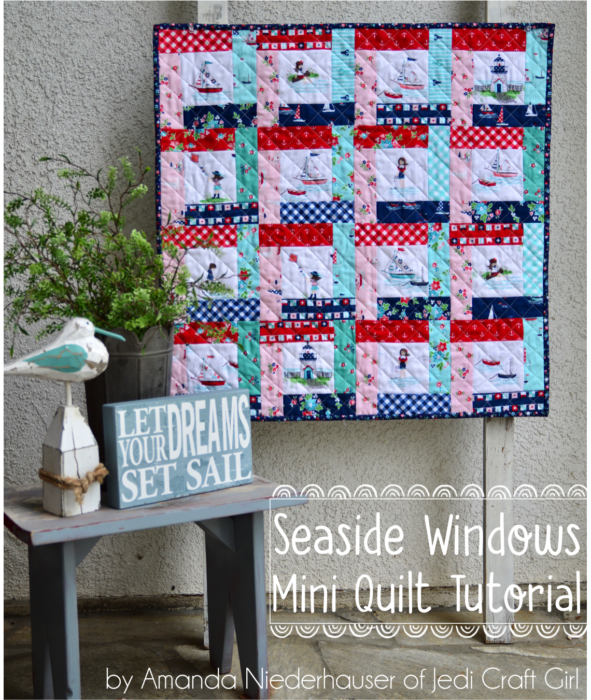
Ahoy! It's Amanda from Jedi Craft Girl and I'm super excited to over here on Amy's blog today!!! I can't wait to share this fun little tutorial with you!
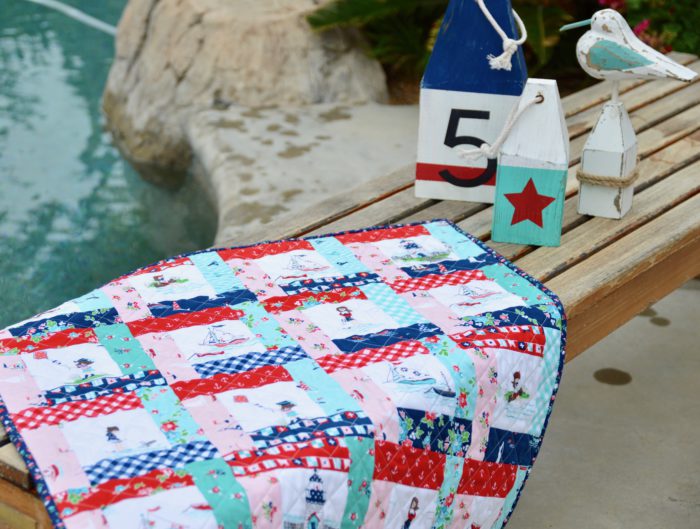
Today we will be making this 26" square mini quilt and learning about fussy cutting and partial seams. The fabrics in this quilt are from Seaside by Tasha Noel for Riley Blake Designs. So cheerful!!! (Check your local fabric shop. Also available online from the Fat Quarter Shop*.)

Fabric Requirements
½ yard of theme print fabric
fat quarters of navy, pink, red, and aqua fabrics. (you can use 1 fq of each color, or go for a scrappy look and use lots of fabrics)
¼ yard binding fabric
¾ yard backing fabric
All seam allowances ¼"
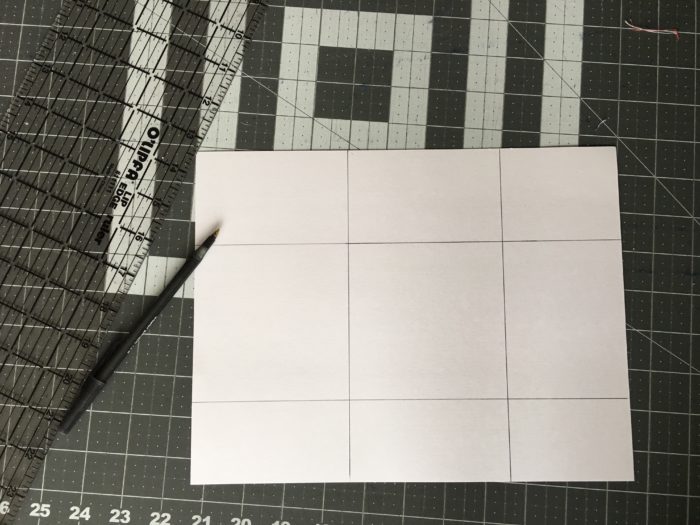
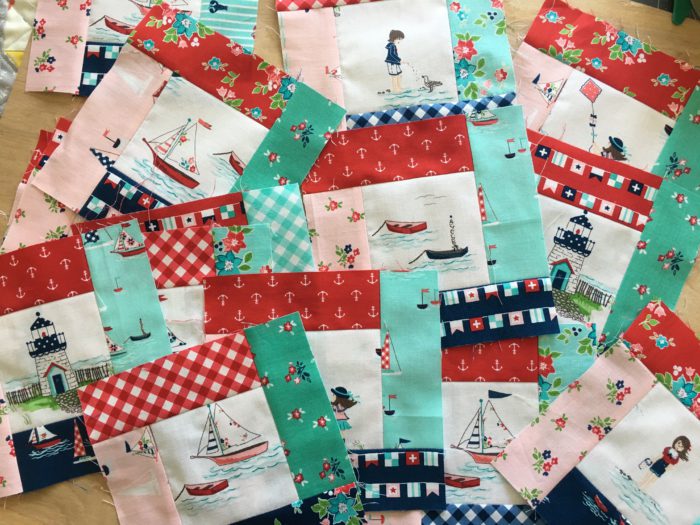
Grab a piece of cardstock and draw lines at 4" so when they meet they create a 4" square.
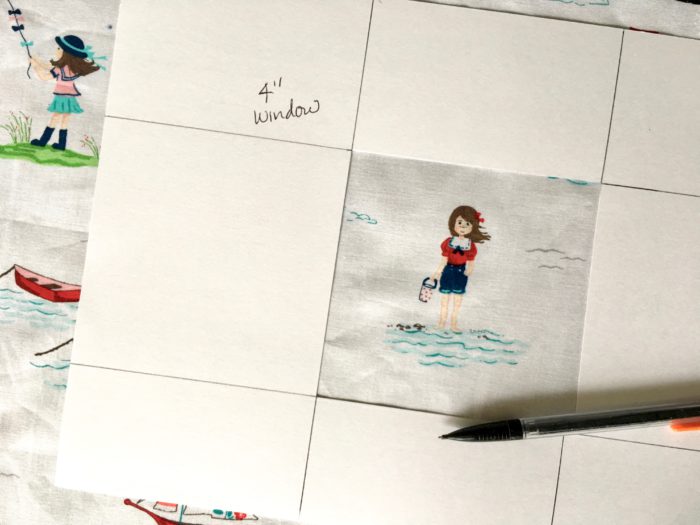
Cut out the 4" square to give you a "window". Place the window over the motif you want to fussy cut.

Using pencil, draw the square. Repeat until you have 16 motifs.

Using scissors, roughly cut around the pencil square, but don't cut on the line.
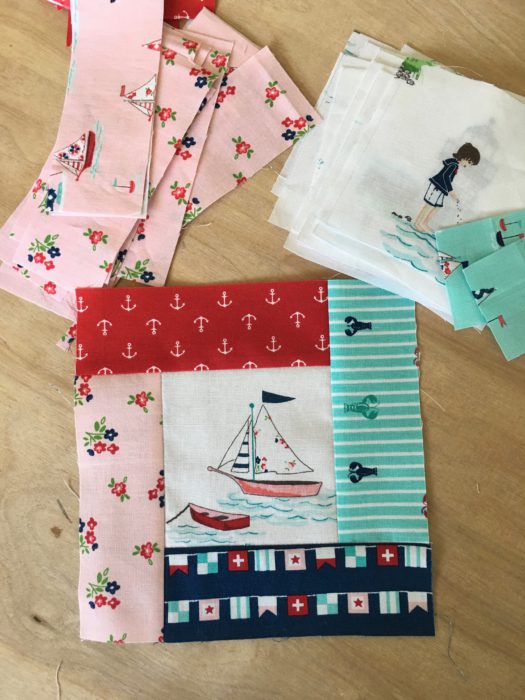
Place the motif on a rotating cutting mat and using the pencil lines as guides, line it up on the inch lines. Now, using the cutting mat lines, cut a 4" square. This may differ slightly from the pencil marks. Not to worry, the pencil will be covered in the seam allowance. Repeat until all 16 motifs are cut to 4" square.

Cut (16) 2" x 5 ½" rectangles each from the red, navy, pink, and aqua fabrics. You can get as scrappy as you want!
That's all the measurements!! Super cool!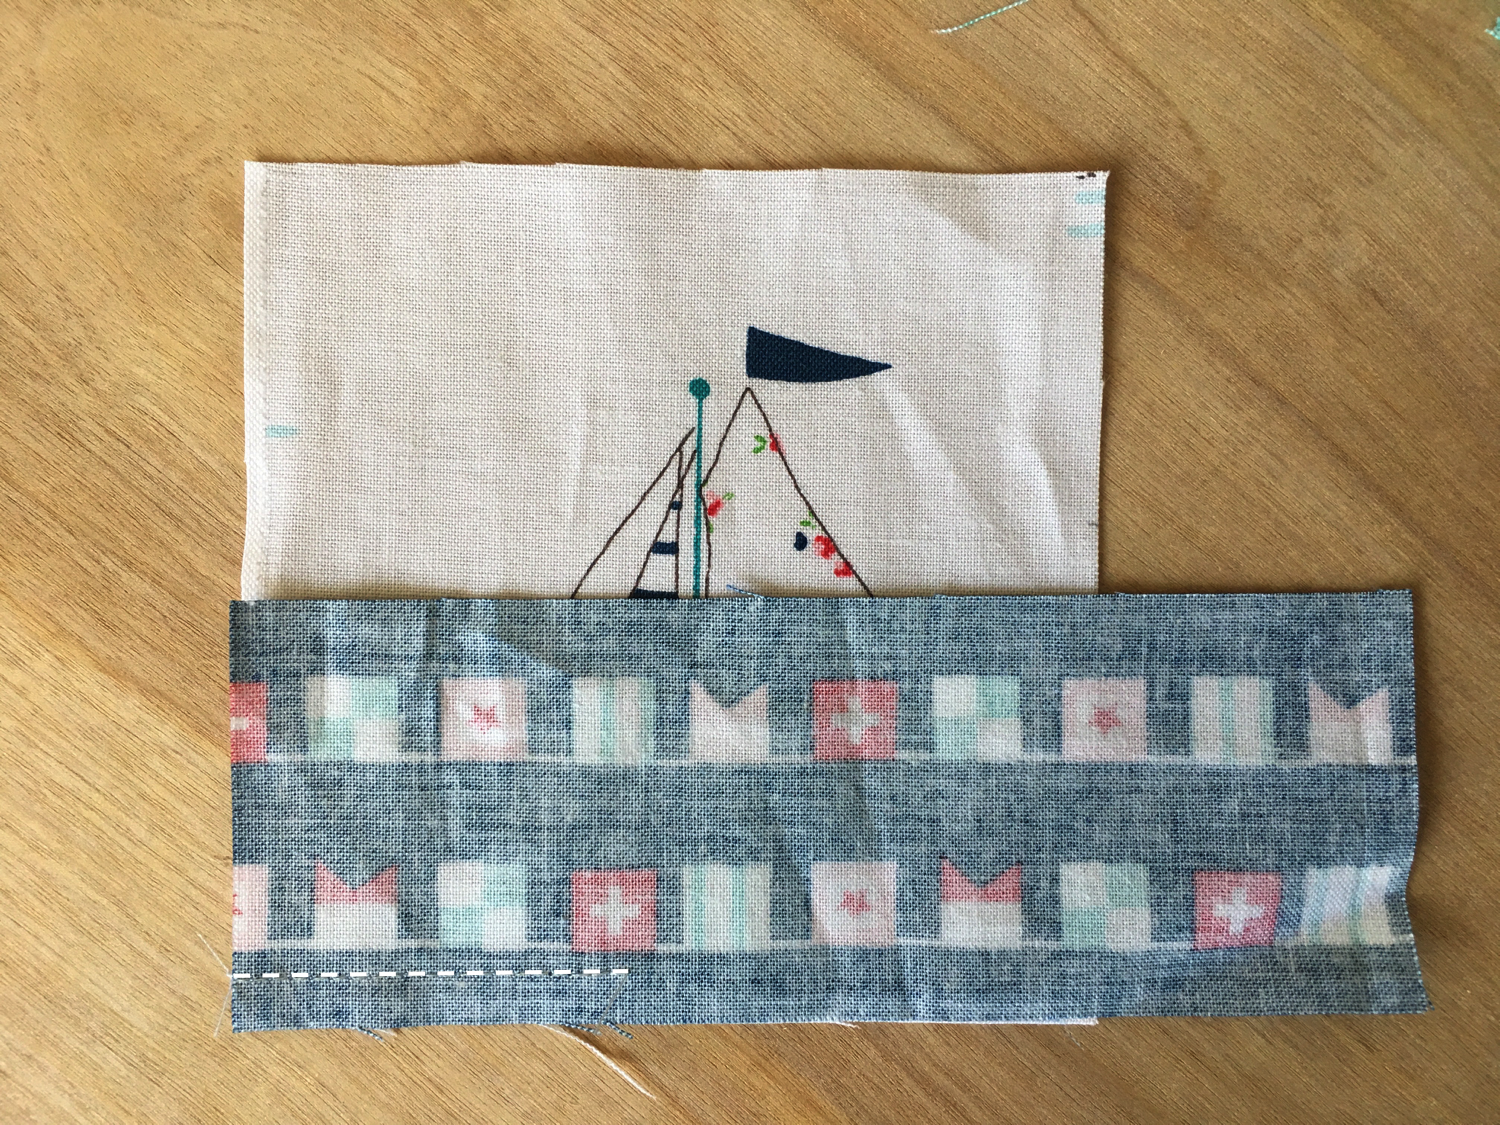
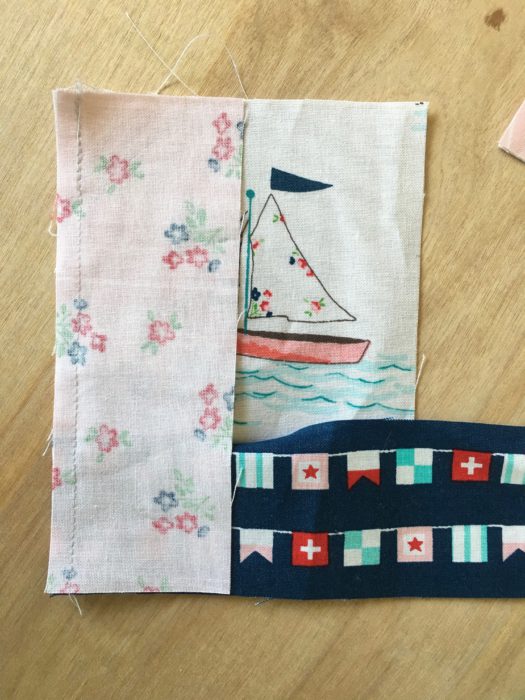
Place a navy strip on the bottom of a 4 " square, right sides together, lining up the left edges. Sew a partial seam as pictured above. No need to back stitch. Press only the partial seam toward the navy.
Place a pink rectangle, right sides together on the left side of the motif. Sew a ¼" seam along the entire length.
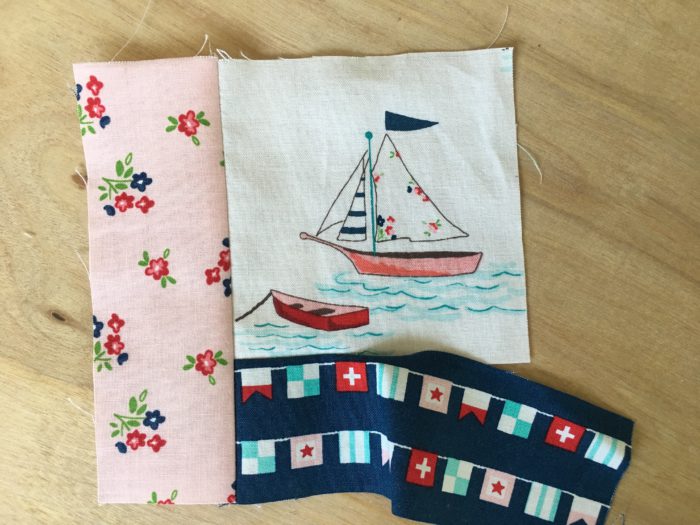
Press toward the pink.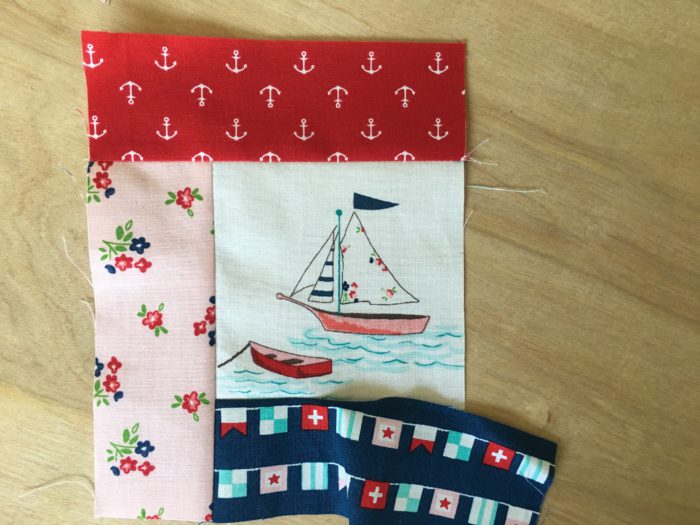
Repeat this process by sewing a red rectangle to the top, pressing toward the red.
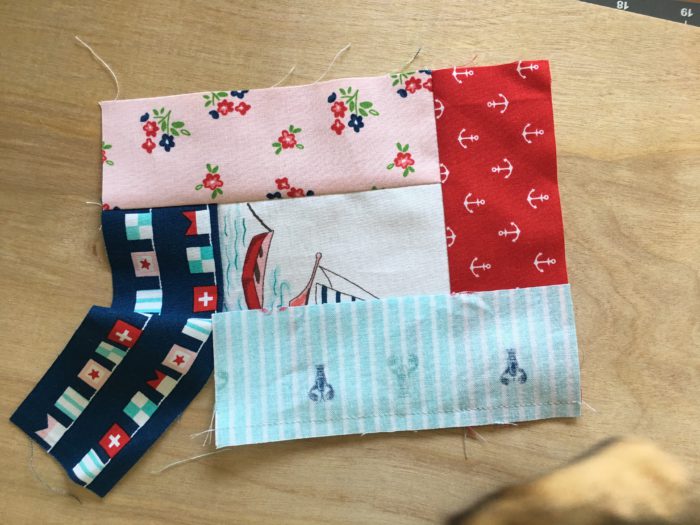
Sew an aqua rectangle to the right of the motif, pressing toward the aqua. Make sure to keep the navy strip out of the way.
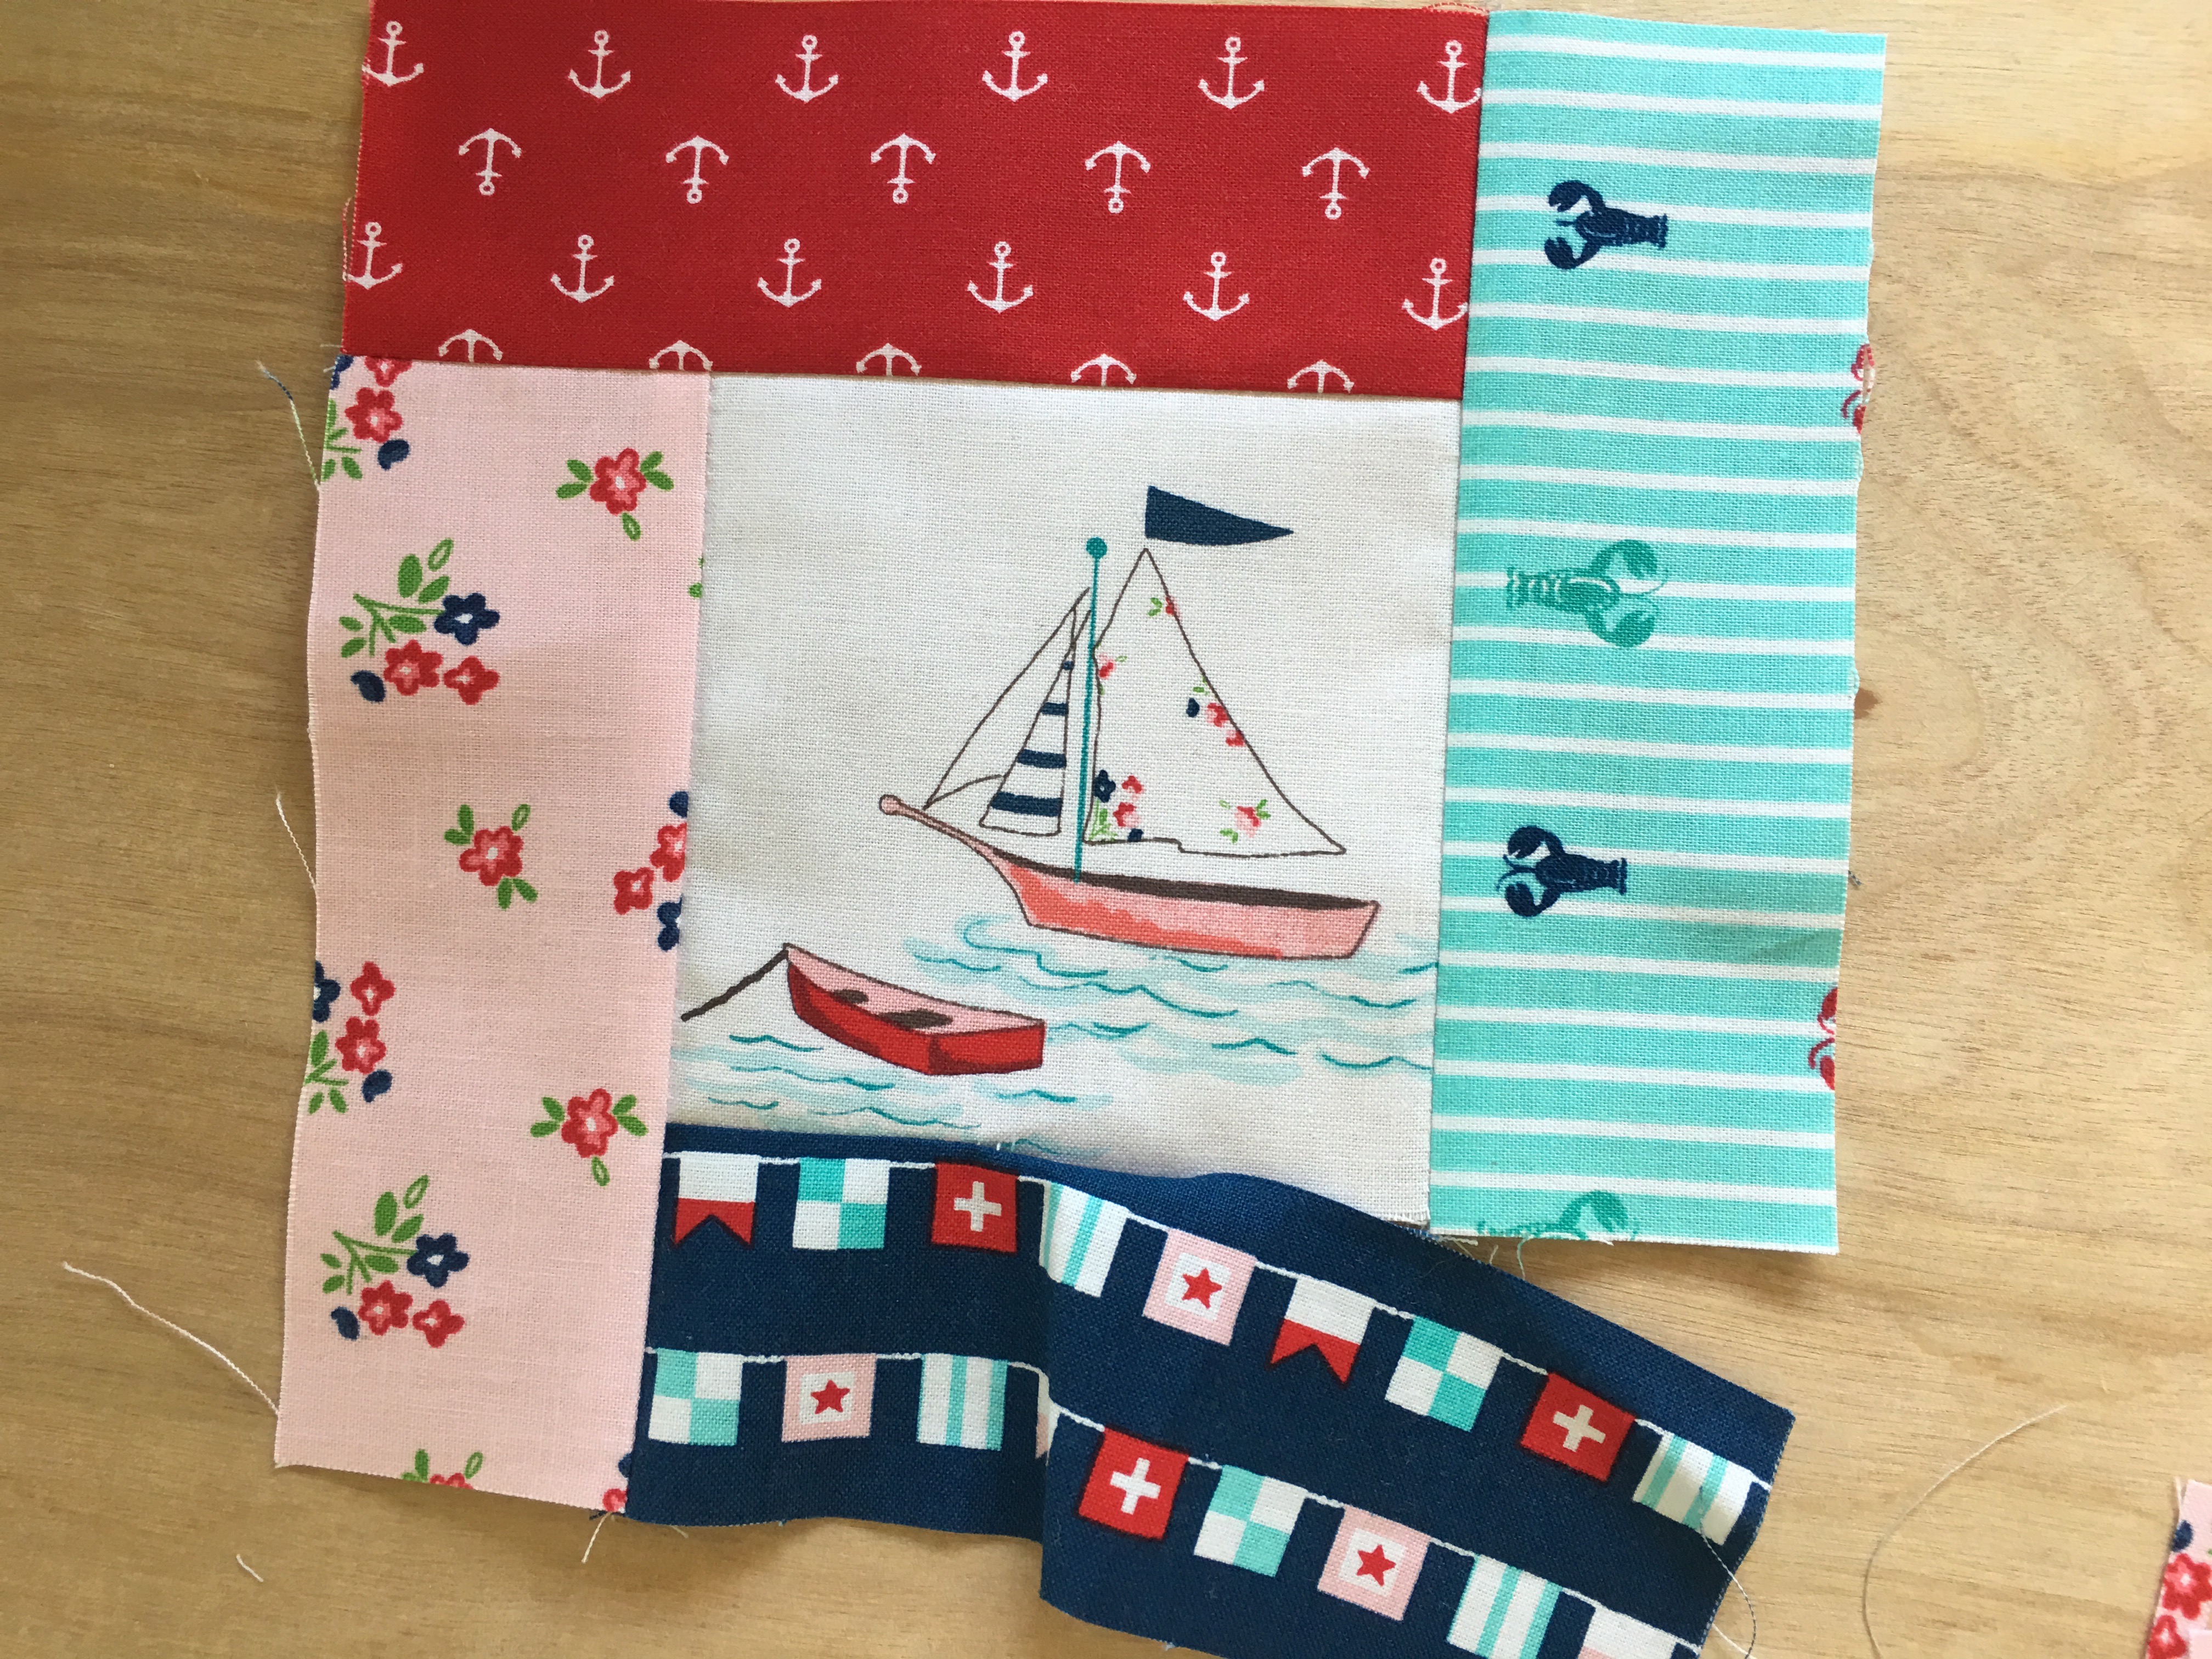
Now it's time to complete the partial seam. Your block should look like the picture above at this point. Fold the navy rectangle back so it's right sides together and the raw edges are lined up. Sew the completed seam. I like to do a little "stay stitch" or you can backstitch where the two seams meet.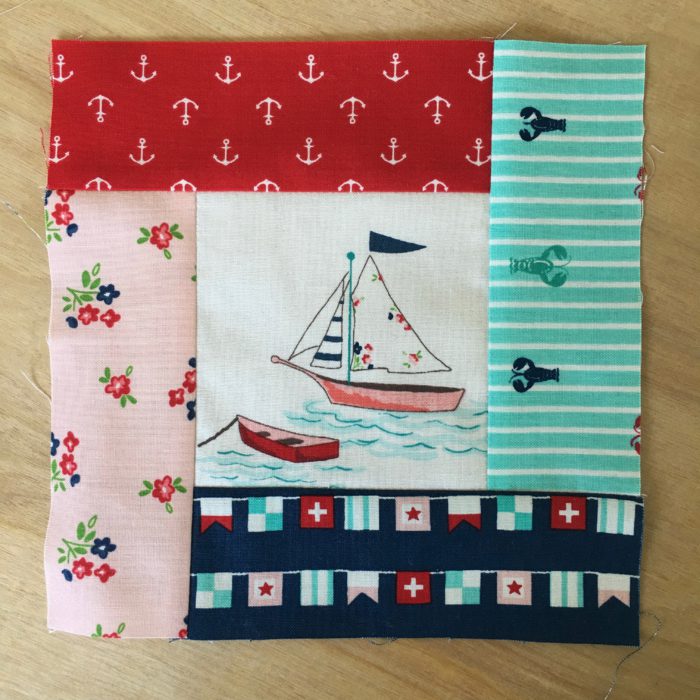
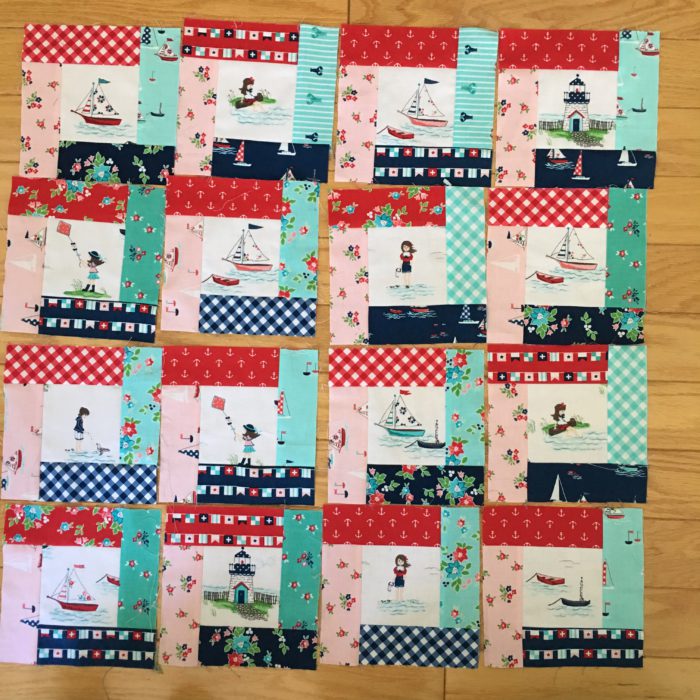
Press toward the navy. Repeat this process for all 16 blocks. For faster sewing, sew all the navy at the same time, chain piecing. Sew all the pink at the same time, chain piecing, and so on.
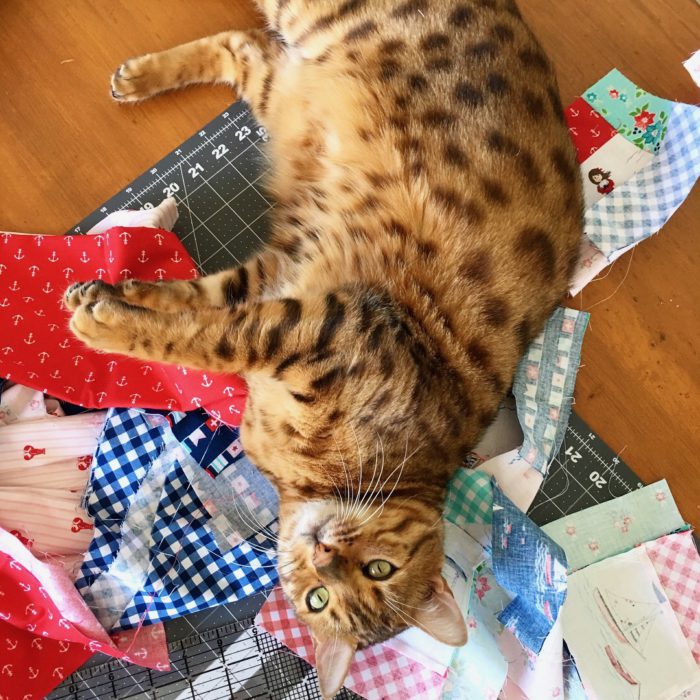
Once the blocks are sewn, let your cat roll around in them before proceeding.
The blocks are so happy!!!

I didn't lay the entire quilt out to begin with, I had a variety of each color and did my "grab and go" method. Sometimes this comes back to haunt me when putting the final quilt together. I had my artsy daughter work her magic laying out the blocks so all the prints were spaced. There were a few that ended up close together, but oh well!
Here is what we came up with. Once you have your blocks laid out, sew them together in rows. Press the seams of each row in alternating directions. I always press toward the first block of the odd number row and away from the first block of the even row - so I remember!
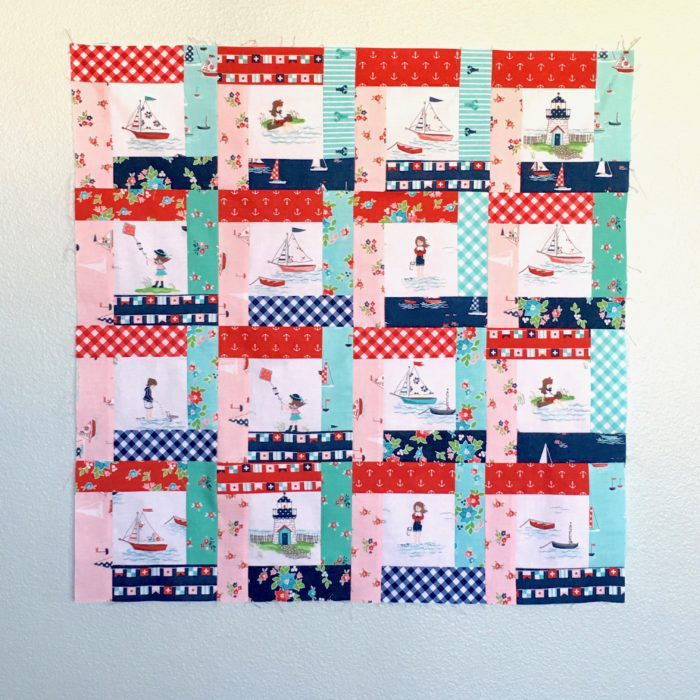
Sew the rows together, press seams going in one direction. Baste, Quilt, and Bind!
I hope you enjoy this project - it was so fast to put together and would make a lovely gift for you or a loved one 🙂
I would love to be friends! Find me on on my blog, Jedi Craft Girl, or Instagram @jedicraftgirl.
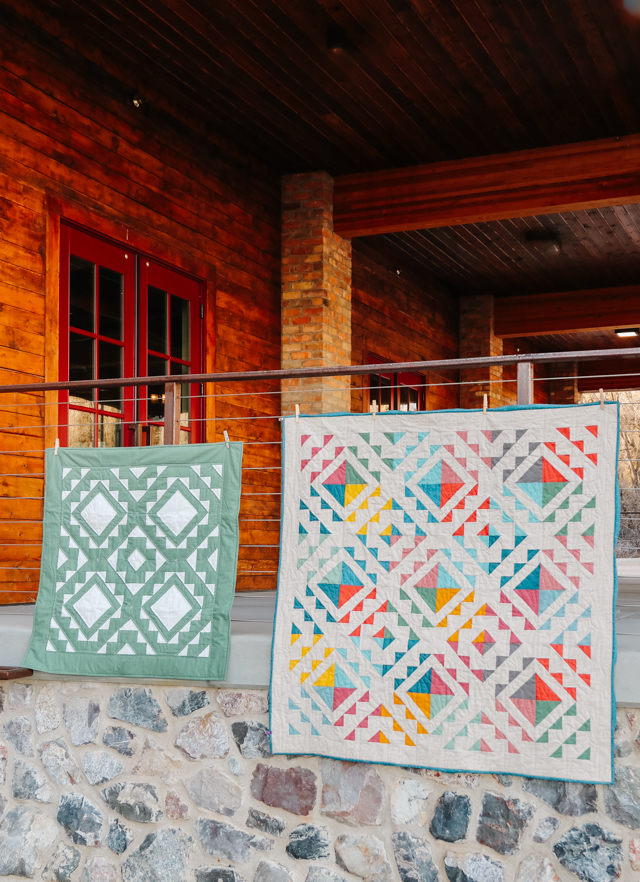
Here are a few of my latest quilt patterns!
Sunny Days Quilt featuring Sunnyside Ave fabrics

Good Morning Starshine Wall Quilt featuring Guenivere fabrics
Love it, Amanda! I'm totally adding this project to my list - especially next time I come across cute fabric for fussy-cutting!
*this post contains affiliate links
Jocelyn
Wow your blocks are so cute!
Kay
This is fab, I need some of that fabric now. x
Melanie
What size is the finished guilt?
Nancy @ Grace and Peace Quilting
Too cute!!!
Little Quiltsong
So pretty with this delicious fabric! Thank you for the tutorial on this lovely mini quilt!
Patti A.
Thanks love this so nice of you to share it!!!
Blinkey
This is so adorable! I’m hoping to make this. Thank you!!
Rosemaryflower
So sweet. I like Amanda, she is a very industrious quilter.
Amy, I am so happy you shared this with us. I have a few "juvenile" fabrics this would be perfect for (I never bought this kind of fabric until I had grand children)
This quilt turned out adorable
Kathy
Hi do u sell the fabric.
Amy
No, I'm afraid I don't sell fabric. Sorry.
Ellen F. Fournier
Thanks for your partial seam tutorial. I am working on a quilt with partial seams, and told myself I would "figure it out" when I got there; thanks for the instructions.
Kathy Dennis
Do u sell the material online.
Amy
No, I don't sell fabric. But the fabric is available from the Fat Quarter Shop! https://shrsl.com/yon5
Lea
How did I ever miss this fabulous tutorial? I pinned it. Thank you Amy!
Vivian
Hi Amy,
I used your technique and made a super cute wall-hanging for my grandson.. using the 4" squares as in this pattern.
I want to make another one for a baby shower using 5" squares (instead of 4") but need help figuring out how long to cut the 2" strips. Any advice would be greatly appreciated. Thanks!