
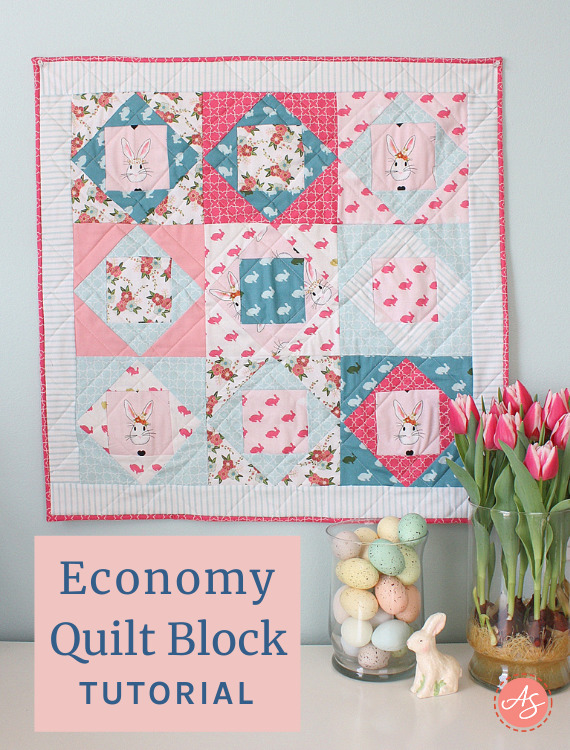
It's week 4 of the Riley Block classic quilt block challenge. This week we're making Economy Blocks - which are definitely among my top favorite quilt blocks. In fact, I've already been on an Economy block quilt-making kick this year, with two finishes since January. Plus I've got lots of Economy Block Quilt inspiration for you. See below for pictures!
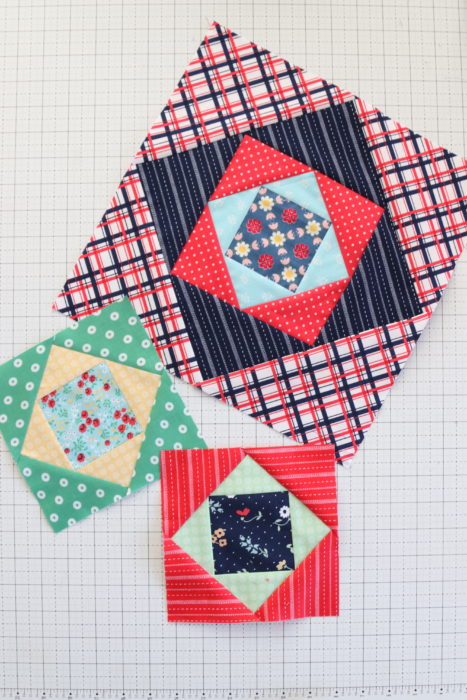
This is such a great block for playing with fabric, making a scrappy quilt, and the centers are perfect for featuring fussy-cut prints. It's a really simple, no-waste block (hence the Economy name).
As with the blocks from previous weeks, the other Riley Blake Designers and I are sharing instructions for two sizes: 6" x 6" and 12" x 12" finished blocks.
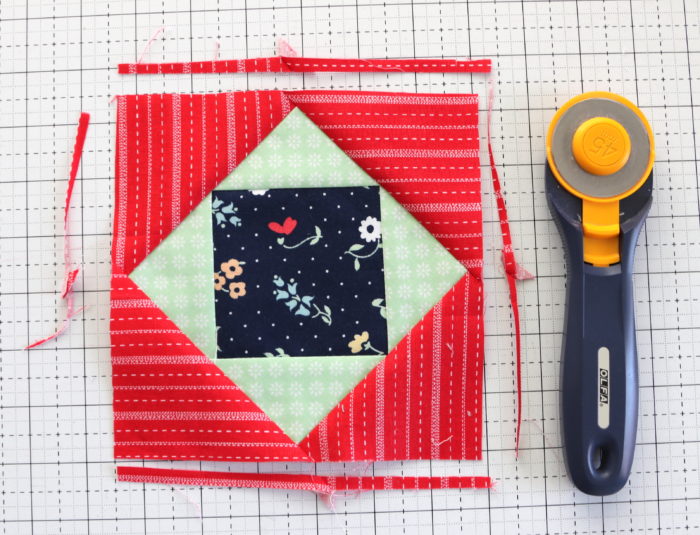
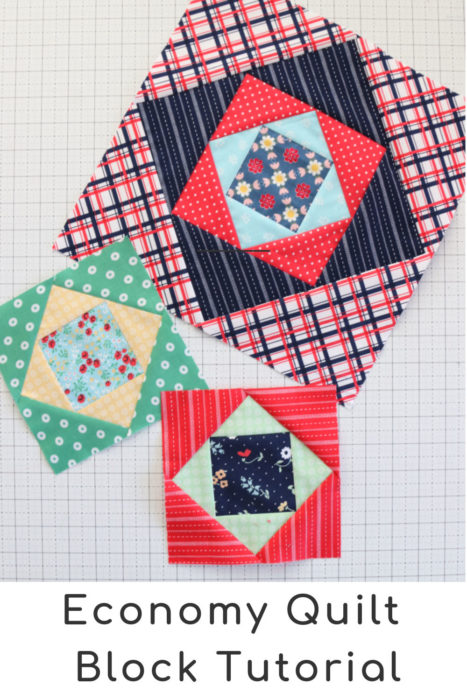
6" x 6" Economy Quilt Block tutorial:
Fabric Requirements:
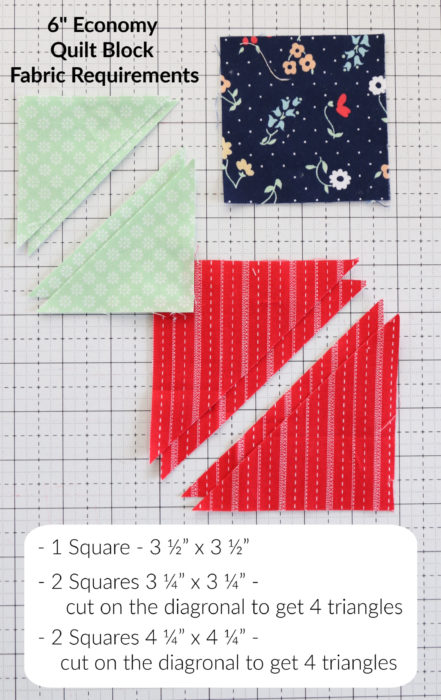
- Center Squares - 3 ½" x 3 ½" square
- 2 Squares 3 ¼" x 3 ¼" - cut both squares on the diagonal to get a total of 4 triangles
- 2 squares 4 ¼" x 4 ¼" - cut both squares on the diagonal to get a total of 4 triangles
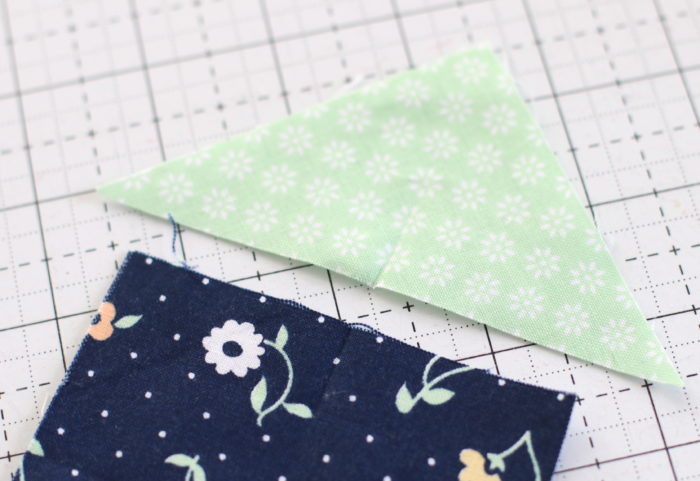
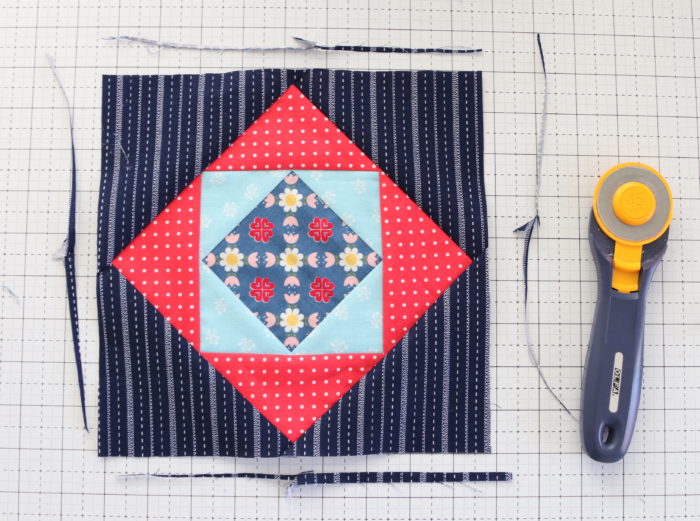
Center the long edge of two of the smaller triangles on opposite sides of the center square and sew in place using a ¼" seam. (This is one of the very rare times I don't recommend a scant ¼" because it can make your block slightly too big. Use an exact ¼" seam allowance.) Triangle tips will overhang the outside edges of the square.
Helpful tip: to make sure the that your triangles are centered, fold the long edge in half and make a little crease with your finger nails at the center. Do the same on all four sides of the center square. Match up crease marks to easily center the triangle.
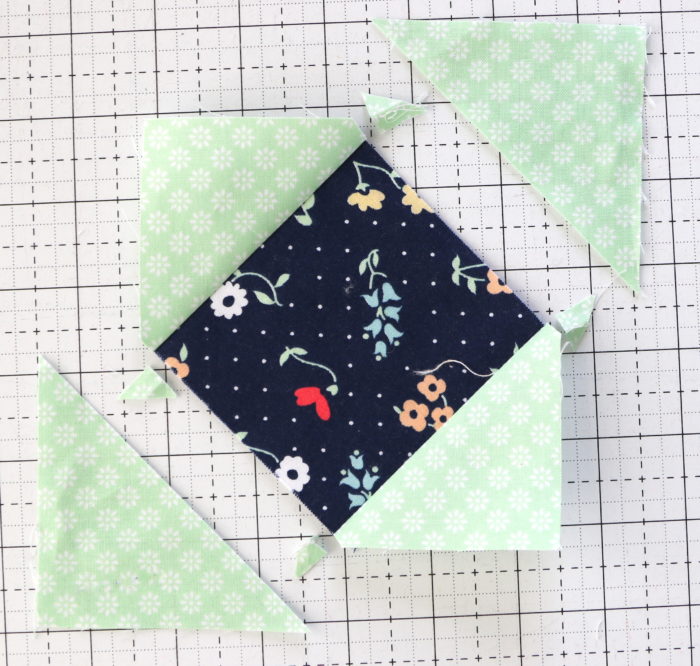
Press seams toward the outside triangles. Trim dog-ears overhanging the square. Repeat the process with the remaining 2 triangles, pressing seams toward the outside.

Find the center and carefully square up the block to 4 ¾" x 4 ¾" by trimming equally on all four sides. (Be careful to leave a ¼" for seam allowance at each point.)
This next step could seam unnecessary, but I promise you that taking this extra step will ensure the accurate sizes of your quilt blocks, which will make a huge difference when you go to piece your blocks together.

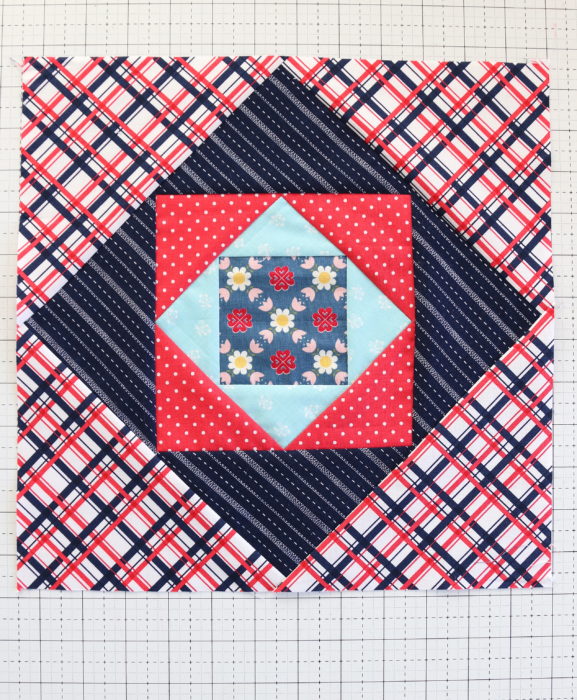
Repeat the same process with the final 4 triangles, sewing two sides, pressing toward the outside, sew remaining 2 triangles, press.
Square up pressed block to 6 ½" x 6 ½".
TIP: if you prefer extra fabric for squaring up, cut squares for middle triangles at 3 ½" x 3 ½" and squares for outside triangles at 4 ½" x 4 ½".
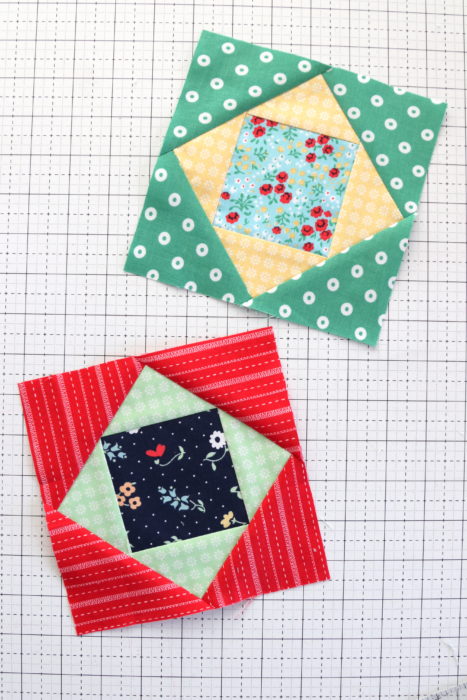
And there you have a perfect 6" x 6" finished (6 ½" x 6 ½" unfinished) Economy Quilt Block.
12" x 12" Economy Quilt Block Tutorial
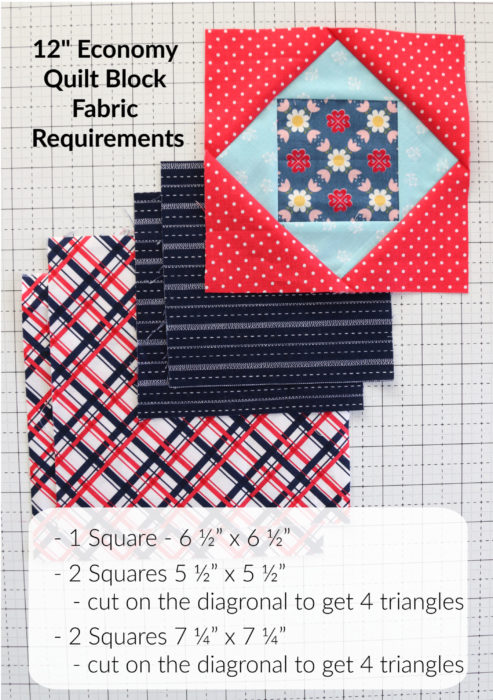
Fabric Requirements:
- Center Squares - 6 ½" x 6 ½" square
- 2 Squares 5 ½" x 5 ½"- cut both squares on the diagonal to get a total of 4 triangles
- 2 squares 7 ¼" x 7 ¼" - cut both squares on the diagonal to get a total of 4 triangles
This is clever because you can either cut a 6 ½" x 6 ½" fabric square for your center OR you could use a 6 ½" x 6 ½" unfinished quilt block. Like the ones we just made above. How great is that?? 🙂
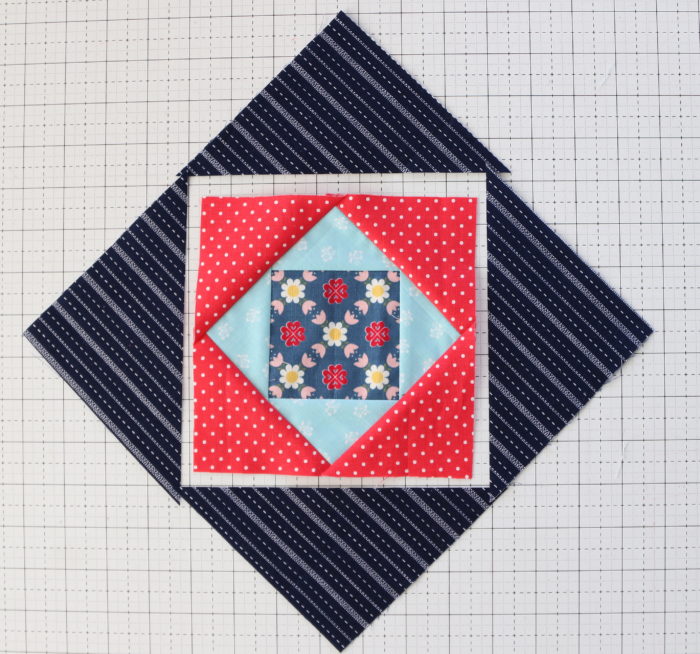
Repeat the process as before, adding 4 triangles to the sides of the existing block
and then square-up sides. Square up first addition for 12" block to 9" x 9".

Add final set of triangles to all four sides.
Square up final block to 12 ½" x 12 ½".
And there you have it! Economy blocks are so much fun to make - they're a great way to show off a fabric collection that you love, but can't decide what to do with it. Like this quilt:
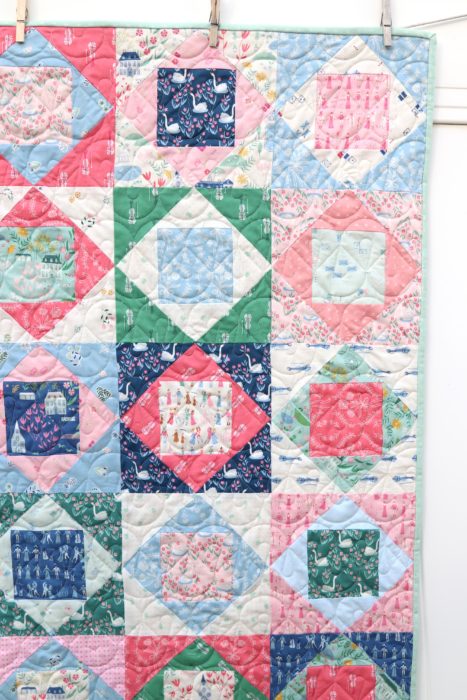
This Economy block crib quilt was made with Citrus and Mint's Pemberley Collection using an 8" x 8" Economy block (tutorial here).
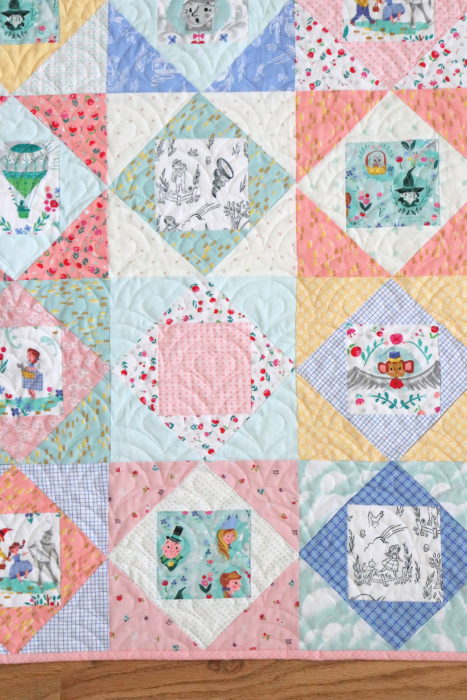
As I mentioned, Economy block quilts are perfect for fussy cutting novelty fabrics for the center block. Here's an example where I used Jill Howarth's Dorothy's Journey, a Wizard of Oz-themed collection from Riley Blake.
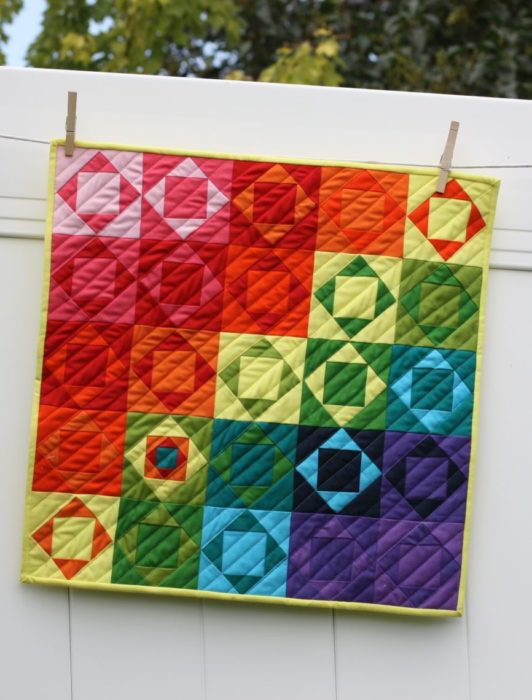
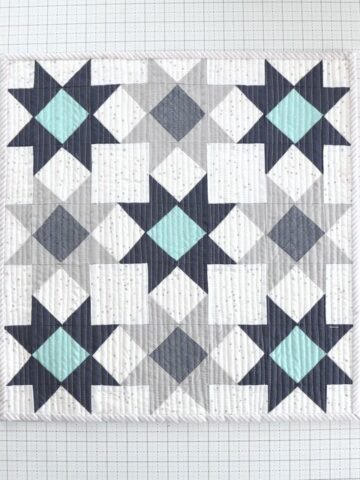
And lest you think Economy blocks look too traditional, here's an Economy block variation mini quilt using only solids that gives the block a modern vibe.
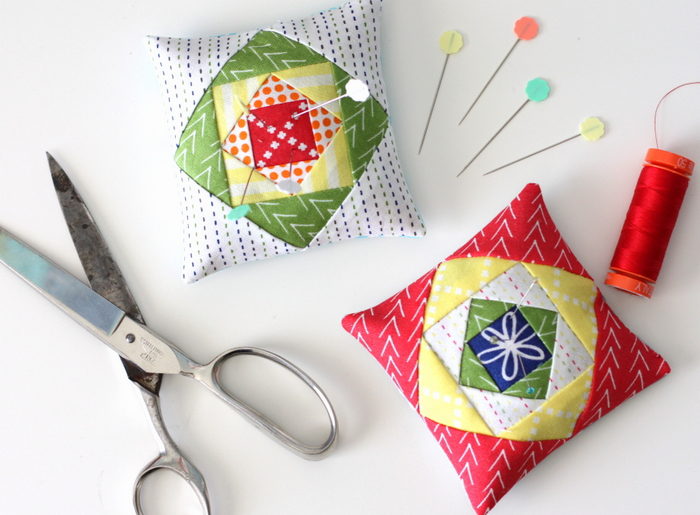
And here is a mini 4" x 4" Economy block that I made into pin cushions. To help these little guys stay accurately pieced, I foundation paper-pieced them using this template I found on Pinterest. I copied the diagram and resized it to the size I wanted (in this case 4″ x 4″).
Another favorite source of Economy block inspiration is Rita from Red Pepper Quilts. She's made may beauties and her fabric choices are always amazing.
So there you go! Economy Quilt Block inspiration galore!
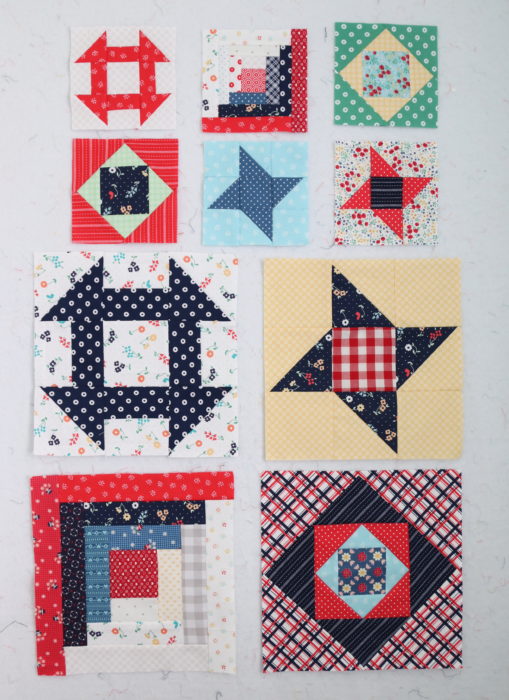
And here are the 4 blocks thus far of the Riley Blake quilt challenge. I'm using fabrics from my Sugarhouse Park collection, with a few pieces of Gretel thrown in. 🙂
You can find all of the classic quilt block tutorials linked below.
If you’re sewing along with us make sure to use the hashtag #RBDBlockChallenge! You can see the blocks here.
Week 1 - Churn Dash
Week 2 - Log Cabin
Week 3 - Friendship Star
Week 4 - Economy Block
Week 5 - Nine Patch
Week 6 - Shoo Fly Block
Week 7 - Sawtooth Star
Week 8 - Bear Paw
Week 9 - Maple Star
Week 10 - Bow Tie
Week 11 - Pinwheel
Week 12 - Maple Leaf
Silvana Lanza
Stupenda la mini trapunta e i puntaspilli deliziosi!!!!!
lthseldy
Thanks so much. Really clear directions.
Lynette Caulkins
Thank you so much for making a great tutorial post for us on these. Economy blocks are one of those that can be hit or miss for me on accuracy. I do have one question, and please forgive me if I'm simply being dense (my brain has been super scattered these weeks) - I can't figure out what the extra step for accuracy is that is referred to right above the photo where the red points are going to be added.
Lydia Qiu
Thank you, Amy, for the wonderful inspiration during this special challenging time! I always love your posts!
Amy
Hi Lynette! Good question - sorry for the confusion. It's referring to squaring up the block in the paragraph above. I hope that helps!
Florence Bowser
have been making free reusable fitted facemasks for people in my community for about three weeks now and have tons of scraps left over-these economy quilt blocks give me an idea of what I can do with a lot of them. Thanks so much
Amy
Hmm, that's an interesting idea! I don't have the answer, but let us know if you find out!
Lori
Is there a link to the total fabric requirements needed to do the weekly classic Riley Blake block challenge?
Amy
There's no official pattern for this challenge - just playing with blocks each week. I will be putting mine together at the end, but won't know until then the amount of fabric used. I'm just pulling pieces from my stash to make blocks at this point.
Joy Darby (The Farmers Mrs)
Just read today's Newsletter and loved the economy block shown, - Like many other quilters, I'm making the most of the sewing time and am presently working my way through a collection of 'cat fabrics' that would rival a small shop.. This block with it's centre square is perfect. Love it.
JoyD
Shari
This has always been a favourite block. Just a note - diagonal is not spelled correctly in your graphics. Thought you would like to know.
Amy
Doh! That's what I get for working too fast. Thanks so much for the heads up!
Maggie
I just sewed up the economy blocks for this quilt. Your directions were so clear and I enjoyed sewing these blocks for a quilt for a new grandbaby that's on the way in October. Thanks for the inspiration and great instructions!!
Amy
I'm so glad!
weddingdressblue
Thank you so much for the tutorial. Here's my first version: https://weddingdressblue.wordpress.com/2021/04/06/economy-block-baby-quilt/
Mary Berecz
Thank you for this. I have been trying to do a Storm at Sea table runner and love how you did the squares. Would you be able to give us the measurements for a 8 ½ square? You show the 6 and 12 and I was hoping for an in between size. How do you do the calculations on the inside square and the outside triangle? Thanks so much!
Amy
I do have a tutorial for an 8" x 8" block here: https://www.diaryofaquilter.com/economy-quilt-block-tutorial/ (Unfinished at 8 1/2" x 8 1/2").
Jan
Amy, how is this block made using one round of triangles. I want the block with
only one round of triangles and the block to finish at 6 inches.
Thanks. Teaching myself to quilt and find things frustrating as I don't know anyone who quilts.