
I'm excited to have Christa Watson as our guest poster today. Christa is a pro (literally) at teaching people to quilt - especially on your own home machine - and making it doable.
Hi all! It's Christa Watson here from Christa Quilts, and I'm happy to be hanging out with you today on Amy's blog. My favorite thing about making a quilt is the machine quilting - so I'm excited to share my secret to stress-free quilting, especially when doing it yourself on a regular home sewing machine. The key is to make a quilting plan!!

I've had fun sharing my methods in three machine quilting books I've written along with my online classes through Bluprint (formerly Craftsy). Each of these resources includes not only step-by-step patterns for piecing a quilt; each pattern also includes a complete quilting plan with instructions on how to finish your quilt!
Today I'll share a several quilting plans and explain how I break down the quilting process. Then hopefully, you'll be able to incorporate some of my methods into your own work. But first, before we even get to that part, you'll need to get your quilt ready for quilting. Be sure to check out previous tutorials I've share here on Amy's blog: 5 Machine Quilting Tips and Spray Basting Your Quilt. Then you are ready to dive in and make a plan!
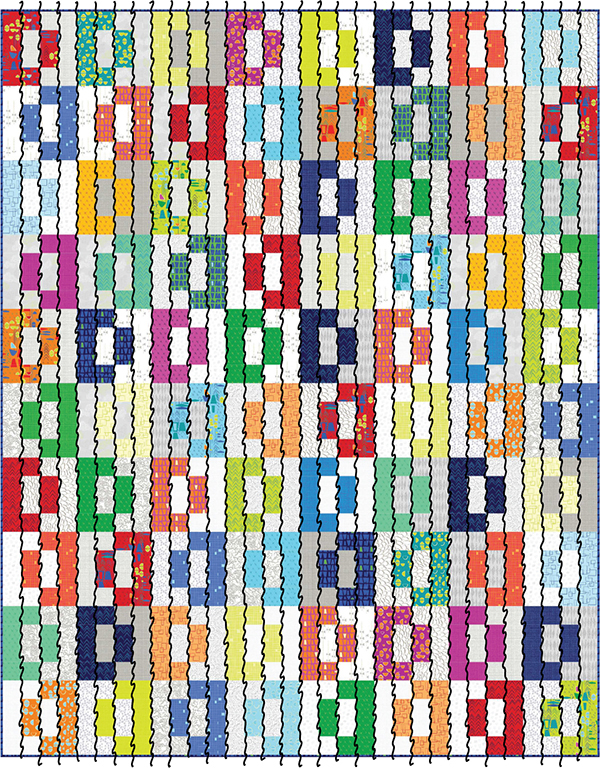
When I'm making a plan, the first question I always ask is, what's the purpose of the quilt and how much time do I have to finish? For example, If it's for a baby shower coming up this weekend, I'll stick with fast and simple quilting, like an allover design. Here's a simple block quilting plan showcasing one of my go-to modern quilting motifs: boxes. The plan is more of a guideline of how to work my way around the quilt rather than an exact replica of the stitching I'll do.
Allover Free-Motion Quilting Plan
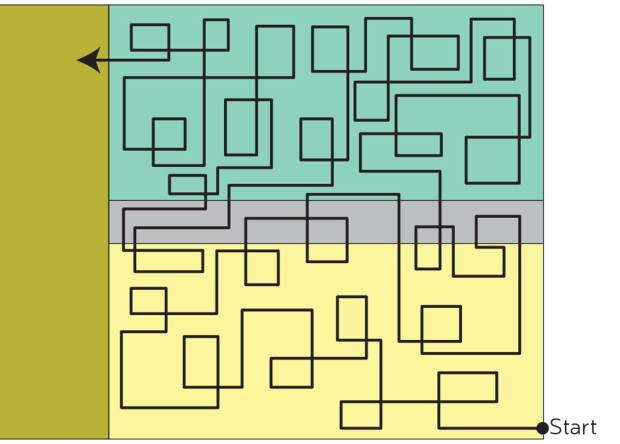
First, I will draw the design on paper to get a feel for how it will flow across the quilt. Then I'll quilt it out on a practice block, or even a scrap of fabric and batting to check thread color and tension. Finally, I'll apply the design to the actual quilt.
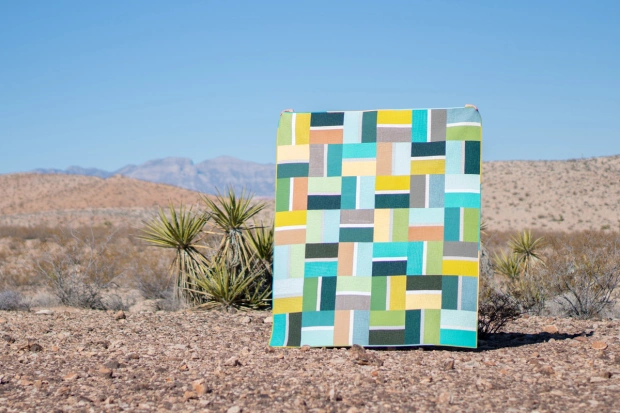
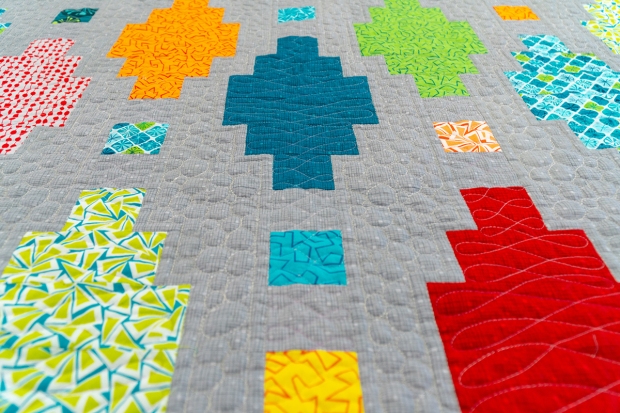
To quilt an allover quilting design, pick a favorite free-motion motif and quilt the design randomly from edge to edge, regardless of the pieced design. It's fast, fun and easy to do, and by the time you reach the end, you'll be an expert at that design! I quilted the free-motion design shown above, on my quilt "Stepping Stones", below:
To make a plan for an allover design, I always start quilting on the right side of my quilt and work my way towards the middle. When the quilt gets too bulky, I rotate it 180 degrees and then finishing quilting from the middle to the other edge of the quilt. It's much, much easier to start quilting when there's no bulk under the machine, and you work your way across the quilt a few inches at a time.
By the time you've reached the bulkiest part in the center, it's time to rotate the quilt, and then it gets less bulky again as you work your way across the other way. As long as you've done a good job basting your quilt, there's no need to start in the center and stress yourself out with all of that bulk to begin with!
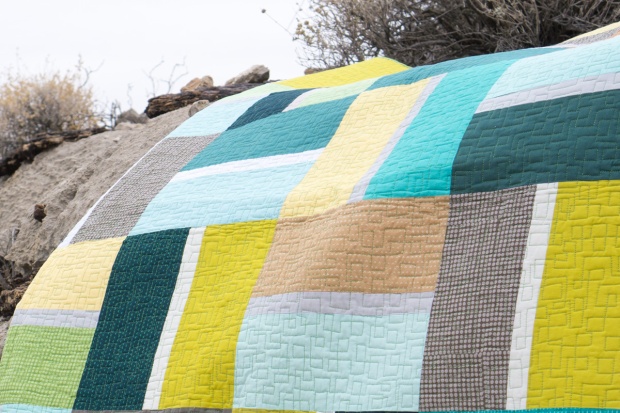
Here's what the quilting looks like on the actual finished quilt. Remember, I didn't try to replicate the design exactly, I just meandered my way across the quilt in an organized manner, block by block. Like everything I design, my Stepping Stones quilt pattern includes instructions for both piecing AND quilting.
Allover Walking Foot Quilting Plan
You can also use the edge-to-edge quilting process with walking foot quilting, by using a process I call "divide and conquer" - or breaking down the quilting design into smaller manageable chunks. I still start on the right-hand side of the quilt work my way across towards the center, rotate, and then continue from the center to the other side. In this example, I'm planning to quilt a wavy line design "near" the ditch rather than "in" the ditch because wavy lines are much faster AND easier to quilt than straight ones!
I'll quilt my wavy lines in one direction for all of the vertical seam intersections, and the spacing will depend on how wide the blocks are. This first pass across the quilt is called "anchor" quilting and will secure the quilt for additional quilting later on. It also distributes the density of quilting evenly across the quilt.
First, I sketch out my plan on an image of the pieced quilt design. You can print off a digital image of the quilt if it's something you designed in Electric Quilt (or other design software). You could also make a photocopy of a sketch or pattern cover and blow it up big enough for you to draw on. You could even take a picture of of the finished quilt top and then print it out in black and white on a regular size piece of paper, too.
Once I've quilted the first pass across the quilt, I'll quilt more wavy lines in between until I'm happy with the final line spacing. When planning a quilt, I won't necessarily draw in all of the lines, but I'll sketch enough of them to remind myself of what I'm doing. You can follow the exact same plan above using straight lines, wavy lines, or even decorative stitches on your sewing machine.
Here's me putting the quilting plan into practice, "scrunching and smooshing" the quilt under the machine as I go. Look closely near the bottom of the image to see how I'm filling in lines of quilting between each of the "anchor" lines.

The quilt shown is called "Modern Puzzle" and it's a free PDF pattern on my website showcasing jelly rolls of my fabric, but of course it would look fabulous in any fabrics. It's the perfect pattern to practice your "divide-and-conquer skills!" The best thing about quilting several passes across the quilt is that you can decide to stop at any time, once you are happy with the spacing of your quilted lines.
Custom Quilting Plan
Now, If I want to spend more time quilting a special quilt, I'll do custom quilting, combining both walking foot quilting and free motion motifs. To divide and conquer the process, I'll break the quilt down visually into these elements: the ditch, the blocks, and the background. Then I'll quilt something different in each section.
Here's an example quilting plan for my free quilt pattern "Beaded Lanterns" - made to showcase my Fandangle fabric line.
Step 1 - Stitch in the ditch between each row of blocks. Here, I'm treating each row of blocks as one unit so I'm basically outlining the shape of the blocks while stitching the vertical ditches. However, I'm NOT stitching the horizontal ditches so that I don't have to stop and start as much.

Optional: Echo the ditch to further separate the elements of the quilt. This is also called outline quilting or channel quilting and will help provide more contrast between the blocks and the background, separating the quilting designs so they'll stand out more.
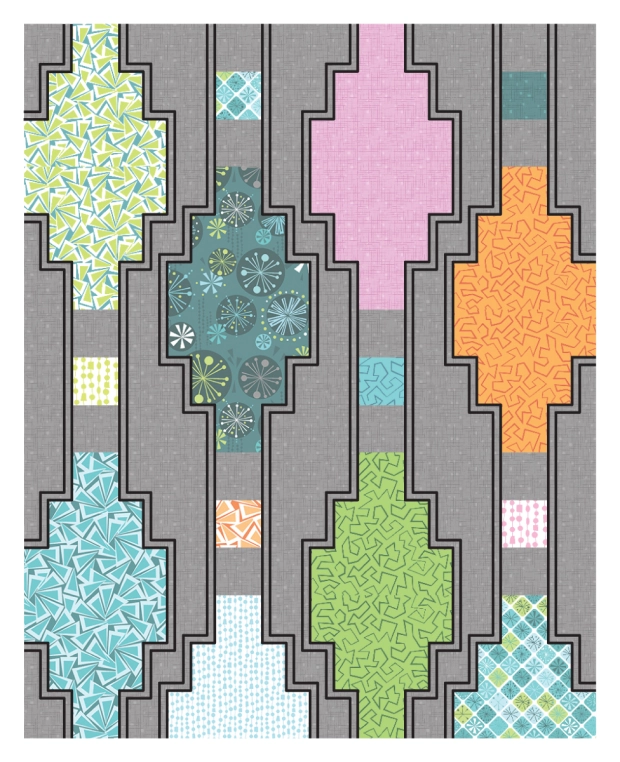
Step 2 - Free-motion quilt "something" in the background. By this, I mean pick ANY free-motion motif you like and quilt it in all the background areas. I happen to really like quilting pebbles in defined areas so I use them a lot. Remember, this isn't an exact replica of what each stitch motif will look like. It's just a roadmap that will tell me which design goes where.

Step 3 - Free-motion quilt a different design in all of the blocks. The fun part is figuring out different combinations of designs you like, and there's no right or wrong answer! Because my background had dense curved pebbles, I chose something more linear and slightly less dense in the blocks to create contrast between the two designs. Because the blocks are made from busy prints, the quilting won't show up as much so it's a great place to practice a fun design that doesn't have to be perfect!
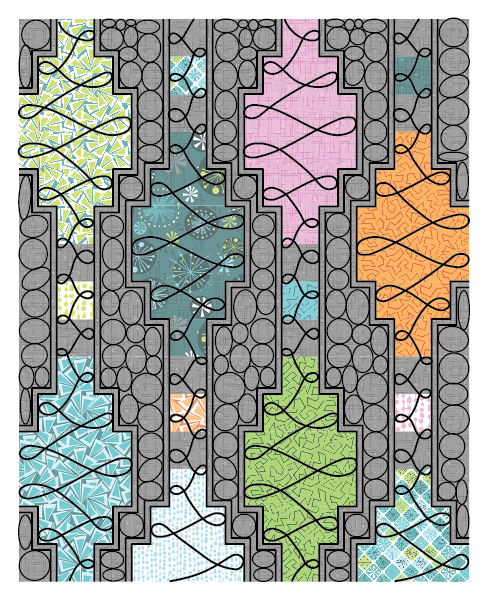
Remember, for each pass across the quilt (ditch, echo, background, blocks) I'm working from the right side of the quilt towards the middle, rotating the quilt, and then working from the middle to the other side of the quilt. I only concentrate on one section of the quilt at a time, and reposition my hands whenever I feel like I'm reaching. By breaking down each step of the quilting plan, the whole process seems much less overwhelming.
Simpler Custom Plan
I'll share one final quilting plan that's a bit simpler to execute, but still gives a custom look. This is the plan I created and included in my "Positive Direction" quilt pattern. It's a combination of straight lines and pebbles which emphasize the subtle arrow design made by the color arrangement of the pieced plus blocks.
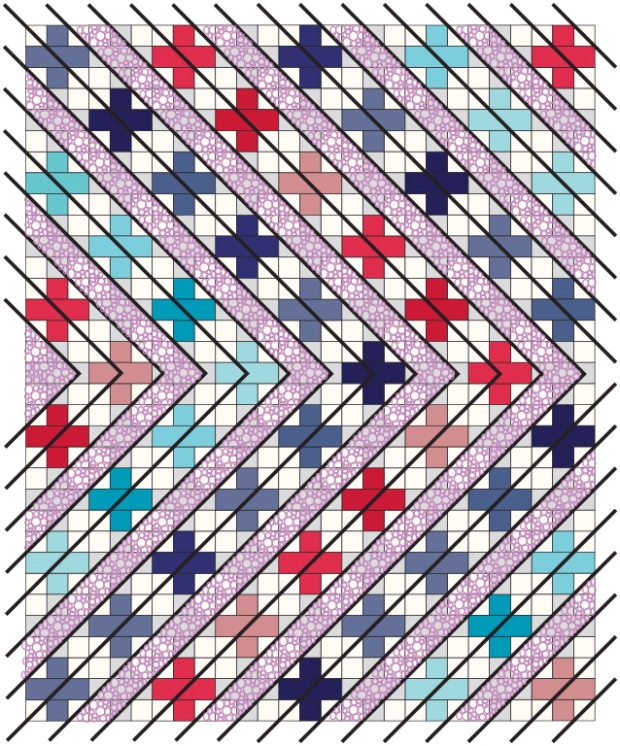
I quilted all of the straight lines with a walking foot first, and then filled them in with additional straight lines until I was happy with the spacing. Then, in the remaining areas, I filled in the rest with free-motion quilting.
And here's what the finished quilt looks like below. The quilting adds yummy texture, but doesn't overwhelm the pieced design. After all, the more quilting you add, the less you see the individual stitches.

I hope this gets you excited to break down the process, and not be afraid to dive in and quilt your own quilts. If you'd like for me to cheer you on in your machine quilting journey, be sure to join my Quilt Along email list where I'll share lots of tips and tricks for quilts we can make together! You can also catch me on instagram @christaquilts or on my blog at ChristaQuilts.com. Happy quilting!

Thanks, Christa! I love the concept of combining both machine quilting with a walking foot and free-motion quilting.
I'm still a little intimidated by free-motion quilting a big project, but if I can do some with my walking foot and then fill-in smaller gaps with free-motion, I feel a lot less overwhelmed by the idea.
So helpful!!
Be sure to check out Christa's blog and other tutorials (linked above) for lots of super helpful tips.

Tamara Gadden
I am loving your blog. It was so nice of Christ's Watson to break down the quilting I feel less intimidated. Love the tips. Can't wait to practice. Thanks Amy & Christ's. Have a great weekend
Linda Theriault
Very interesting and helpful. I am going to try the walking foot and free motion combination on my next quilt!
techsofttips
Wow! great post, This is a great post, I am very grateful you did share your knowledge here. It is an excellent post. Thank you so much for providing such useful content. Thank you for this sharing...
Little Quiltsong
So interesting to read all the wonderful tips to quilting our quilts. Such great ideas and methods of breaking it all down to manageable proportions - especially for those bigger quilts. Thank you!!
quiltbabe
I *love* this. Bookmarked your own page as well. I handquilted exclusively for years, then learned to MQ in order to make more quilts, lol. Thirty years of quilting, and I've only sent one quilt to be longarrmed.
Quilt handling is so important to non-frustrating quilting on a home machine - I do much as you do, usually quartering off the quilt unless there is a specific motif that needs to run from edge to edge.
"Positive Direction" is gorgeous!
Mary McNeill
Thanks for this post. As someone who has only done stitch-in-the-ditch it is very instructive for where to go next. Very clear instructions.
kaywelch
Perfect timing for this helpful and encouraging post. I have quite a few QOV quilts to complete by mid-May, and Christa's tips and examples will help me get out of my "simple" walking foot quilting.
Elizabeth Ann Phares
How can I sign up for your blog.?
Amy
Mine or Christa's?
If you would like to subscribe to my newsletter there's a bar at the very top of my webpage where you can enter your name and email address and that will add you to the email list!
If you would like to subscribe to Christa's blog go to her site: https://christaquilts.com/ on the right hand sidebar part way down is a box where you can enter your email address.
I hope that helps!
Carolyn DiPerri
Thank you for sharing Christina Watsons plan for machine quilting. I have been doing free motion quilting for a long time and I picked up a few helpful hints. My hardest time is keeping the lines even. I guess with the walking foot you can use the edge as a guide if you want the lines that close. Do you have any ideas about keeping the lines even when they are further apart? Thanks again for sharing this.