
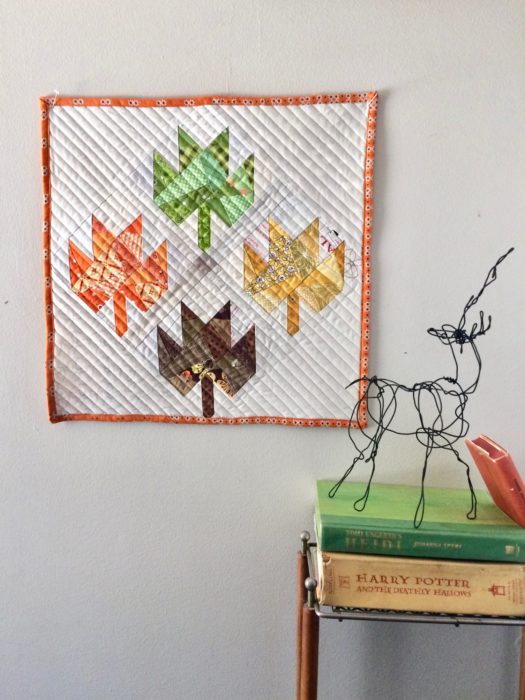
Check out this super fun and scrappy maple leaf quilt pattern tutorial by guest writer, Leila Gardunia. Leila is a foundation paper-piecing artist and I'm so excited to have her here to share this beautiful fall-themed project, perfect for using up your favorite scraps.
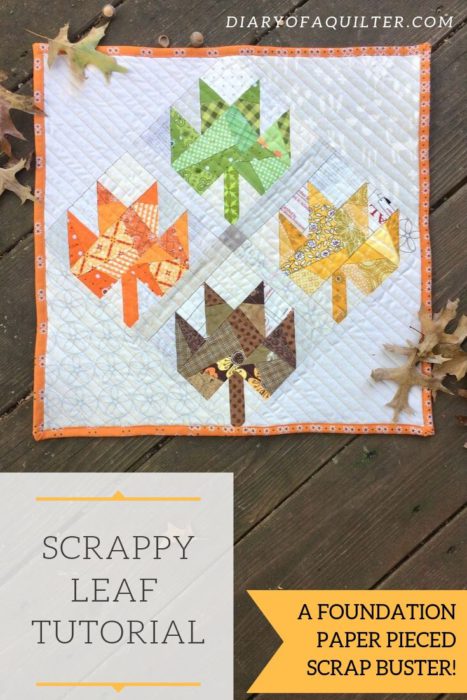
Scrappy Maple Leaf Quilt Pattern Tutorial
Hi! I’m Leila Gardunia and I am rather addicted to scrappy foundation paper piecing. It started with Scrappy Triangles (download your free ones here!) 
and now I’m hosting a Scrappy Mountain Range Quilt Along. So many scraps, so little time!
Fall finally struck here in Missouri and it got me thinking about the classic Maple Leaf Block. I’m not a huge fan of half square triangles and wondered if there would be a fast way to foundation paper piece the whole block. (If you’re not familiar with foundation paper piecing, I have a whole tutorial about it here.
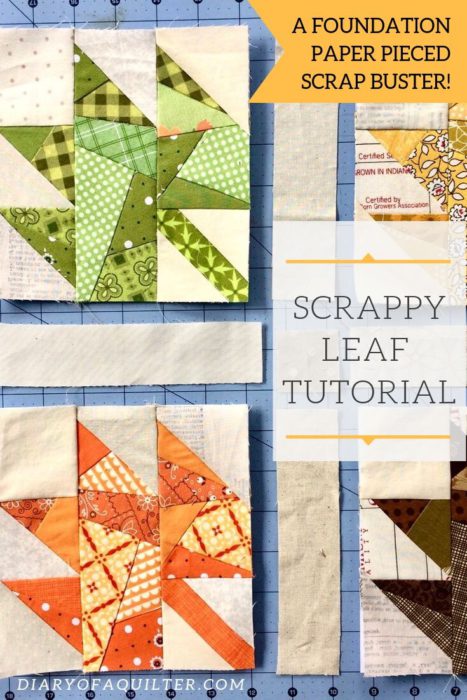
A half hour later I had drafted a Scrappy Leaf foundation. Instead of being pieced with squares and triangles, it is made up of odd sized bits. It is perfect for using up all those little fabric scraps you have lying around.
I pieced four Scrappy Leaves and turned them into a little mini quilt - perfect for a wall hanging or table topper. Let me walk you through how to make one.
Size: about 19” x 19”
Supplies:
Scrappy Leaf Foundation: Download and print 4 copies of the Scrappy Leaf foundations. Check to make sure they printed to size.
Cream, Yellow, Orange, Green, and Brown Scraps
22” square of fabric for the backing
(2) 2 ½” x width of fabric strips for the binding
(1) 20” piece of batting
Cutting Instructions:
From various pieces of Cream fabric cut:
(4) 1 ½” x 6 ½” strips
1 ½” square
(2) 10” squares cut in half on the diagonal
Construction:
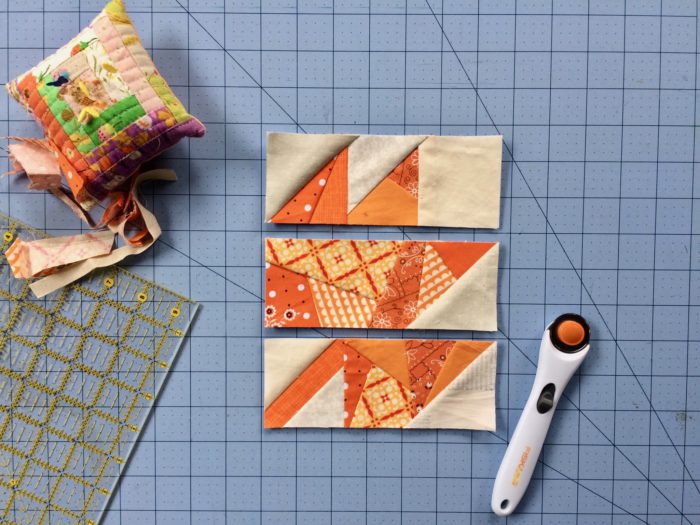
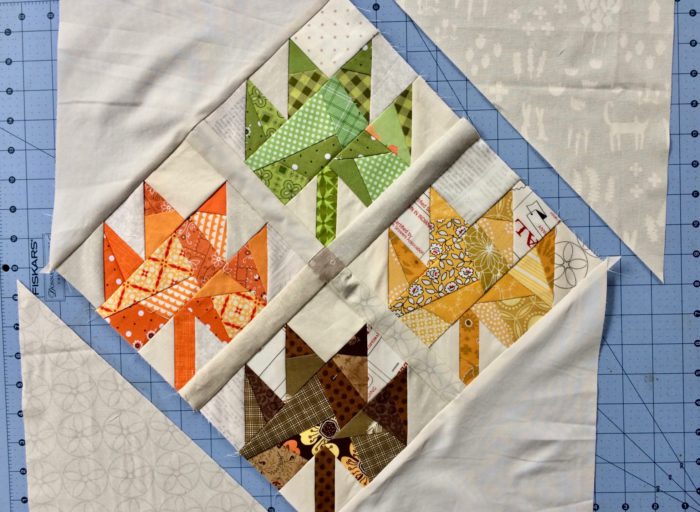
Using the fabric scraps, foundation paper piece 4 leaves, one of each color (yellow, orange, green, and brown). Use the cream scraps for the background fabric.
If you are new to foundation paper piecing, or need a refresher, hop on over to my blog and check out my Complete Guide to Foundation Paper Piecing. You can also check out another guest post I did here 3 Tips for Successful Foundation Paper Piecing.
Trim foundations to size, arrange as pictured, and sew together into a leaf.
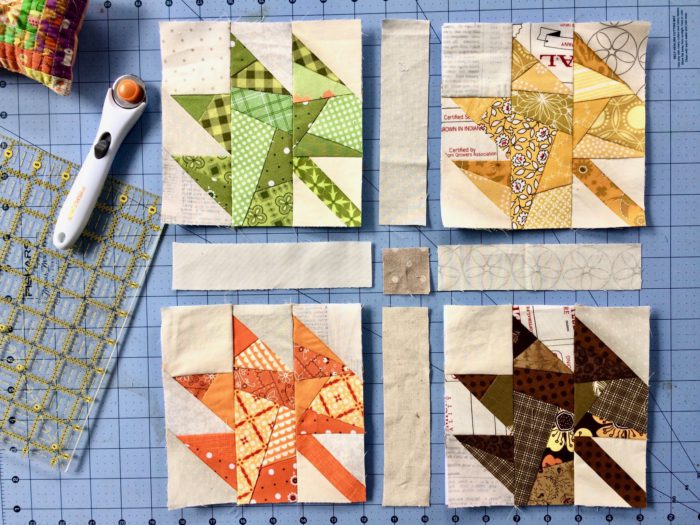
Alternate the leaves with the 1 ½” strips and square as pictured.
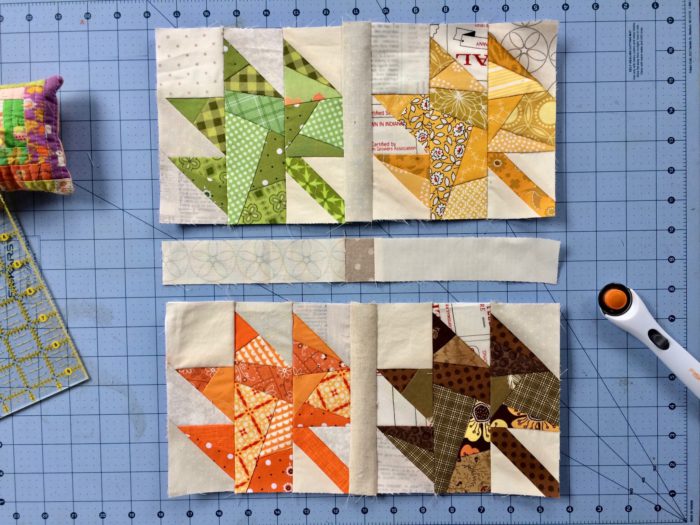
Sew together into rows. Press towards the strips. Then sew the rows together and press towards the center.
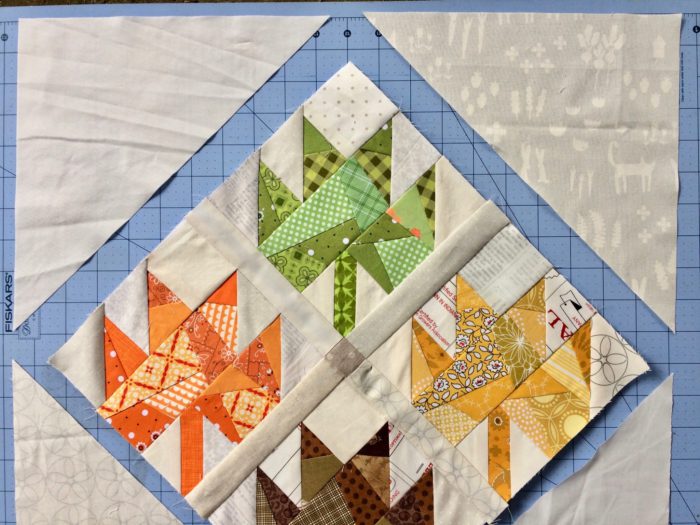
Rotate the leaf block so it is on point and place the 4 triangles made from the 10” squares at each edge.
Center the triangles on the sides of the block and sew. Press towards the triangles.
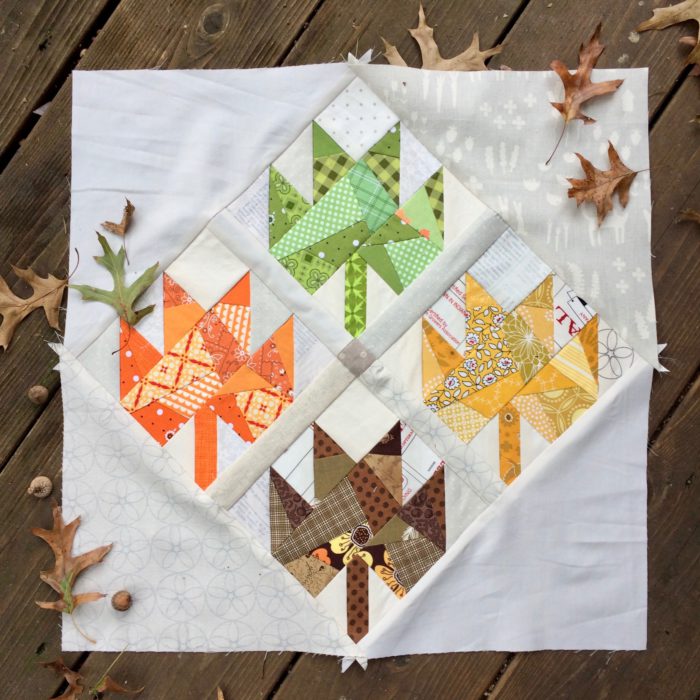
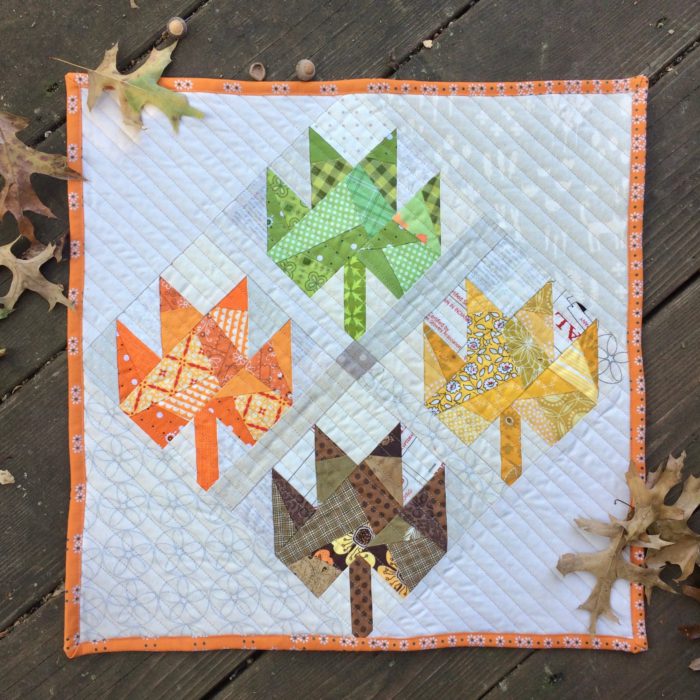
Remove the papers and quilt and bind as desired.
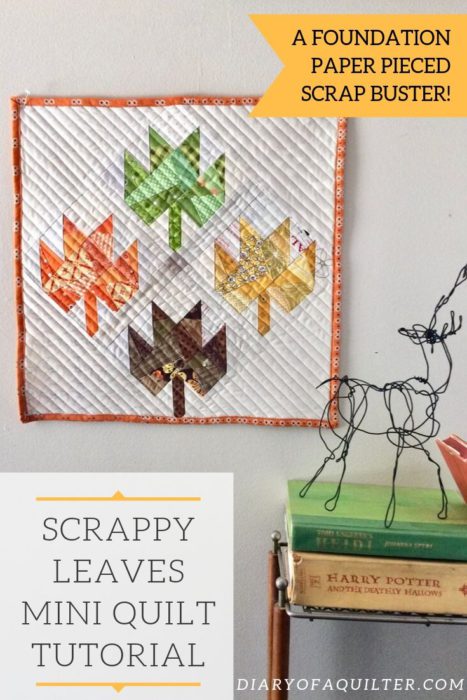
I hope you make and enjoy your own Scrappy Leaves Mini Quilt!
To get more layout and project ideas using Scrappy Leaves, hop on over to my blog.
Thank you so much, Leila! Don't you just want to pull out your scraps and start playing with them?
If you're new to foundation paper piecing, this is a great project for practicing the technique. Plus, Leila has other great patterns and tutorials to help you get started.
As a girl who loves my mountains, I'm especially excited to make some of her scrappy Mountain blocks.
Thanks again, Leila!
What do you think of this scrappy maple leaf quilt pattern? Share in a comment below!
Carmen Montmarquet
Thank You for this cute tutorial, it's been a long time since i even tried to do paper piecing and i can't wait to try this!!
Donna
Working on this now. So fun! Thanks.
quiltersandal
Thank you for this adorable tutorial! I’m collecting ideas for seasonal mini quilts and this is perfect for a New England fall mini quilt! Now to get it on the schedule!
Emma
Thank you, Leila, for the adorable foundation piece Maple Leaf pattern and your time and effort to make them, including the template Also, glad you shared foundation piecing instruction and different ways to use the designs. I should be working on them very soon. Good fall to you..