• Skip to primary navigation
  • Skip to main content
  • Skip to primary sidebar
Diary of a Quilter - a quilt blog
  • Home
  • Start Here
  • Tutorials
  • My Quilts
  • Shop
  • Favorite Supplies
  • Contact
menu icon
go to homepage
  • Home
  • Start Here
  • Tutorials
  • My Quilts
  • Shop
  • Favorite Supplies
  • Contact
    • Facebook
    • Instagram
    • Pinterest
    • Twitter
  • subscribe
    search icon
    Homepage link
    • Home
    • Start Here
    • Tutorials
    • My Quilts
    • Shop
    • Favorite Supplies
    • Contact
    • Facebook
    • Instagram
    • Pinterest
    • Twitter
  • ×

    Home » Blog » tutorial

    Quilt Block Coasters Tutorial by Stephanie of Swoodson Says

    June 11, 2019 by Amy 2 Comments

    Another fun tutorial today that’s perfect for a quick summer-sewing finish. This guest post is by Stephanie from Swoodson Says where she shares so many creative ideas for a variety of fun sewing projects! These quilt block coasters would make a fun mug rug gift for a friend. It would also be a great way to use up scraps or orphan quilt blocks you might already have laying around!

    Quilt Block Coaster featured by top US quilting blog Diary of a Quilter

    Hi! I’m Stephanie from Swoodson Says and am happy to be a guest blogger here today! If you love seeing Amy’s beautiful quilts but feel intimidated by sewing an entire blanket, I’m sharing a fun and easy project to start with first: quilt block coasters.

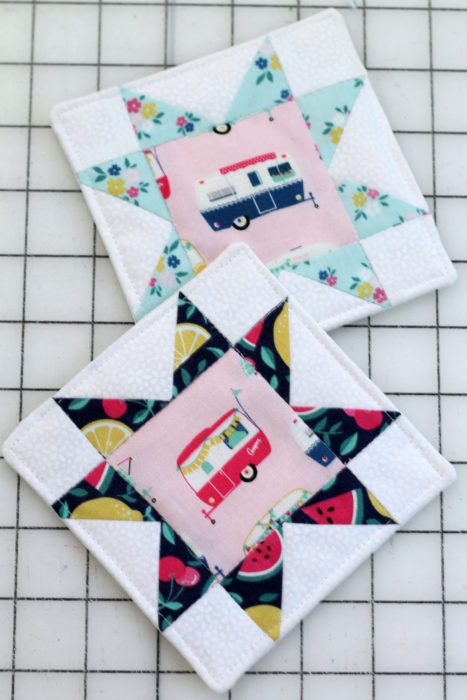
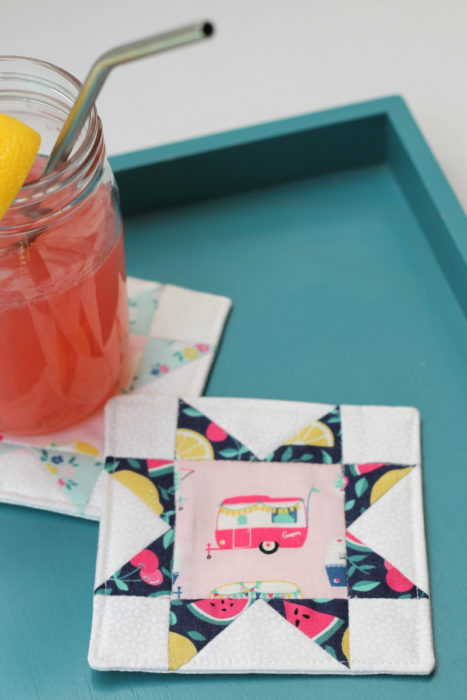
    I am a novice quilter but I love experimenting and trying new things; this was my first time sewing this type of quilt block, using Amy’s easy sawtooth star tutorial. I think coasters are a great, easy way to put practice or orphan blocks to good use! Coasters make a great gift, stocking stuffer, housewarming present, or an easy seasonal decor accent.

    Quilt Block Coaster featured by top US quilting blog Diary of a Quilter

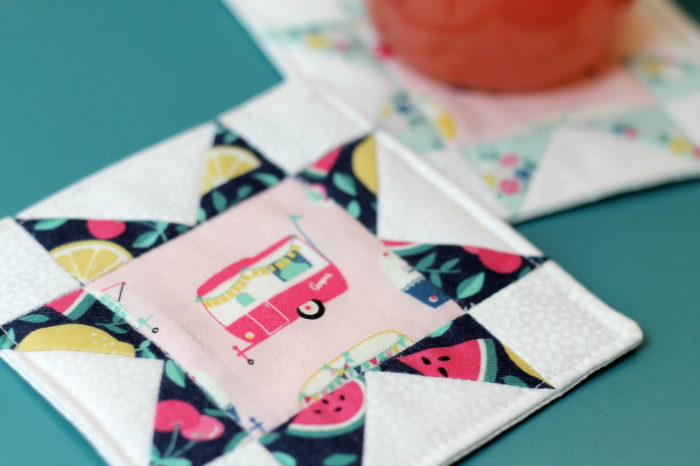
    Riley Blake Designs generously provided the fabric for the tutorial, from the “I’d Rather Be Glamping” line by Dani Mogstad (available here or here), doesn’t it scream summer? I thought about using my easy coaster sewing pattern with it but wanted to feature those cute little campers instead, and a fussy cut in the middle. There are so many different motifs that would look cute in that middle square; I can picture hand embroidery there too! It only took me a night to sew this tutorial so I added it to my 10+ small quilting projects to make in a weekend post.

    Quilt Block Coaster featured by top US quilting blog Diary of a Quilter

    Ready to make quilt block coasters?  

    Supplies

    • Fat quarter bundle of quilting cotton (or favorite assorted fabric scraps)
    • Rotary cutter
    • Rotating cutting board (not necessary but useful!) 
    • Acrylic quilt ruler
    • Batting scraps
    • Coordinating thread
    • Iron


    Steps

    Quilt Block Coaster featured by top US quilting blog Diary of a Quilter

    Step 1

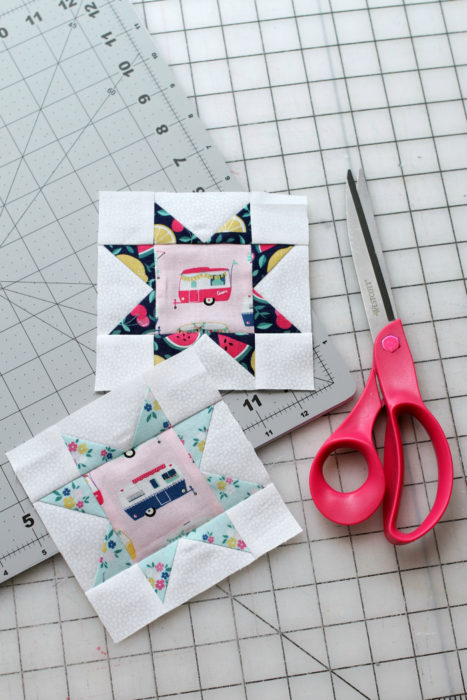
    Make the 5” square sawtooth star blocks using the tutorial here on Diary of a Quilter!

    Quilt Block Coaster featured by top US quilting blog Diary of a Quilter

    Step 2

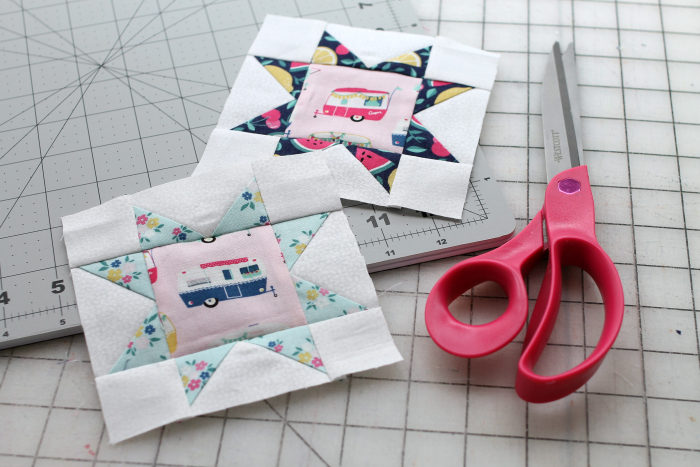
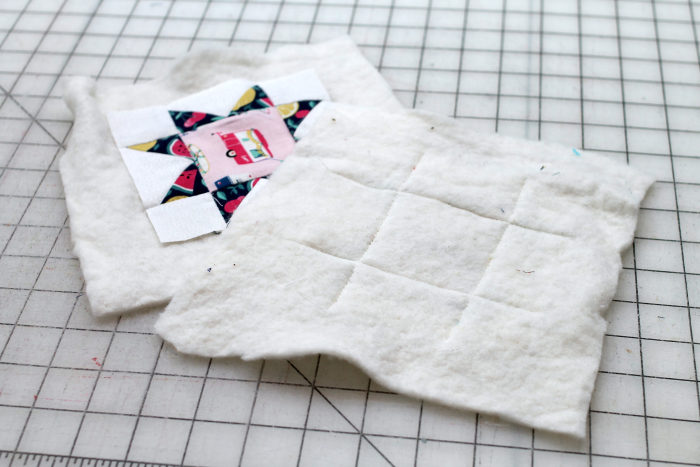
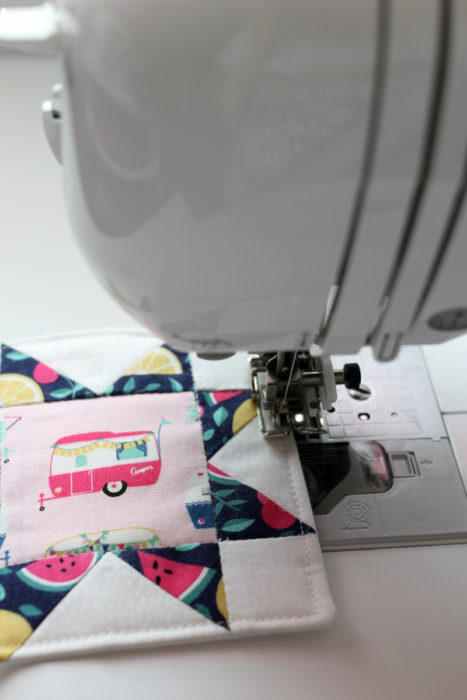
    Lay each block on top of batting and quilt as desired. I just stitched in the ditch along the main lines, forming a #.

    Quilt Block Coaster featured by top US quilting blog Diary of a Quilter

    Step 3

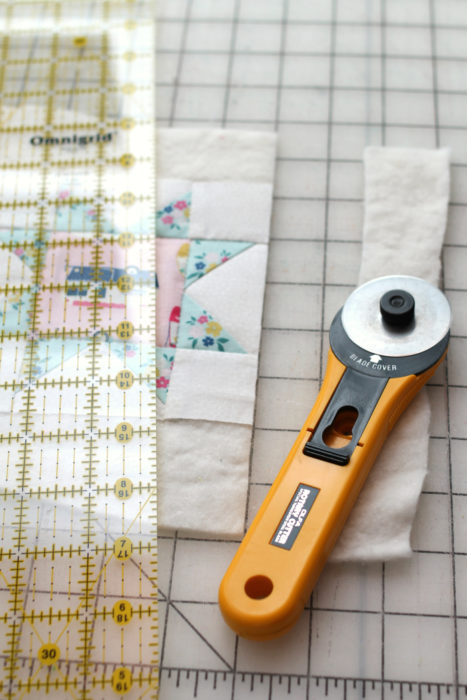
    Square up the blocks, trimming off the batting.

    Quilt Block Coaster featured by top US quilting blog Diary of a Quilter

    Step 4

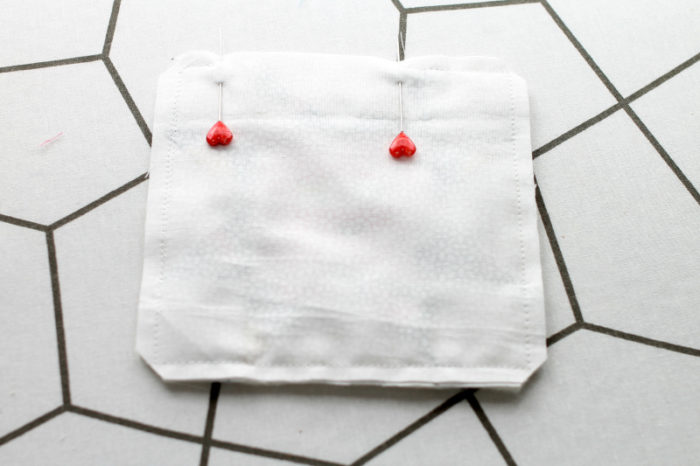
    Layer the quilt block & backing fabric right sides together and sew all 3 sides, leaving roughly a 2” gap for turning. Clip the corners off without going through the stitching.

    Quilt Block Coaster featured by top US quilting blog Diary of a Quilter

    Step 5

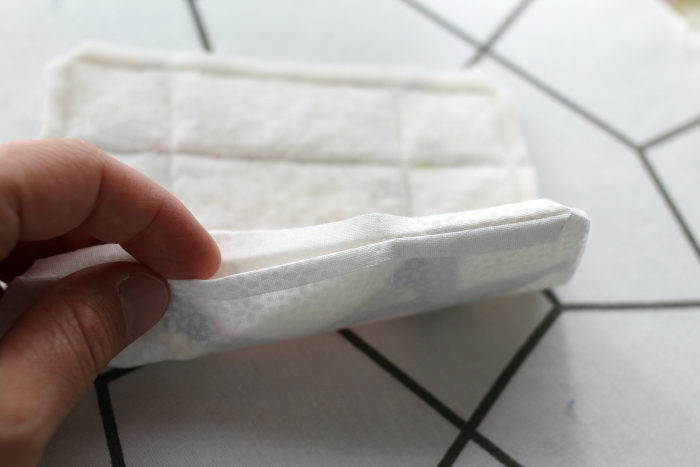
    I like ironing the seam allowance back on the opening, to make it nice and crisp. Then turn it right side out and then poke the corners out gently. Press all seams.

    Quilt Block Coaster featured by top US quilting blog Diary of a Quilter

    Step 6

    Gently tuck the raw edges inside the opening and press, then edge stitch all the way around. Press one more time and you’re done! Repeat steps 1-6 until you have as many coasters as you’d like for a set.

    Quilt Block Coaster featured by top US quilting blog Diary of a Quilter

    You’ll have scraps left from the fat quarter bundle; consider using them on one of these 30+ best fabric scrap projects. If you can’t get enough coaster projects, check out these other options with 12+ fabric coaster tutorials!

    Quilt Block Coaster featured by top US quilting blog Diary of a QuilterThanks, Stephanie! Be sure to check out Stephanie’s blog for SO many fun sewing-themed ideas!

    You can also find Stephanie on Instagram and Facebook.

    *this post contains affiliate links

    Share this:

    • Click to share on Facebook (Opens in new window)
    • Click to share on Pinterest (Opens in new window)
    • Click to share on Twitter (Opens in new window)
    • Click to print (Opens in new window)
    • Click to email a link to a friend (Opens in new window)

    Related

    « Easy Lone Star Crib Quilt Tutorial
    Pretty Quilts (and other pretty things) along an Eastern States Road Trip »

    Filed Under: guest post, tutorial

    Reader Interactions

    Comments

    1. Candace

      June 12, 2019 at 7:22 am

      I enjoyed the ideas in the “12+coasters” link! Love the new color and shape ideas. I used to have a larges pile of test or orphan blocks, then began turning them into mugrugs or coasters. I use the large orphans for tote bag fronts and backs and get a lot of comments on them. Keep up the great blog and interesting links!

      Reply
    2. Emily

      June 12, 2019 at 7:46 am

      I have made a few coasters before but have noticed that the colors bleed when my cup condenses. 🙁 Do you experience the same, or did I just get unlucky? If you experience the same, how do you combat this pickle? These are so darn cute, I’d hate for the colors to run!!

      Reply

    Leave a Reply Cancel reply

    This site uses Akismet to reduce spam. Learn how your comment data is processed.

    Primary Sidebar

    amy smart headshot

    My name is Amy Smart and I'm a quilter, pattern and fabric designer, wife & mom. Excited to have you here!

    Let's Sew →

    THE PERFECT PLACE TO START

    CHECK OUT MY

    I Sew With

    Baby Lock Sewing Machines

    Favorite Fabric Shops

    Come Sew With Me – Craftsy Class

    Pre-cuts Shortcuts Video Craftsy Class with Amy Smartma

    Top Posts & Pages

    • Diary of a Quilter by Amy Smart - a Quilt blog
    • Easy DIY Star Baby Quilt Tutorials
    • Quilted Coasters Tutorial by Sedef Imer
    • Fast Four Patch Quilt Tutorial
    • Lattice Baby Quilt Tutorial
    • American Military Sites, Normandy France - a sobering reminder about freedom
    • 25 Favorite Charm Square Quilts & Projects
    • Charitable Sewing: Quilts of Valor
    • Perfectly Pieced Quilt Blocks - in the Hoop!
    • Binding a Quilt: a Complete Tutorial
    Tips for Choosing Fabric for a Quilt
    How to Choose a Sewing Machine for Quilting, tips featured by top US quilting blogger, Diary of a Quilter
    Patchwork on Point Crib Quilt Tutorial

    Star Baby Quilt Tutorial

    Star Baby Quilt Tutorial
    Fast Shortcuts to make multiple Half-Square Triangles

    My Riley Blake Fabric Collections

    Categories

    Social

    • Facebook
    • Flickr
    • Google+
    • Instagram
    • Pinterest
    • RSS

    More of Me

     photo splendid_button_4 1.jpg
     photo Babylock_Logo_300x150.png imanauthor
     
    Follow

    Footer

    ↑ back to top

    About

    • Privacy Policy
    • Disclaimer
    • Terms & Conditions
    • Accessibility Policy

    Newsletter

    • Sign Up HERE! for weekly emails and updates

    Contact

    • Contact
    • FAQ

    This site uses affiliate links:

    I make a small commission on some purchases with no additional cost to the reader.

    As an Amazon Associate, I earn from qualifying purchases.

    Copyright © 2022 Diary of a Quilter - a quilt blog