
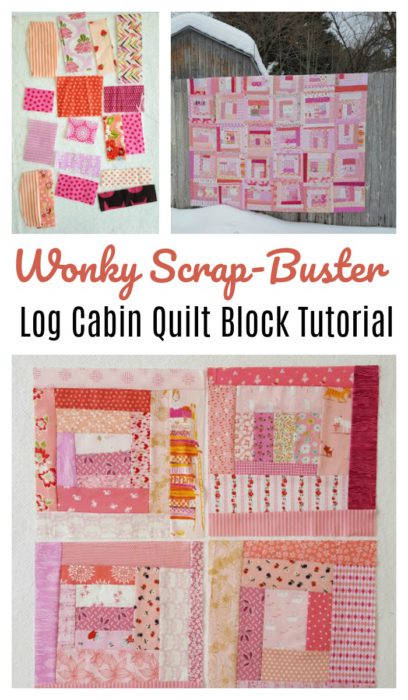
This improv log cabin-inspired quilt block has become a favorite way to use up scraps! They blocks are quick to assemble and their scrappy ways are a great way to get past any perfectionist tendencies. 😉
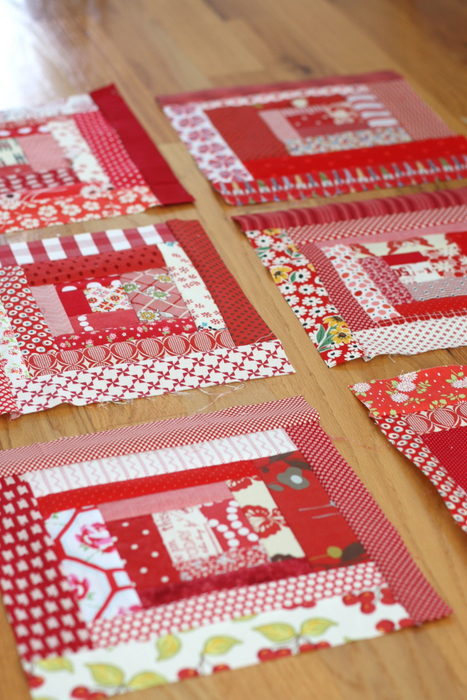
You may remember my red blocks I made last year. They were a blast to make. There's no serious measuring or math, so they come together really quickly. I pulled out my red scrap bin for this quilt. You'd think I'd totally depleted that box, but it looks like I've hardly made a dent! (I could probably make a few more quilts, just from the red scraps that are left over!)
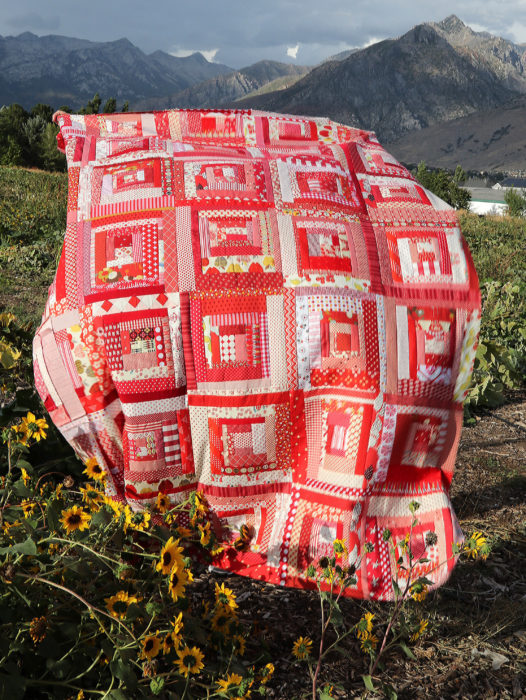
It was fun to pull out old scraps from beloved past projects and reminisce. You can see the fully finished version of this quilt here.
There are many methods out there for similar blocks. If you're looking for a simple way to piece these blocks, my friend Emily of Simple Girl Simple Life came up with this easy to follow tutorial and generously allowed me to share it here.
Here is Emily's method for making a Wonky Log Cabin Block:
I am well aware that I am not inventing anything new here, as there are a million tutorials out there for Wonky Log Cabin Blocks. I'm just going to share my method for getting down and dirty with your scraps. I'm also aware that my blocks are not "true" log cabin style blocks. I'm going for a loose interpretation, but the general idea is the same.
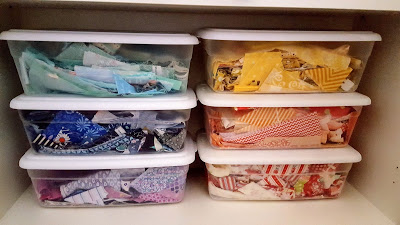
First off, I organize my scraps by color
I keep them in these clear plastic shoe boxes from Wal-Mart ($1). This make it easy for me to see what I actually have, besides making my shelves look pretty. These bins contain my string-like scraps -- long skinny pieces I've saved from the trash can.
 I lay my scraps in the bin nice and flat so I don't have to iron them when I use them. (No reason to add extra work.) Once a color bin is overflowing it's time to tackle the scraps!
So here's where things get down and dirty...
Step one is to DUMP the bin on the floor!
The dump method makes it easier to see what you have while sewing and sorting.
Once you've dumped your scraps it's time to do a quick sort. Pull out scraps and sort them into equal lengths. But if you spend more than 5 minutes doing this, you are taking too long! You don't need to sort the whole bin, just enough to get you started.
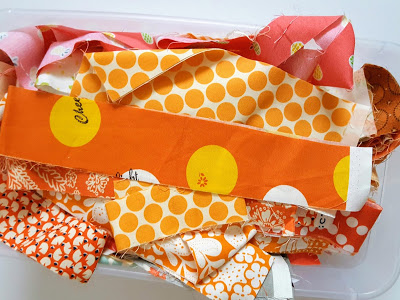
Pull out the smallest scraps first.
Mine are about 1.5" wide by 2" long, but just use whatever you have.
These will be the start of your blocks.
The idea is to make multiple blocks at a time while using the size of the scrap to determine it's placement on each block. By doing this you can think less with minimal trimming!! (Who doesn't want less work?!) 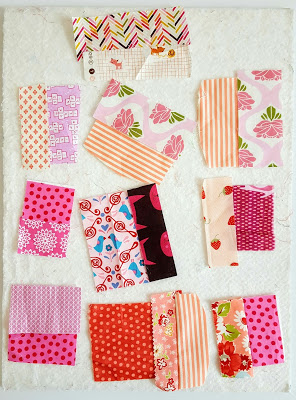
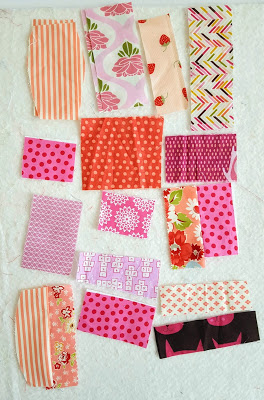
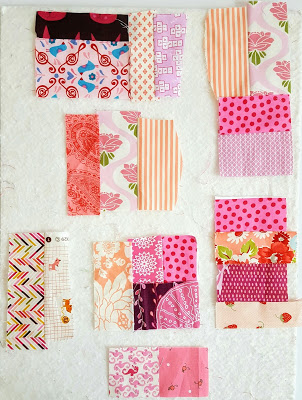
After pulling out all the tiny scraps, lay them out on your design board and try to match up similar sized pieces. (The picture above shows my matched pieces before they are sewn.)

 Once you have done that, chain piece them into pairs fast and furiously. These are now your block centers.
Then it's time to iron.
(Iron open or to one side, it doesn't matter.)
Next, lay your newly ironed pairs out on your design board, dig thru your scraps for more small scraps, add them to each pair, and sew like the wind! Remember, you are trying not to trim so find similar sized pieces.
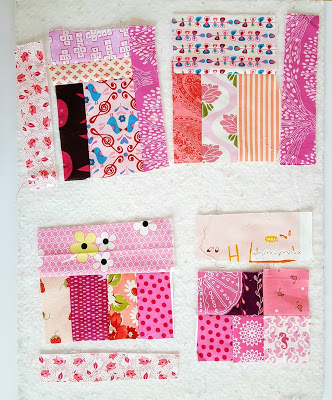
This picture shows how I've matched up scraps as I've added on. Sometimes I'll combine my initial pairs together (like the block in the upper right corner) and sometimes I'll add a new scraps, always letting the size dictate it's placement.
 Once you are done sewing on a new scrap to your blocks, take them back to the ironing board, iron, find a scrap that is the right size, sew, and REPEAT. Over and Over and Over...
I can't stress enough that chain piecing will be your best friend!
The goal is to mix up the placement of lights and darks in your block to create more depth and dimension in the quilt. If you put scraps that are too close in value together it will create less dimension. But again, the idea is not to think too hard. That's why making multiple blocks at a time is so helpful. If a scrap doesn't work for one block it will likely work in another.
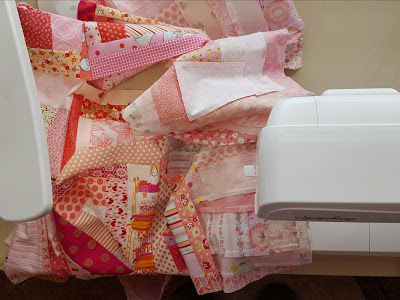
And, because my fabric is all over the floor I can sort and find the length I need easily for each block without much effort.
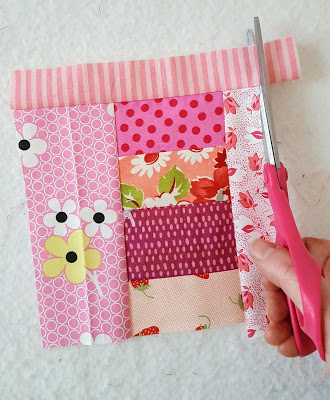
Once the blocks get to a certain point I will need to start cutting strips to length. But I use my scissors. Again, fast and furious (down and dirty) is the name of the game. No need for a rotary cutter at this point.

You can see on the back of my block that not everything is perfectly trimmed. I'm totally ok with that because it's so minimal. And no one looks at the back.
Let me stress again, that the only trimming I've done at this point is cutting off super long ends with scissors. The rest of the scrap is used as is. That is how it becomes wonky!
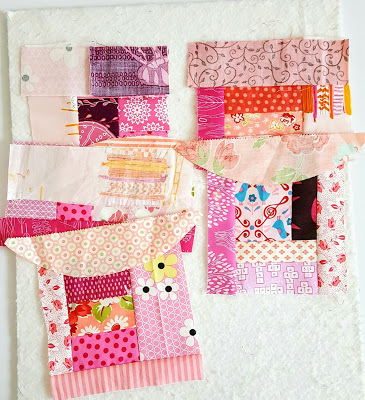
 Once you get into a rhythm you can bust out blocks pretty quickly and tear thru your scraps fast.
Chain piece, chain, piece, chain piece...
Find a scrap, sew, iron, repeat! Easy as that!
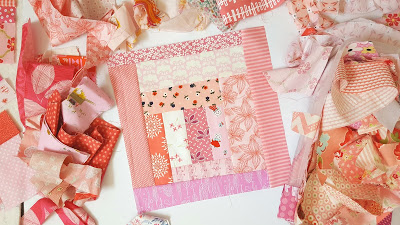
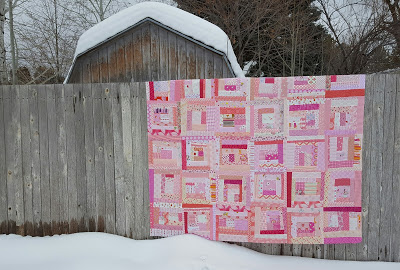
Once your block is BIG, square it up to 12.5". If your block isn't wonky enough, this is when you can add some extra tilt.
Up close your blocks might be a bit crazy, but once you step back and look at the whole picture (as I like to call it... using the "Galloping Horse" Method) you'll enjoy great dimension in your quilt.
Thanks Emily!

This tutorial was used to collect quilt block donations as part of the Sew Goodness campaign in 2018. Here are the seven quilts that were assembled from those donated blocks! Want to read more about Sew Goodness and other charitable sewing ideas? Check out this page for a brief Sew Goodness introduction as well as links back to other sewing charities.
You can read more about these multicolor log cabin charity quilts in this post.
These quilts were assembled donated to Project Linus. You can read more about Project Linus here.
Machine quilting on these quilts was generously donated by Charmed Life Quilting, Mixi Heart Quilts, Homestead Quilter, Material Girl Quilts, and Tricia Clayton.


Nancy
I’ve been involved with Days for Girls for a few years and it’s a wonderful and rewarding organization. I was just looking at my scrap bins yesterday and trying to figure out a service project, so thanks for the inspiration. Hopefully I will send some blocks your way.
Pam M
I would be happy to sew blocks together
Masa
Thanks for the reminder of an easy improv quilt; working on other blocks this month, but will use this for future scrap buster.
Linda Thompson
I have made several of these, using your idea...Everyone loves them and I get to use up my ever growing stash of scraps! Thank you!
Lorraine
I love your blog and I am full of ideas but ... Please will someone tell me what # something means. What is it for? Do I need it? Oh Lordy I am so old fashioned it's not funny. I am blind in my left eye so I can't use ipads or mobile phones that don't have a real keypad because I can't see the letters etc. So I think I have missed a whole heqp of technology.
Amy
Haha! Don't worry Lorraine! # is called a Hashtag on Social Media sites. It basically creates a category that people can search across social media. Don't tell social media I said this, but you're not missing out. 😉
Laurie Vottero
I would love to assist with sewing blocks together.
Amy
Thanks, Laurie!
Jan Snell
Amy, I would love to contribute a block or two. Janice.snell@gmail.com
Dorothy
I would be willing to sew block together, but won't be available until the second week of April.
Annabelle H.
Thank you so much for featuring Project Linus! I am a Project Linus Chapter Coordinator in Northern Virginia, west of Washington DC. This has been a very busy and fulfilling volunteer job. I have had the privilege of meeting many generous women, children, teens, and even men, who support my chapter and want to help sick and traumatized children in our area.
Laura Dixon
Spent the afternoon making squares to donate to my favorite charity. Boy, these are a fun and quick block, now new favorite!
Lea Brummett
Great quilt, wish I had time to whip one up, but it will definitely be on the someday list!
Julia
Thanks for helping Project Linus, what chapter will you donate to? I'm a chapter coordinator for Project Linus in Orange Co. NY & Pike Co. PA and I know most chapters always need blankets/quilts. Thanks again and great idea and pattern.
Amy
Oh wonderful! I was going to donate locally, but if you know of chapters that are really in need, I'd be happy to send them your way! Will you email me? amy@diaryofaquilter.com
Diane McNamara
Julia we should totally do this at a meeting!! Everyone could make one block each. love this idea!
Diane
Diane McNamara
I made 4 blocks this weekend! Pink, purple, green and orange and they will be on their way to you this week! Love this idea!
Amy
Hooray!! Thanks, Diane!
Diane McNamara
I hope you got my blocks okay. I cant wait to see the update on this project!
Amy
Yes. Summer has been bananas - they are in front of me right now, ready to sort and ship to people who've volunteered to sew! Thanks again for your contribution! I'm planning to have an update by later this month!
Debbie McGuiness
I would LOVE to send you some blocks!
Amy
Wonderful! Send me an email and I'll get you the mailing address. amy@diaryofaquilter.com Thank you!
Simone Fisher
Hi Amy! I would love to help out!! I am a longarmer and can quilt some together. My website is http://www.charmedlifequilting.com if you would like to take a look around and shoot me an email with details.
Amy
Fantastic! I'd love to take you up on that. I'm just waiting to get the final blocks this week and plan how many quilts we'll have.
I'll get back to you next week! Thank you again. xo
Pamela Von Plutzner
Amy, somehow I missed April’s posting until now! Oops! I thought Project Linus on accepted fleece blankets. I am thrilled to learn I was incorrect and that Project Linus has a chapter in my town. I plan to get involved! If you are short blocks please let me know and I will whip them up! Thank you for all you do! Pamela
Katie Trott
Amy I love this scrappy log cabin method! And I love using my scraps. It sometimes even makes me feel like I need more scraps 😀
Debbie
Amy, loved the “scrap quilt” that you made-it is BEAUTIFUL! I am new to your blog & very new to Quilting. As far as the “wonky” Quilts, wished I’d known about them sooner. Due to my disability, I had several “wonky” strips & tossed them. Now I will start a “bin” for different lengths of wonky strips. Thank you & have a very blessed day! ?
Joan
Amy Thank you for the wonky quilt pattern. It is great to having a break from making all quilting pieces perfect.
Amy
I'm so glad you're enjoying it. I think they're super fun.