

I decided it was time to write a Nursing Cover Tutorial. This way everyone can create a lovely handmade baby-gift trifecta (along with the burp cloths and diaper clutch). Just think how impressive you will be at all those baby showers. This version isn't the snazziest, but it's fast, efficient, and let's face it: the baby is not going to care and the mom is probably sleep-deprived enough to just be grateful for something she doesn't have to hold up with her chin and keeps her baby from looking he/she's been in a sauna for an hour.
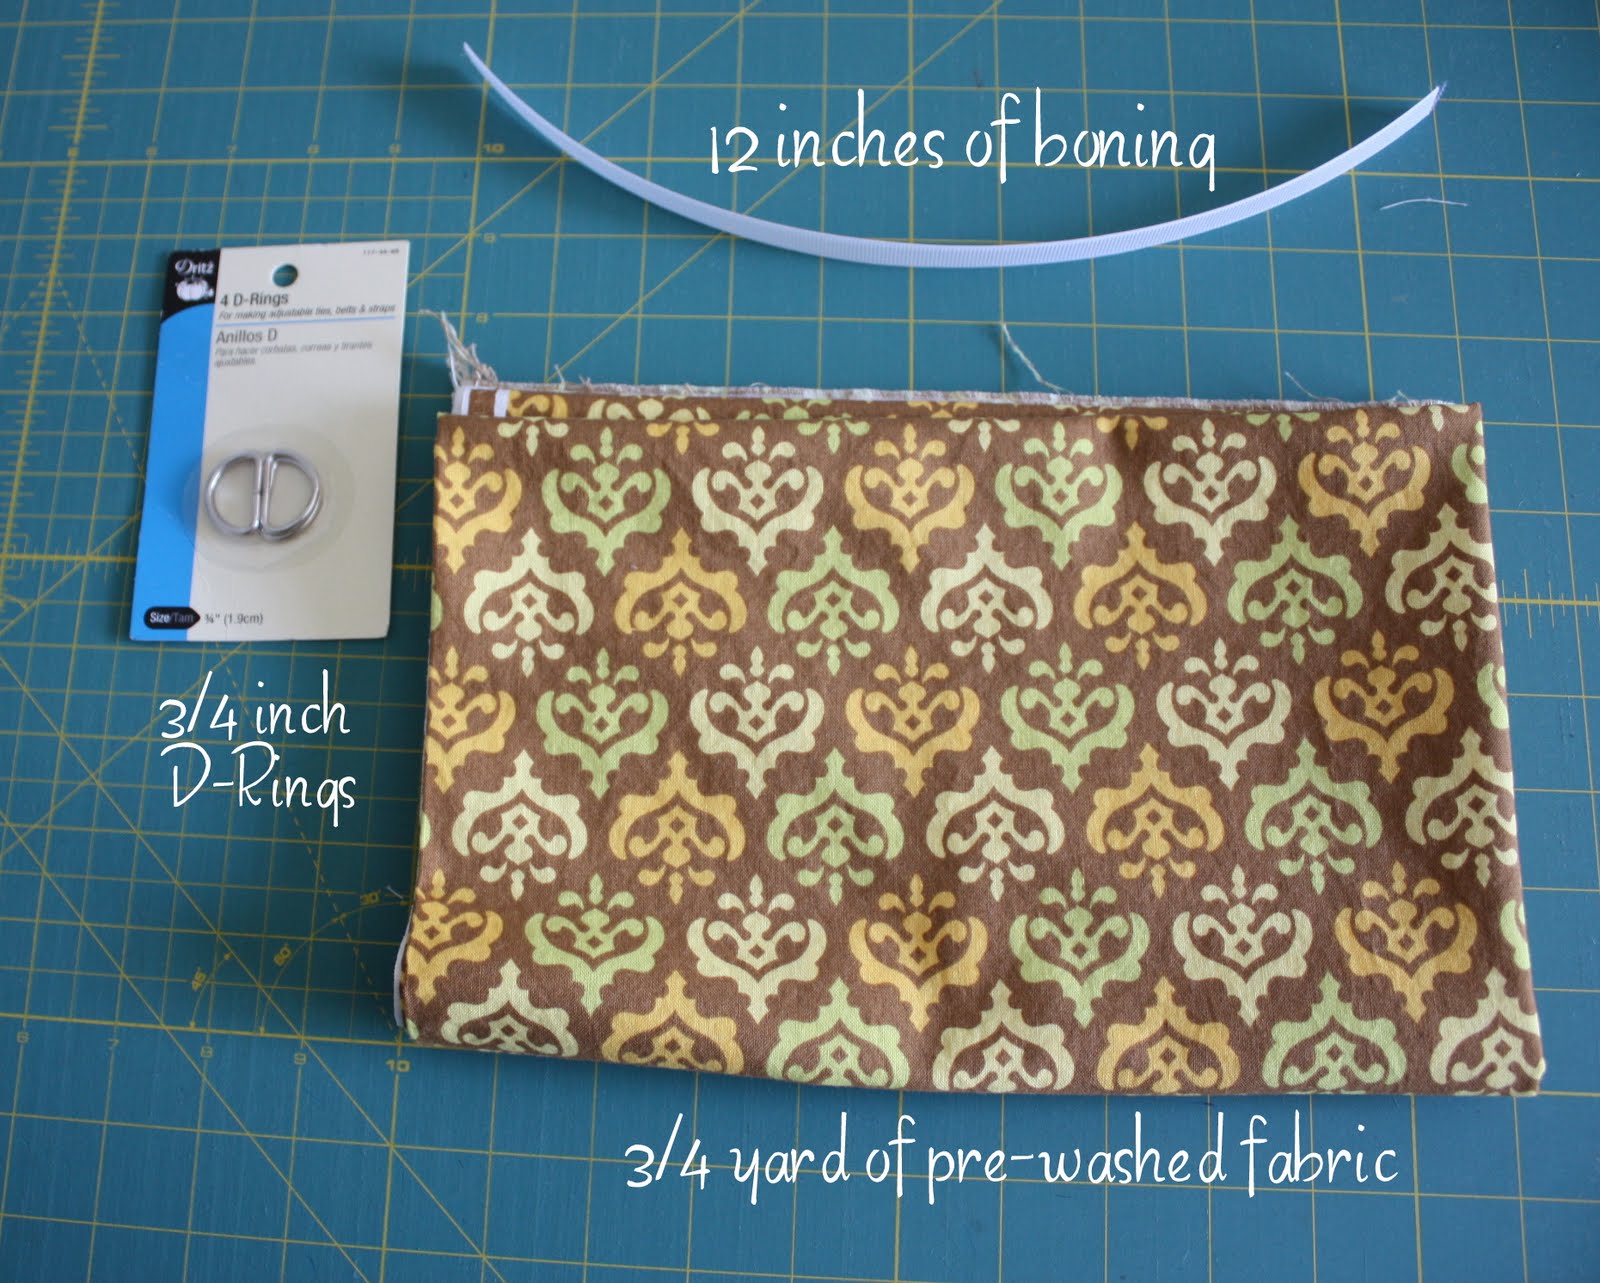
Supplies:
¾ yard of pre-washed fabric. You could go longer if you're making this for a taller person. (Keep in mind that this baby accessory is actually for the mom. As cute as fire trucks and smiling, rubber ducks are for the little munchkins, mom would probably feel a whole lot more chic in a swanky, designer print. Whenever I see great designer fabric on sale, I always snatch some up and keep it handy for nursing covers.)
12" of Boning. This stuff is found at JoAnn's or any other store that carries a lot of notions. It can be found in the Notions aisle and is purchased by the yard. (I know this sounds kind of tricky and requiring extra effort. I felt this way myself at first, but seriously, it is SO EASY. The easy-effort : impress-your-friends ratio is amazing.) The first nursing cover I made I used 18" of boning and when I tried it out, I felt like I was sitting under a covered wagon. I found that 12" provides enough length to make the cover bow out so you can peek at your adorable little one, but not feel too big. This is all personal preference though. If you are making it for someone a little more well endowed, maybe you want to use a longer piece. By all means, use as much or as little as you desire. (One of the great parts of making something yourself! You can change things up when you want!)
A package of ¾" D-rings. These are also found in the Notions aisle. I tried the 1" D-rings and felt like the neck strap got too loose and didn't stay in place, but again - go with what makes you happiest. The D-rings come 4 to a package and you will only need two per cover.
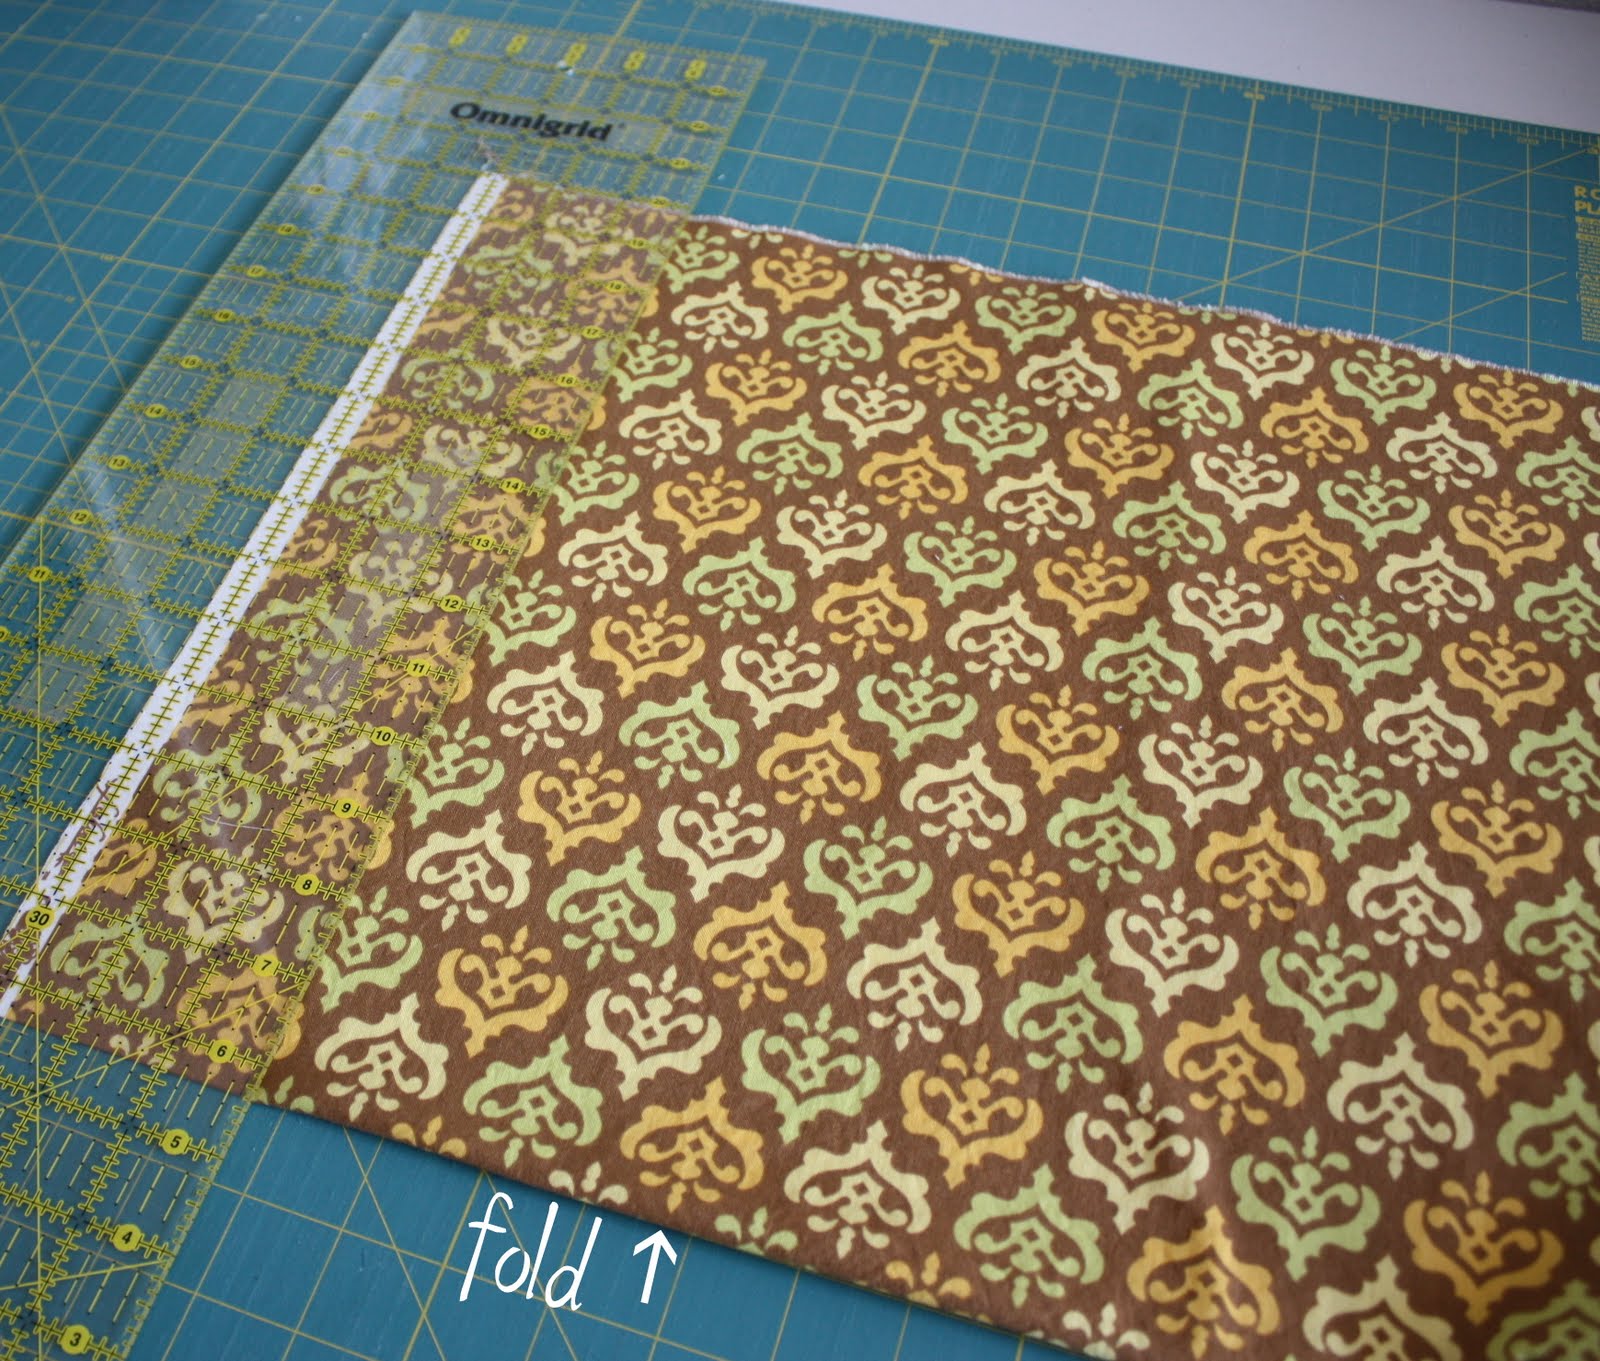
After you have washed and ironed your pretty fabric fold it in half length-wise (i.e. label-side selvage folded on top of itself) so that you can easily cut a strip off one side.

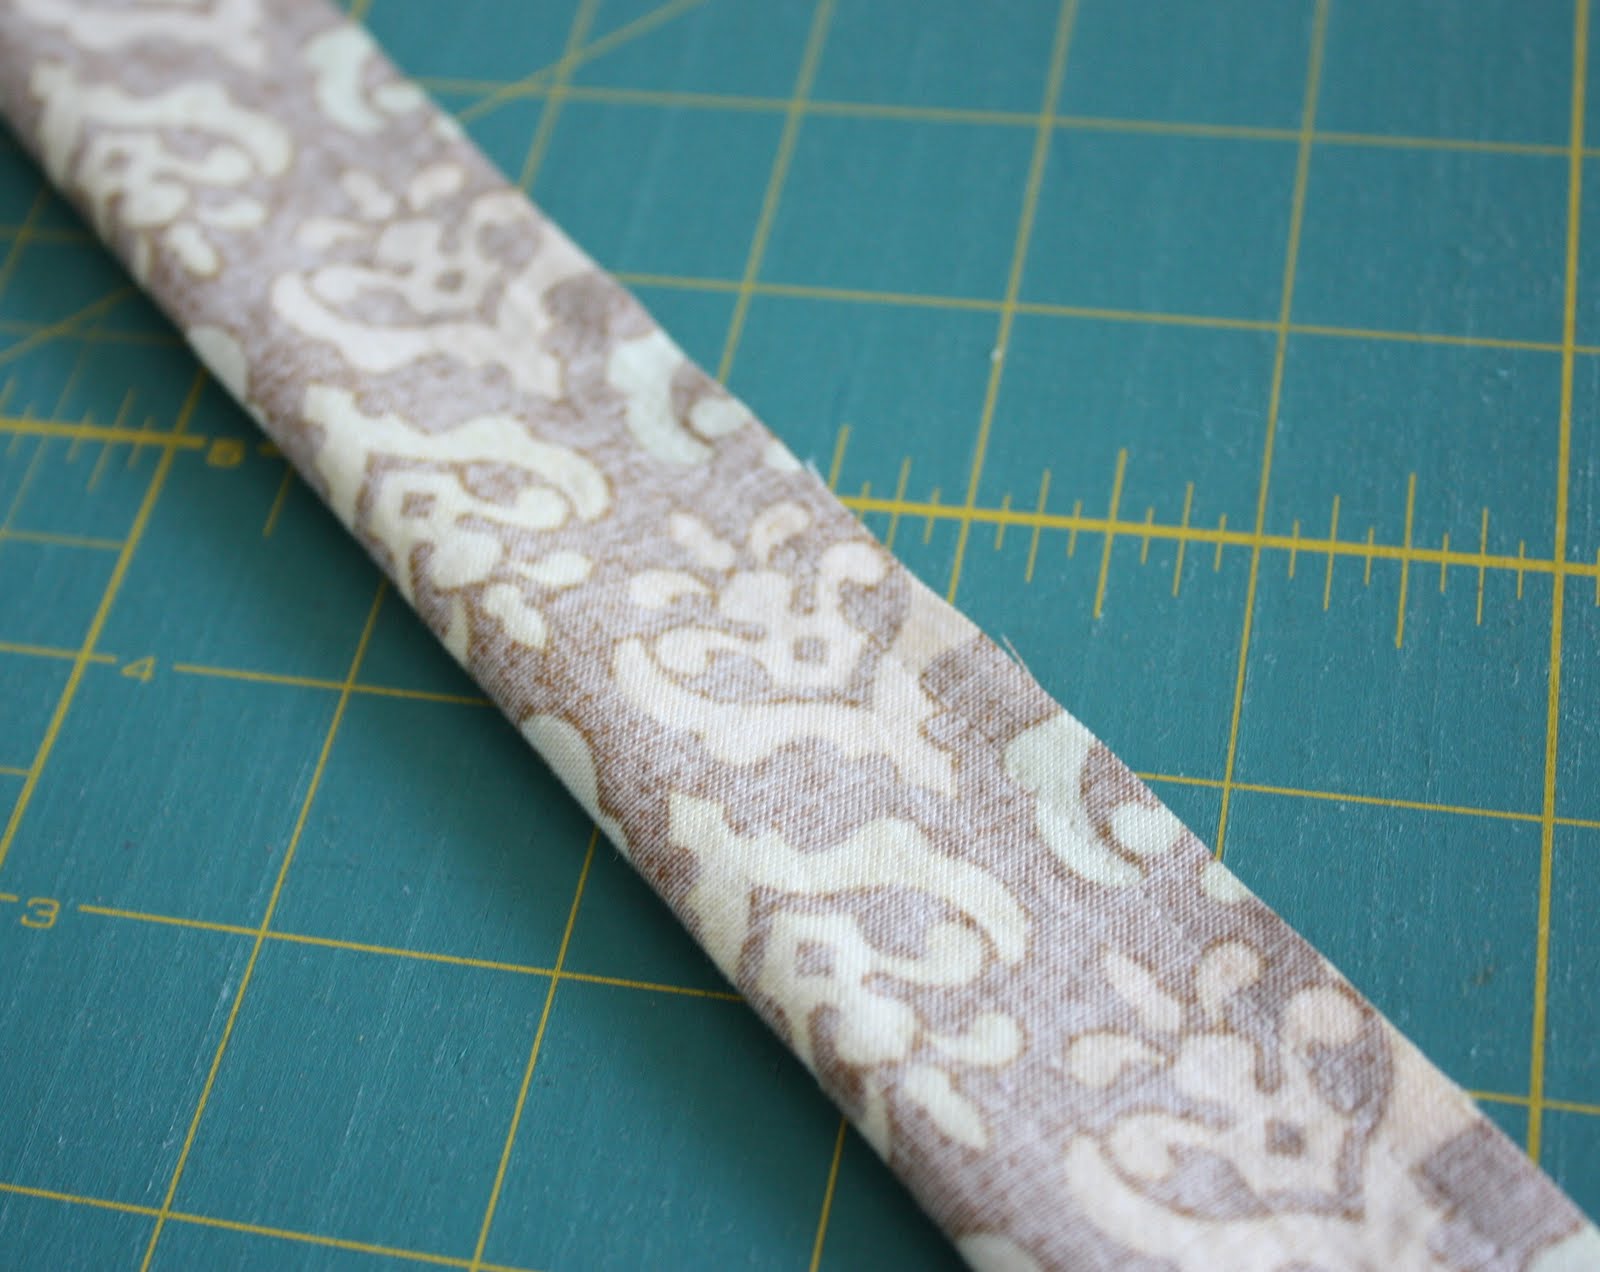
Cut a strip 3.5" wide off the selvage side for your neck-strap. (Trim selvage first.)
Put that strip in a safe place because you will need it again shortly.
You will now have a giant rectangle measuring roughly 27" x 39".
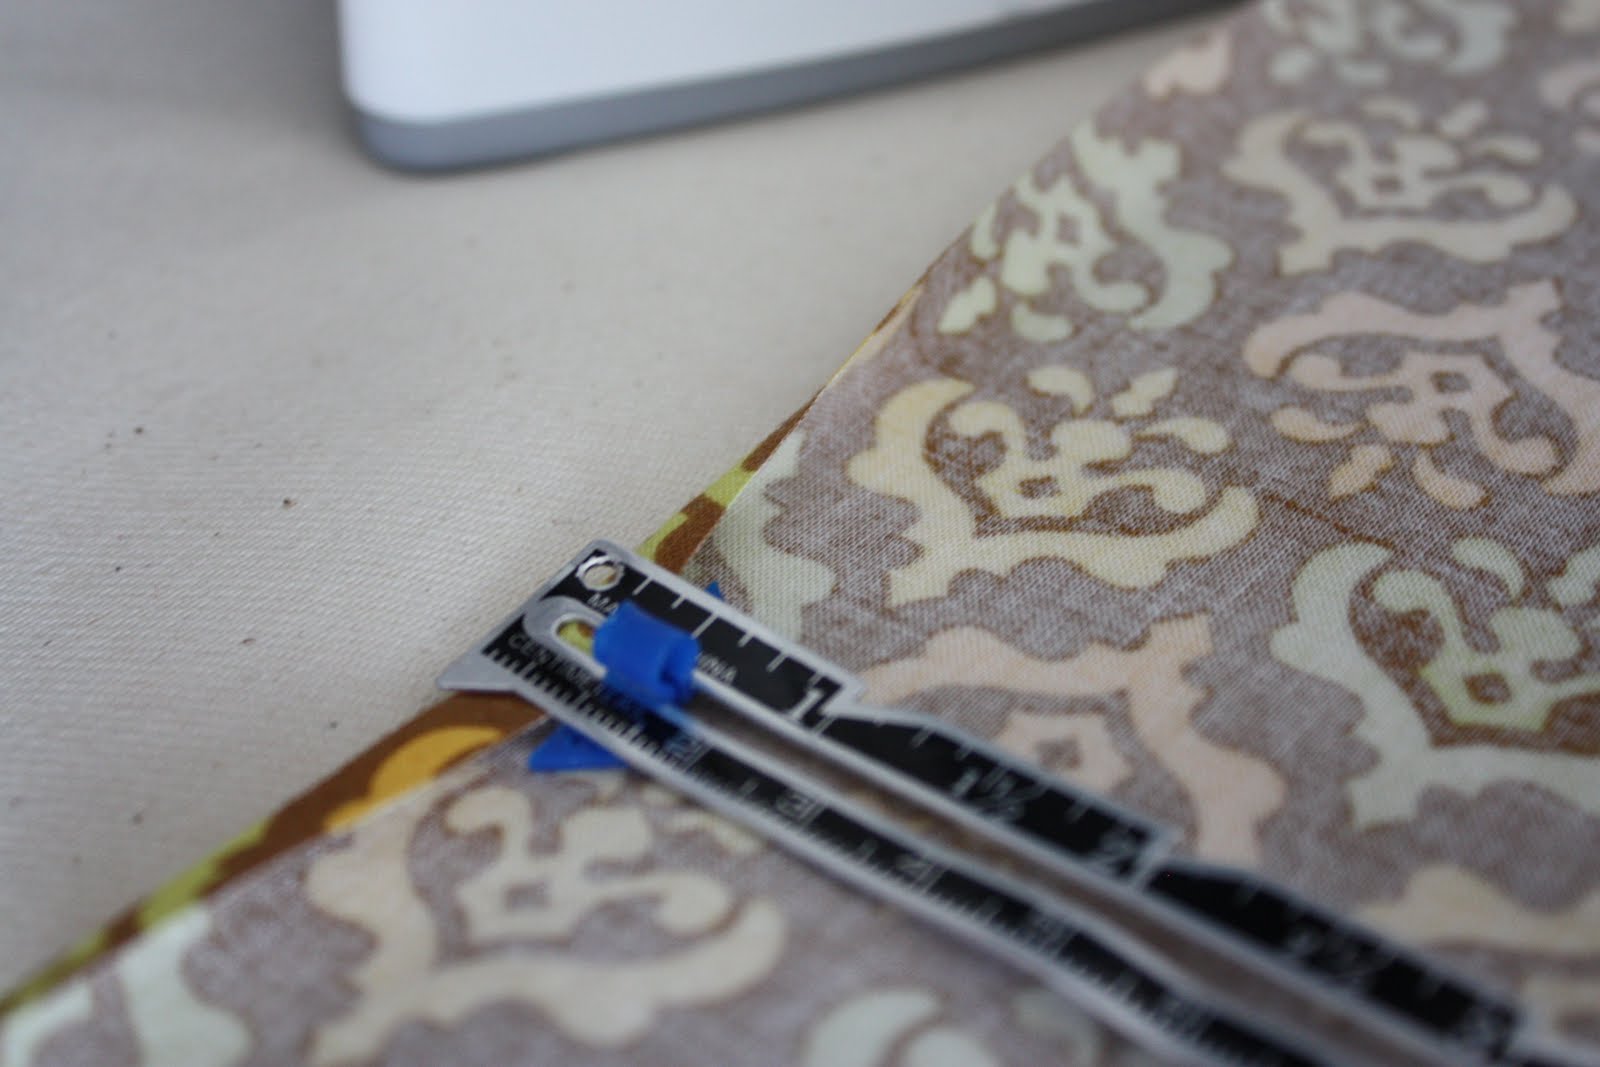
Get out your favorite slidy-ruler-thingy and turn the short sides of your rectangle under ¼". Press. (Again, steam and a little spray starch will help a ton.)
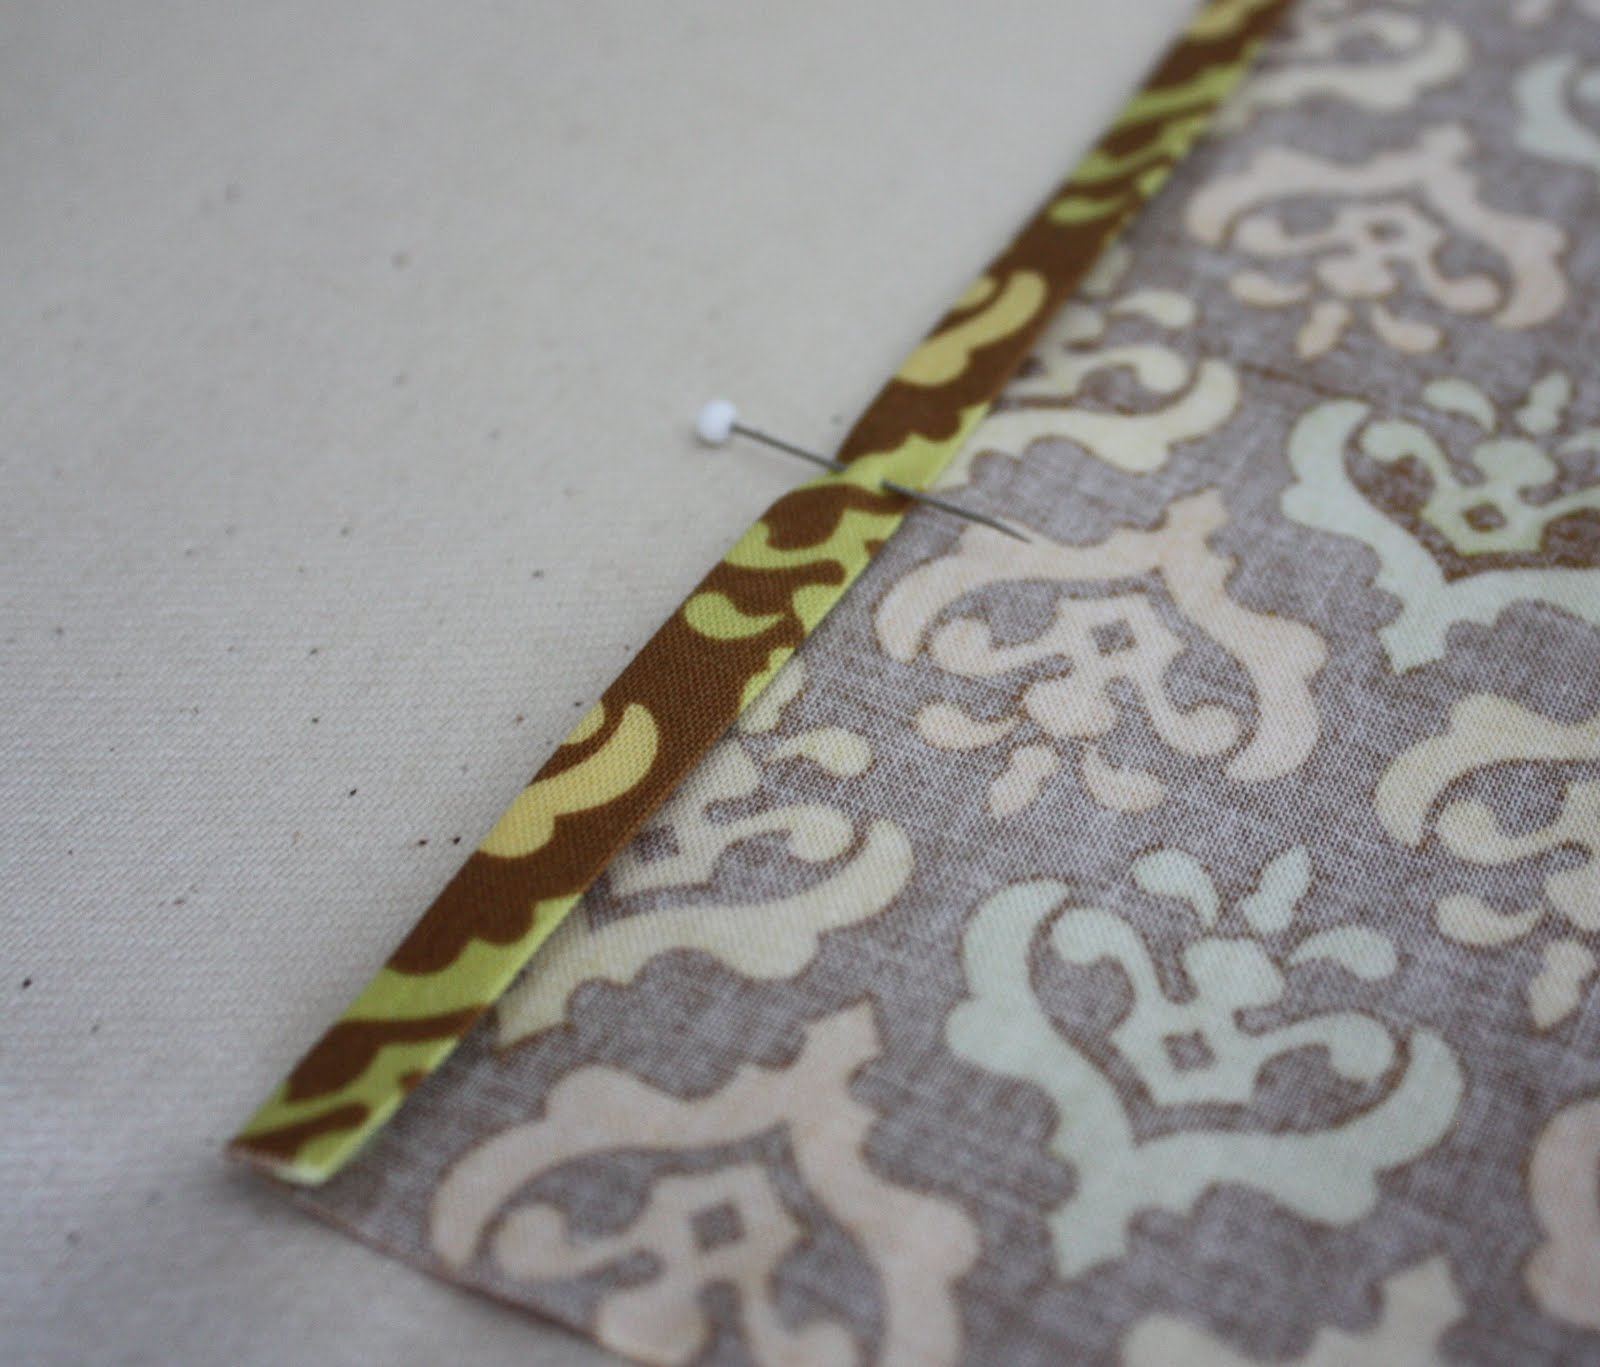
Turn pressed edges over another ¼". Press and I like to then pin.
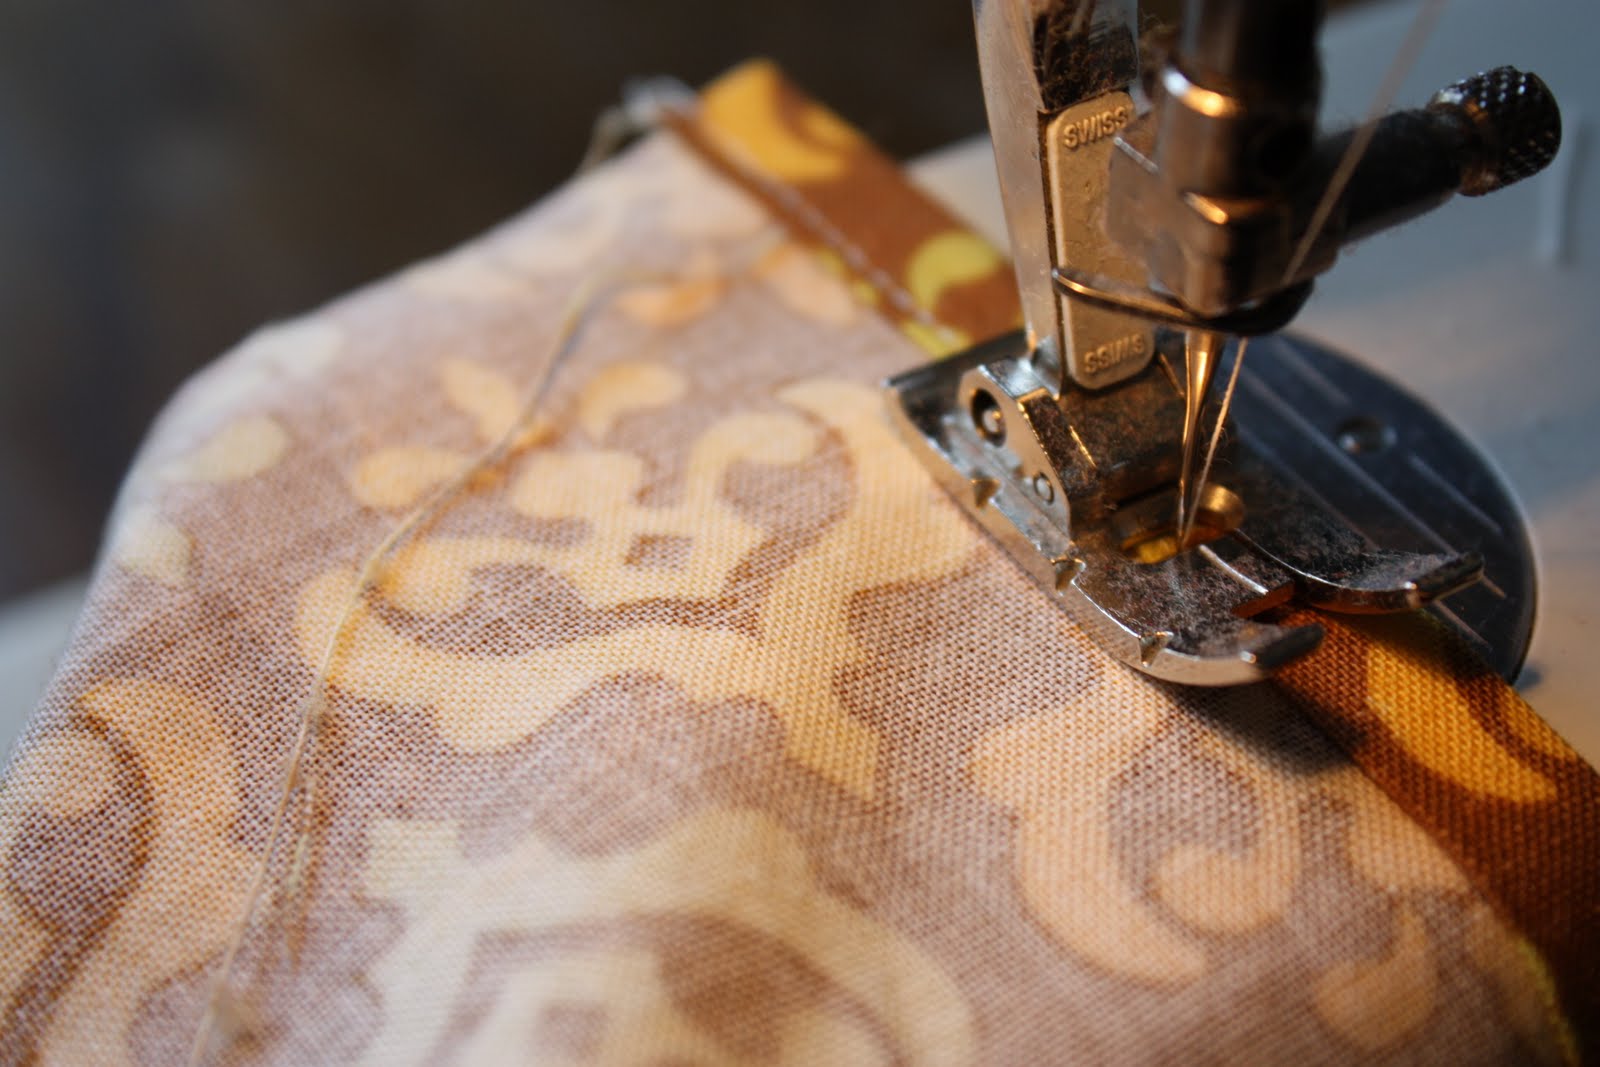
Sew the hemmed sides down.
Repeat the process with the bottom hem, only turn it under ½" the second time and don't forget to back stitch at the beginning and end of your seam. (I know the slidy-ruler is kind of tedious. If you'd rather eye-ball it, go for it. I do. I've made so many that I'm getting pretty good at those hems.)
For the top seam, turn down ¼", press, and then turn down again ⅝" or just wider than your boning.
Sew that hem in place, leaving the sides open so you can insert the boning.
Now pat your self on the back, because you are half-way done.
Now, take your 3.5" strip and fold it in half length-wise, sewing the edges together with a ¼" seam.
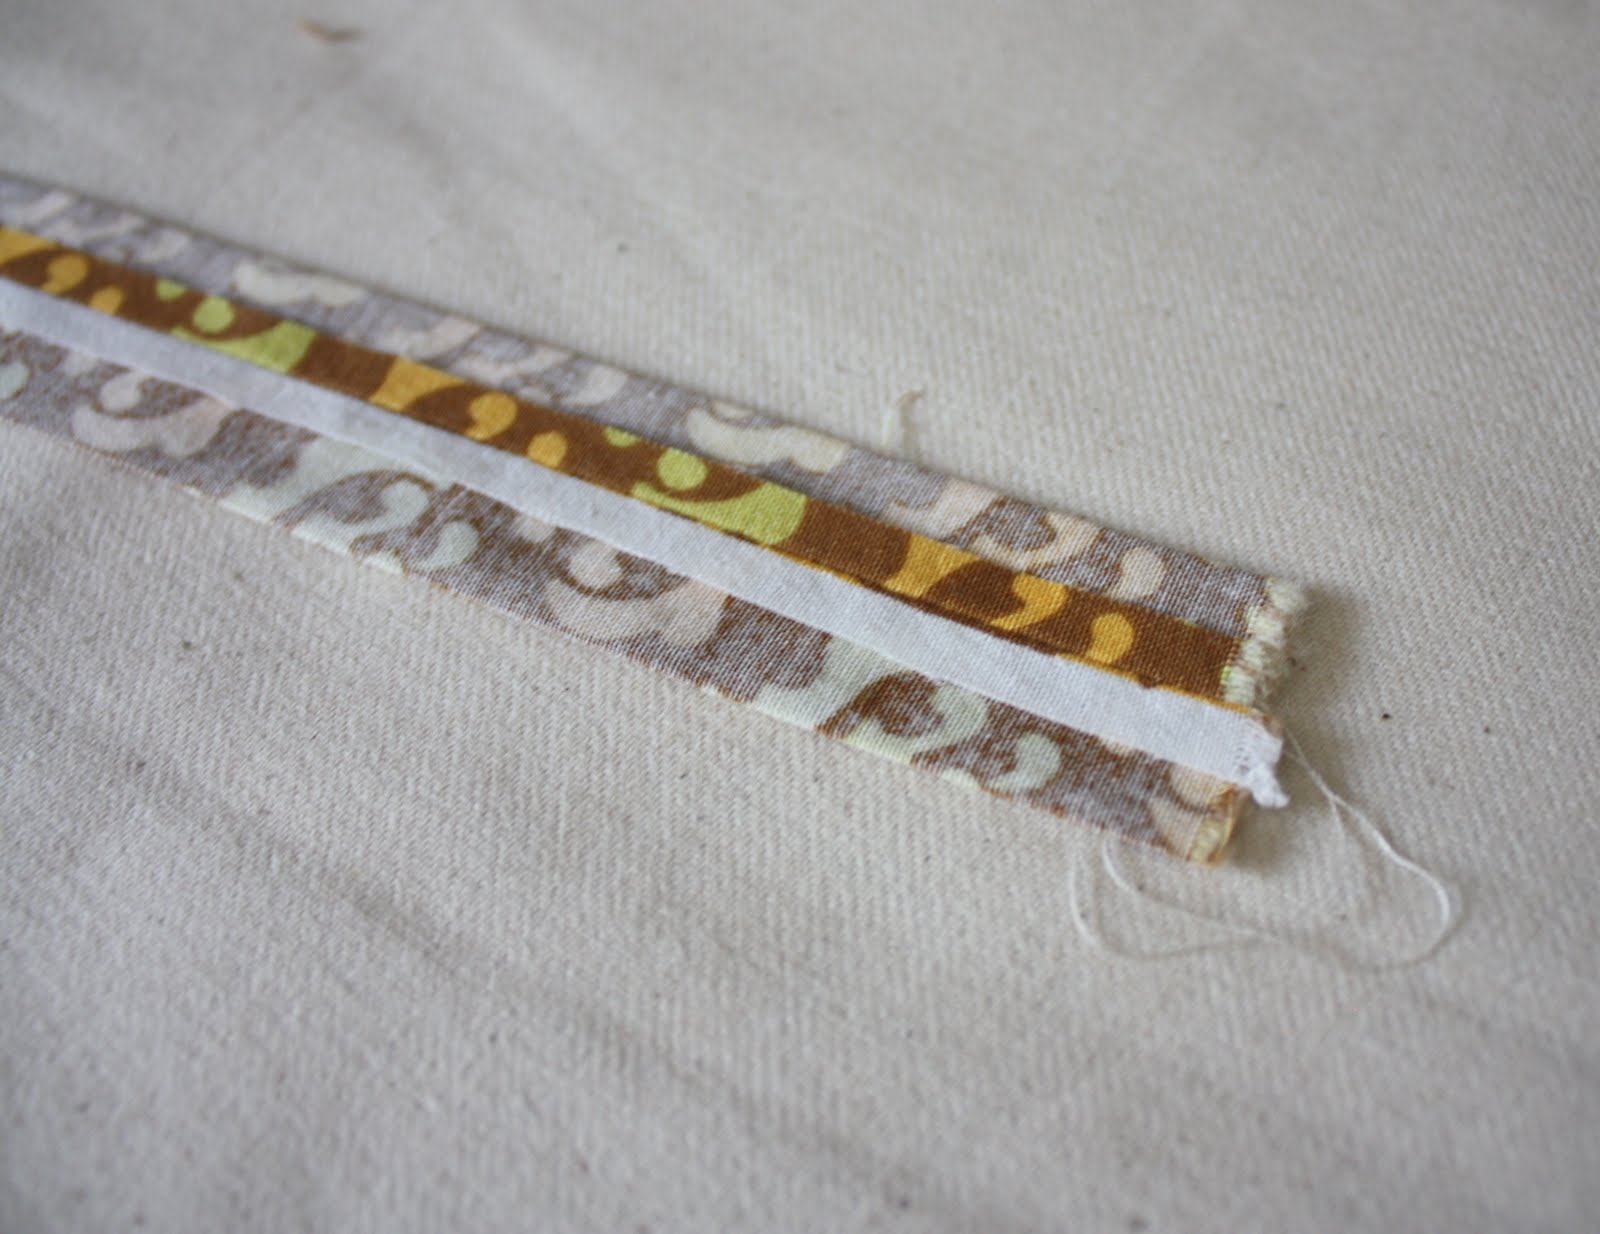
Take your strap piece to the ironing board.
Roll the seam so that it's centered and press the seam open.
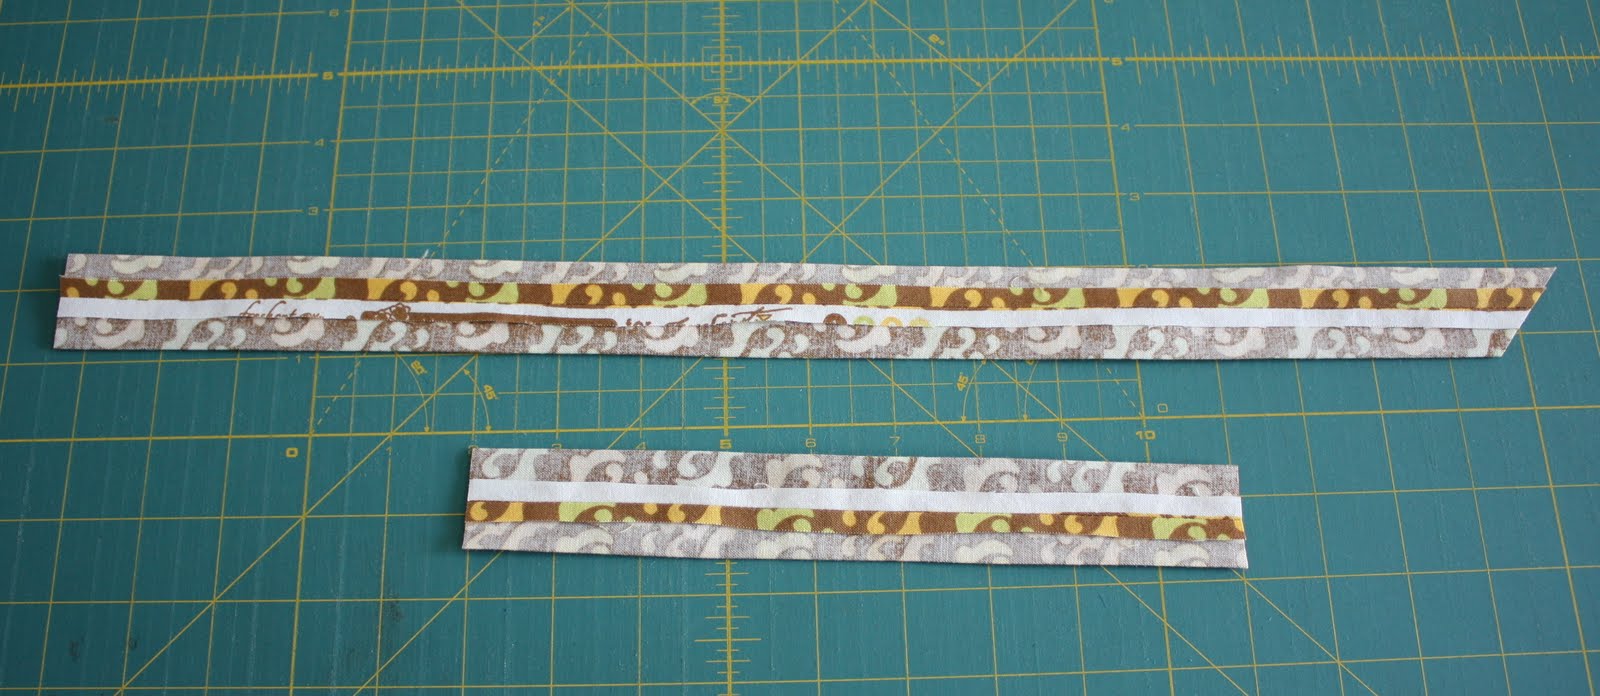
Now cut a 9" piece off one end of your strip.
Cut one end of the long strip on a diagonal.
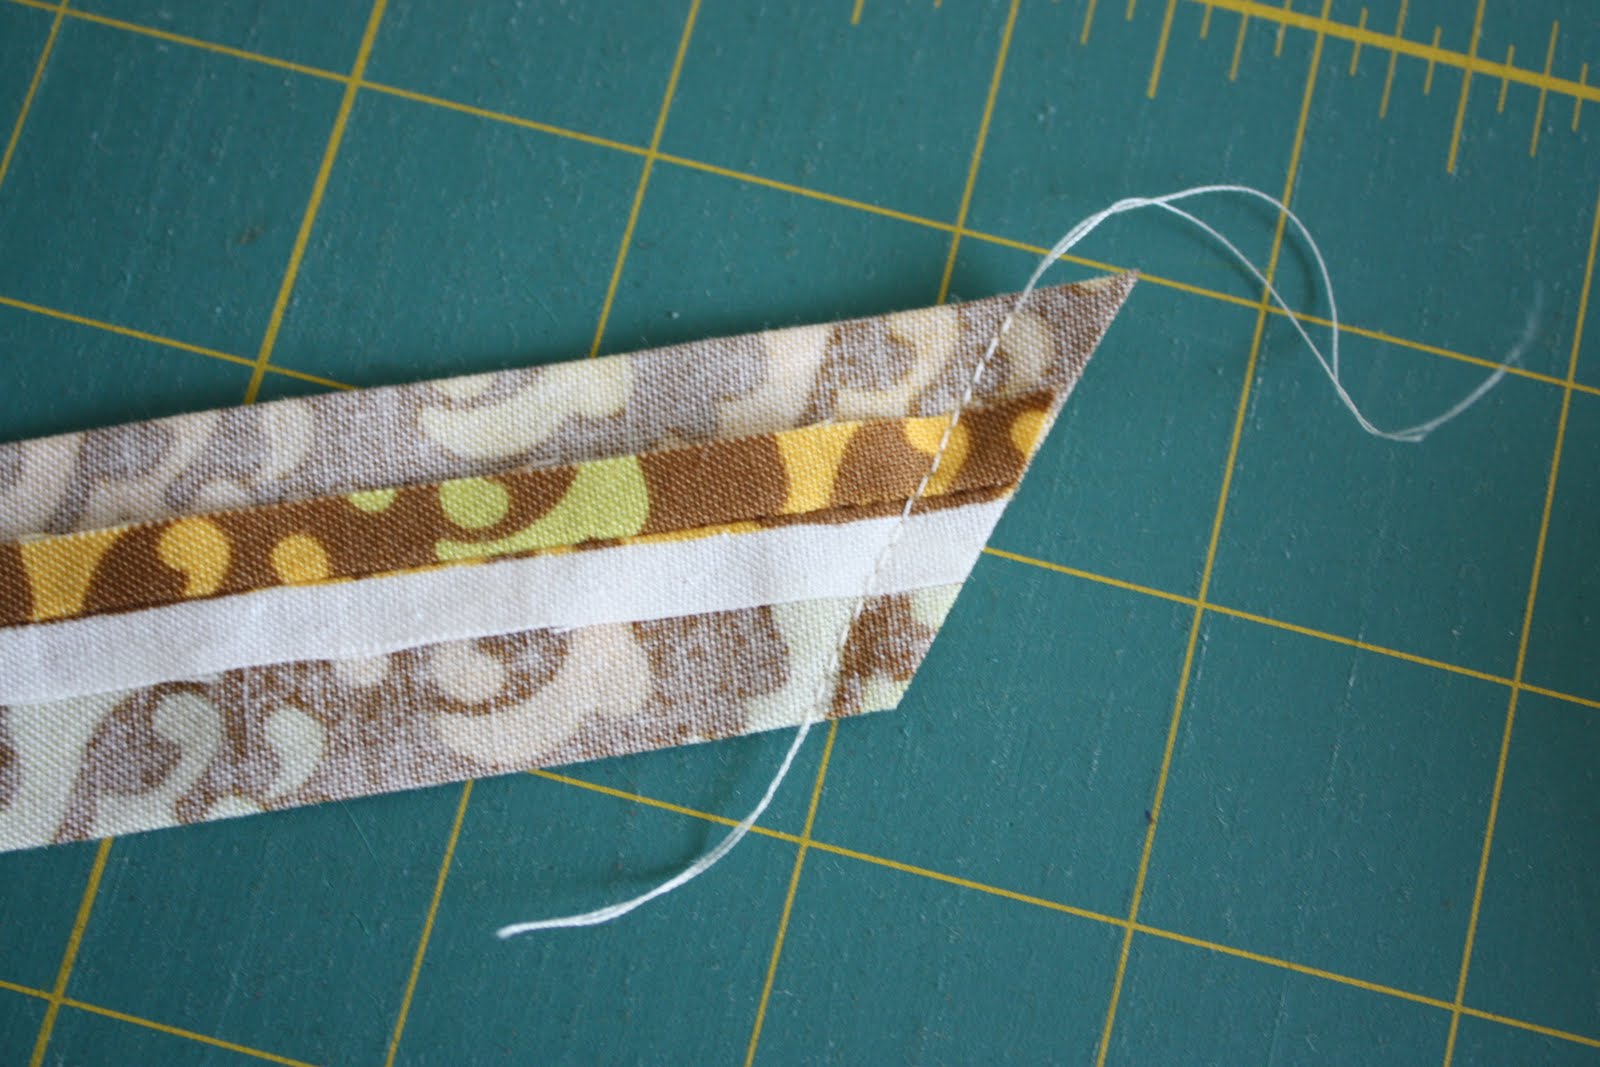
Close the end with the diagonal cut with a ¼" seam.
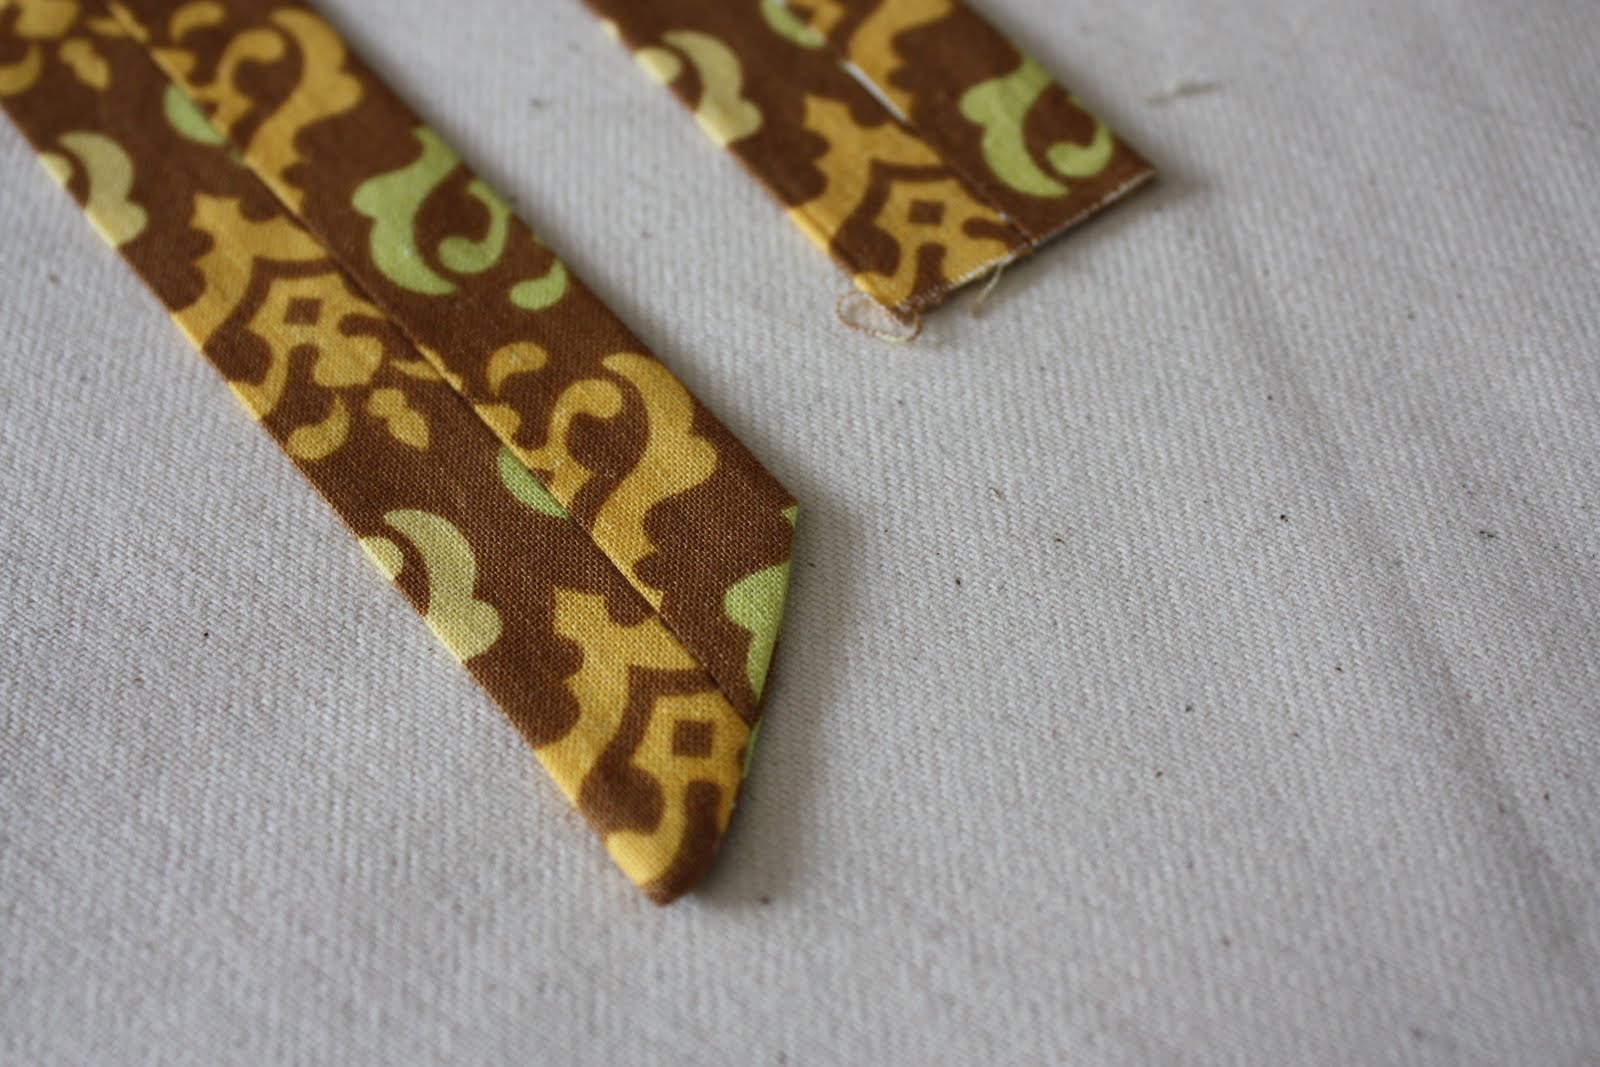
Carefully turn both strap pieces right side out.
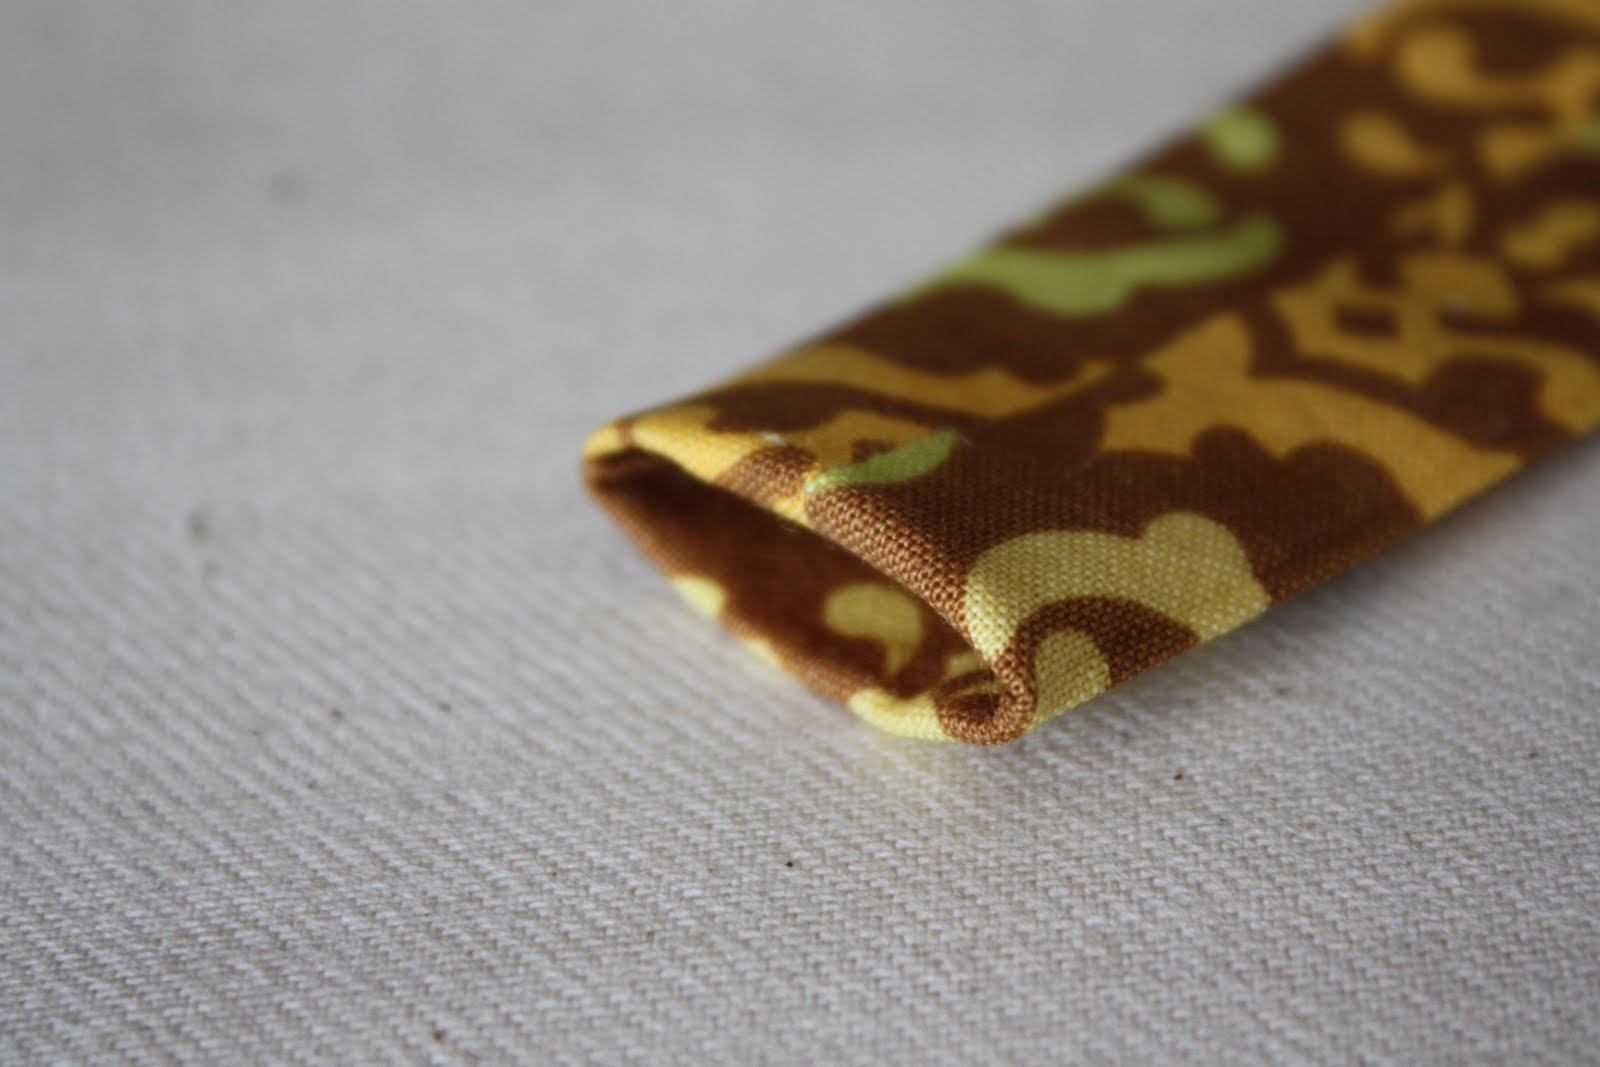
Tuck all raw edges under about ½" and press.
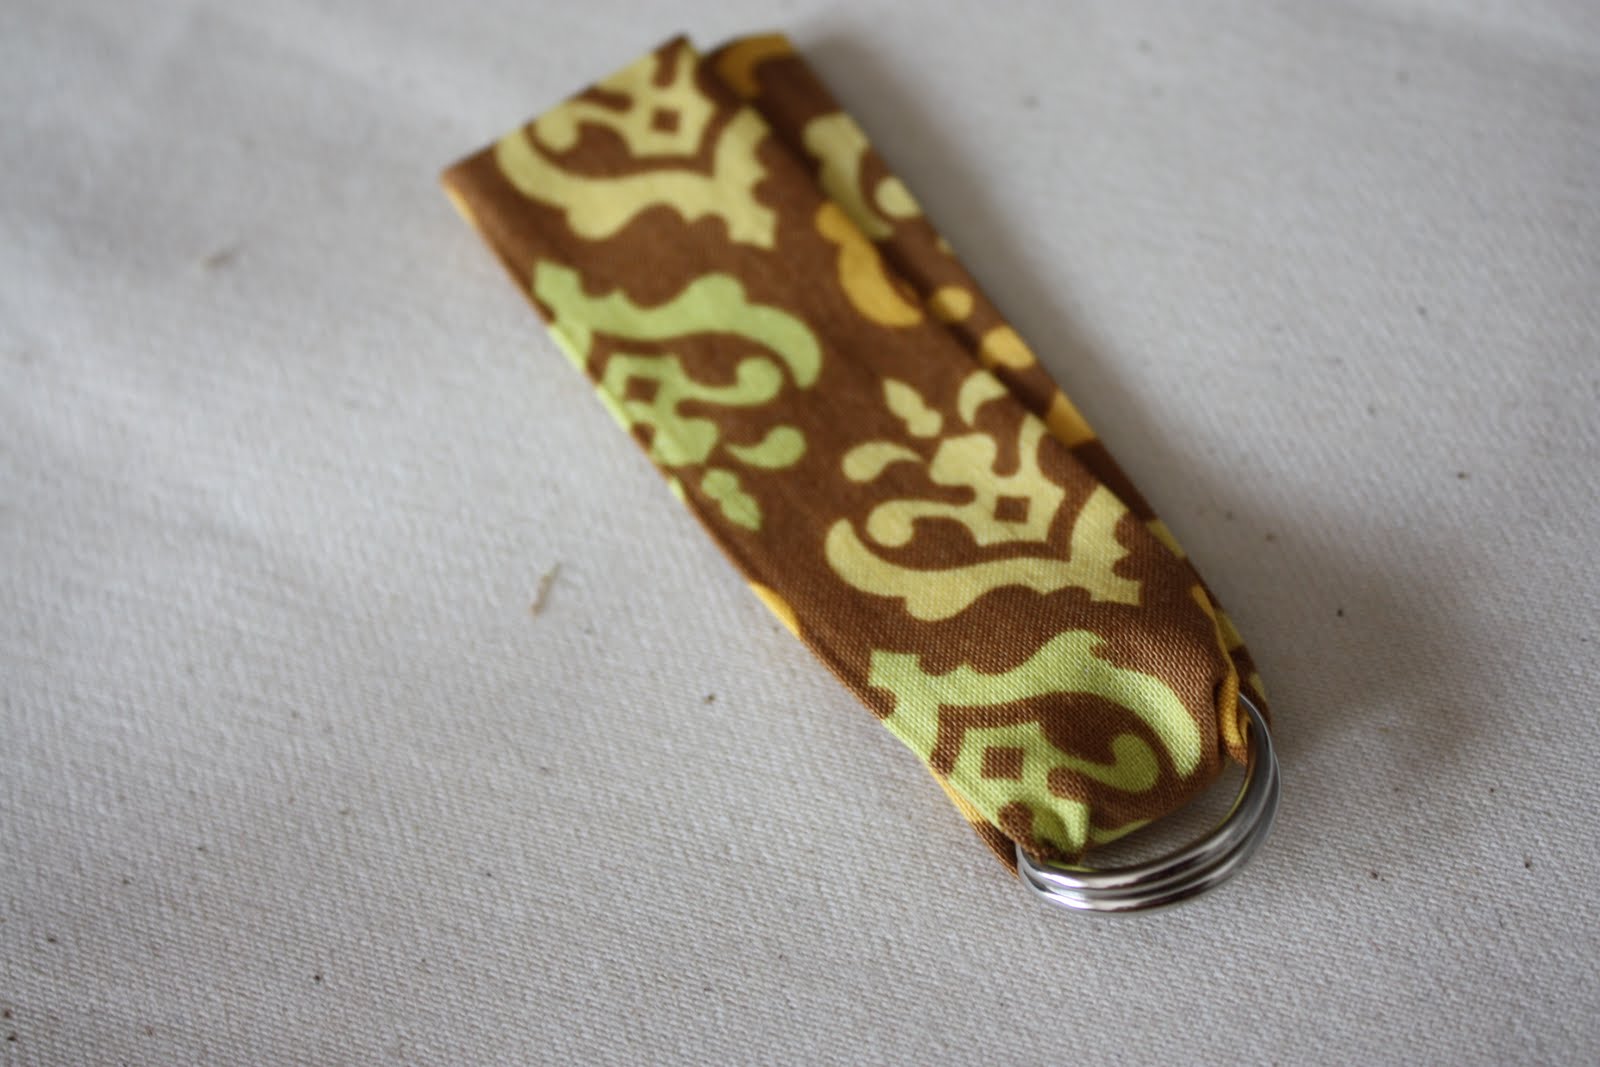
Slide D-rings on the shorter strap piece and fold in half.
(I forgot to picture this part, but you can sew a seam right
underneath the D-rings to hold them in place.)
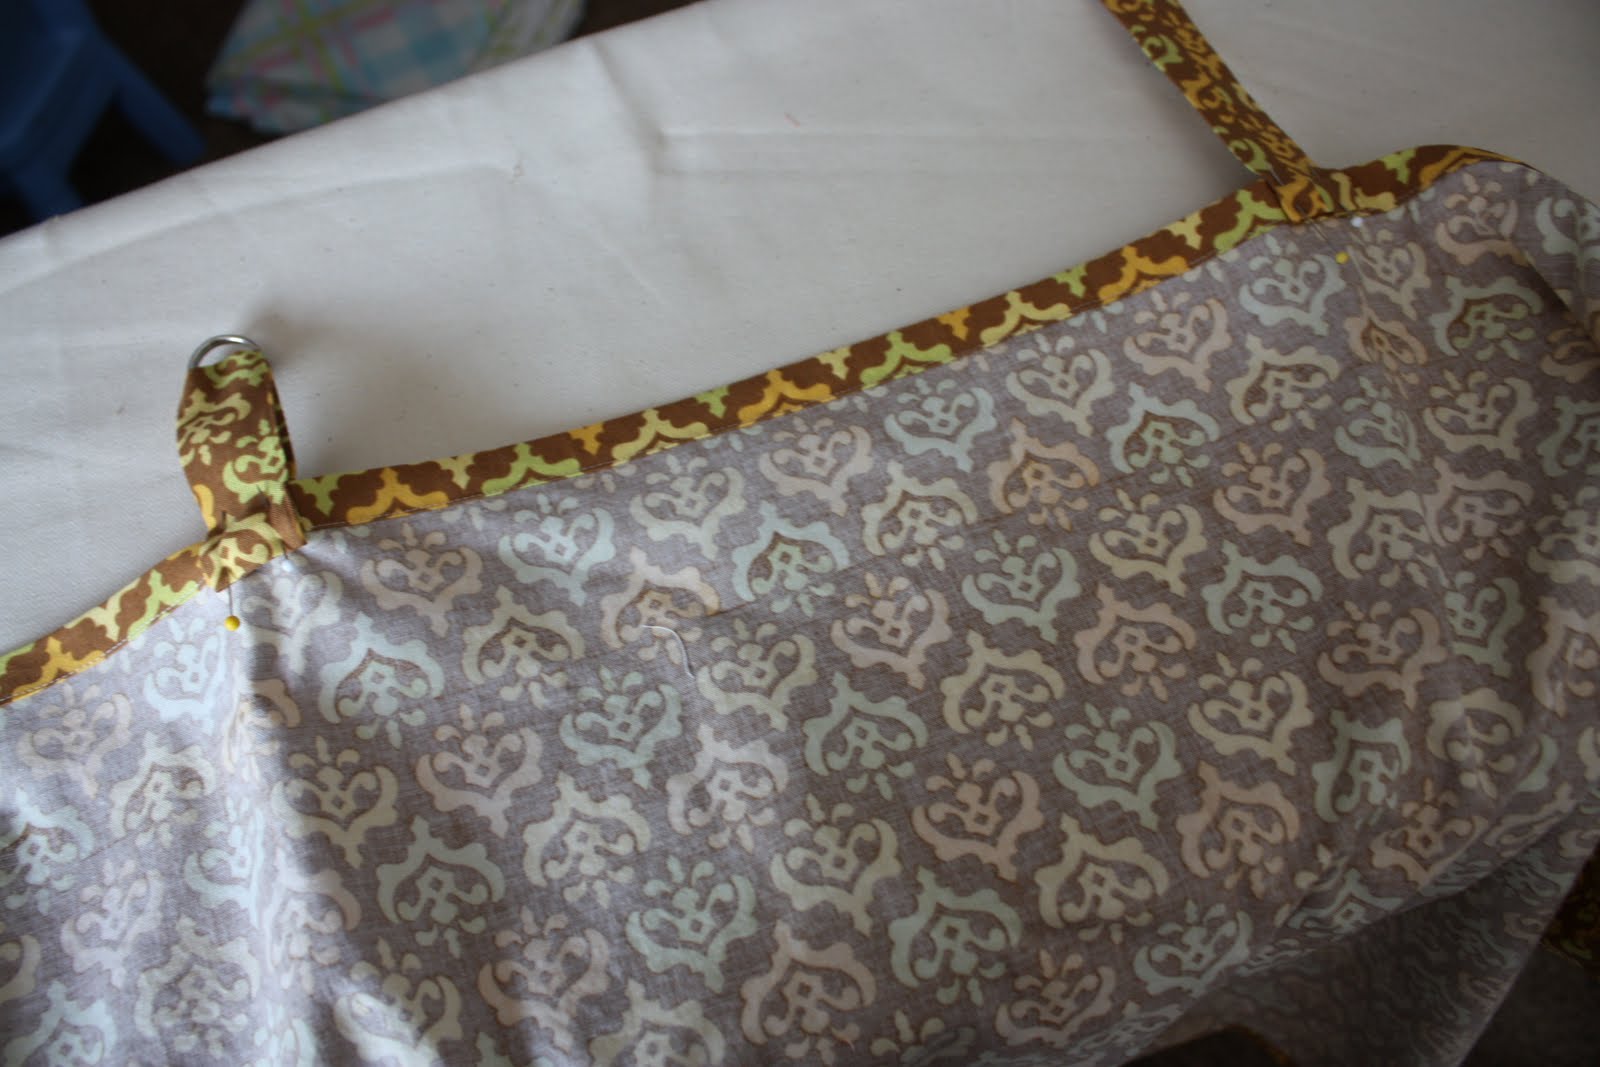
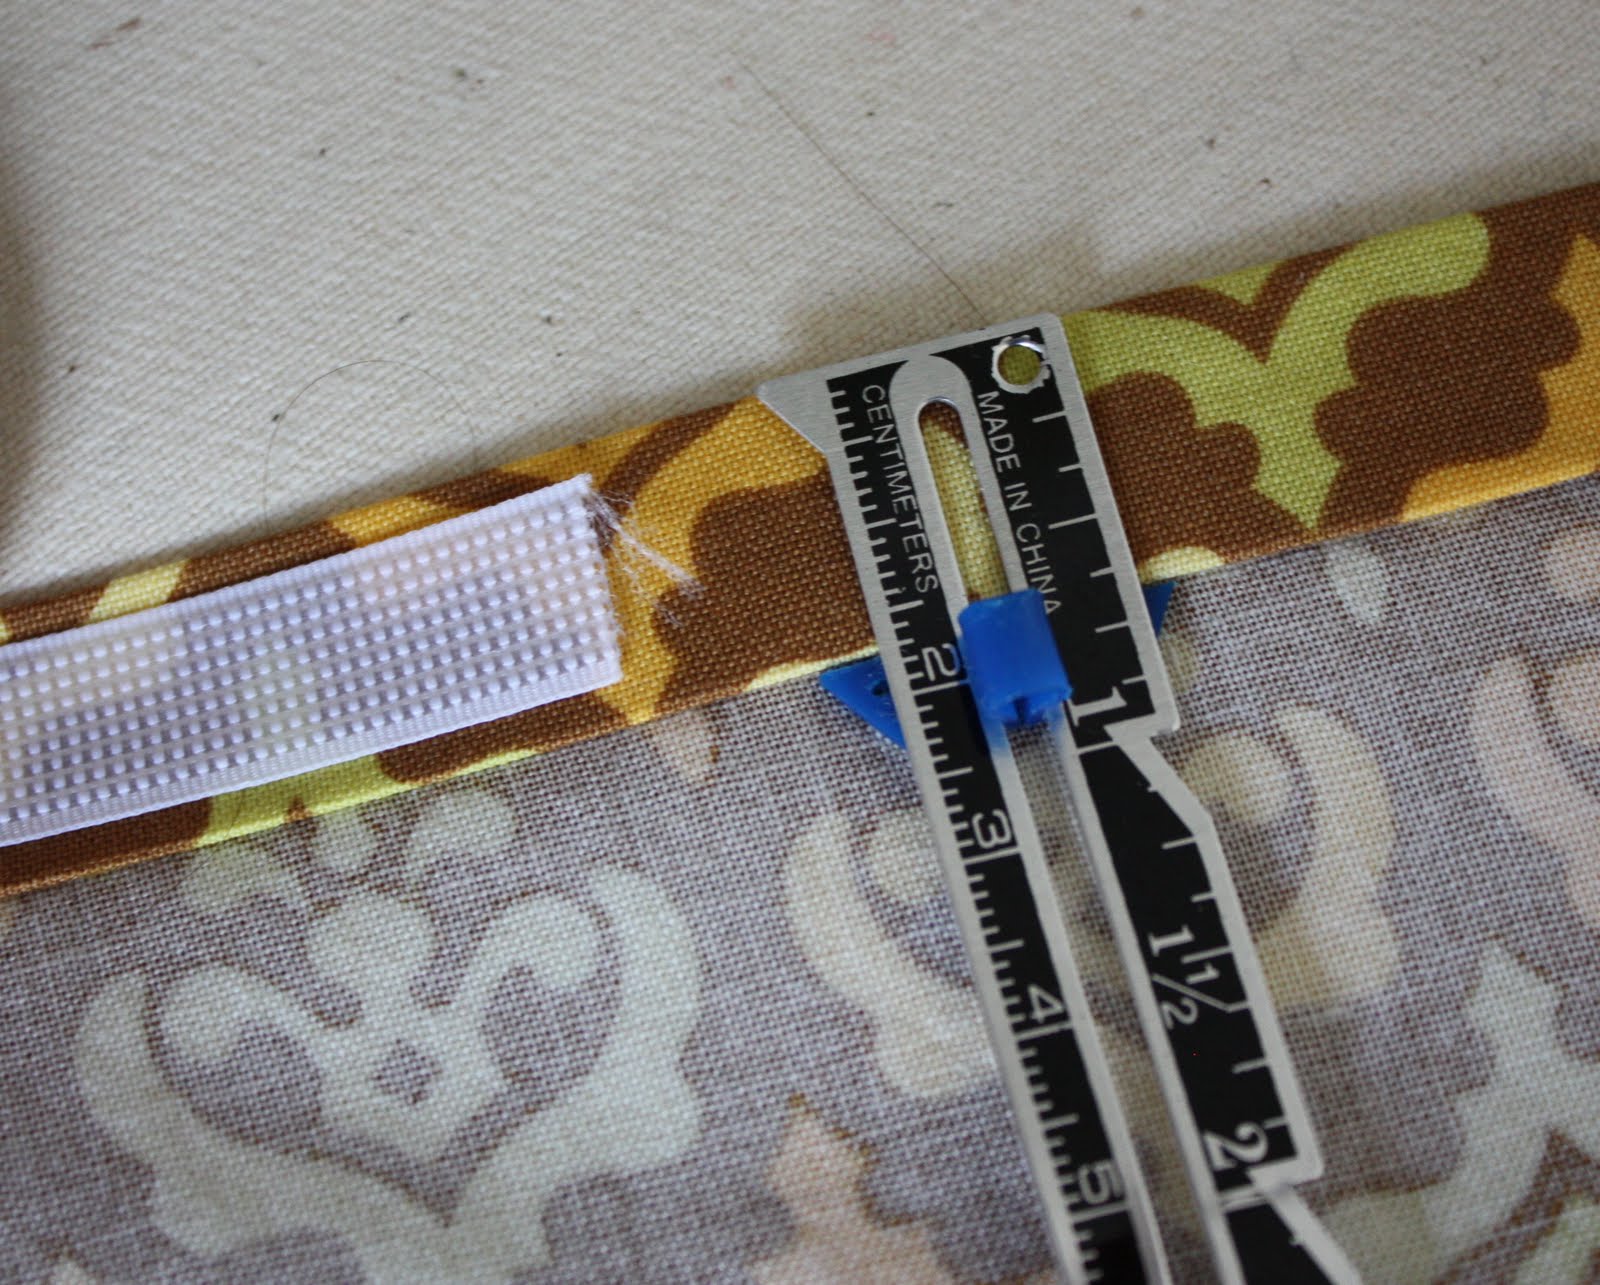
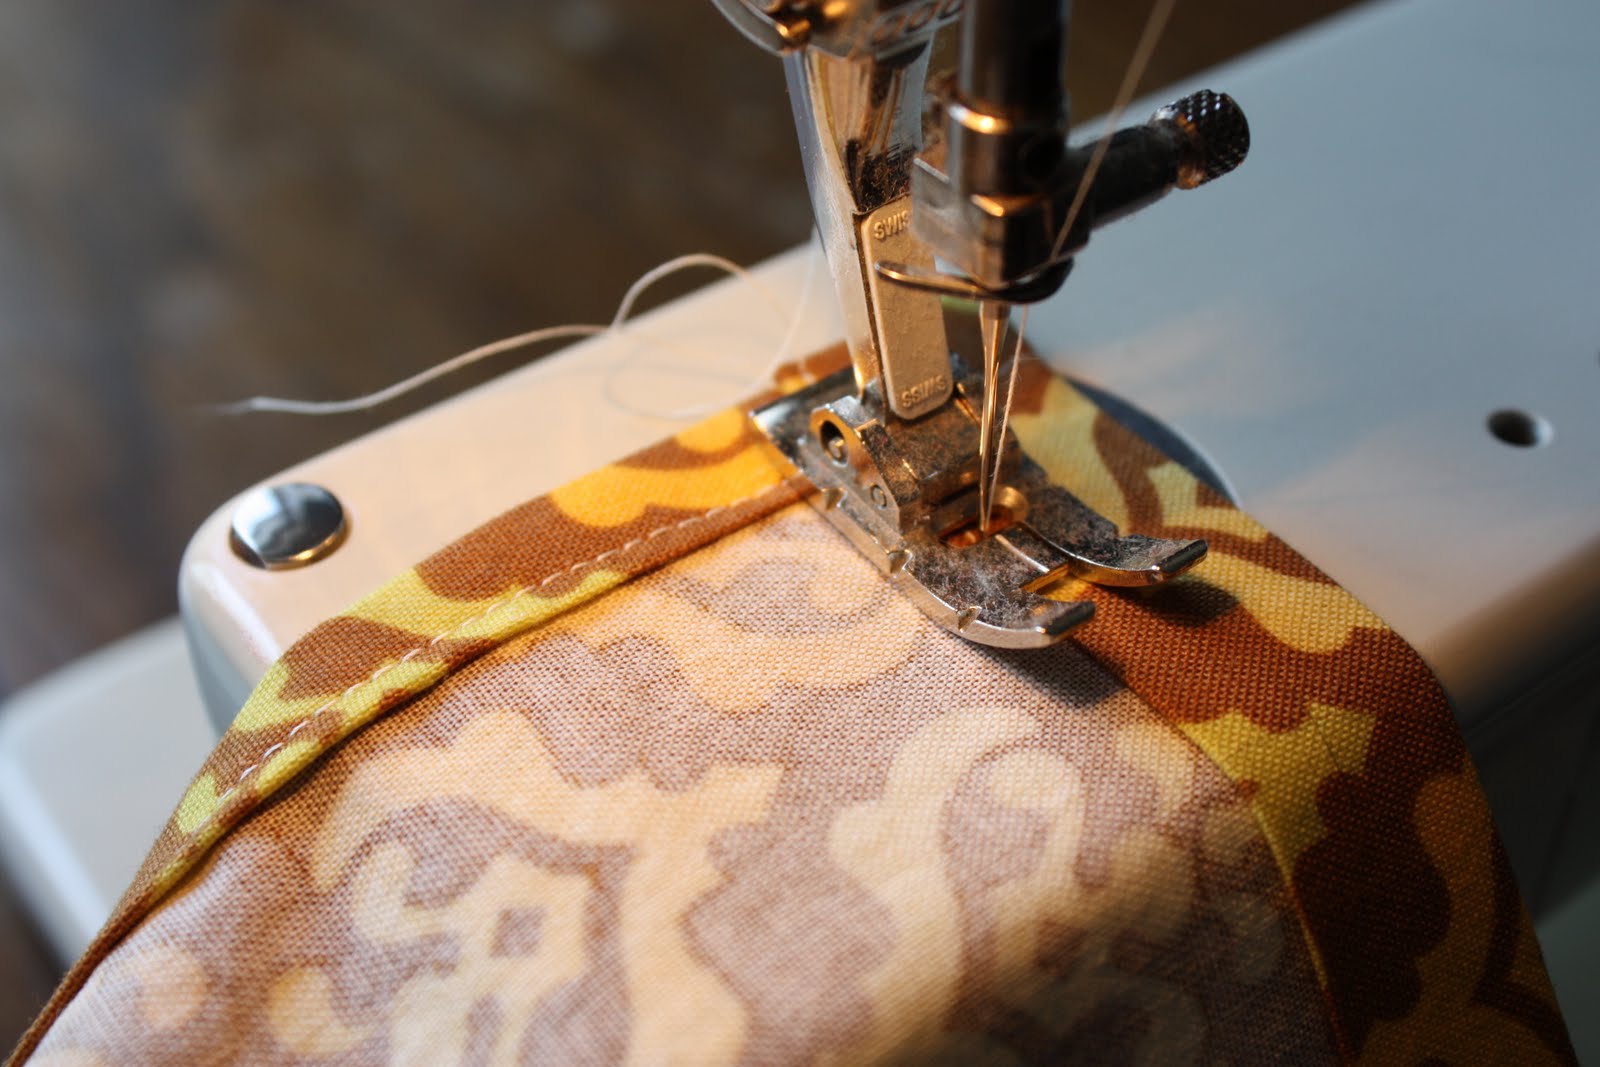
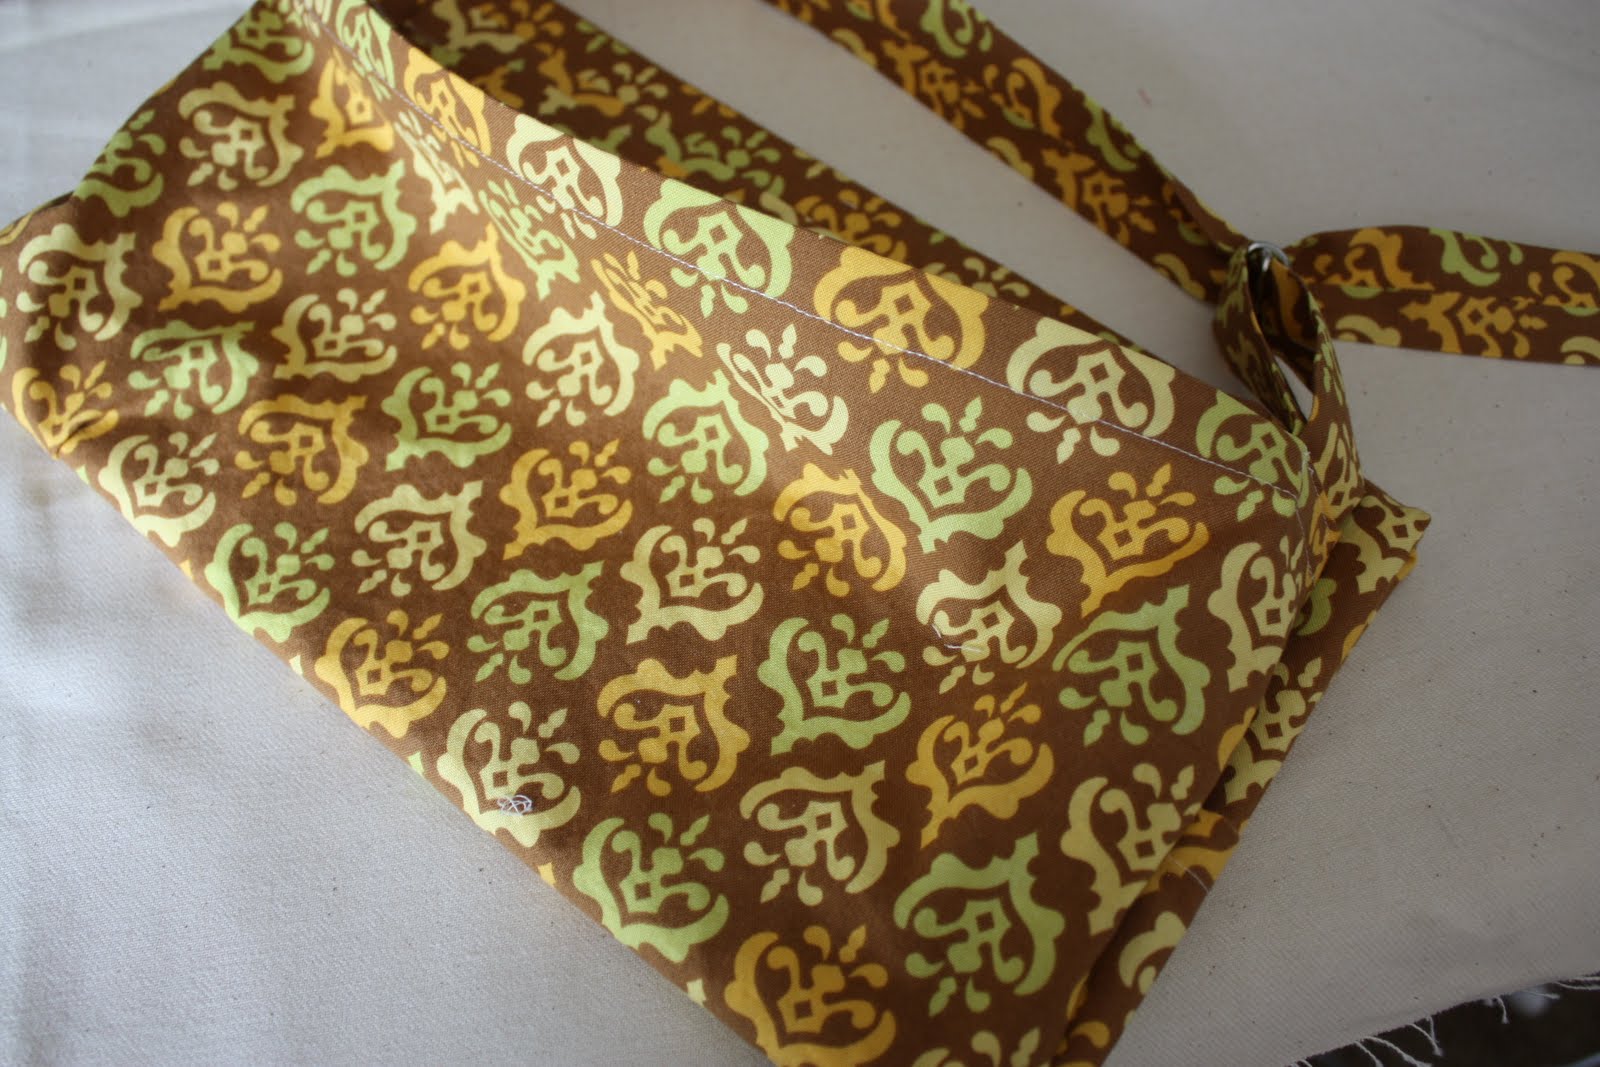
Now, slide the boning piece into the place you made for it in the top hem and center it.
Pin the two strap pieces your made on either side of the inserted boning.
These are going to hold the boning in place.
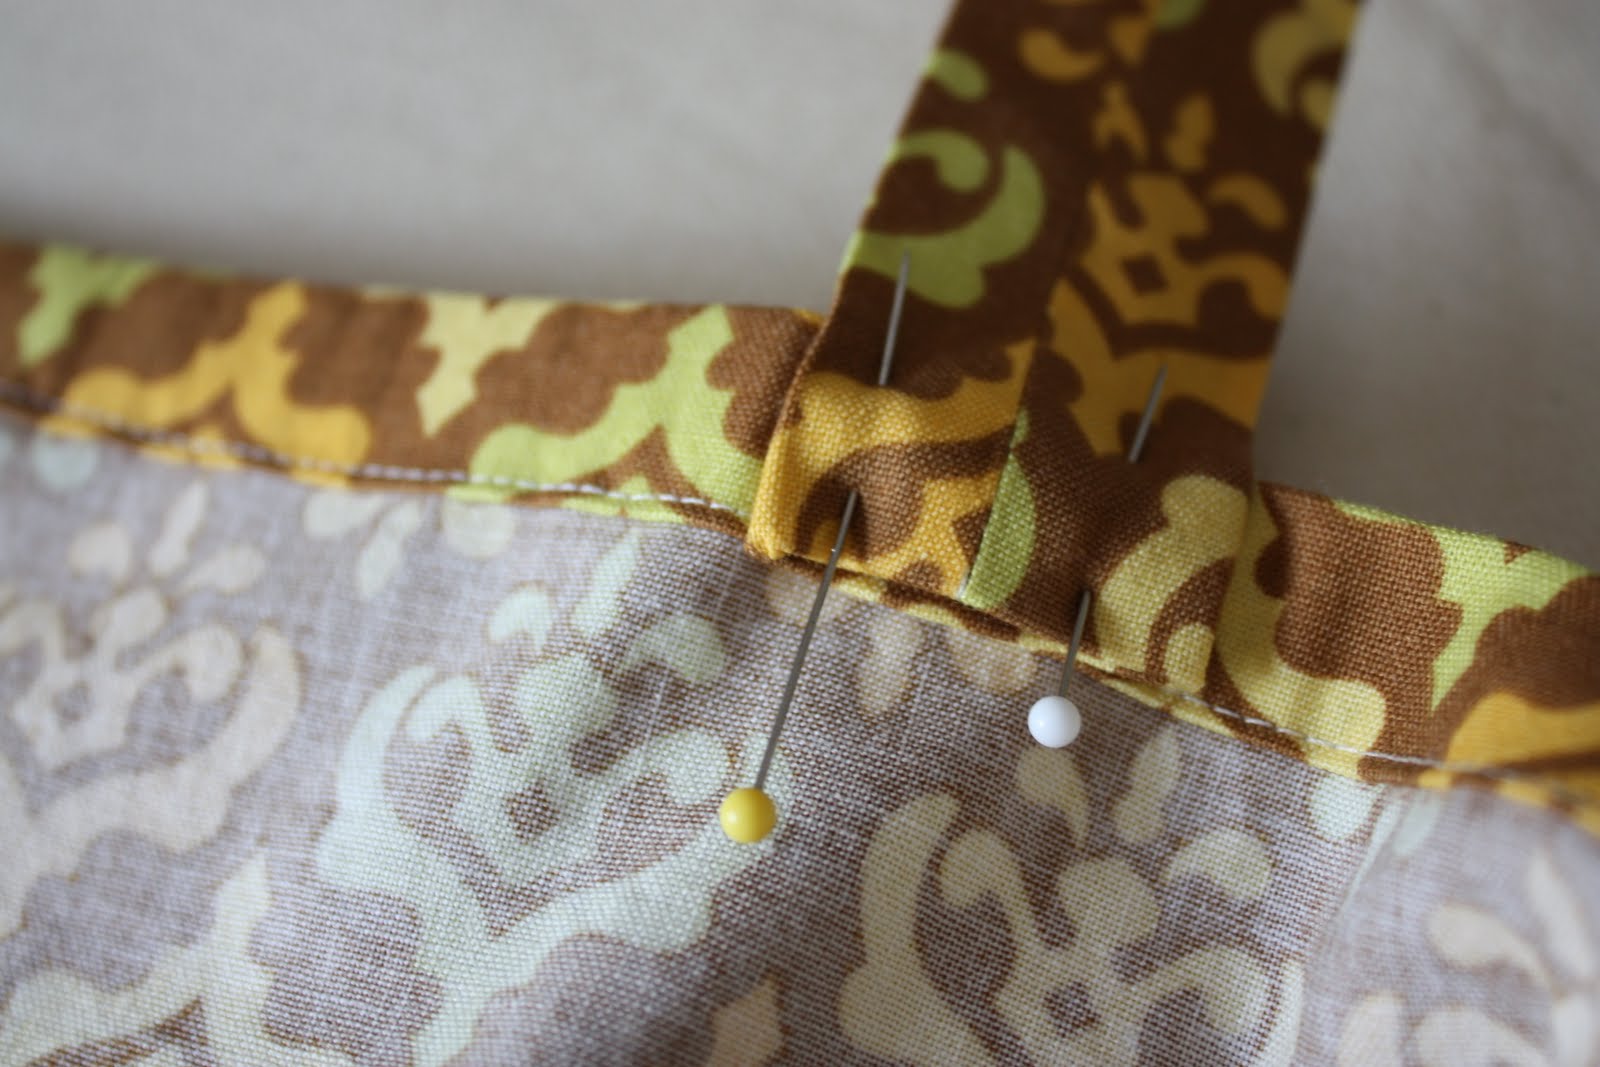
Put the shorter D-ring strap on the left.
Keep the seam on the longer strap facing the back of the cover.

Carefully sew the straps in place with a nice rectangle.
Don't forget to back stitch.
Clip your threads and you're done!
That's really all there is to it.
Please feel free to email me with questions or where the instructions need clarification. I want this tutorial to be around for a while, so anything I can do to improve it will be much appreciated.

Kimberly
Very nice and awesome directions!<br /><br />When I made these myself, I also added two corner pockets from double triangles of flannel... for wiping baby's mouth or storing nursing pads or soother... <br /><br />Have a great afternoon!
Kristin
Great tutorial!! And very cute fabric 🙂 Thanks!!
Jessa
Thanks so much! This is a perfect baby gift for a friend of mine. 🙂 I have one of the $$pricey$$ ones that I bought online and I could not for the life of me figure out what they used to make it bow out at the top! 🙂 I'm so excited - thanks for sharing!
gale
This is great!! When I was nursing I put those no-sew snaps on two corners of a receiving blanket and snapped it behind my neck. I like these MUCH better. I almost want to have more kids so I can make all the cute nursing and baby stuff I see on blogs. Almost. But not quite.
Mauri
Thank Amy! This was on my list to make before baby girl arrives. Looks super easy and super fast!
Calli Makes Do
What a great tutorial! I had a very ugly one when I had babies... didn't work when I nursed twins, but I loved it for my son. It seems like I know a lot of new mom's right now... and am making a lot of new mom gifts. It will be nice to add some variety to my sewing projects!
Amy - Park City Girl
I so needed one of these when i was nursing my babes! I will keep this in mind for friends - Thank you!!
Little Lady Patchwork
Awesome tutorial! These would make the perfect baby shower gift :0)
The Ashtons
Do you have a tutorial for a car seat cover?? Thanks for this know how..it's awesome! And I am dying to see the finished product of your prairie points quilt!
why not sew?
I wish I would have had one of these! My SIL just bought one and it's the first time I'd even seen them. She paid 40 bucks for it. The one you made is MUCH cuter too!
Kim Walus
Great Tutorial. I sure wish I'd had one of these nursing covers with my kids. I'll have to file this project to make for my children when they have children.
jaybird
great tutorial! my SIL has made a few of these... for herself.. and gifts! {maybe i'll need one... one day!}
TJ and Whitnee
Thanks for sharing this tutorial! I'd like to share a link to this on sewwhattoday.blogspot.com on May 7!
Saige
Awesome tutorial! Wish I'd had it 2 1/2 years ago when I was figuring all this stuff out on my own (I based it on one a friend had bought from one of the original nursing cover companies). I'm about to have another baby though, and since my old one is kinda worn out, I'll be using your tute to help me make another one. Thanks for doing this!
Jamie Lee
Wow, I love it! Thanks for the great directions! I am making one today...
Sara
Great tutorial - thanks! I made one yesterday and it was so quick and easy. Perfect project when you're almost 40 weeks preggo and don't want to sit at the machine for long 🙂 https://feedthedogsnow.blogspot.com/2010/05/nursing-cover.html
Anna
this is great Amy, love the fact you used boning. My sister-in-law will love one of these, she's due in Sept!
Regan Rothery
Yay! Soooo glad you made a tute because I was going to and now I don't have to do the work. Ha!! 🙂 I agree with Kimberly in adding something like flannel or terrycloth (just use one of those weensy baby towels) sewn on the inside bottom corner for wiping baby's mouth, but then again, you do have 3/4 yard of cotton draped on ya so that works too, hahaha. Is it OK to link to this tute
sweettooth7
I made one for before I had my last little one. I followed these same directions but my part of my cover with the boning kept falling forward so I couldn't see. What did I do wrong?
Mrs Quilty
Beautiful Nursing Cover up and I have been looking for this pattern. Thanks so much! I'm going to start on it right away, it's for a friend's daughter whose baby is due in January! Glad I have lots of time!
Mrs Quilty
Thanks for that great tutorial! Am gonna make one right away!
Goddess in Progress
Just made one, easy peasy! Will have to make more to give to friends. 🙂
Corrie
ohhhh i love it! and need one! I fed bub #4 in a foodcourt for the first time last weekend and spent 5 minutes tring to get the muslin wrap to stay up and cover my boobies! just what I need!<br /><br />thanks<br />Corrie:)
Katie
Thank you so much for the tutorial! I am due with baby #2 any day now and decided to make this last minute. It was very easy and something I really needed. I didn't have one with my first baby and I hated wrestling with blankets every time I would nurse! Thanks! 🙂
beautiful things
I just made this and it's fantastic! I made mine 30" long because I'm a bit taller, but the instructions were great!
Michele
Definitely will be making one! A friend made one for me, but it was huge and just well, ugly (there I said it).<br /><br />Thanks for the wonderful tutorial!
Marie
I am loving your tutorials! I am due with my 3rd a week from tomorrow and just made this for myself! Thank you so much!
Greg and Diana
I am getting ready to have a third baby and this time I want all the cute stuff that has come along, but didn't want to buy it...I am making this nursing apron ASAP!!! I wanted one with the last baby but didn't have the sewing experience then...now I feel confident and this tutorial made it so easy. I will be following your blog from now on!! Thankyou!!
Nursing Care Plane
I love this blog, it sums the issue up exactly. A family member saw the 'nurse-in' link on my FB page and commented 'I thought we'd fought this fight when you lot were being breastfed!' (I'm 33).
seaschell
I love the idea of a baby gift "trifecta". 🙂 I'll have to keep that in mind for pregnant friends. And it was so easy to make one of my own! I finished it today and blogged about it here: https://seaschell.blogspot.com/2011/06/what-are-odds-ill-use-all-this-stuff.html
Amber
I ordered one of these when I was pregnant with my son. I hated how thin the fabric was and it wasn't very soft either. When I saw this pattern I fell in love with the idea of making my own! Not only for me but for my prego friends! I made mine and lined it with the super soft and fuzzy minky fabric. It will be nice and comfy against a new babies skin. Plus for a winter baby it will be nice
eholst
Thanks so much for this tutorial! The directions were so clear and easy to follow - especially for a beginning seamstress like me! I just made one of these for a friend who is due any day. I hope she likes it!
mrsbombayjr
Hello Ms. Amy,<br /><br />I tried this project and got stumped on sewing the rectangle around the straps and boning. I could only get 1/2 a rectangle on the side the boning ended. Did you sew into the boning material to complete the rectangle? I'm a beginner sewer so maybe I'm missing something.<br /><br />Help<br />Tia
amy smart
Hi Tia! I don't have an email address for you, so I'm hoping you'll see this response.<br /><br />Pin the strap right next to the boning not on top of it and sew the rectangle next to the boning. The rectangles on either side will hold the boning in place.<br /><br />I hope that helps a little!
Joan J
I know it's been awhile since you posted your initial tutorial, but I just wanted to say Thank You for such an easy to follow pattern. I just finished making this for my daughter-in-law and new grandbaby. I know she's going to love it, and it only took me about 90 minutes to make!
meg shaklee
what kind of fabric works best?
Vonnie
I love yo use my "scroll foot" to do simple turn unders on the edges saves me all that ironing too although I don't mind ironing so much in the winter I HATE it in the summer (I live in SO Cal USA). I may have to make on of these before I go to visit my son, D-I-L and granddaughter for birth of my newest grandchild! Thanks for tut..
Waseem
like the tutorial...and the fabric...I appreciate you share it.<br /><br /><br /><a href="https://www.send-gifts-to-pakistan.com" rel="nofollow">Send Gifts To Pakistan From Australia.</a><br /><a href="https://www.pakistangifts.net" rel="nofollow">Send Gifts To Pakistan From Australia.</a><br /><a href="https://www.karachigifts.net" rel="nofollow">Send Gifts To Pakistan From Australia.</a>
Domestic Diva
Thank you for the VERY easy to follow tutorial! I just finished my nursing apron and it was easy and adorable. Thanks (:
Kimberly Mickolajczyk
This is a great tutorial!! Do you have any suggestions for making one that wraps around? I am making one for my sister-in-law and i know her concern about the ones in store are that when shes sitting in a chair it doesn't wrap around to cover her back. Any thoughts?
Rosalind Bell
Thank you so much for this tutorial, it is fantastic! I haven't seen anyone using one of these in the UK and I have just used your tutorial to make one for a friend who has just had a new baby. She's fed up of using muslins held by her chin when feeding little Isaac so she is going to be over the moon with the new nursing cover I have made for her. Thank you so much for sharing! x
Saira
Thanks so much! This was super easy to make and super cheap too! I saw some at a baby store for $35 and made mine for about $13 in the fabric of my choice. I'm so happy! I will be making more for my friends that are also expecting, I'll probably be the nursing cover sponsor for my friends and family from now on:)
originalmj
Thank you for posting this! I made one in March of 2011 and it was a hit at a shower. I'm in the process of making one now and I am so impressed with your tutorial... so easy to understand and follow. I recently completed another sewing project from a blog tutorial and it was so confusing. I truly appreciated your clear style when I was rereading this. Thanks!
jsedlund
Oh thank you for posting this! My daughter's bestfriend just had a new baby. This was fantastic and easy peasy. I will be making more for future babies and grandchildren.
loulouB
thank you for this tutorial, so quick and easy! I put 4 pin tucks about 4 inches long at the bottom centre as this gives a better shape. I hope my daughter will be pleased with it. This will now go into my idea box for baby showers.
Samantha
Hi! This is a great tutorial and I thank you greatly for posting it. I was wondering, tho-- is this washable?? I've never used boning, so I wasn't sure if that'll hold up in the wash or not.
Idag
I made one for my daughter and she found she could not see to latch and it was not wide enough for her comfort. Therefore I added 2 more rows of boning and extra fabric to give more coverage and she is very satisfied with the final product
Multi use nursing cover
Wow that quite interesting after reading all of your procedure I feel like a master, I am surprised how effectively you explain all the method in a simple way. Thanks for the tutorial "Amy".
Toby
Do you use featherweight (twill) boning, or polyester boning? Thanks!!
Amy
I used polyester boning.
Toby
Thank you!!
louClou
Dear Amy, I've just finished my nursing cover and I'm very proud of the result! It was my first sewing project and thanks to your clear instructions, it was really easy to make. Thanks so much for sharing !
Debbie Ledbetter
Super quick and easy pattern, and the momma just loves it! Thank you for the tutorial.