
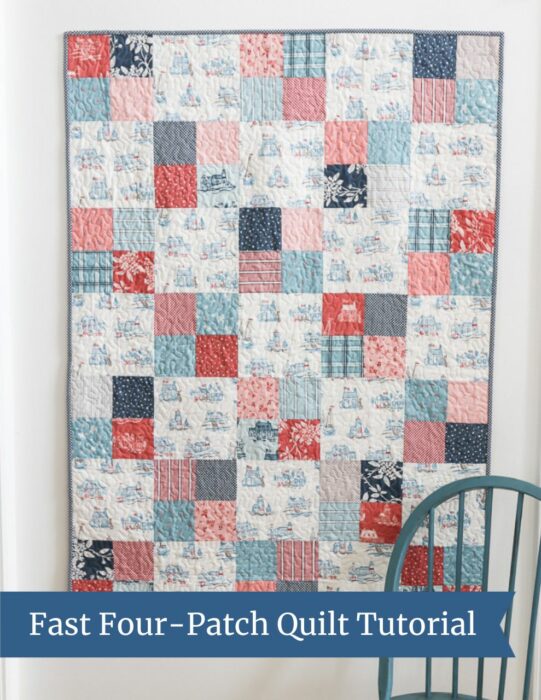
This quick and easy quilt is one of my most popular quilt tutorials of all time: a fast, beginner-friendly Fast Four Patch Quilt. This simple patchwork quilt is perfect for a scrappy look and showing-off a fun feature print fabric. It's also a great project for a beginning quilter.
It's been 9 years since I first published this pattern and felt like it was time for an update. If you are brand-new to quilting, be sure to check out my Beginning Quilting series for all the basics on supplies, cutting, piecing, and quilting!
Four Patch Quilt Tutorial:
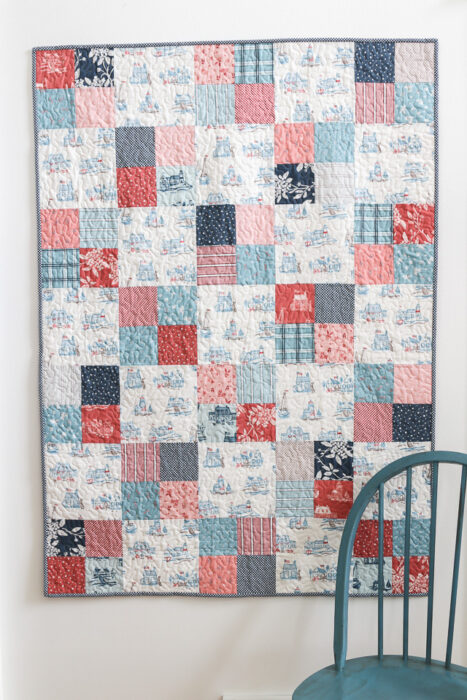
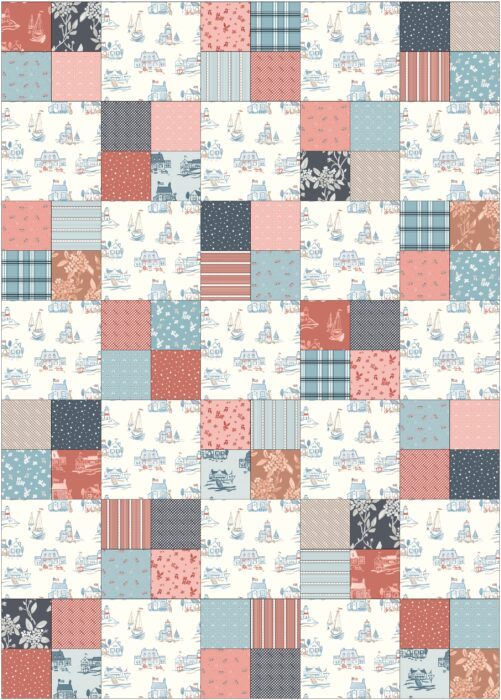
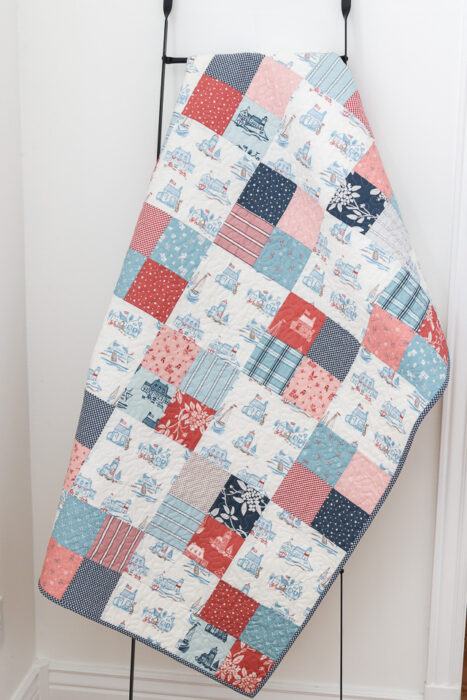
This is one of my favorite simple quilt patterns for a quick baby quilt. It works really well to show off a main 'feature' print contrasting with a variety of prints in scrappy four-patch blocks. The quilt shown here finishes at 40" x 56".
If you would like a printable version of this Crib-size pattern you can find the PDF Pattern here.
I have fabric requirements, cutting and piecing instructions for Throw, Twin, Queen and King sizes below.
Tips: Choosing Fabric
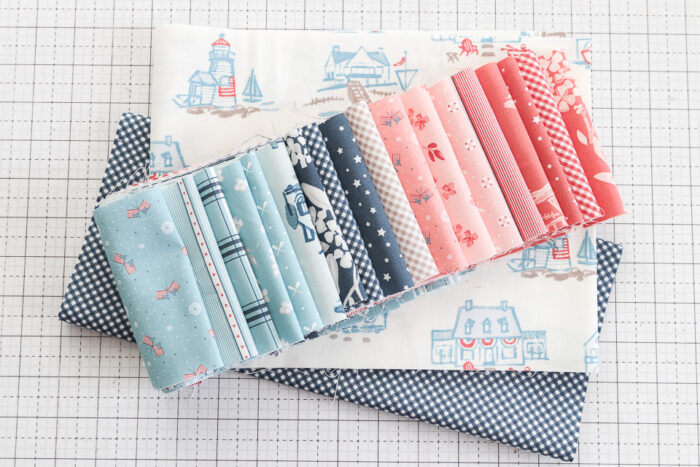
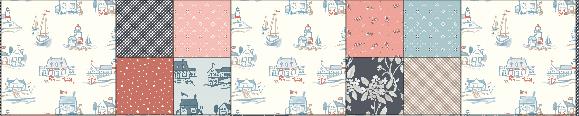
For this four patch quilt I used the Riley Blake collection I designed called Portsmouth. It's a nautical, summer-y collection. This quilt is so versatile that you can use whatever color scheme or palette you want.
Here are some tips on choosing fabric. (None of these are hard, fast rules. You can use what ever suits your fancy. Just some tips that I use when choosing fabric for a quilt.)
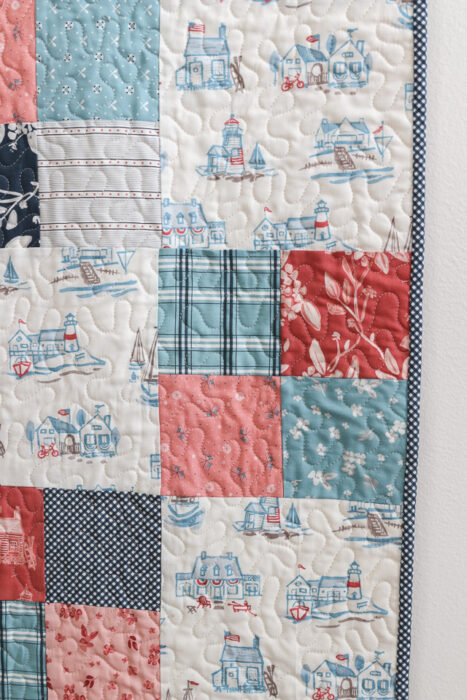
This four patch quilt design is great for showing off a big print and then pairing it with a variety of different fabrics that contrast well.
If you're stuck trying to choose fabrics, start with your "main" feature print. This can be a larger scale print (if you want) because the blocks are larger scale and can show off a busier print.
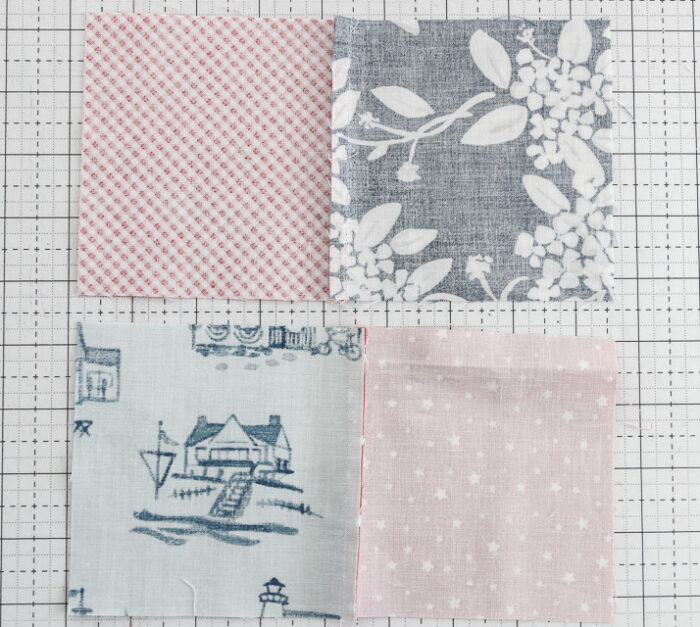
I chose the toile-looking Seacoast print for the feature fabric squares and then used the navies, blues, reds and a few of the coral pieces as the contrasts prints for the 4-patch blocks.
(I personally chose to avoid the other light-background fabrics in the four patch blocks as they didn't contrast as much with the light background print.)
Finished four patch quilt: 40" x 56"
Fabric Requirements for your Four Patch Quilt:
- 1 ¼ yard background print
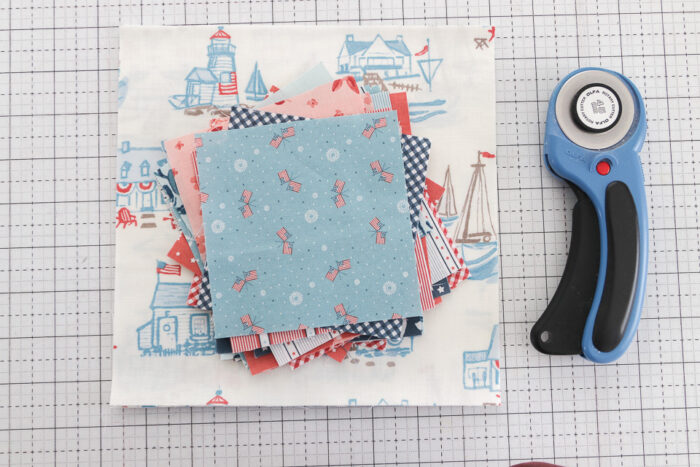
- At least 8 different ⅛ yards for contrasting four-patch blocks (you can use more if you want) OR a couple of packages of 5" precut squares (you will need to trim the squares down to 4½ " x 4½ " but precuts are a great way to get a variety of prints)
- 2½ yards backing fabric (If you are careful with the width of the backing and choose something wider that 42", you may be able to get by with 1 ¾ yards and not piecing a back.)
- ½ yard binding
Cutting the fabric for the Four Patch Quilt:
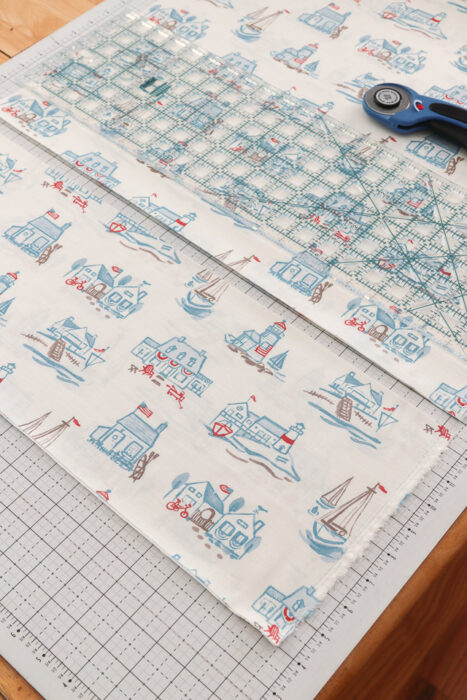
- From background print cut 5 strips 8½” x width of fabric. (The pattern instructions assume you will only get 4 squares 8½” x 8½” from each strip, but if your strip is longer than 42½” and you cut very carefully, you could get 5 squares per strip. It’s okay if they include a tiny bit of selvage that will end up in the seam allowance.)
- Sub cut into 17 squares 8½ " x 8½ ".
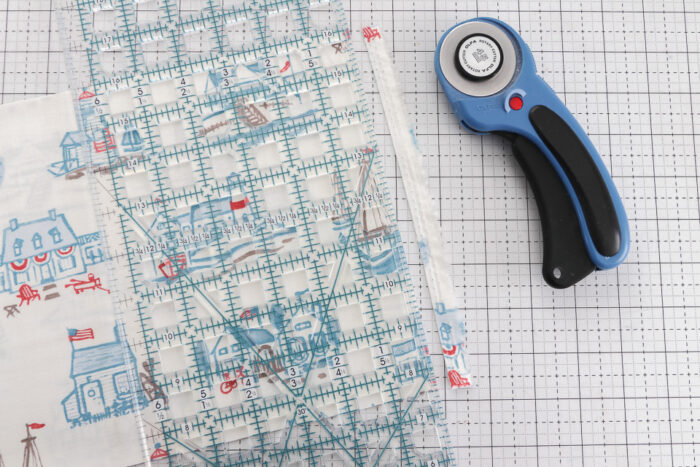
- From ⅛ yard prints cut 72 squares, 4½” x 4½” - you can cut 9 squares 4½” x 4½” from each ⅛ yard
- From binding fabric cut 5 strips 2½” x width of fabric
Piecing the Quilt
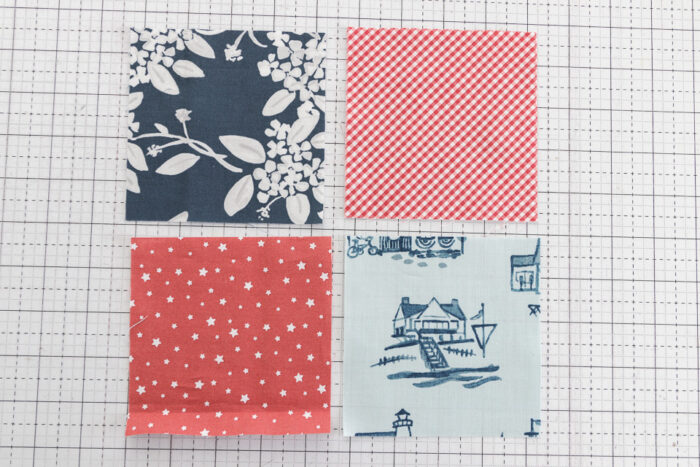
Match 72 squares up into contrasting pairs.
Sew squares together using a ¼" seam allowance. (IMPORTANT NOTE: A consistent ¼" seam allowance is key to consistent piecing.)
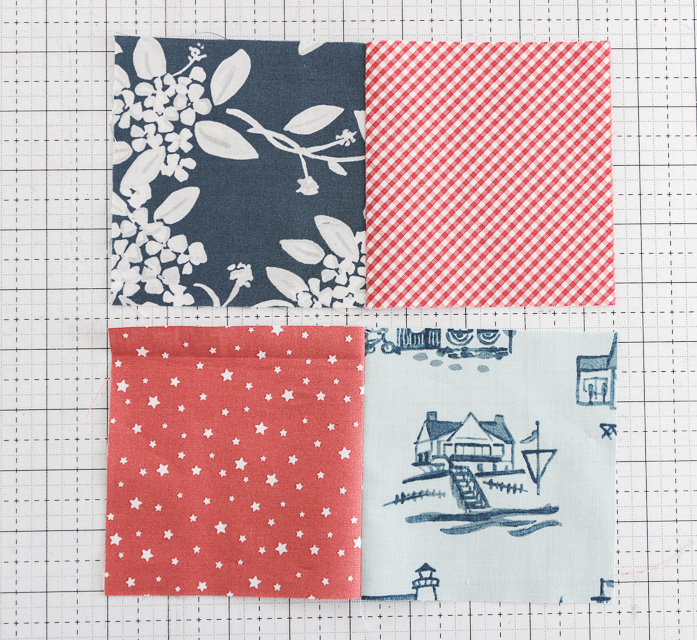
You can 'chain' them through quickly without even cutting the thread. Press seam to one side.
Match each pair of 2 squares with a contrasting pair of 2 squares with seam pressed in opposite direction.
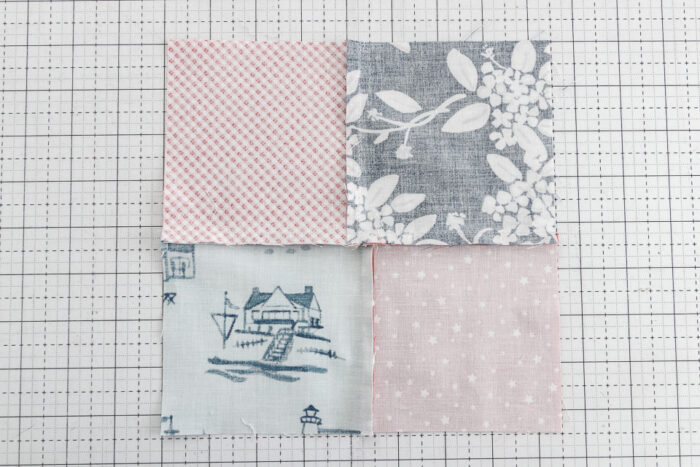
Place right sides together and sew to a four-patch blocks. Press long seam to one side.
Make 18 four-patch blocks.
Layout quilt blocks into seven rows of five blocks each. Row 1 Start with a four-patch block in the first row and alternate with feature print squares.

Sew rows together and press seams all the same direction.
Layer quilt top with quilt batting and backing and baste together into a "quilt sandwich". If you're new to quilting, you can find details to walk you through the basting and quilting process here.
I used the Portsmouth Plaid in red for the back of the quilt. You can find a list of other retailers carrying Portsmouth fabric on Etsy or The Fat Quarter Shop.
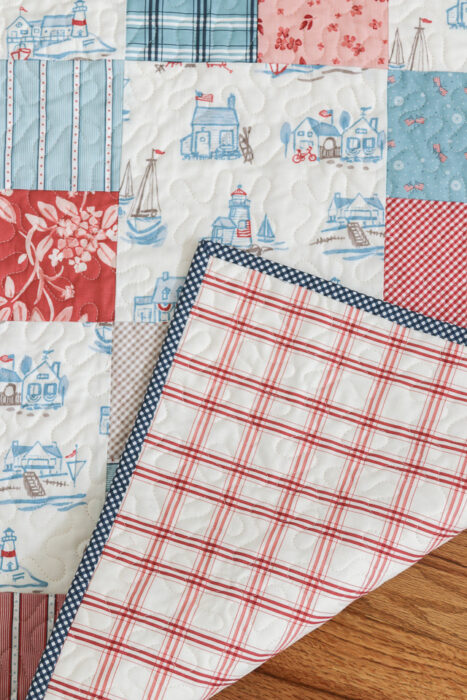
For Binding sew the 2½" x wof strips end to end. Binding tutorial here.
And voila! A super quick - and very cute - four patch quilt!
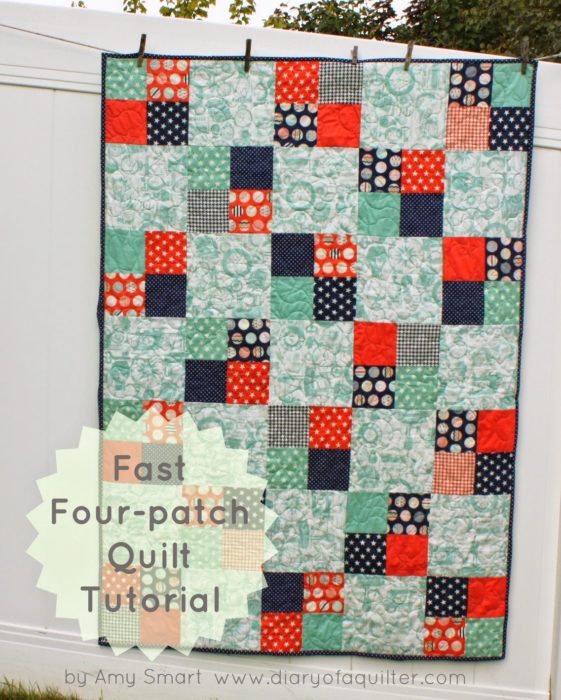
This is a great quilt for using up fabric and showing off fun prints. Here is a previous version in a brighter color palette:
Here is another previous version of this simple four patch quilt design.
You can find the free printable PDF for this Crib Size Fast Four Patch Quilt here.
I have an expanded version with fabric requirements and piecing instructions for Throw, Twin, Queen and 2 different King size options here for purchase in a printable PDF format.

Big thanks to Baby Lock Sewing Machines for sponsoring this free pattern and lots of other content on my site. I love my Baby Lock sewing machines and have loved working with them as an ambassador for Baby Lock for over 6 years now.
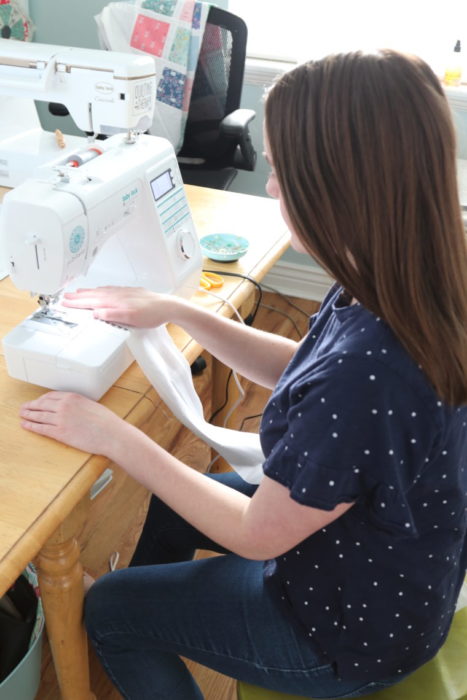
You can read some of my sewing machine recommendations for different budgets and preferences here. And check out Baby Lock for their latest promotions and specials going right now.


Linda Powell
Those fabrics are beautiful Amy, I love this colour palette too. I am a beginner to all this as you know so thank you very much for the tutorial which I have shared on my G+ page (so I can find it again when I attempt this haha) The coral colour really makes this I think, stunning 🙂
Frankie Carson
I love your colour palette! <br />Frankie<br />https://knitwits-owls.blogspot.co.uk/?m=1
Heidi
Beautiful quilt! Love the colors your chose!
A Quilter's Mission
Great fun quilt! Yes, this color pallet is wonderful.
Carmen Lee
Ammy, I love your choice. These quilts are really wonderful , it's fabric is beautiful as well as designs are very nice.
Rebecca Barnes
I love the back - thanks for the tutorial
Rozina
I have a question, I have a yard of main fabric I want to use, if I were to order a 1/4 of a years more in order to have enough to do this quilt would that totally screw me up? This is my first quilt so it's probably a silly question. Thanks!
Lindawithani
I would say, just to be on the safe side, order more than the 1/4 yard you are missing. I would go for at least 1/2 yard. And good luck with your first quilt!
emmalee
This is beautiful....
Perfect to showcase a fabric collection I have my eye on,
Can I Ask is the twin size equivalent to
single ?
Im in Australia and our sizes go bassinet ,
cot , single , king single , double , queen king.
I have v
emmalee
*have never made a quilt, my mum is the quilter I make baby / toddler clothes for my miss 2
Amy Smart
I'm guessing it's the equivalent. I don't know the measurements of a single, but I'm sure they're very similar.
Janine
Thank you for adding the other measurements and requirements!!! I love the quilt and it hate having to figure out what to buy for a bigger one! LOL...
Thanks again,
Janine
Kelly
Wondering if the King size requirements are correct. How can the double/queen be 3 1/2 yards of focus fabric and the king size require double that?
Amy Smart
Thanks for your question. I went back and checked my math. I was off slightly and have updated the measurements. But still, that King size is almost double the Queen requirements. Those King-size quilts are just exponentially bigger. It's crazy.
Mona Marin
I'm making a king-size quilt for my husband for Christmas who is a retired vet, I need a quick and easy process to finish the back of the quilt can you help me ?
Judy
Thank you for making this pattern available free.
Love your choice of fabric, will be making this in
baby colour maybe adding embroidery/applique.
Again thank you
Linda
Love the tutorial. I've not done to much quilting but like to do embroidery. Your directions are very clear and anxious to try this! Thank you.
Lorena
I have a question about the quilting. What color thread was used for quilting the three pieces together? I'm making this quilt with different fabric but since there are so many colors I'm not sure what color to use when quilting.
Amy Smart
I just had the quilter use a cream/neutral thread that would blend with most of the prints.
Michelle
There seems to be a little something off with the measurements -- after sewing the 4.5" squares with the .25" seam, they won't match the 8.5" blocks anymore like in the pictures, but rather be off by .25". Were either of the squares cut to different dimensions, perhaps?
Amy Smart
Hmm. I'm sure that's right. Because four 4" x 4" squares (finished) will create an 8"x 8" finished block. So unfinshed the blocks would be 4.5" and 8.5". Check your seam allowance. Even if it's only slightly bigger than a 1/4", it could skew things and the block will end up slightly smaller. Let me know.
Katie
I had the same issue Michelle. I just used the "square up" method to get all my blocks to be the same sizes.
Clara
I had the same issue, but I feel it's my fault. Pretty sure I was slightly bigger than .25. So I just plan on squaring them up. It will make it a bit smaller, but it's a lounge (twin size) quilt for my husband to snooze in his chair with. So if it is smaller it's not a big deal.
Nancy
I agree. If you sew together a four patch block using 4 1/2" squares, the finished four patch block would be 8", not 8 1/2". Therefore the larger squares should be cut to 8", instead of 8". Anyway, that's what I'm thinking. But cute quilt, I'm going to try one!
Amy
The 8 1/2" measurement is for the added seam allowance. For example, if you laid 4 4" x 4" tiles in a square you'd get an 8" x 8" square. But when quilting you need to build in the 1/4" seam allowance on all four sides. This is why when you cut and sew together 4 4 1/2" x 4 1/2" unfinished fabric squares you will get an 8" x 8" finished block - but UNfinished it will be 8 1/2" x 8 1/2" because it still has the 1/4" seam allowance on all four sides. This is why you need to cut the offset (one-piece) squares 8 1/2" x 8 1/2".
That said, if your seam allowance is even a thread or two wider than 1/4" the 4-patch block will shrink to a smaller size. If all of your blocks are smaller because the seam allowances are wider that 1/4" on the 4-patch blocks, then I recommend trimming your off-set (one-piece) squares smaller to match the size of the pieced blocks.
I hope that helps clarify.
Amy
What is the square by row layout for the twin quilt? Second quilt so still a beginner. Really excited to try this quilt.
Amy Baird
How many blocks by rows for a twin? Want to make sure I do it right. My second quilt so I am still a beginner. 🙂
Amy Smart
Layout blocks 8 blocks across by 11 rows down.
Leanne
Thanks so much for these easy to follow instructions. I'd purchased some fabric quite some time ago and didn't have a project in mind only that it was going to be some sort of patchwork. This is my first ever quilt, I started making it today and it's looking fabulous so far!
Amy Smart
Awesome! I'm so glad to hear! I hope you'll enjoy it.
Jane
Will this quilt look ok with a few random small squares of another fabric that goes well with the others. I am not sure I have enough of the 13 that I need, they cut my pieces too small when I bought them. Thank you.
Amy Smart
Oh, that's so frustrating. But yes, I would just add other fabrics in colors that go well. I think it will look even better with more variety. 😉
Michelle B
Hi! I am so excited to try this pattern, in a twin size, but I can't figure out how to cut the focus fabric. At 1 3/4 yds, 44 in wide, I can only get 35 8/5" squares out of it. I'm not sure what I'm doing wrong. Any help would be appreciated!
Amy Smart
Ahh! You're right. There's a typo - should say 2 3/4 yards. THanks for the heads up! I'll fix it right now!
Francine Skoglund
This was my first quilt EVER and now I'm totally quilt crazy. I made a lovely pink quilt for my granddaughter for Christmas and she and her parents love it. Thank you for your great instructions!
Gerry Robideaux
Some of terms used for fabric are confusing to me. For instance, what is a "layer cake"?
Stephanie Lunn
Hello! I am hoping to try this pattern out for my first quilt. I see these really cute Fat Quarter fabrics at JoAnn and was wondering if those would work ok for the four-square patches? I'm not sure how many "Fat Quarters" I would need to equal 1/8 yard. Any help would be appreciated.
Thanks,
Steph
Amy Smart
Hi Steph!
Good question- you can get 16 4 1/2" squares from 1 Fat Quarter. So if you are making the crib size quilt, you would need at least 5 Fat Quarters.
Jenna Stamas
Could you tell me the dimensions of each block for the backing? I'm trying to mimic your design with the fabrics I picked out and would like to know dimensions for each block. I know it's 40 inches across for each fabric.
Amy Smart
Just making sure I understand your question - do you mean the 4-patch block measurements? They should measure 8" x 8" finished (8 1/2" x 8 1/2" unfinished.) Let me know if that is not the information you are looking for.
Bobby Jo Oliveras
Just made this quilt using the new Star Wars fabric as the focus piece with contrasting 4 patch. It came out beautiful. I made the twin size and the directions were easy to follow and accurate. Now I'm making a double size with John Deere fabric as the focus. Love this pattern.
Amy Smart
Those sound awesome! I'm glad the directions were helpful!
Brenda
I'm having trouble getting you links to social media working.
Amy Smart
Thank you SO much for letting me know! I think I've fixed them. I didn't realize they weren't working so I really appreciate the time you took to tell me!
Mandy
If the fabric store cuts exactly 1/4 yard and their cut is off- it doesn't leave you with enough fabric. Just an FYI. I couldn't figure out what I had done wrong until I realized that's what happened. I'm going to add a border so it will work out to be a twin size quilt. Might want to get a 1/2 yard of each fabric instead.
Amy Smart
Oh, I hate when that happens. 🙁 Good solution though and thanks for the suggestion.
Sarah durham
I am wanting to make a wheelchair blanket and have told 36x36'', so 4.5 x 8'' finished block so have 2 x 1 mini squares rather than them made into 2x2 blocks. Do you think it would work?
Amy Smart
Sure. Or to make it even easier, do a quilt that is 32" x 32" and then add a 2" border (cut 2 1/2" strips) and then you'll have 36" x 36".
Alicia O'Brien
Hi Amy!
I love this quilt! I need to make a crib quilt for my son, how could I adjust this for crib quilt dimensions?
Thx!
Amy Smart
The quilt as demo'd is close to a crib size quilt at 40" x 56". If you want slightly bigger, I suggest graph paper and sketch it out in the finished size you're aiming for, and then add the additional blocks.
Lisa
Amy, I'm a new quilter...I have some precut fabric squares that are 5x5 and 10x10. What are the dimensions of the big square? I know I'll have to trim my 10x10 squares but want to make sure of the measurements.
Thanks, Lisa
Amy Smart
Cut the big squares 8 1/2" x 8 1/2" and the small squares 4 1/2" x 4 1/2"
Erica MT
I'm late tho the party but had a lot of fun using this pattern idea!
https://i1332.photobucket.com/albums/w606/ericamt82/Mobile%20Uploads/2014-02/Finished%20Quilts/20161221_153637_zpsudpgnqcp.jpg
Karen Beasley
Amy, I have my fabric on order and can't wait to get started on this beautiful quilt. I have made four quilts so far, but all have been crib size. You are so easy to follow! Thank you for sharing!
Amy Smart
Awesome! I hope you enjoy it!
Samantha
I have 4 prints and they are 1/2yd each will that be enough for this quilt to make for a baby?
Amy Smart
Yep!
amarea
Love this quilt! I'm taking a quilting class now, so I may use this pattern for my first "on my own" quilt. I definitely don't want to attempt free motion quilting yet. How would you suggest doing the quilting with only straight lines? 🙂
Amy Smart
I would quilt the straight lines a 1/4" away from the seams. That's one of my go-to quilting plans. (I'm still terrified of free-motion myself!)
Melissa Meisterhans
Can you give the measurements for a throw sized quilt? If you already have, will you point me in the right direction? TIA
Marjorie
Hi. I am wanting to use this pattern to make a lap blanket. What would I need?
MiMi
I have not made a quilt yet, this one looks like a good candidate for my first try! I am not understanding how I would use the 10 strips as the border for the King size... Would i sew 2 sets of 2 of them together, ending up with two 84" strips, would those be the border of one set of edges, and then sew the other 2 sets of 3 of them together, ending up with two 126" strips, which would be the border for the opposite set of edges?? HELP!
Amy
Good questions. Here's how I do it - I sew the strips together end to end and then trim them to the length of the side I'm going to attach them to. I have a tutorial with pictures of my border method here: https://www.diaryofaquilter.com/2013/11/virtual-quilting-bee-sashing-and.html
I hope that helps!
Sabrina
This quilt is beautiful and I want to try this as my first quilt, making it for an elderly nursing home patient but can you tell me how to make it throw size? How many blocks and how many rows across the top and down?
Thanks so much!
Amy
Hi Sabrina! I finally updated the tutorial to include a Throw Size (56″ x 72″) variation.
Sabrina
Thanks so much!
Marnie
I am so excited, not only have I found a tutorial I understand in an effort to try my hand at quilting (first time quilter, long time pinner) but you actually still respond to questions from your followers. THANK YOU! Look for lots to come your way.
Amy
Thanks, Marnie! I hope you have fun with your quilt!
Darci
Quilters, I have a question about how to deal with the back side of this quilt. I'm getting ready to cut some of the fabric that I plan to use on both the front and back, and I realize that I failed to consider how making a larger version of this quilt would affect the back.
One of the pictures shows the back with five wide strips of fabric that span the whole width of the quilt (11th picture down from the top of the page.) Those are solid pieces of fabric, right? HOWEVER, I'm making the double/queen size (80" x 88"), so my fabric will not be wide enough to be solid strips. Oops!
BTW, I plan to use only 3 different fabrics on the back rather than five: 1 yard of one, 3 yards of another, and 2 yards of a third.
So.... how do you think I should deal with this back? I have enough fabric, but not enough to make solid strips across, like in the picture. I just don't have the experience to know how best to proceed. ? Make big blocks? Try to match prints to give the effect of solid strips? Or some other fix? Any ideas or advice you feel like sharing would be so appreciated! And thanks for reading this long-winded post. ?
Debbie
What would the measurements for a throw size quilt be?
Amy
56″ x 72″
emilylarnold
For a queen size quilt , how many 4.5 squares would need to cut out of each coordinating fabric ? 220? The math is confusing me
Amy
Yes, you need a total of 220 4.5 x 4.5 squares. You'll sew those together to make 55 4-patch blocks.
Hope that helps!
Emily N
I'm making this in the twin size (first quilt!), but I'm stumped on the backing. I got 5 yds of the fabric for the backing and have measured multiple times but just can't seem to figure out the layout for it. Any tips or tricks?
Amy
So, I always go back and forth about telling people how much fabric to buy for backing - whether to buy a lot so it's only one seam to piece a back, and then have a lot left over, or as little as possible, which might involve more piecing.
Here's how I would piece this one: Cut into two 2 1/2 Yard (90") pieces and sew together side by side. This will create a 80" x 90" piece of backing. (If the background print is not directional) you could trim 7" off one side and sew it to the bottom of the backing, making it 73" x 97" so that you have more space on all sides to make quilting easier.
I hope that helps! Thanks so much for your question. I did change the backing yardage to 5 1/2 yards just to eliminate the extra piecing.
Beverly Burchwell Caudill
Thank you so much for the beautiful pattern, also I love how you also provided the instructions for other sizes, that was very helpful!!!
courtney
Attempting the queen size quilt. Spent 5 hours cutting square, and only have 80 4.5s. Is the average or is there a faster way to get this done? haha Only my second quilt 🙂
Amy
Sorry I'm so slow getting back to you on this. :/ If you cut 4 1/2" wide strips of fabric, then you can cut them into squares much more quickly. I hope that helps!
Brittany
Would this look okay if the feature fabric was a solid color? Has anyone tried it that way? This is going to be my first quilt and my OCD has taken over.
Amy
I think a solid color works great for this quilt!
Valerie Womack
Hi Amy - I'm new at quilting but have been a sewer for 50 years. Do quilts work well with flannel fabric? I want to try this pattern with some I got on sale? Thanks for the tutorial.
Amy
Yes! Quilts made with flannels are wonderful! This pattern would work great with flannel fabric.
Valerie Womack
Thanks Amy - will share picture when I finish. May take me a few months. lol
quinn
how would I make this smaller for a baby blanket
Amy
Just make fewer blocks/squares. The blocks are 8" x 8". Using that number, decide how big you want your baby quilt to finish. Graph paper or sketching it out will make it easy to customize it to whatever size you want.
Sally R Woodford
I plan to use fabric from "old" flannel shirts my husband wore for work. I've read that I should apply iron on interfacing to the fabric to keep it from stretching. Do you think I should do this before I piece them together or after I've made the blocks? Also, I am wondering about using the fleece fabric for the backing. Is it a good idea to mix fabrics? Thanks!
Amy
Definitely apply the interfacting before you piece them together. If possible, I would apply the iron on interfacting, where possible, before you even cut the squares. It will give them stability and help them keep their shape - it will make it SO much easier to bot cut AND sew them together.
I've never personally used fleece for a quilt back. My only hesitation is if the shirts are all cotton and the fleece is polyester, the cotton parts could shrink differently, but where these are shirts that have probably been washed dozens of times already 😉 I think you'll be safe. I would try googling it to see if someone talks about using fleece as a quilt back, just to be safe.
judie
New to quiliting - I am making a king size quilt - I am wanting to make the 4 patch with borders. what size do i need to cut my squares?
Dora Otto
I would like to make this quilt for my daughter. She has a full sized bed and I don't know how much material I would need. Could you please help me?
Thank,
Dora Otto
Kristal
I have a question. I just cut 80 five inch squares. Do you know what size I would cut the larger middle squares if I sewed the 5" squares together for the quad??
Amy
Cut the larger squares 9 1/2" x 9 1/2".
Sharon Hulin
For the twin size it should be 11 strips @ 8.5 for full block. Equal 44 sq. You list 9 strips. FYI. Thank you for sharing.. beautiful❤️
BARBARA V
Help! I cut my small squares 4 1/2" X 4 1/2" and when I sewed them together with 1/4" seams, the resulting squares are 8" X 8" and don't match up to the bigger 8 1/2" squares. Have I made a mistake?
Amy
Hmm. Without looking at them, my guess is your seam allowance is a little wider than 1/4". A scant 1/4" will help your squares end up at 8 1/2" x 8 1/2".
https://www.diaryofaquilter.com/2011/10/quilting-tip-scant-14-inch.html
BARBARA V
You were exactly right! Either it's off on my sewing machine or I don't know how to use it. My seams were all just a little too big. I reviewed your tutorial and will get it right next time. I just trimmed down all my blocks and carried on. I finished binding it today and now my first quilt is in the books. Thanks for sharing these instructions.
Nanette
Should be 8" squares to 4, 4 1/2" squares. I verified by using paper. Once the 4 1/2 squares are sewn together using a 1/4" seam allowance it becomes a 8" square. ?
Amy
The squares are 8" x 8" finished in the quilt (that's what you will get when you combine 4 finished 4" x 4" squares) but to allow for the seam allowance, cut them 8 1/2" x 8 1/2". If your four 4" x 4" squares sewn together are coming out smaller than 8 1/2" x 8 1/2" (before they're pieced into the quilt), check the seam allowance. And, if you've already sewn together all of your 4-patch blocks and they're coming out smaller than 8 1/2" x 8 1/2", then yes, square them down to the smaller size.
A scant 1/4" seam allowance will help pieced blocks stay the size planned for. https://www.diaryofaquilter.com/2011/10/quilting-tip-scant-14-inch.html
Theresa DeBon
Absolutely lovely! Thank you from us visual learners for all of the pictures. New to quilting at 63 and sorry I waited so long.
Karen Benitez
Hi Amy - this says baby quilt in the opening paragraph but the smallest size you give instructions for is the 72” throw. I’d like to make this for a stroller or smaller size throw. Do you have the instructions for that? Thanks so much - this is so pretty!
Amy
Hi Karen! The main quilt in the tutorial (demo, cutting list, etc) is for a 40" x 56" quilt. If you want to make it smaller, just remove a row of blocks at the bottom? Or just sketch out the size quilt you need based on the 8" x 8" blocks. I hope that helps!
Karen Benitez
Thanks Amy!!
Jane
Hi Amy, As a beginner quilter I love this quilt but I want to make the blocks bigger, ie. 12" finished size. So if I cut the large blocks to 12.5" and the smaller ones to 6.5" each that should give me 12" blocks when joined, is that right?
That means that 4 across and 5 down gives me a finished size of 48" X 60" not counting any borders.
Will this size block look ok?
Thank you and thankyou so much for the tutorial
Jane
Amy
Yep! You've got it! I bet it'll look great. Let me know how it turned out!
Lisa
So I have a lot of 8 inch blocks already cut. What size do I cut my small blocks? Im a beginner so all of this is confusing lol Also has anyone used different prints for the focus fabric? I wondered if it makes the design to busy?
Katrina Sowden
Thank you for this beautiful pattern! I would love to create some blocks, unfinished 8 1/2 x 8 1/2, that are made up of 3, patches, 6 patches, 9 patches. Can you recommend a resource that breaks down simple patterns that make up 8 1/2 by 8 1/2 unfinished blocks.
Amy
I don't know of a simple resource, but I know if you Google 8 1/2" x 8 1/2" quilt blocks a ton of resources will come up!
Olivia Harding
Hi, Amy, I love this pattern! Do you think I could add a layer of batting in between the front and back to make it a bit warmer? Also, do you think it would be an issue for the blocks on the front to be cotton fabric and make the backing flannel for extra warmth? Thanks!
Amy
Absolutely! I always add batting between my front and back. And yes, I think you're totally fine to use flannel for the back! You may want to pre-wash/shrink the flannel ahead of time as it will shrink a little more than regular quilting cottons when washed.
Enjoy!
Lisa Clark
Thank you for this tutorial. Hoping you can help me answer a few questions: I am making a memory throw-sized quilt out of men's dress shirts. 1) For the batting, do I use the same yardage as I would for the backing? 2) For the men's cotton dress shirts, should I use a stabalizer or not necessary? Love your site. Thank you!
Amy
Hi Lisa!
This post will help a lot with batting and backing: https://www.diaryofaquilter.com/2010/10/little-bit-batty.html
I've never made a quilt with men's shirts, but my guess is that unless they're super lightweight (like threadbare) you don't need to use any stabilizer. The shirts as they are should be just fine. You may want to spray them with some starch though, just to give them a little extra stability while you piece.
Good luck!
Amy
Elisa Flores
Thank you for sharing your pattern, I have enjoyed using it. I like simply and easy!
Emma Kent
I absolutely love this quilt pattern. Made one for my nephew and my daughter and now I have a new niece so I'm just starting the third version of this quilt. Thanks so much for this fantastic tutorial 🙂
Nancy
My friend just said I was wrong about the four 4 1/2" squares, and it's true that my math skills suck so I give. Must be 8 1/2" after all. Sorry! I'm still going to make the quilt, because it's cute!
Amy
No worries! It happens to the best of us. 😉
Have fun making this quilt!
Tevana B
Why is the back piece cut into two pieces? There are no instructions on how to handle the back side in the .pdf I purchased. This is my very first quilt. Please help.
Amy
Hi Tevana - which size quilt are you making?
The reason it is cut in two is because most fabric yardage isn't wide enough to cover the whole back. You need to sew the two pieces together to get a big enough back. I hope that helps. Let me know if you need more details.
Gwyn
Now I'm thinking I could make something similar with 2 charm packs and a background, but I would have to keep in mind your recommendation about trying not to use the lights.
Brenda Towsley
how can i get the free patterns if I do not have a drop box?
Amy
The link is hosted by Dropbox, but it should just offer you a PDF file you can download and save on your computer.
Mary Lou Regit
Can I add borders to the throw size quilt? If so, how wide and how much fabric would I need? Thank you!
Amy
Yes! You can add any size border you'd like. Just cut the width-of-fabric strips 1/2" wider than you'd like the finished border to be. You'll need 7 of these strips. (1 yard if you're cutting 5" wide strips - more if you're cutting wider borders.)