
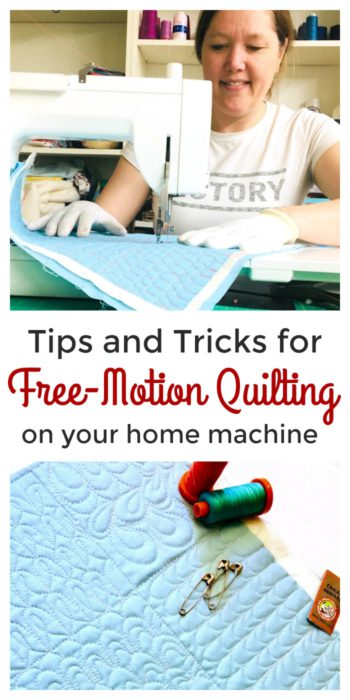
This post will introduce you to quilting basics including: how to quilt your own quilts using your sewing machine or by hand. We'll also talk about how to baste the quilt layers together. If you're looking for help with choosing the right batting for your quilt, check out this post. I will also give resources for machine quilting your quilts on your home machine either by straight-line quilting or free-motion quilting techniques.
We are now ready to combine the three layers of our quilt sandwich and ‘quilt’ our project. There are a variety of methods for quilting. I’m going to focus on machine quilting, but we’ll discuss others as well.
Basting a Quilt:
Basting is a very important step in the quilting process. It seems tedious, but doing it carefully will result in a professional-looking finished project. Basting is a way to temporarily hold the three layers together while you ‘quilt’.
First of all, it is very important that all three layers are smooth and wrinkle free. Iron the backing fabric and lay on the floor face down. Carefully pull the fabric taught (but don’t stretch it) and tape it to a hard, flat surface.
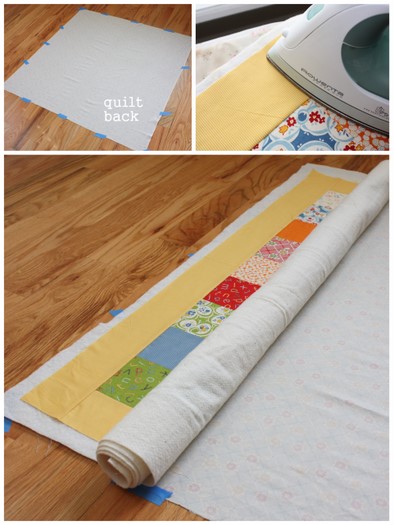
Smooth the batting and lay your quilt top over the batting. I like to press both layers together to get all wrinkles out. Doing so also helps the quilt top adhere slightly to the batting. When top and batting are smooth and flat, carefully roll the two together.
Bring the top/batt to the quilt back and carefully unroll on top of the backing, smoothing all wrinkles as you unroll. Make sure you can see backing fabric around all four edges of the quilt top.
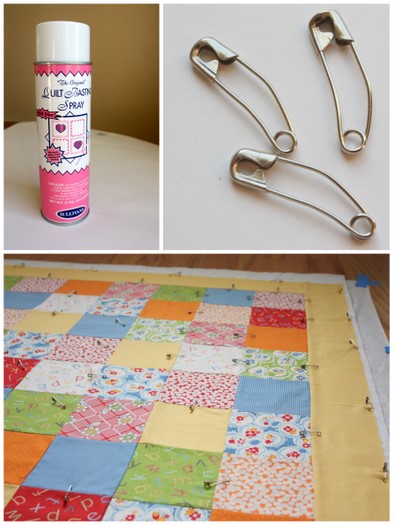
Now is the time to baste all layers together. There are two options that work best for machine quilting: spray baste and/or safety pins.
- Basting spray is available in the notions of most sewing supply stores. (Make sure you get one that washes out.)
- Basting pins are slightly curved (as opposed to regular safety pins) to make it easier to pin from the top through all three layers.
Pin quilt top starting at the center. Working out pin every few inches, especially at the edges of the quilt top.
When pins are in place, remove the tape and check the quilt back to make sure things are tight and flat. If there are puckers or excess fabric, now is the time to fix the problems. If the fabric is loose when you start quilting, there will be tucks or puckers in the quilting. There is no way to adjust the back once you start sewing without a lot of headaches or time with the seam ripper. (However, using a busy, patterned fabric for the back will help to hide any small mistakes.)
Here are some other helpful tips for basting your quilt layers together:
Pin Basting a Quilt shortcut from Pat Sloan using a table
Spray Basting a Large Quilt using a Design Wall
Machine Quilting at Home:

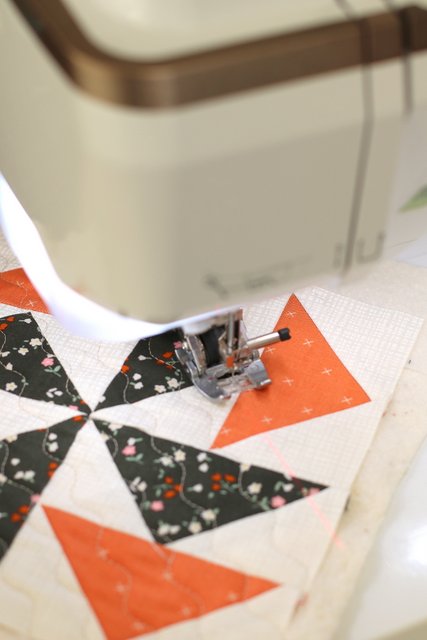
There are many options for machine quilting. The first is to let the seams/fabrics themselves be your guide. Sewing next to the seams themselves is called ‘quilting in the ditch.’ (Top left) Works great. If you want to create more visual interest in the quilt you can stitch lines or patterns in other directions.
There are lots of supplies for pre-marking your quilt before you start quilting. Pens with disappearing ink, chalk pencils etc. work well, but research the pens you use. Check reviews. Some are harder to get out of fabric than others.
I really like to use a hera marker which gently scores the fabric. (All available in the quilting notions aisle at most stores.) You can use a ruler for marking straight lines or there are quilting stencils available in all kinds of patterns. Or be creative. Here’s a great example of using painters tape as a guide for quilting.
For my quilt I chose diagonal lines. I used my hera and a ruler to mark my lines.
It’s a good idea to start quilting from the center and work your way out. Because it’s hard for all that bulk to fit through your machine, roll the sides in. You can un-roll as you work toward the edges.
I use a walking foot when I’m quilting straight lines. It’s not critical if you don't have one, but it does help feed the layers of fabric evenly through the machine.
Another option for machine quilting on my home machine is a Serpentine Stitch. This is Stich 2-18 on my Baby Lock Crescendo and Destiny Sewing Machines.
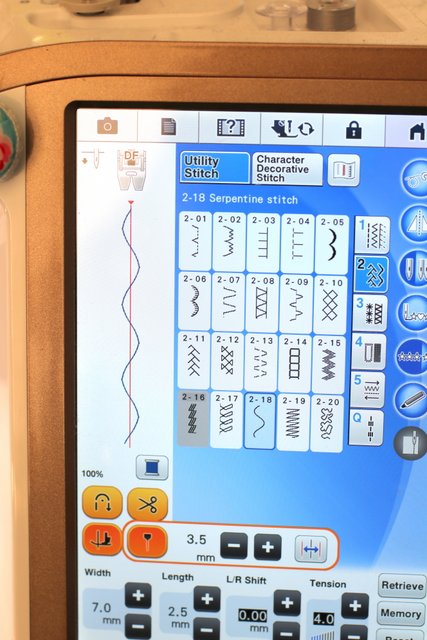
The reason I love this stitch is that you're basically sewing in a straight line, but the machine does all of the work moving the needle to create the wavy line. You can also play with stitch width to change the shape and density of the design.
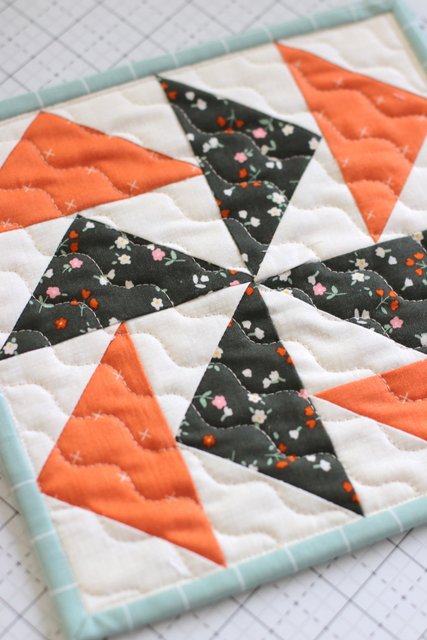
The Serpentine Stitch creates a free-motion stipple effect, without having to actually free motion quilt. It's one of my go-to options for a fast finish.
Free Motion Quilting
Another machine quilting option is free-motion quilting. This process is kind of like drawing with your needle and thread.
One kind of free-motion quilting is called ‘stippling’ and looks like a continuous squiggly design or loops over the whole quilt. For this kind of quilting you use a darning foot and drop the feed dogs on your machine – this means the only thing moving your quilt is you! (Some sewing machines now come with feet attachments specifically for machine quilting.
Free-motion quilting takes a little more practice because there is usually no pattern marked on the quilt and it can be tricky to maneuver a quilt through a machine. But the results are fantastic once you’ve mastered the technique.
I have lots more helpful tutorials for machine quilting using your home machine here.
Hand quilting vs. Machine quilting:
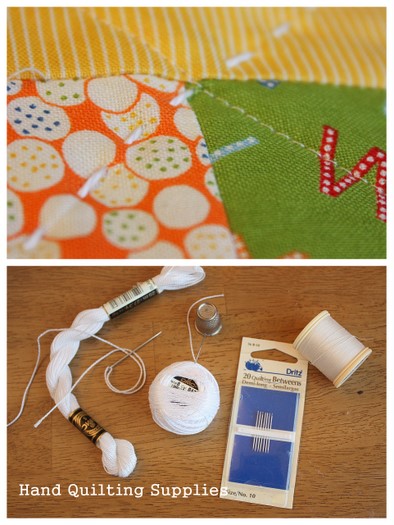 Hand quilting is another option – and again, there are lots of variations. If you choose to hand quilt, it is still important to baste the quilt. You can use safety pins or baste in the traditional sense with very large stitches. Traditional hand quilting requires a thimble, small quilting needles called ‘Betweens’ and a heavier thread specifically for quilting. Here is a more detailed source of information on Hand Quilting Basics for Beginners.
I really like to use the DMC pearl cotton for a bigger stitch look. It’s thicker thread, so you will need a bigger needle. The size 8 thread (center) works well for a running stitch and the size 5 thread (left) is great tying a quilt.
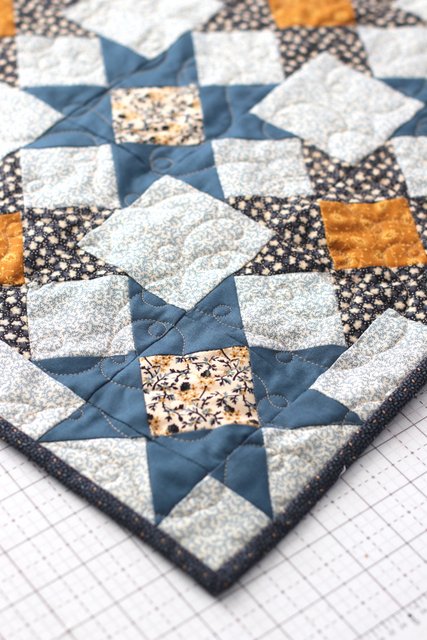
Quilting is not only functional – holding the three layers together – but it also creates texture and visual interest. The more quilting – or stitching – there is holding those layers together, the longer the quilt will last; fabrics last longer, batting shifts less, etc. But there’s no right or wrong option. As with everything in this process so far, choose what works best for you!


AMKreations
Love those AB scraps! =) Congrats to the winner.
Kirwanigans
Thank you! This is a great article!!
Nedra
Put baking soda in the shoes and leave it in for a while, and then shake out. My daughter did this with her son's shoes the other day when he had a potty training accident. (Of course, clean up as much as you can with a wet cloth first!)
Leila
Thanks for the Dream On heads up. I just bought one and gave a friend a heads up about the Origins they have on sale. Thanks!
QuiltyGirl
If they are sneakers, I'd toss them in the wash. 🙂
Becky
coarsely ground coffee works too... absorbs moisture, masks the smell, but can stain, so be careful! Hope you don't get sick too!
Four dogs and one quilter
Thanks for the link to Crafty Girls Workshop, have been looking for some Dream On.<br /><br />On sale and 10% off, can't beat that. Will have to get more than one.
Collaborations
Going to check out Dream On right now!
Angie
Kitty litter also helps with the smell in your shoes! I love dream on, not sure I can justify buying it though- I have so many vintage sheets!
Andrea
I have never "blogged before and quite unsure of how all of this works, however, I found a picture someone posted on October 3rd after describing a pink fabric that was in that picture. it is the pink fabric at the bottom of the picture that has a red and white flower that look like they are hooked together. I have been looking for this fabric very intensly and I want to know if you know
Andrea
Just after I posted this comment I noticed that fabric I am looking for is also featured in a quilt that you have hanging over a fence in pinks and blues. Again, it has a light pink background with red and white flowers that look like they are linked together printed on the light pink. If you can help me I would really appreciate it. Thanks!!!
kc
Hmmm...sounds like a good reason to go shoe shopping! Tho, if you're like me, you'd rather have a root canal than go shoe shopping. That's one reason we live where we only need flip-flops, heehee. Beautiful fabric!
Jen
Thank you so much for this tutorial! It was clear and helpful, and the parts I didn't follow (taping the backing to the floor) I ignored at my peril 🙂
Charo
Thank you so much for your great tutorial. I'm a begginer and it has been very useful.<br /><br />Greetings from Spain
letsbeamie
I know you use a walking foot, but any help for someone who doesn't have one? I've tried without and my stitches are too tight and small.
amy smart
I'm sorry, I'm not helpful there. I would check with sewing machine retailer for your make of machine. They might have some helpful guidance or classes that would help.
Melissa
Oh I'm so excited to have found you. I have so many quilt ideas and patterns, but I've never actually made a quilt. Terrified of the quilting and binding process on a quilt. Your tutorials look awesome! I'm now your newest follower! Oh and I love that you call yourself a 'stay at home quilter', I'm still working on getting my husband to let me be one too! <br /><br />
Kathy O'
Thank you, Thank you!! I found your blog via Pinterest a few months ago and I have to say this has been the easiest tutorial for making a quilt that I have come across. I followed your directions up to the quilting part, then decided to hand tie my quilt, which was fun and looks so cute! This is my first ever patchwork quilt and now I can't wait to make another. I will be using your
amy smart
Kathy - thanks so much for your nice comment. I'm so glad to hear you enjoyed making a quilt! I'm sure it is wonderful. The fact that you want to make another is a really good sign too. 🙂
Haunted House
Haunted house <br />https://bestforhalloween.com<br />Horror and Halloween Link Directory. Add your site for free. Horror authors, Halloween props, Halloween sound, Halloween costumes, Haunted houses, all horror related sites are welcome to join.<a href="https://bestforhalloween.com/" title="Scary House" rel="nofollow">Scary House</a>
Amber @ Nana June's
This comment has been removed by the author.
Amber @ Nana June's
Hi Amy,<br /><br />Thank you for your GREAT tutorials. I am almost finished my very first quilt! I'm just wondering - when quilting, does one still need to backstitch at the beginning and end of each diagonal line?<br /><br />Also, what stitch setting should I use on my sewing machine? I did all my piecing with a straight stitch at 2.5 - but will that length be too short for quilting the 3
Christine
Thank you so much for this fantastic tutorial! I have a quilt that I've stashed away in my closet for about a year, scared to move forward because I didn't know how to actually do the 'quilting' part. I almost considered sending it off to be done, but with your tutorial I was able to easily complete that task. I taped down the base and used the spray adhesive... rolled up the
hotpinkmanolos.com
Hello! I was wondering what kind of thread you use for machine quilting.
amy smart
I definitely use 100% cotton. I love Aurifil 40 wt, but I know it can be a bit pricier. I'll get Gutterman from JoAnn's when it's on sale too.
urbancholita
My first attempt at quilting didn't go so well. I used a walking foot to sew diagonal lines, but the top layer ended up really skewed -- not squared with the other layers. Does this mean I didn't baste well enough? Would you recommend using basting spray plus pins?<br /><br />Also, what stitch length should I use for machine quilting? And do I need to worry about backstitching the
amy smart
yeah, I think basting will solve that problem. I often use basting spray and pins. Pinning a lot will make a difference.<br /><br />I use around a 3 for my stitch length. <br /><br />You don't need to back stitch, but you could if you're stopping and starting a lot.
Savannah Leerar
Wow, thanks for posting this! I'm a beginner quilter and his helped me a lot!
Mrs. Kamp
Hi Amy- I love to make little quilts for friend's babies but have never added borders, and usually I just tie knots in the center of the squares with cross-stitch floss. I would love to try to do one like this with a border and machine quilting on the diagonals. But, I am a little confused how to do diagonal quilting across the squares while keeping the quilting off of the borders and also
Margaret
Hi there! I made my first ever quilt...ever. I wanted to come by and thank you for helping me. I blogged about it and sited you for helping. Thanks so much and come check it out if you have a minute.<br /><br />https://www.earthwormsandmarmalade.com/2013/12/my-first-ever-quilt.html<br /><br />Thanks!
wiwin
Thank you for the tutorial, it help me a lot, I am a beginner.<br /><br /><br />
Melanie Spitz
I had a question about machine quilting and the thread. What do you do when you start and stop? Do you knot it, go forward and backward a few times? I'm a beginner. Great tutorial! Thanks, Melanie.
Syaiful isma
very amazing post, good job, Thank you for presenting a wide variety of information that is very interesting to see in this artikle<br /><br /><br /><a href="https://www.tourkarimunjawaisland.com/" rel="nofollow">karimunjawa</a> <br />and <a href="https://jualfurniturejepara.com/" rel="nofollow">furniture jepara</a> <br />or <a href="https://www.mebeljeparafurniture.com/" rel="nofollow">mebel
Mahkota Jati
Anda mencari <a href="https://tokojatifurniture.wordpress.com/" title="Toko Furniture Jepara" rel="nofollow">Toko Furniture Jepara</a>? atau <a href="https://www.mebeloneline.blogspot.com/" title="Mebel Jati Jepara" rel="nofollow">Mebel Jati Jepara</a>? ya kami menyediakan <a href="https://www.tokojati.com/" title="Furniture Minimalis" rel="nofollow">Furniture Minimalis</a> asli dari jepara dari
sara
I just wanted to let you know how much I appreciated your series on how to make a quilt from start to finish. Growing up I always watched my grandmother quilt, and I always wanted to learn. However, I moved away shortly after high school and never really learned. Your posts taught me to quilt! As corny as it sounds, I was able to accomplish a childhood dream of mine. And now my grandma admires my quilts when I post them on Instagram 🙂 Thanks so much for this.
Amy Smart
OH that's so great! Made my day. Thanks so much for taking the time to share. Those are the best messages to get. I love bringing people over into this crazy hobby that I love. 🙂