
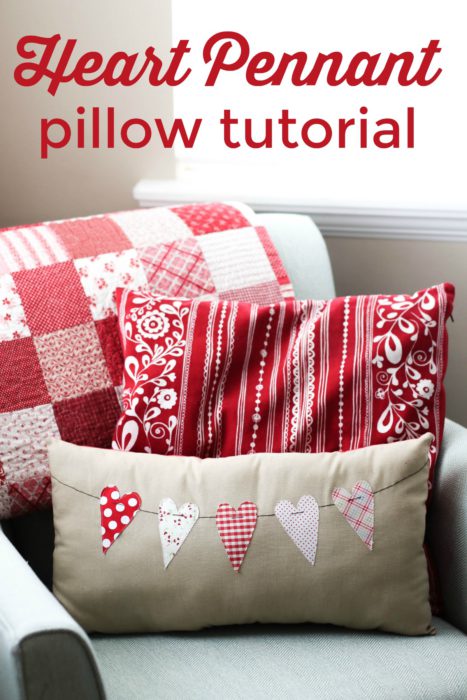
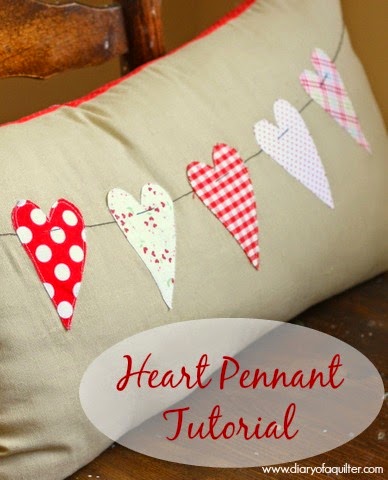
This is fun, quick DIY heart-themed pennant pillow, perfect for Valentine's Day or year round! This throw pillow can be made any size or shape your heart desires and comes together very quickly.
Supplies needed:
- WonderUnder or HeatNBond - enough to trace 5 hearts
- Scraps of fabric for the hearts
- Background fabric in the size you desire
- Needle and DMC floss for the 'string'
- Batting to stuff the pillow
- Backing fabric in the same size as your background fabric for the back of your pillow
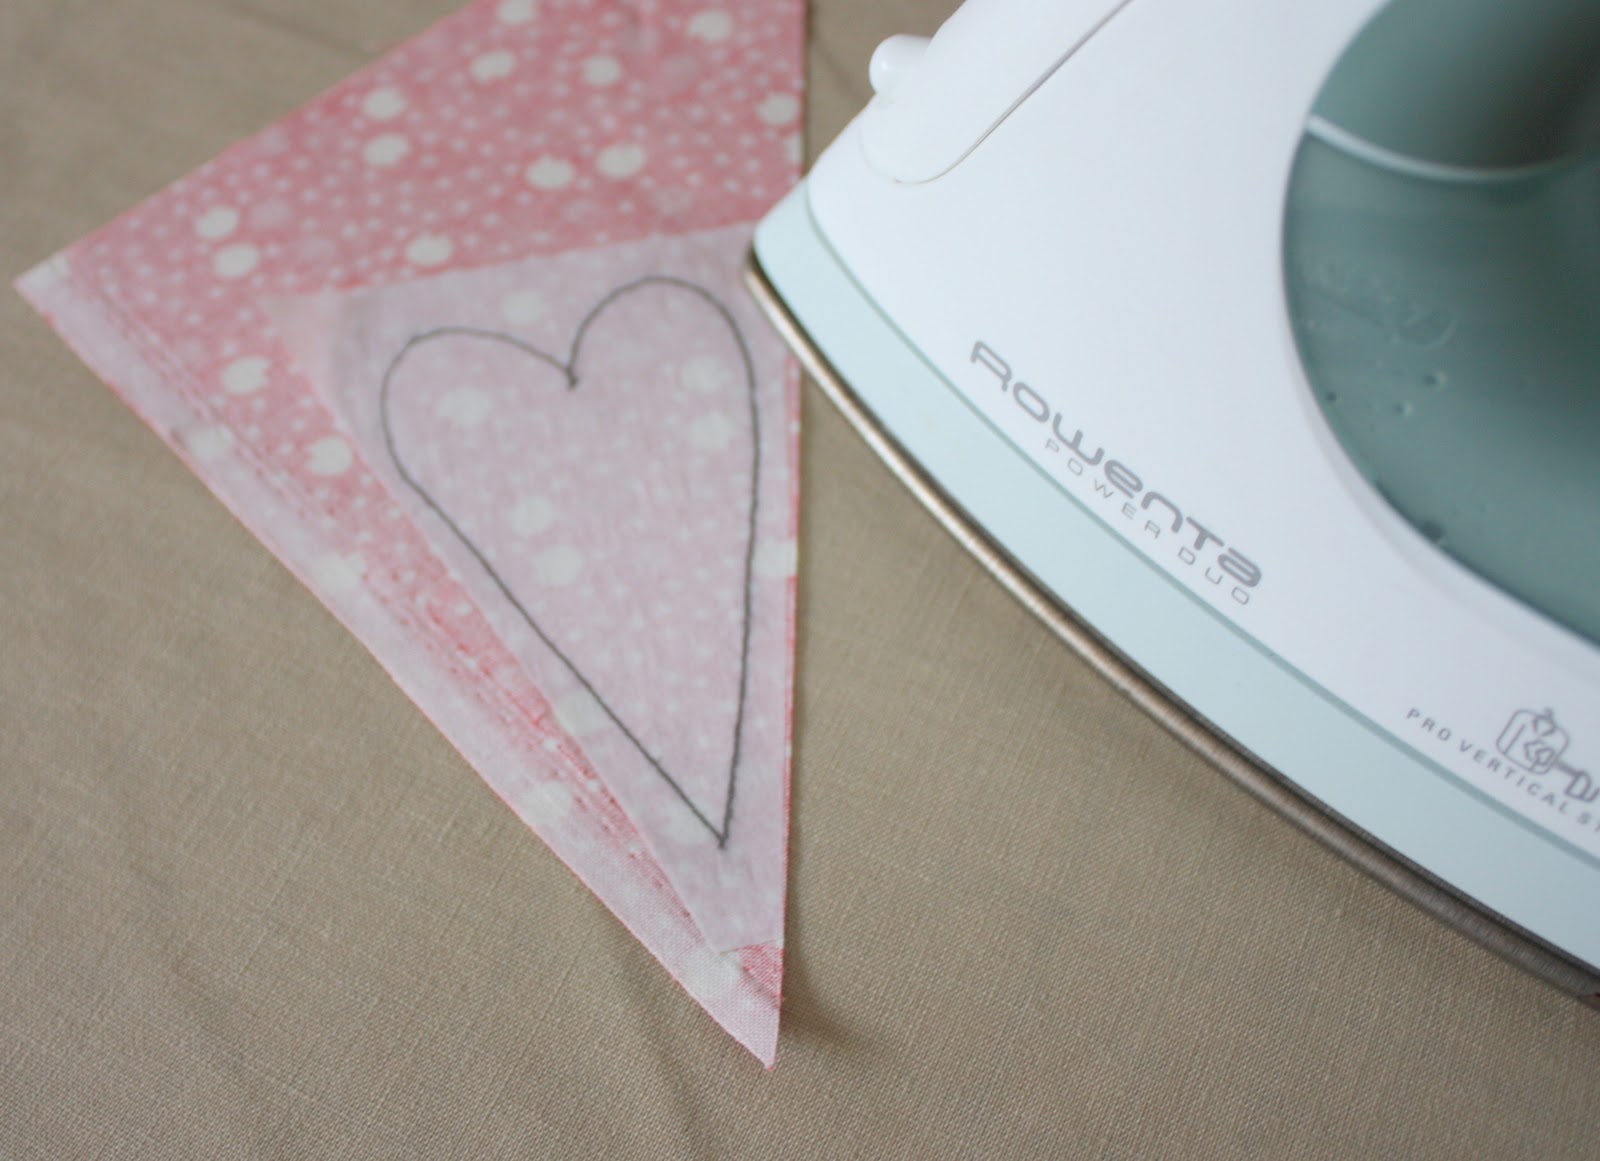
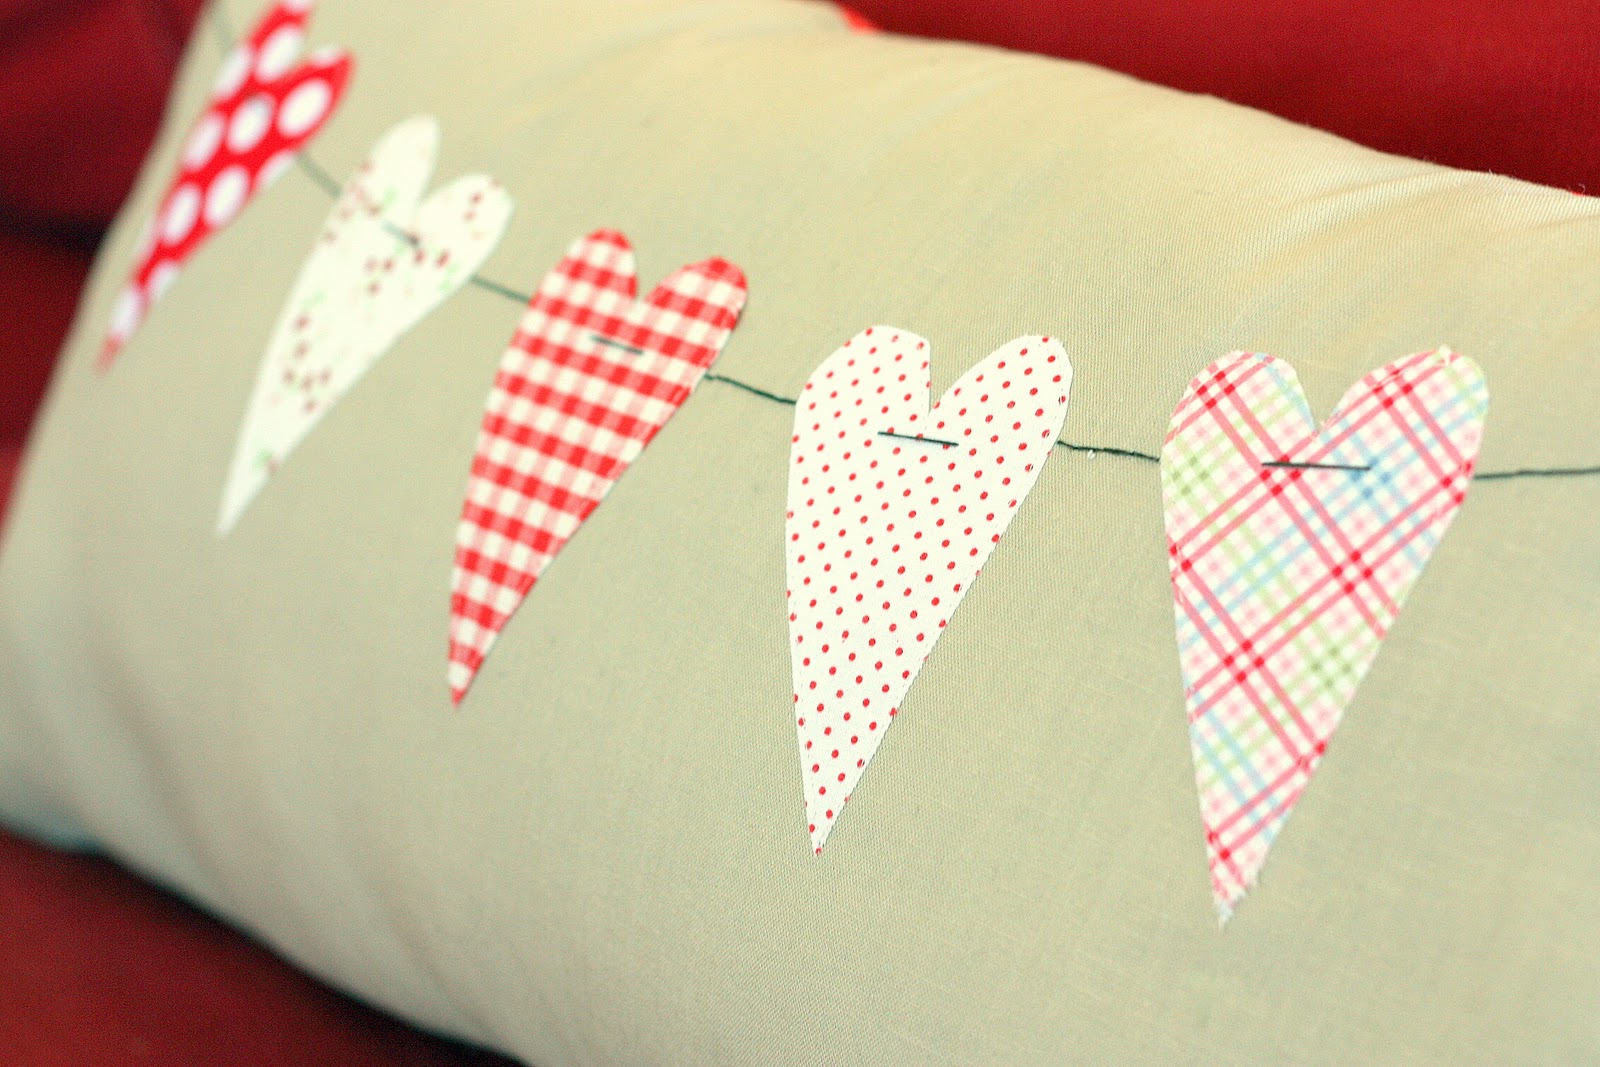
First trace a heart template (or draw your own) on the paper side of the WonderUnder/HeatNBond. I googled Heart Template and found dozens if you want a slightly different heart. I used this one, reducing the size a little. My hearts are about 3.5" long and 2" wide.
Iron the fusible side to the back of your fabric scraps. You could use a variety of scraps, or if you're not like me with fabric scraps coming out of your ears, you could use all the same fabric. Felt would be equally adorable.
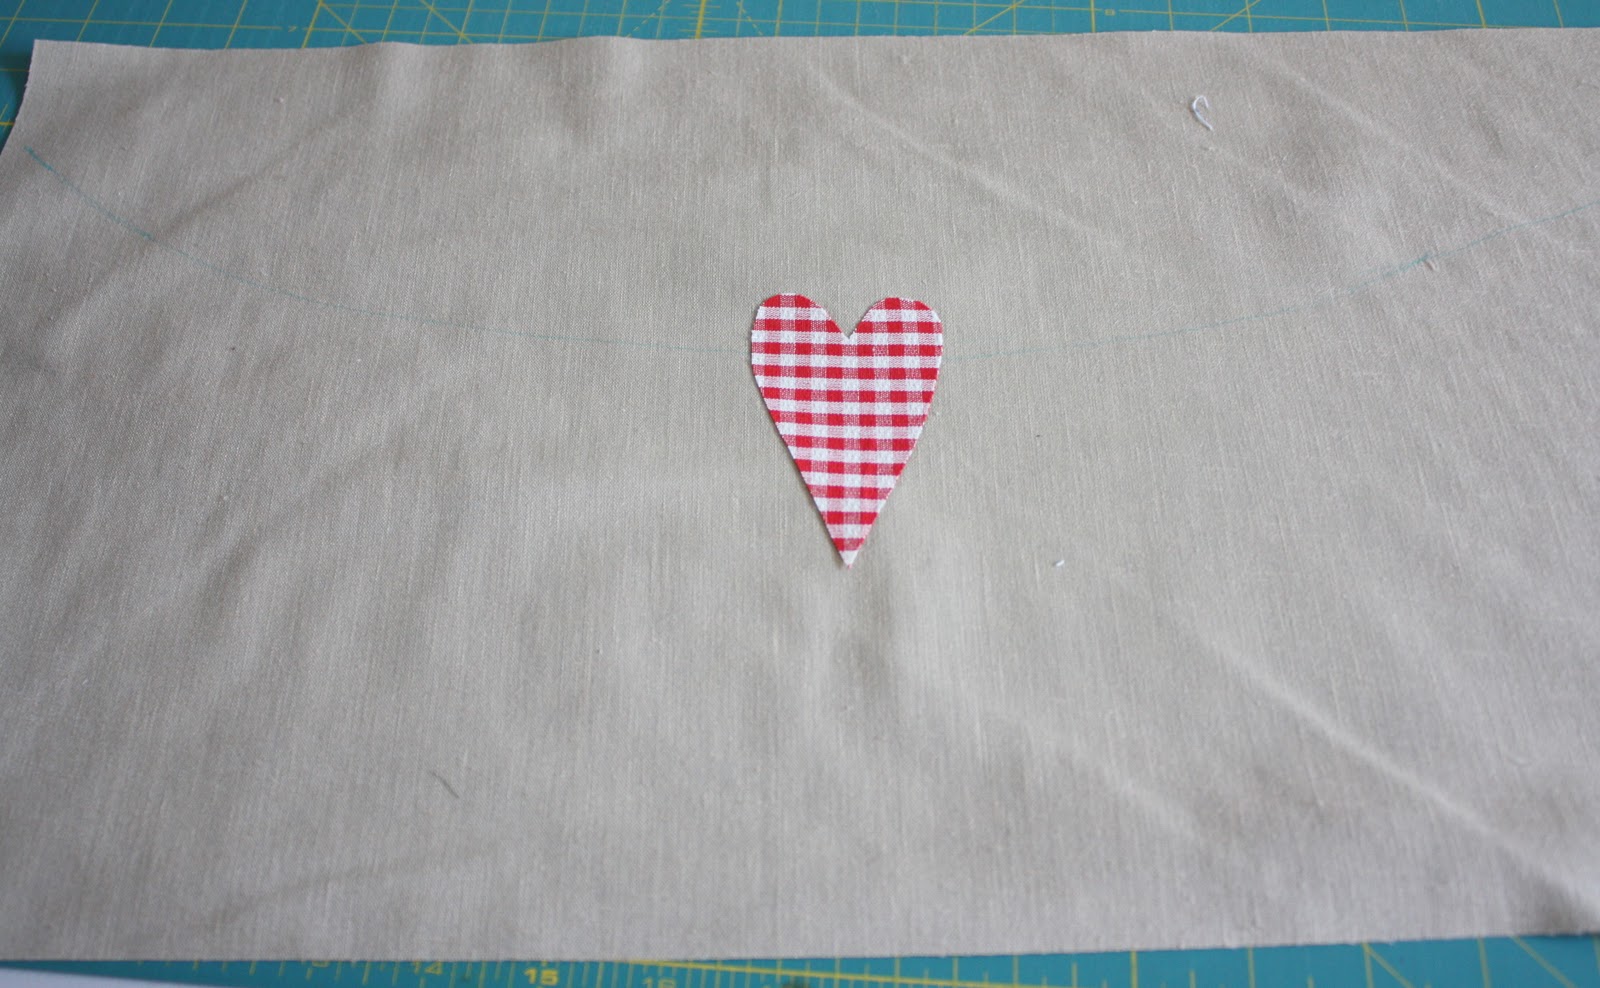
After the HeatNBond is fused on, cut out fabric hearts. Cut a piece of backing fabric to the size you would like your finished pillow. I used a piece of linen-type fabric and cut mine 12" x 21" - but there's lots of room for flexibility here. Make it whatever size you want.
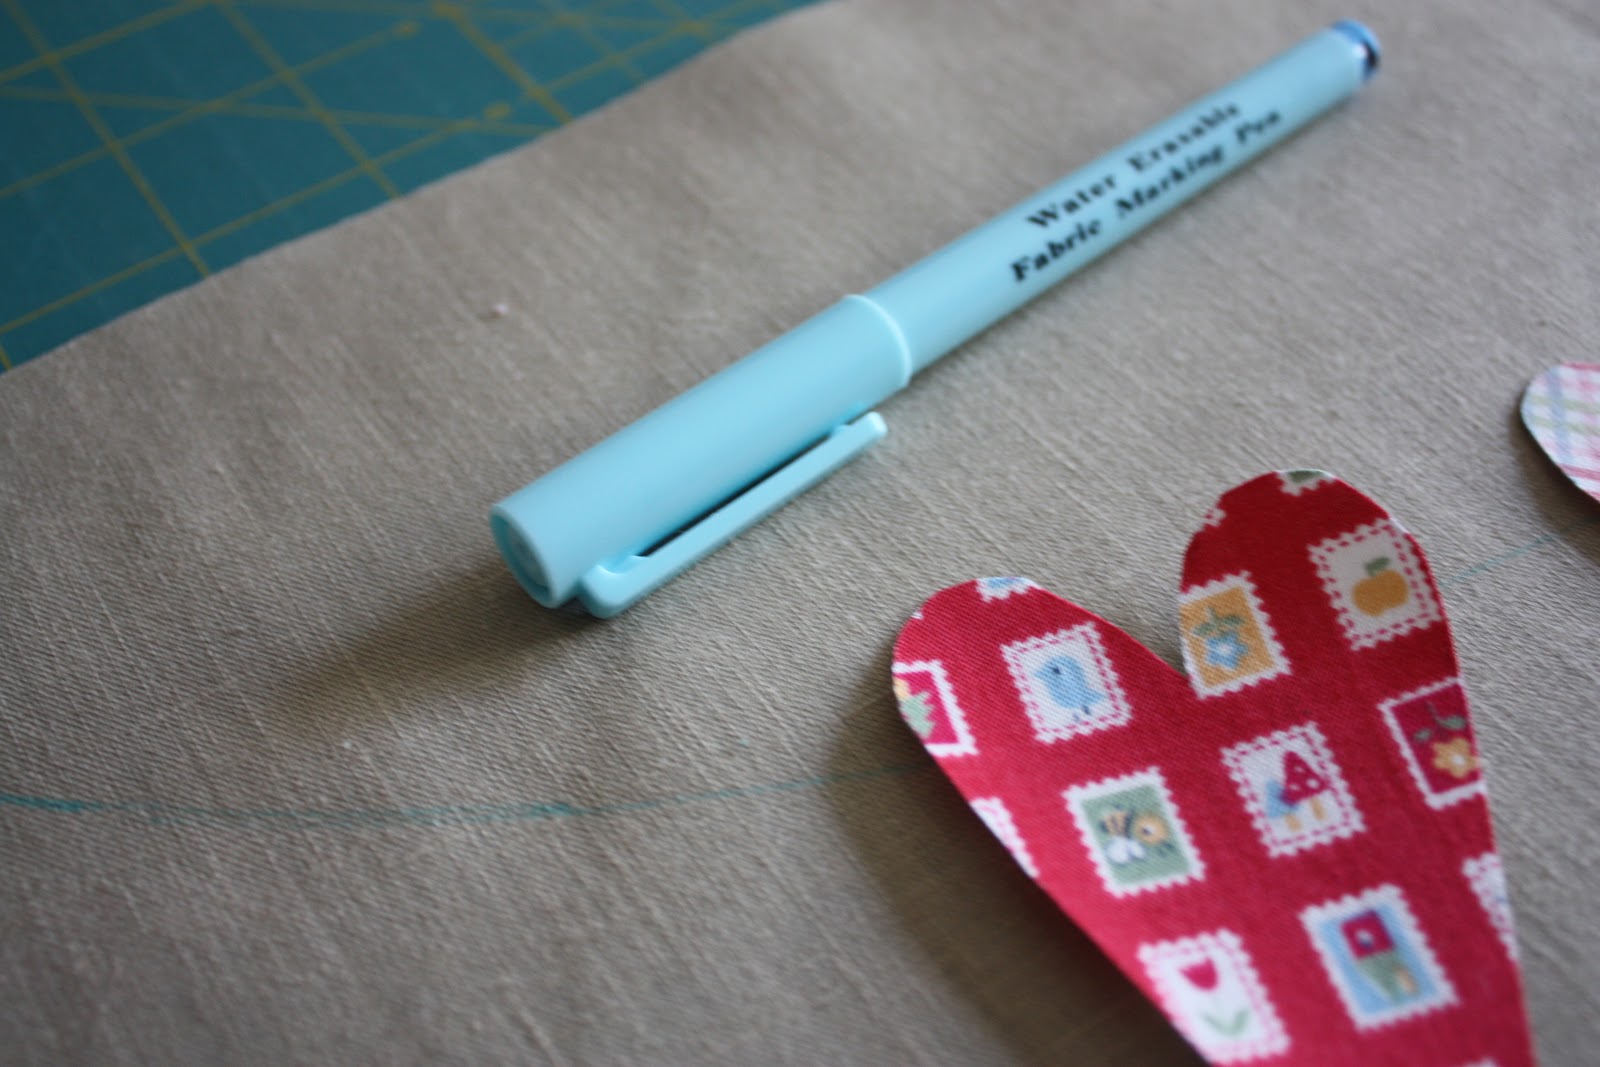
Using a water eraseable pen draw a line for the 'string' the hearts will hang on. I just eyeballed it. And if I wasn't happy with the drape of the string, I erased and changed. Don't stress about this part. You will stitch on this line after the hearts are attached.
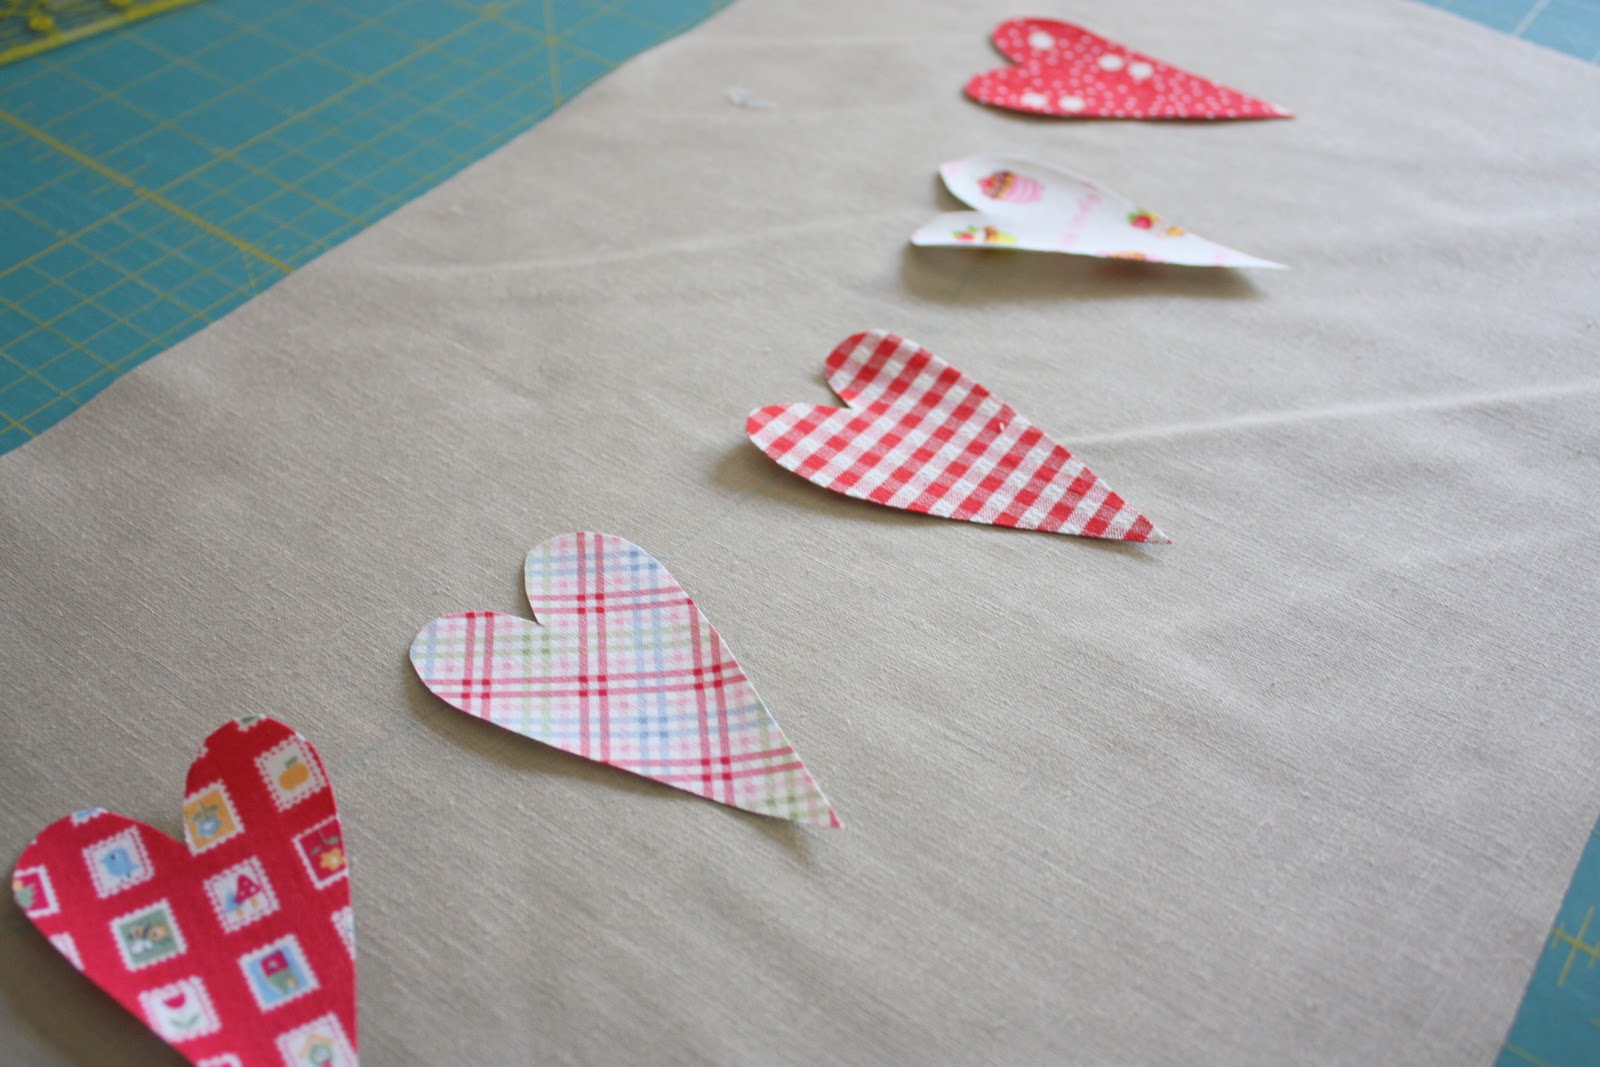
Lay your hearts on the 'string' line to play with their placement.
You could mark where you would like them to stay permanently.
Start with the center heart when you are ready to adhere the hearts to the backing fabric. Remove the paper backing of the WonderUnder and iron the first heart into place. Repeat with the hearts on the left and right of center, and then finish with the final two hearts.
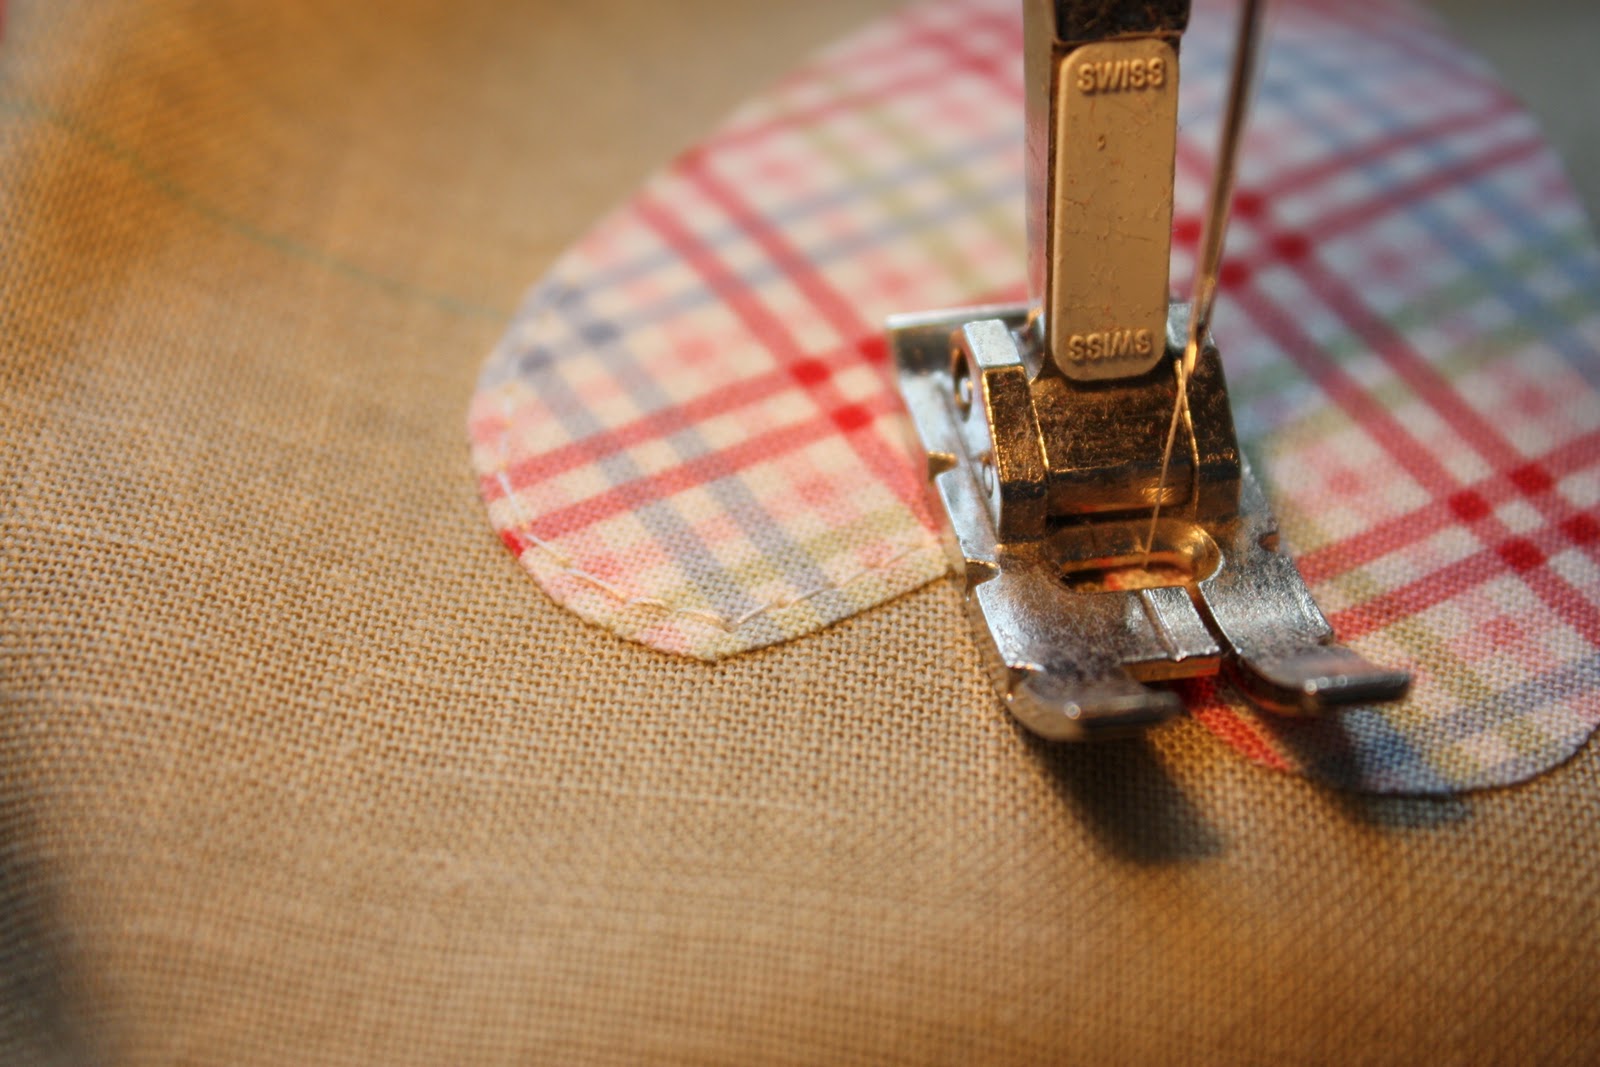
After hearts are fused to the background fabric, sew around the edges with a sewing machine. Hand stitching would look great too.
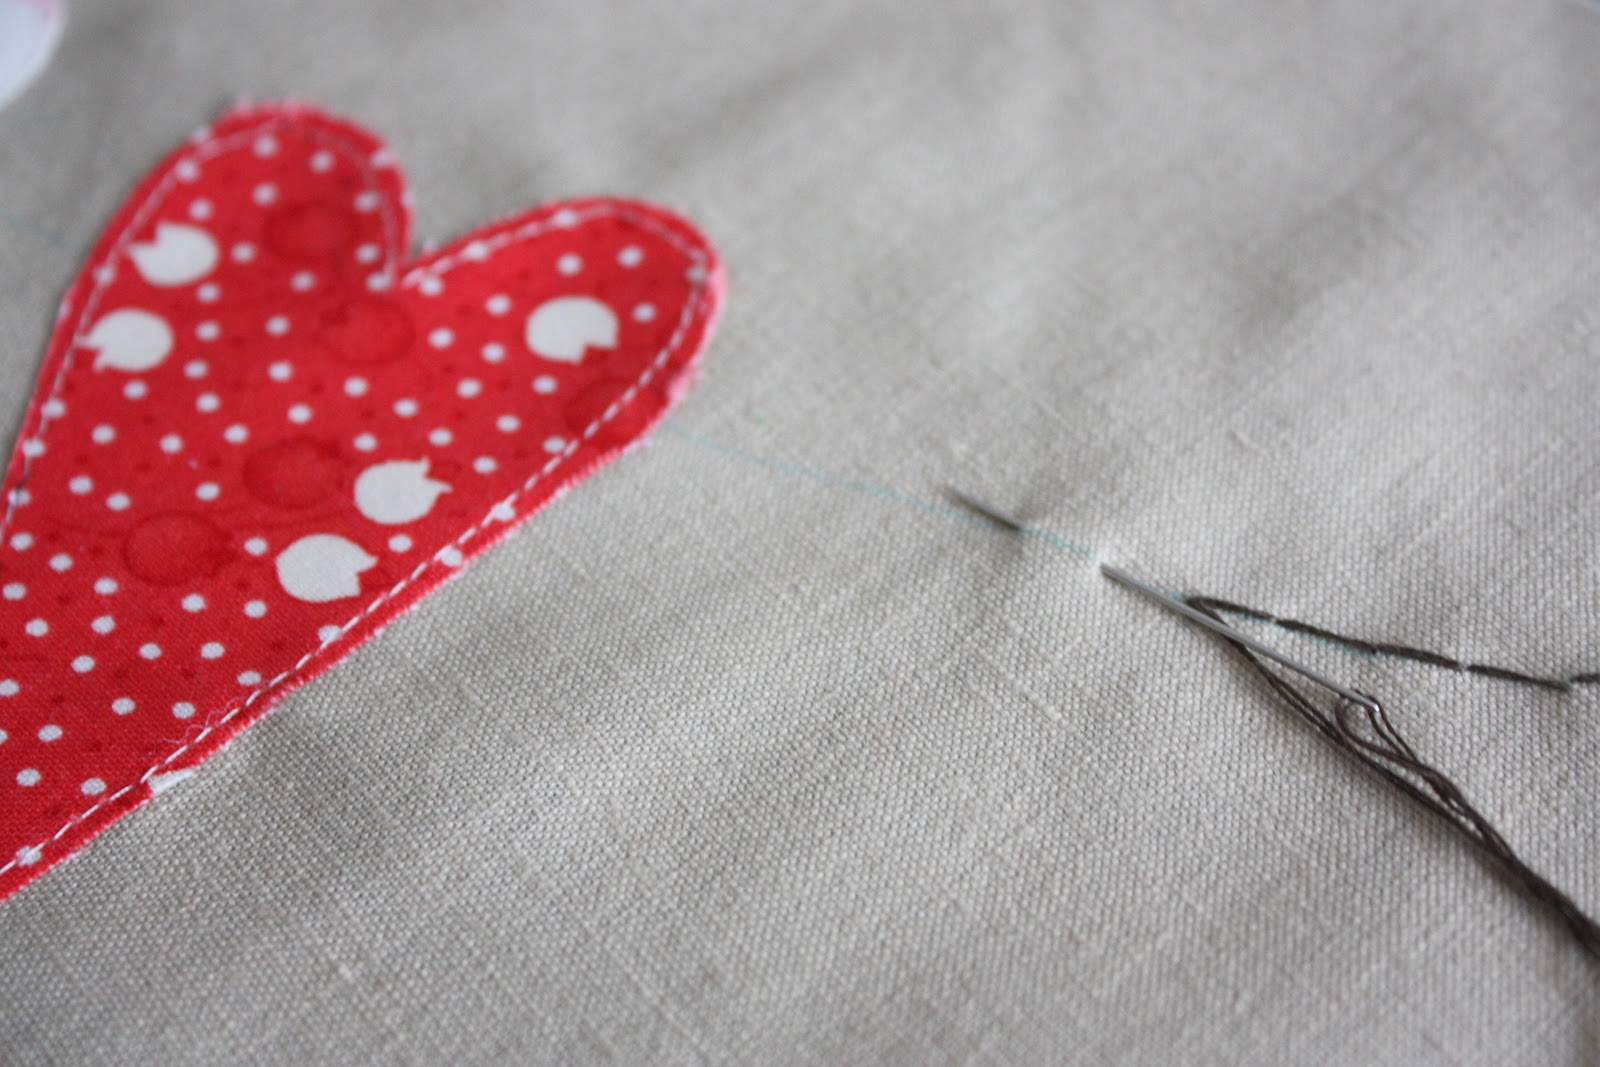
After hearts are stitched down, it's time to stitch the 'string' the hearts are 'hanging from.' I used 2 strands of some dark gray DMC floss and backstitched along the line I'd drawn on the fabric.
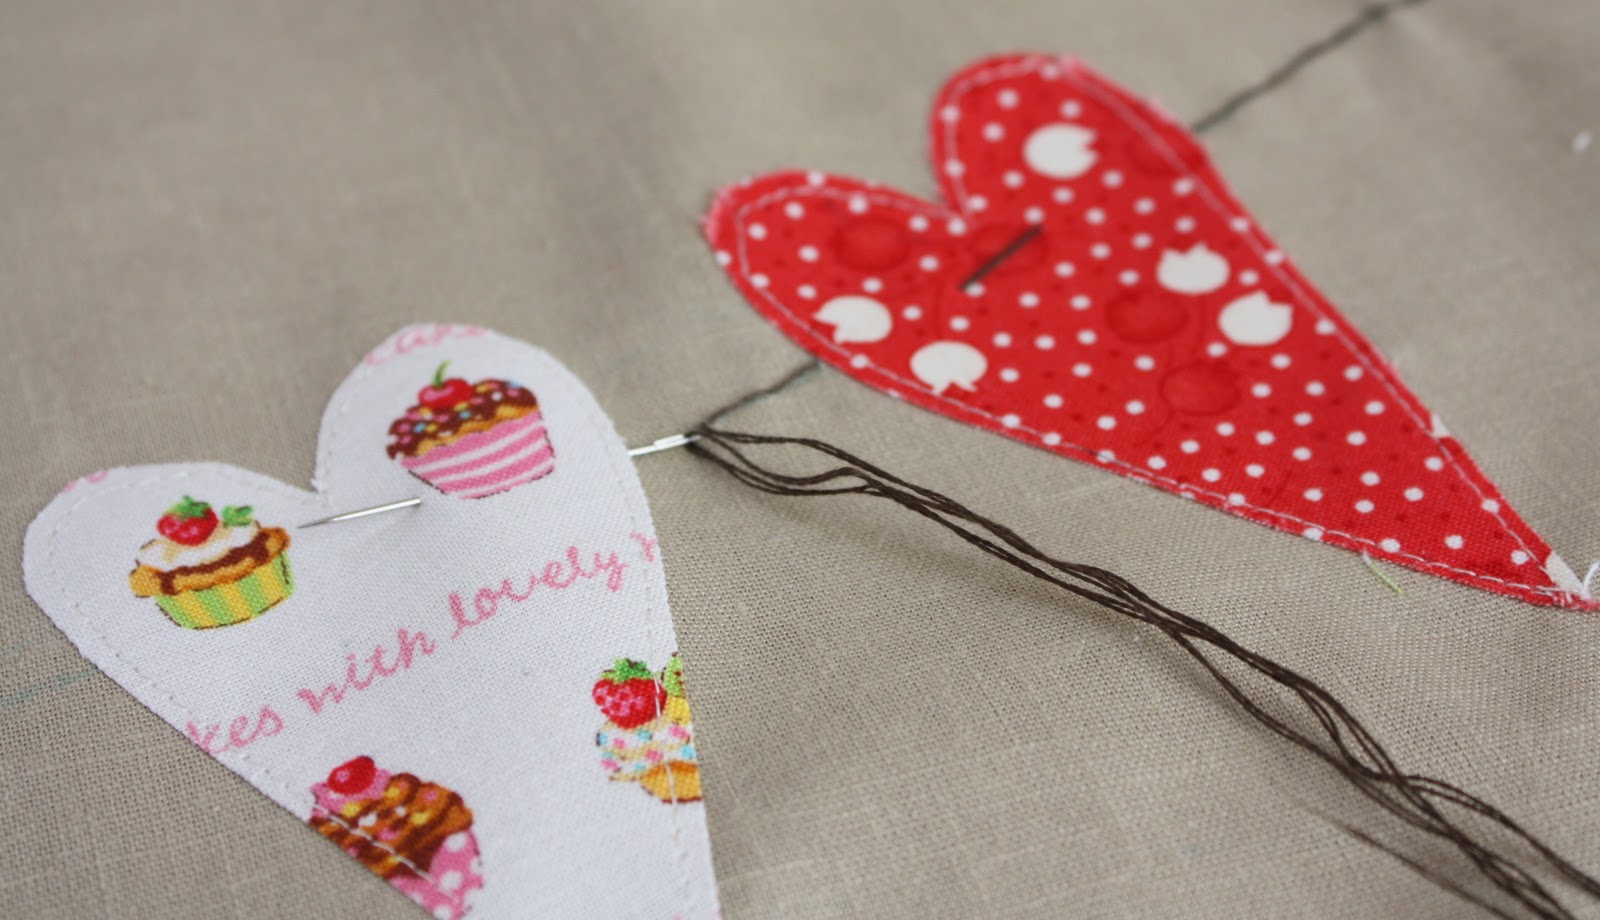
When you get to the edge of the heart come up inside the heart about ¾" from the edge, make a ½" stitch" and resume stitching on the other side of the heart, so it looks like the hearts are threaded onto a string, hanging like a banner.

When you're finished stitching, cut a backing fabric the same size as your front piece. Sew right sides together, leaving an opening at the bottom for stuffing. Turn right-side out and stuff. That's it! Super easy. The same design could be used as a table runner or wall hanging, instead of a pillow.
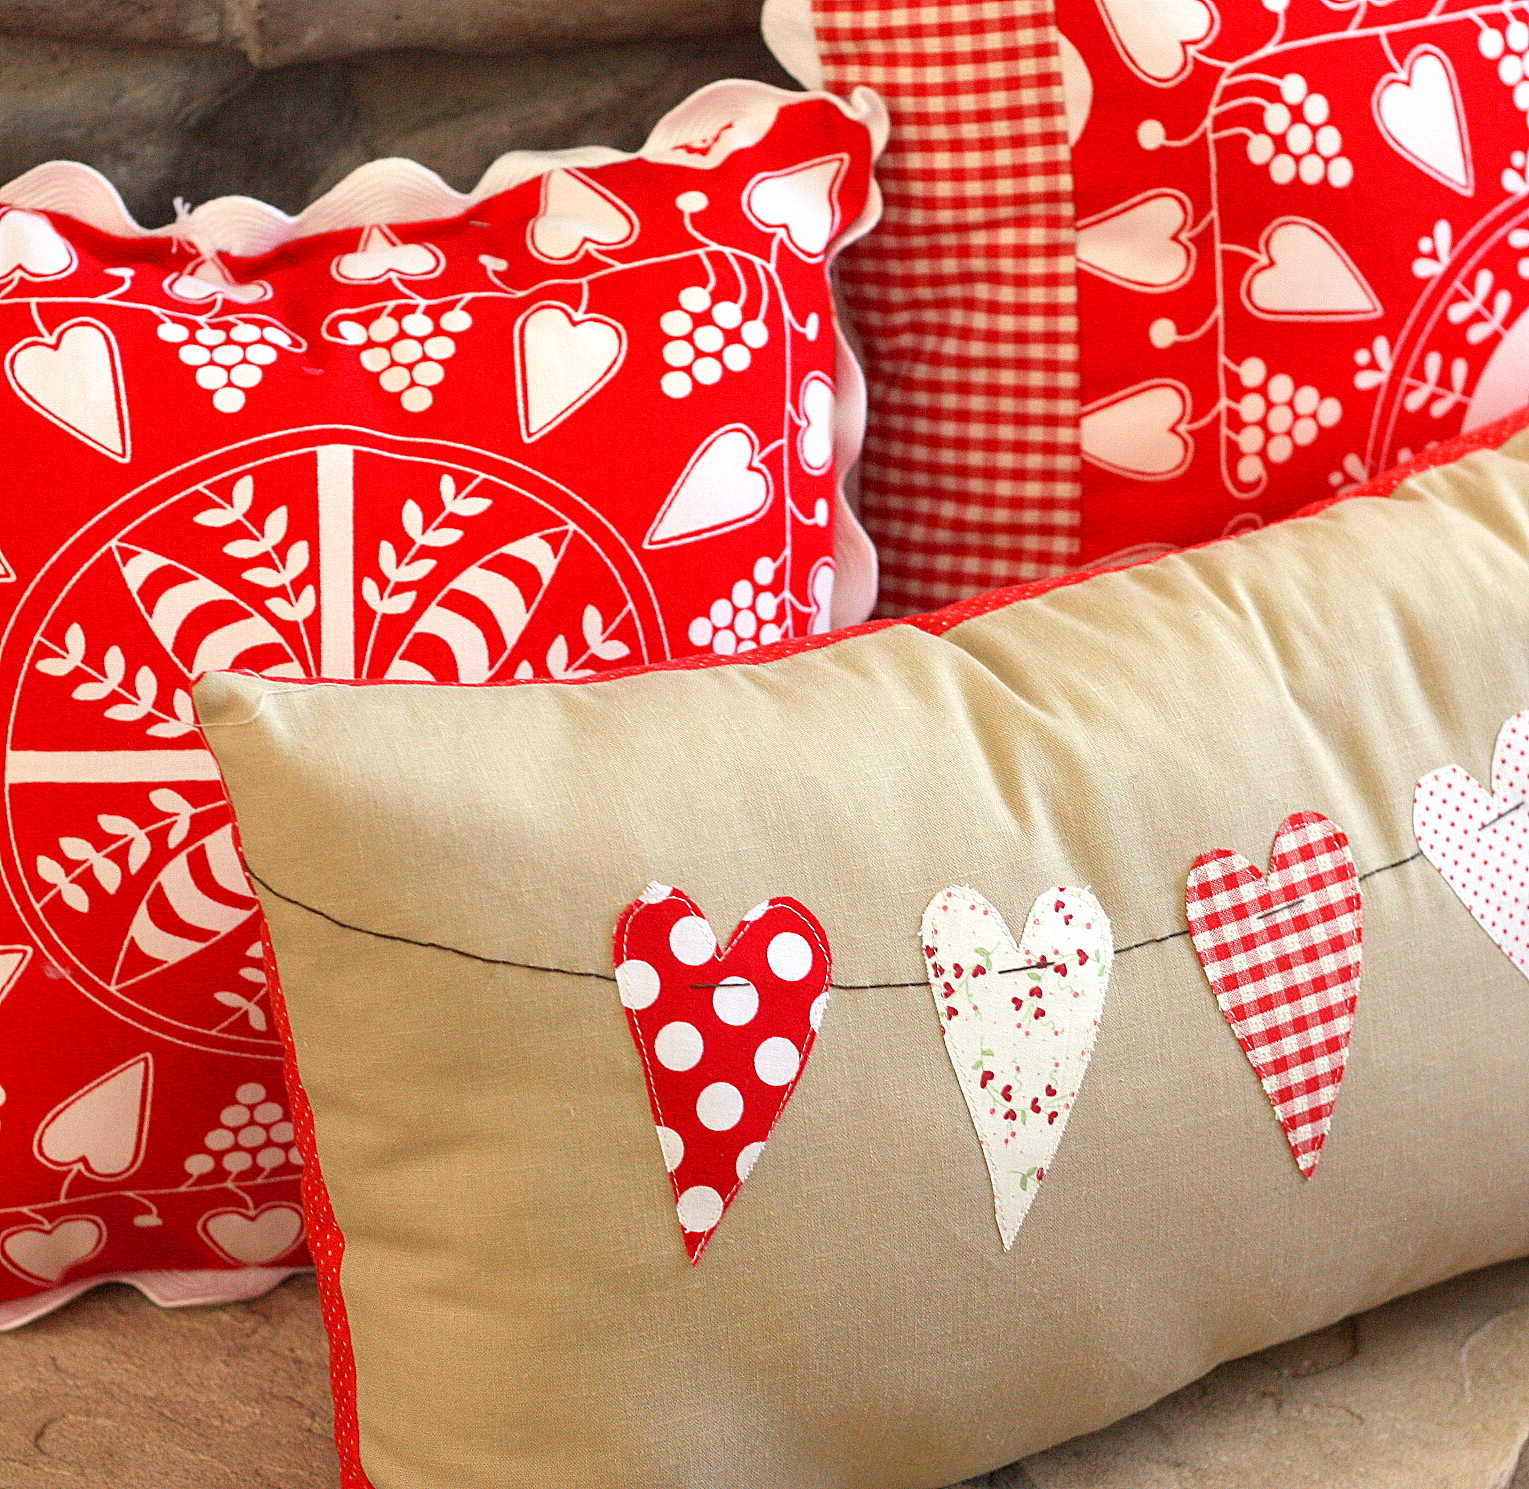
I'm loving this with my Snoa Flinga throw pillows. Perfect for February.


Lucy @ Charm About You
This is so pretty Amy! Thanks for the great tutorial. The hearts are so cute !
Pat
What a sweet design! Thanks for the tutorial!
Anita
How lovely...very sweet tutorial!
Annabella
So cute - may have to make one! Thanks for the tutorial.
notes of sincerity
I fell in love with this tutorial the very first time I saw it! I need to make it this year!! :o) Will let you know when I do. :o)<br />Can you tell me what the name of the red fabric is, with the little postage stamps on it? Too cute.<br />love ya, Trish
~Damita's Pretty Wrap~
Great pillow!! It's so cute and festive!! Have a wonderful day!
Gaertegang
super cute! thx for sharing it again!
Melissa @ Happy Quilting
I love this pillow Amy!!! So adorable!!!
Ann-Marie
adorable pillow Amy!!!
Minnie
This is so simple but it looks adorable, I'm going to make a few of them in different colours/patterns, thank you! x
Kati
I really love it! It's so simple yet looks pretty. Nice job! 🙂
Kate @SwimBikeQuilt
I just found your tutorial last week. I was looking for something simple and classic and this was perfect!
Claire Jain
That is super adorable! And what a great gift for someone, too.
janae king designs
Thank you for sharing the heart pillow...i love it and look forward to making one.
luciethehappyquilter
I love your pillow. Thanks for sharing the tutorial.
Kazz
this is sooo cute!! I love it!!
Sharon
That is so pretty, Amy! Thank you for the tutorial. 🙂
Natalia Bonner
I love your pillow!
Quiltstory
That is so cute!!! Love it! 🙂
{northern cottage}
ohhh that is just DARLING! thanks for the great tut!<br /><br />www.northerncottage.blogspot.com
**nicke...
cute! cute! cute!
Barb
Absolutely adorable!!
Kari
cutest Vday pillow ever!! Thanks again Amy for sharing it with my readers! <br /><br />❤<br />Kari
Jodi
Oh these pillows are precious! Very, very cute!! Thanks for the tutorial.
Amber
so cute amy. i love it. it's darling.
Sherry
So cute! Thanks for sharing.
szyju szyju...
I love your pillow 😀
Jen Conlon
Great tutorial! You've been featured on the <a href="https://qualitysewingtutorials.blogspot.com/" rel="nofollow">Quality Sewing Tutorials blog</a>.<br /><br />We hand select only the best free tutorials and patterns for home sewers.
Deb @ Paper Turtle
This is adorable! I'm totally inspired... :o)
Jerri Rivers
Your pillow is so adorable! I found you on pinterest, and I'm featuring your pillow as my pinterest pick for my Friday Favorites event this week!
Ramona
This is just darling!
Letterpress
In my blog reading tonight I'm seeing quite a few Valentine's Day projects, and this is one of the best. I am so glad you posted it, as I can't sew for too long right now (recovering from surgery) but can still do hand work and stand. I needed a pillow for our bed for Valentine's Day--thanks for this great post!<br /><br />Elizabeth E.<br />occasionalpiece.wordpress.com
Michele
Very cute. My Sunshine is loving pillows right now but I'm thinking she'd prefer ones featuring Minnie Mouse or the Princesses.
LittleLucyGoosey
Amy, you always have the cutest tutes! Thanks for this one, I will definitely be making one (or two)! 🙂
Kristen
Very sweet and happy pillow! One day I will enjoy expressing the holiday in pillows, the kids will only beat the crap out of them now. I will pocket this tut!
Septiembre
Thank you very much Amy.<br />A very simple, very nice, I liked a lot.<br />I've been following your tutorial very much like a cushion.<br />Greetings.
Janna
I made one today! Turned out so cute. Thanks for the tutorial 🙂
Little Texas Cuties Boutique
I love love love this pillow! Going to have go add this to my to do list.
DeAnna
I made one today and I am doing something wrong! The Heat n Bond!! I adhered the hnb to the heart but I cannot figure out how to adhere it to the background fabric. I am sure it is a simple fix but I am fabric challenged! What am I doing wrong?? I sewed it on then put it through the wash and it messed the hearts up! I have to start over!
amy smart
Hi Deanna - I don't have a return email address for you, so hoping you will see this reply here. <br /><br />Did you peel the paper backing off the heat n bond before you ironed them to the backing? That's the only thing I can think of. Let me know if that is not the problem.<br /><br />Hang in there!
Nanette Merrill
Really sweet. What a delightful project.
Waseem
simple and easy to do tutorial...you make it easy to follow.<br /><a href="https://www.send-gifts-to-pakistan.com" rel="nofollow"> gift pakistan </a><br /><br /><a href="https://hankhendricksinformation.blogspot.com" rel="nofollow"> Hank Hendricks </a> has been a student at the University of New Hampshire- Whittmore School of Business and Economics. <br />At the university he was a very active
Jennifer Dawn Oliver Shelton
Love this. As the sewing contributor for Making the World Cuter, I'm featuring this in a Valentine's Day Roundup posting soon. 🙂 https://makingtheworldcuter.com/ Hopefully it will bring lots of traffic your way.
Gnomemade
Just made on for this Valentine's Day! Thanks for the tutorial.
YOLANDA
Thank you very much Amy.<br />So So cute!, very nice, I liked it.<br />I've been following your blog its very interesting!<br />Greetings.
GL Conley
This is a very nice and informative tutorial for making this beautiful pillow. My grandma made quillows and I thought would try one this summer. So I <a href="https://thelaceprincess.weebly.com/blog/the-magic-pillow" rel="nofollow">handmade this quillow</a>.
Pam Blanton
LOVED it so much I had to make one for myself! <3
Robby
Amy this is adorable. I almost can’t wait to get home from Seattle to try it. Thank you again for wonderful inspiration.