
Inset Seams on a quilt block look so much trickier than they really are. I will show you a simple shortcut for making your quilt blocks with Inset Seams (sometimes called Partial Seams) come together super easy.

This block was originally part of the Virtual Quilting Bee series, but the process works on any quilt block with Inset Seams.
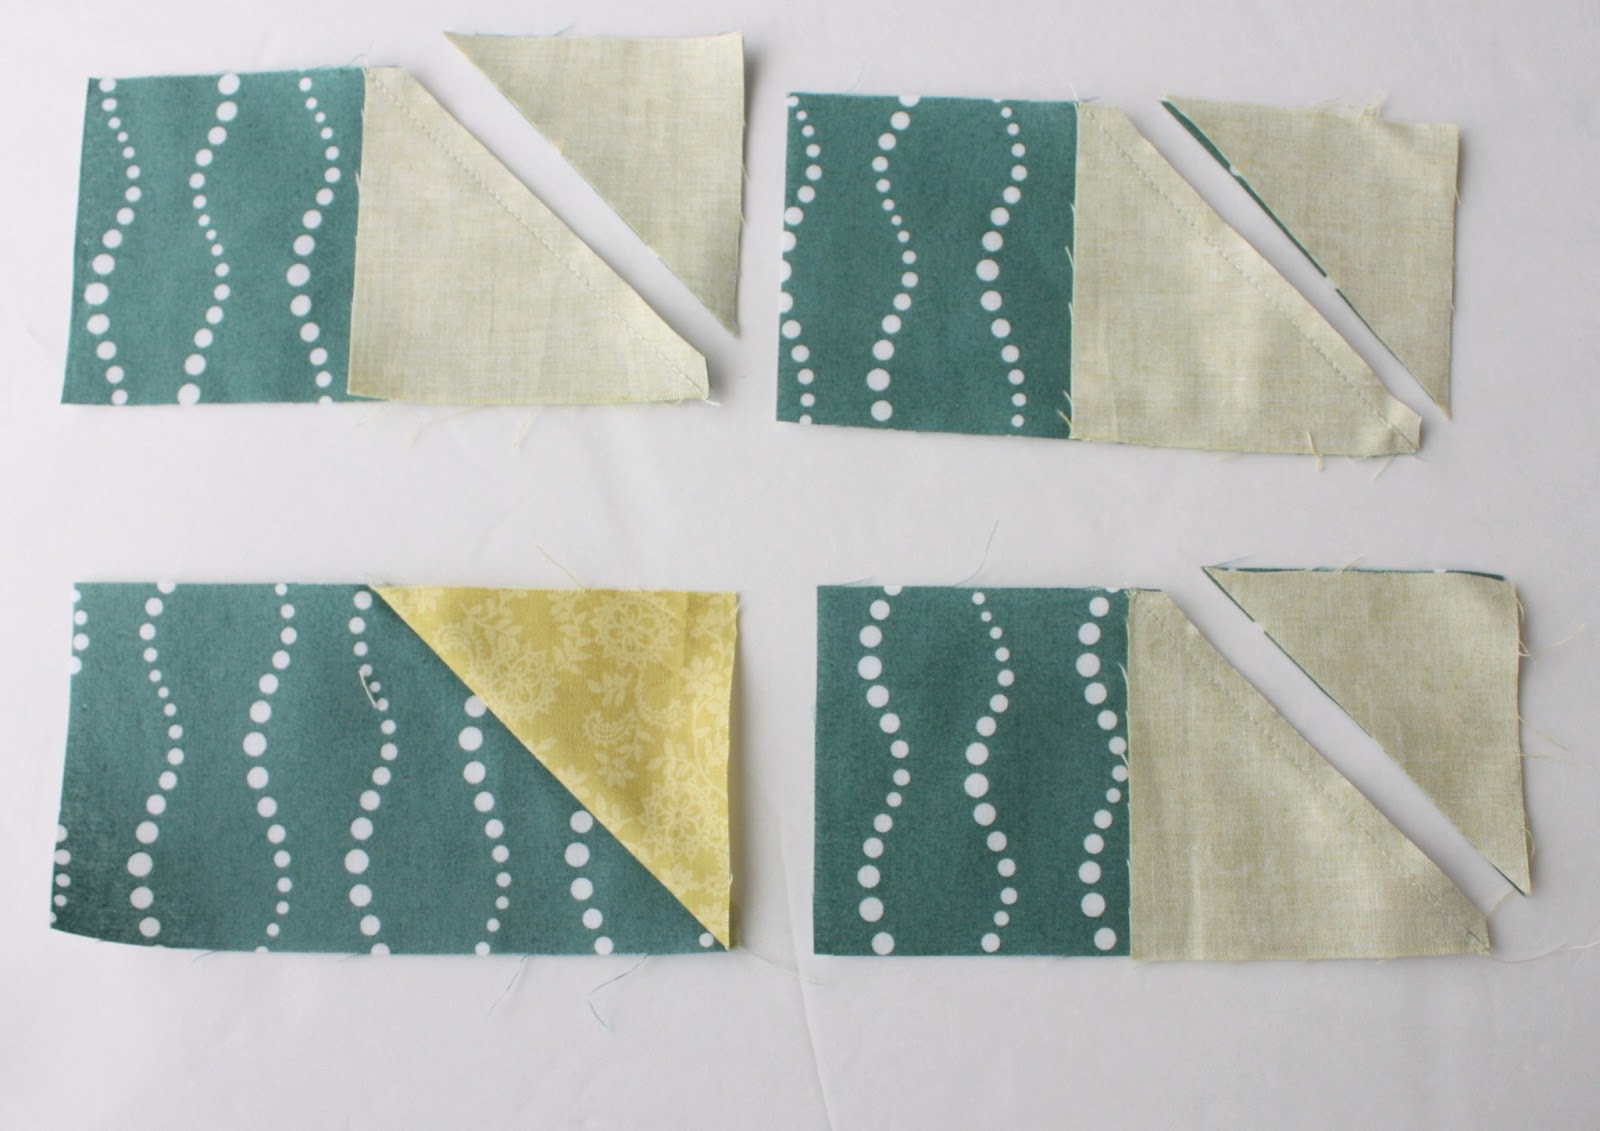
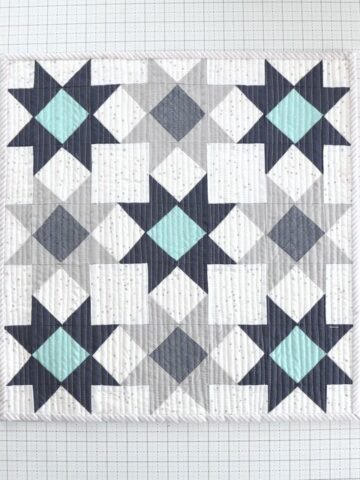
Go here for to see the block cutting requirements. **I did make one change - I cut my center square 3.25" (instead of 3.5") and it worked perfect.** Make outside flying geese blocks per Amanda's instructions.

After four Flying-geese units were created I laid out my pieces.
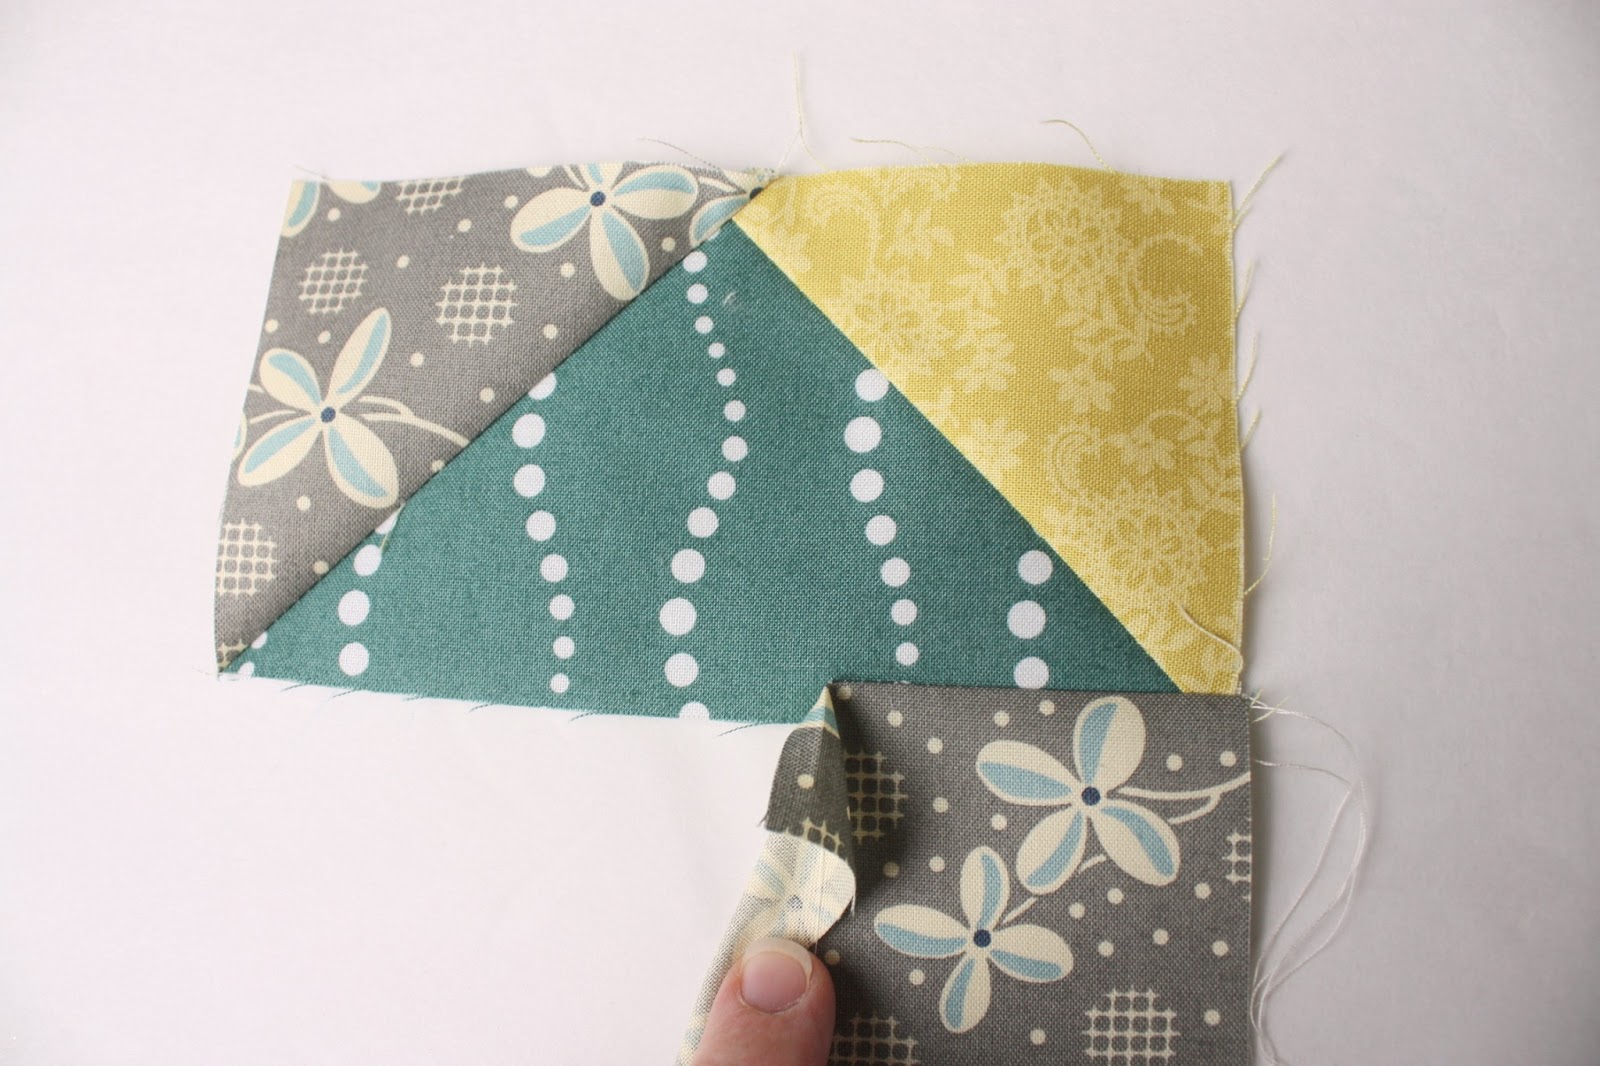
Starting with the top flying-geese unit, I lined up the right side with the right side of my center square and sewed a regular ¼" seam, stopping and back-stitching about 1" from the end.

Going clockwise, you will notice that the second flying-geese block is the same length as the right side of the pieced unit. I sewed the second flying-geese block to the pieced unit like normal and pressed the seam toward the flying-geese block. No inset-seams to worry about. Easy-peasy.
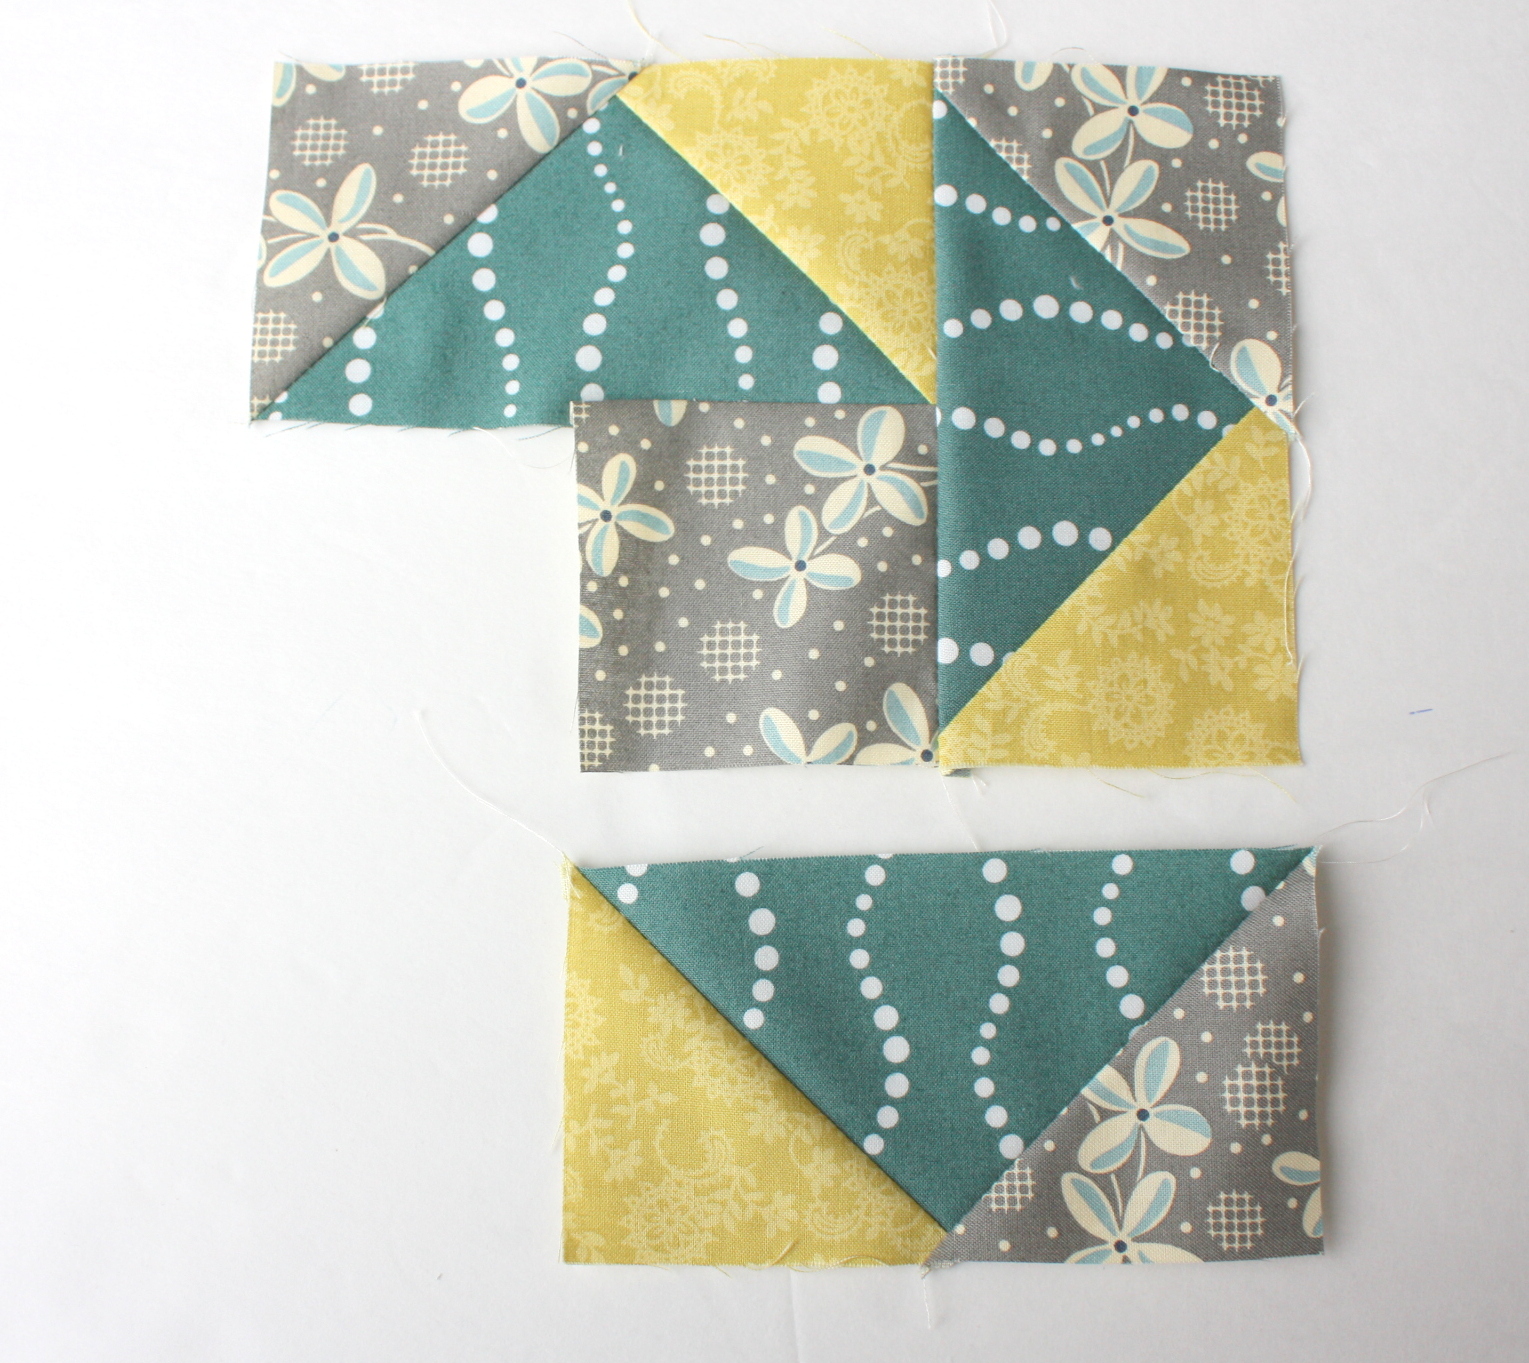
Repeat the same process again, moving clockwise and sew the third flying-geese unit to the bottom of the growing block.
Repeat one more time on the final side.
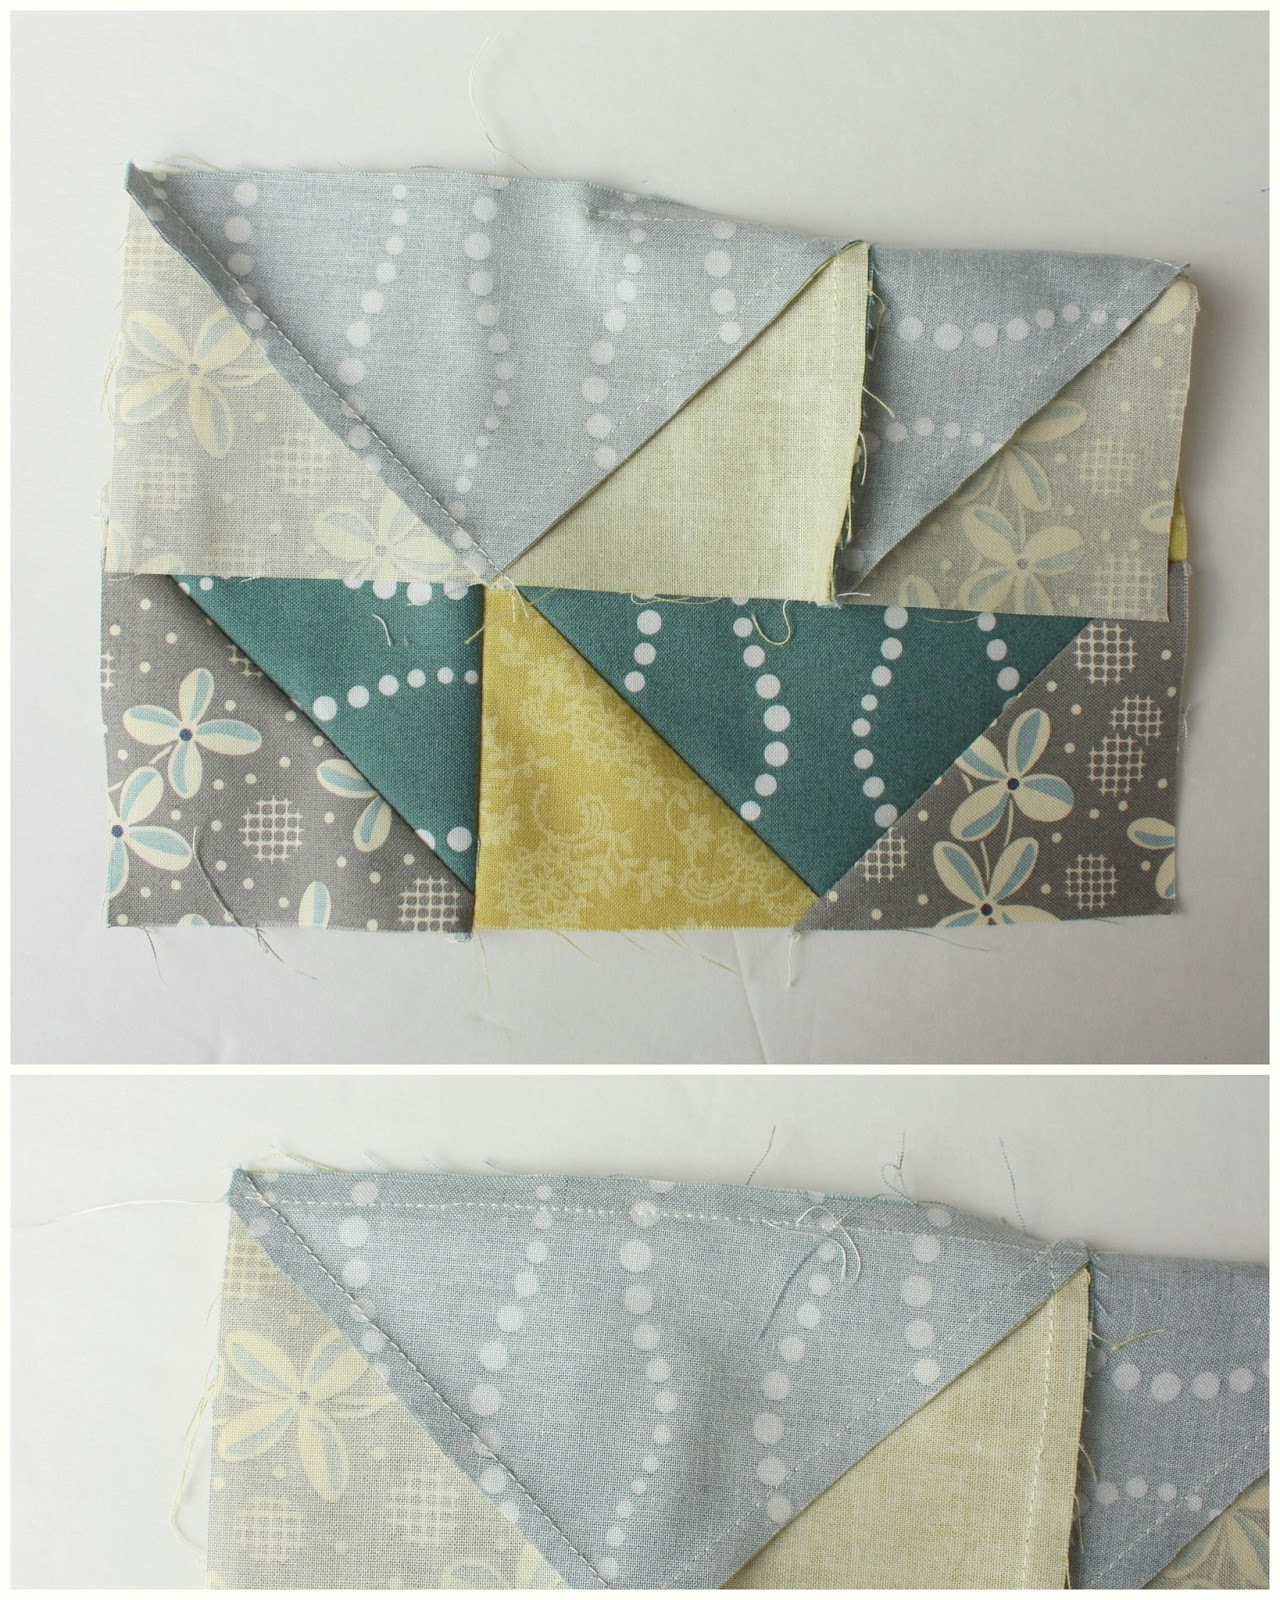
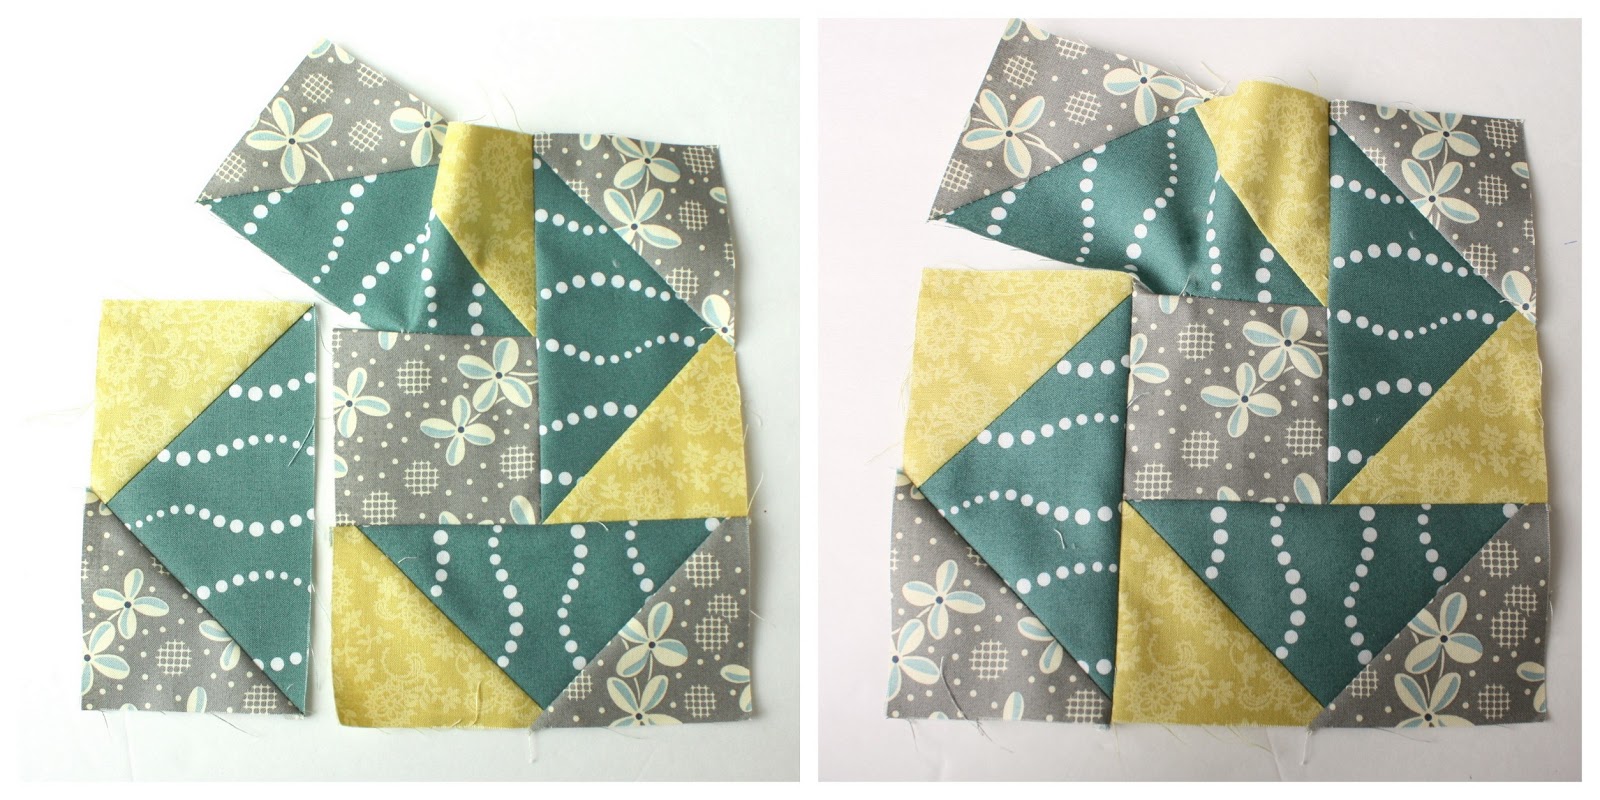
Now we are ready to finish of the final side. Fold down the original flying-geese block, matching up edges and finish sewing the partially-sewn seam.

Fold back up, press seam toward the flying-geese unit and voila: you did it!
 See?! Easy peasy! Now you can impress your friends with your Partial Seams Quilt Block know-how.
For another fun and simple partial seams project, check out this cute fussy-cut mini Seaside quilt tutorial by Amanda Neiderhauser.
Katy Cameron
Your version looks great :o) Hope you had fun at Market when you weren't stressing about this!
Linda
THANKS YOU'RE THE BEST!<br /><br />msstitcher1948@yahoo.com
Nancy, Near Philadelphia
"LIKE!"
Andrea
Your version is simply perfect! So easy to understand...can't wait to try it! I also love, love, love the colors of your block. hope things are getting back onto an even keel this week.
Cynthia
Your tutorial is great, I've never tried that technique before.
francis
Bellissimo il tuo tutorial!! una pistrella veramente interessante diversa da altre! Grazie!
prsd4tim2
Thanks! You make it look so easy!
Kathy
Much easier!
Lynn
Oh! Thanks! This helped bc I am such a visual learner and a newbie at sewing!
Jennifer
Thank you! I am going to make a new one right now!
Clairequilty
Thanks. Instruction just as valid as when shared 2013.
Sonja M
Great idea! I am doing a memorial quilt having to make these seams right now. This is a great tutorial cuz it took my seem ripper and I a few runs at it then I forgot to do it on a couple I needs to oops 😬