
Did you know that March is National Quilting Month? It's a thing! To celebrate, I'm sharing a quick star mini quilt free pattern and quilting tips. This mini quilt has a classic Ribbon Star (or Morning Star) quilt block design, but the construction method is super simple AND will eliminate a lot of unnecessary seams, giving your patchwork a clean, graphic look. This would also work for a great 18" x 18" pillow cover.
Free Star Bright Mini Quilt Pattern
A couple of years ago I designed a this mini quilt pattern for a quilt along. Last year it was featured in Quilts and More Magazine and now I want to make it easily available to all of you, my readers here!
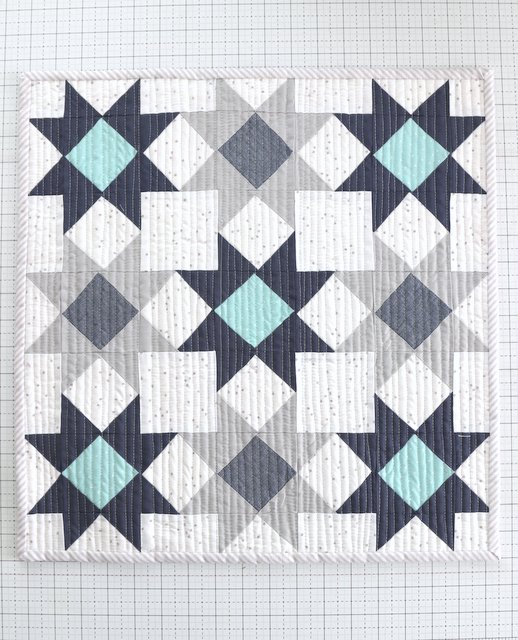
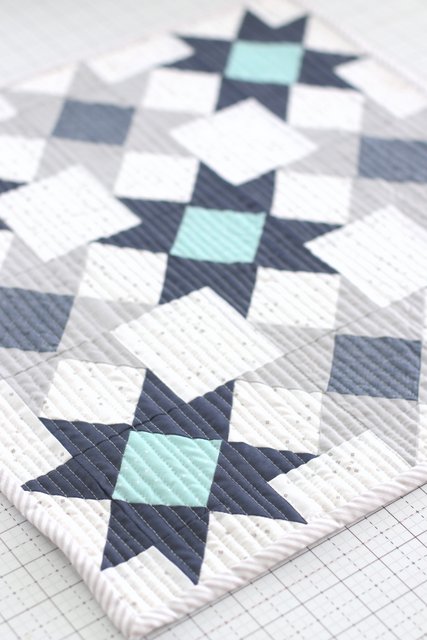
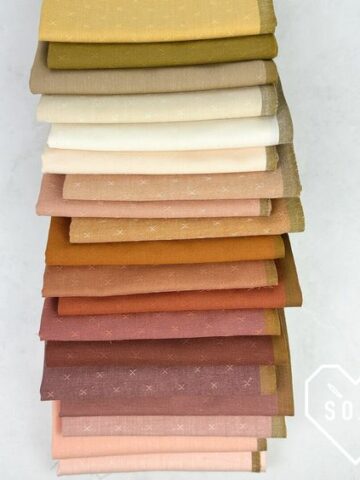
This quilt can take on a lot of different looks - from modern to traditional - based on the fabric that you choose. I've made multiple different variations of the Star Bright mini quilt including the original with navy and gray solids and a neutral blossom background:
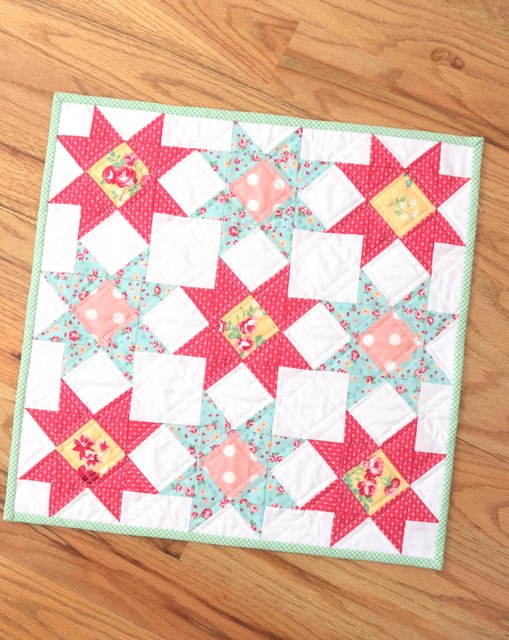
one with my Notting Hill fabric collection
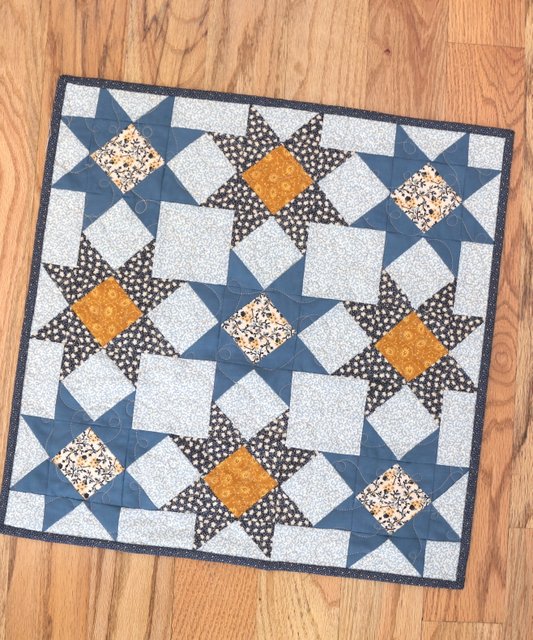
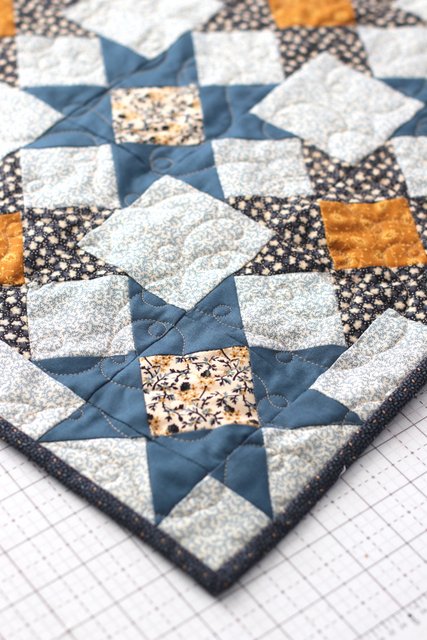
and this is the latest version made with the Riley Blake collection Buttermilk Homestead.
Isn't it amazing how different fabric styles or colors change the whole feel of a quilt? If you're looking for tips on choosing fabric for a quilt, go here.

This National Quilting Month free mini quilt pattern is sponsored by Baby Lock Sewing Machines. I have been working and sewing with Baby Lock sewing machines for many years. They have a huge range of machines for every need, skill level or budget. I've got some helpful tips on how to find the right sewing machine for you.
Download the Free Pattern Here

Quilt Block Tips and Tricks
This quilt pattern features two basic and super useful quilt blocks: the 4-in-one Flying Geese blocks and Square in a Square blocks. All of the fabric requirements and cutting instructions are in the printable quilt pattern.
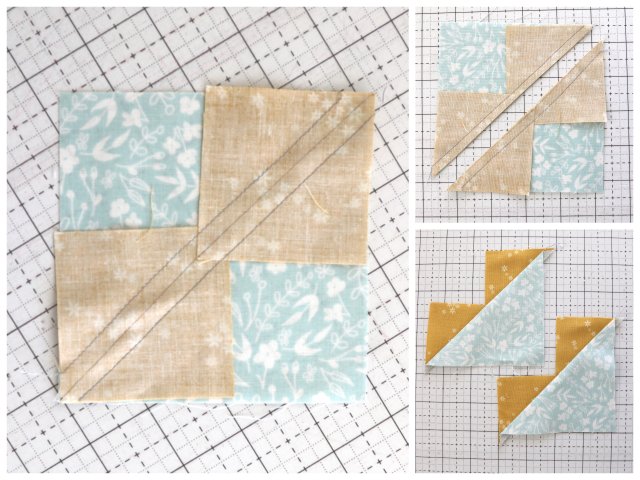
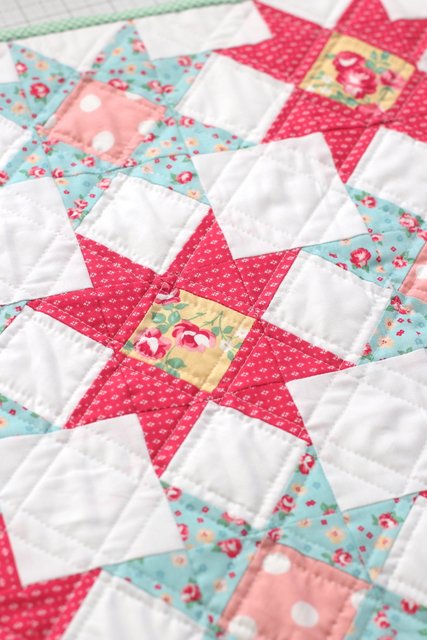
Making 4 Flying Geese blocks at once is one of my favorite quilting short cuts. Here are photos of the step by step process for the pastel quilt version above.
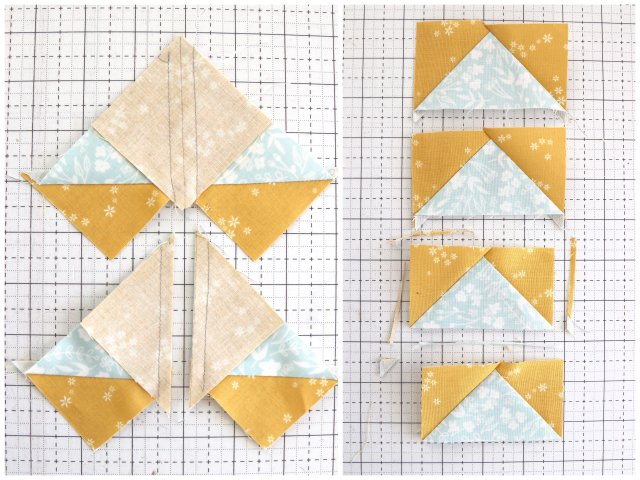
All of these steps are in the printable pattern. If you'd like more step by step photos of the process of making 4-in-one Flying Geese blocks check out this post here. There is also a printable chart for making flying geese blocks in multiple sizes.
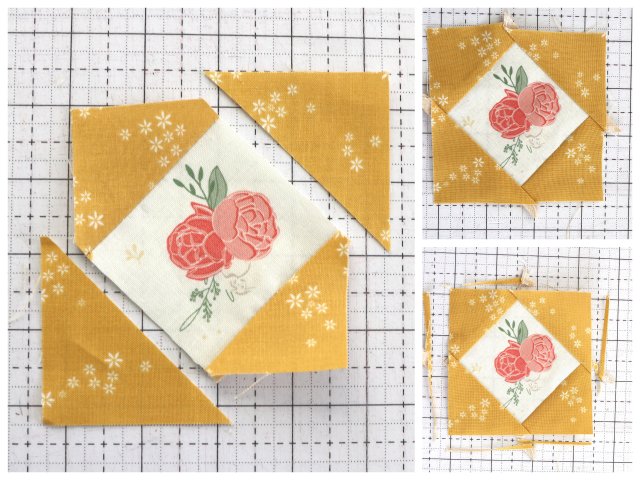
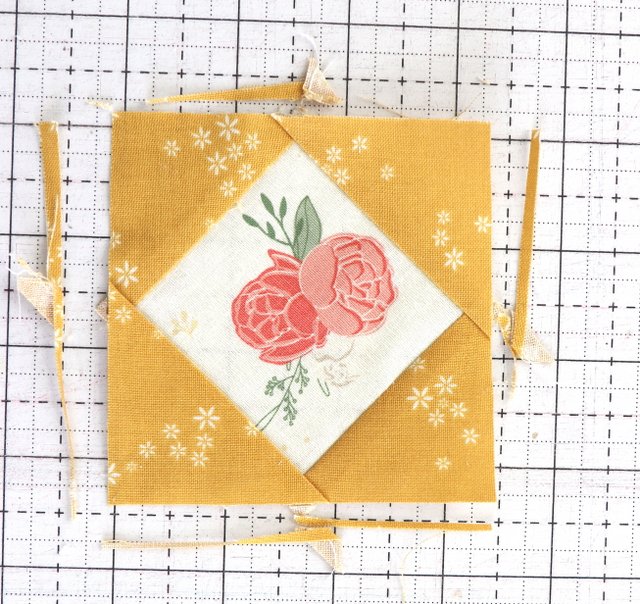
Square in a square blocks are another one of my favorite quilt blocks. Here are some helpful tips for making these versatile blocks.
Center the long edge of two of the smaller triangles on opposite sides of the center square and sew in place using a ¼″ seam. (Use an exact ¼″ seam allowance. This is one of the very rare times I don’t recommend a scant ¼″ because it can make your block slightly too big and your seam allowance width at the top of each point of the inside square could end up too small. )
Helpful tips:
to make sure the that your triangles are centered, fold the long edge in half and make a little crease with your finger nail at the center. Do the same on all four sides of the center square. Match up crease marks to easily center the triangle.
Press seams toward the outside triangles. Trim dog-ears overhanging the square.
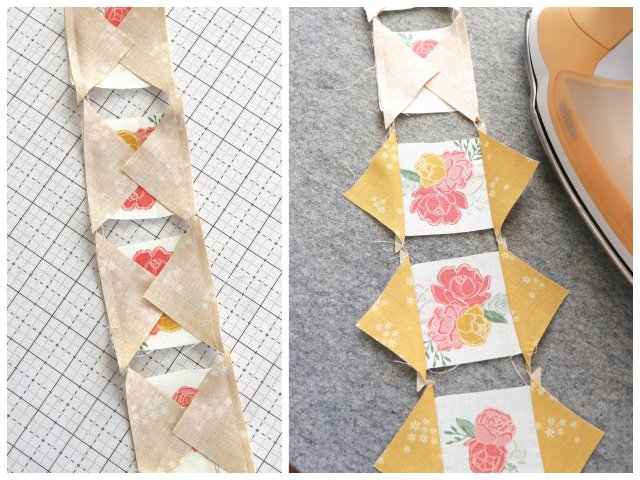
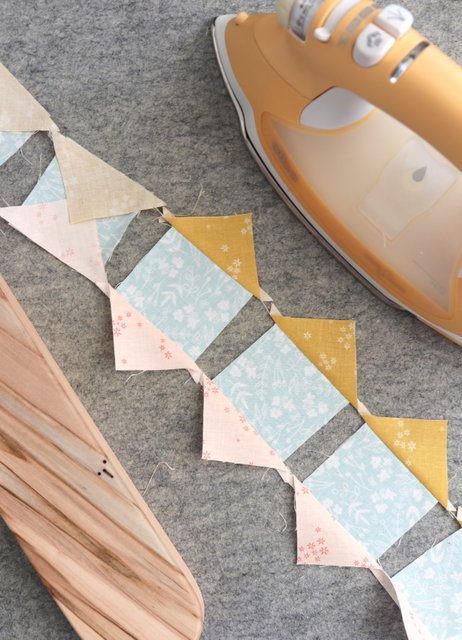
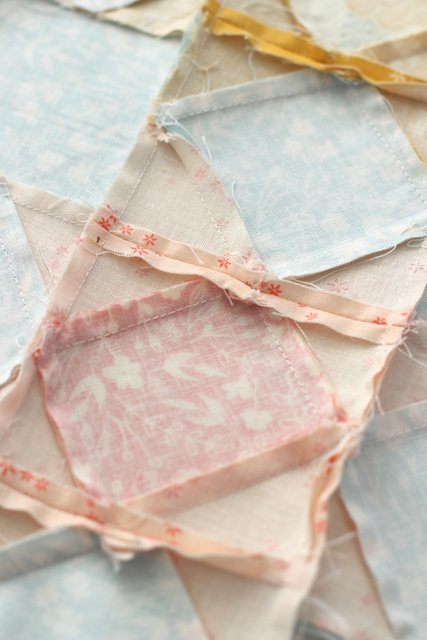
Chain Piecing is a great time-saver when you're making multiple of the same blocks. You can even press the first set of triangles open before trimming the threads and the overhanging triangle tips.
Repeat the process with the remaining 2 triangles, pressing seams toward the outside
Find the center and carefully square up the block to 3 ½" x 3 ½" by trimming equally on all four sides. (Be careful to leave a ¼″ for seam allowance at each point.)
(These square in a square blocks are the basis of a traditional Economy Block. You can find a tutorial for Economy Blocks here.)
What is "Squaring Up"?
Both the Flying Geese and Square in a Square blocks on this quilt require trimming excess fabric to 'square-up' the block to the exact size. Don't skip this step!
Squaring up the components of a quilt block may seem like an extra effort but it will make a huge difference in the accuracy of your piecing. Triangle tips will overhang the outside edges of the square.
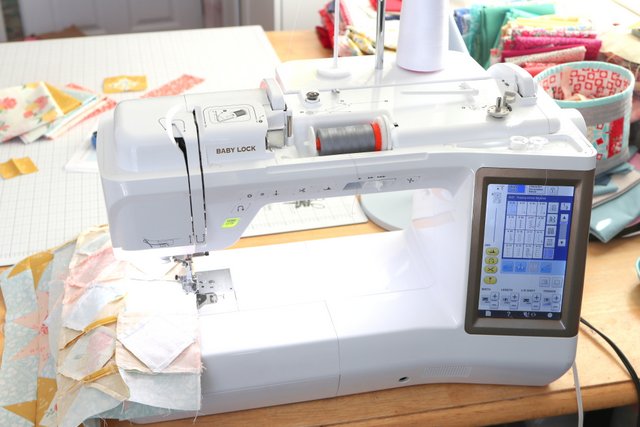
I used the Baby Lock Crescendo for piecing these blocks. This has been one of Baby Lock's top of the line sewing and quilting machines. It was recently replaced by the new and improved Baby Lock Chorus machine.
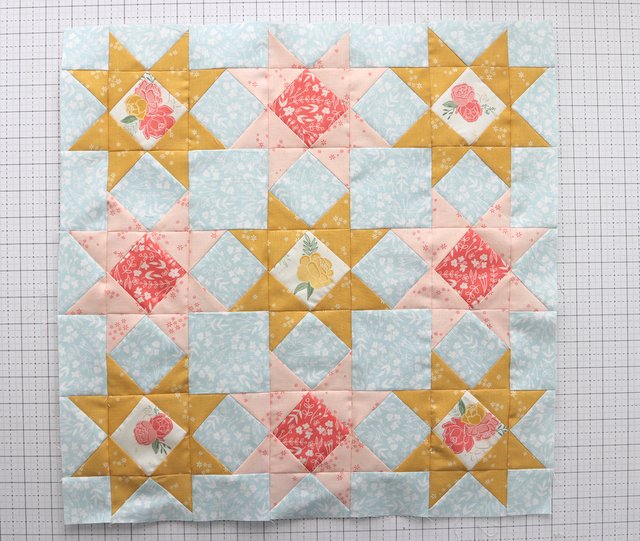
After all of your components (flying geese and square in a square blocks) are pieced, follow the layout in the pattern to sew them together.
(Fabric in this version is Daybreak by Fan Gulick.)
When sewing the blocks together, you may want to press the seams open as there is some bulk along the seams where the star points intersect. Normally I'm a press seams to the side kind of girl, but since this is a mini quilt it won't be getting as much folding wear and tear as a larger quilt and less bulk at those intersections will make it easier to quilt.
Machine Quilting and Finishing
After you mini quilt top is pieced, prepare a backing fabric that is at least 22" x 22" and create a quilt sandwich with the backing piece, right-side facing down, a piece of 20" x 20" batting, and 18" x 18" quilt top piece facing up.
Secure them together with safety pins or adhesive spray baste before you quilt the layers.
This tutorial on preparing for Machine Quilting walks through the process of how to baste your layers together and how to quilt the three layers with your sewing machine. Most important - always start in the middle of the quilt and work towards the outside edges.
There are lots of options for quilting with your home machine. Mini quilts are a GREAT project to practice machine quilting because they're small and easier to maneuver. Some options you could try:
Straight Lines - I love how they give a really modern look to the quilt.
Use the pieced shapes as a guide. Here I used the diagonal lines of the stars points and did straight line quilting ¼" away from the seams.
Mini quilts are also great for practicing free motion quilting. There are some great tutorials and tips on free motion quilting here. I quilted the Buttermilk Homestead mini quilt with the swirly embroidery design part of the Blue Tiles system from Kimberbell Designs.
Bind the quilt. Mini quilts are also great for practicing different binding techniques. You can read How to Finish (Bind) a Quilt here.
Making a Pillow
If you would like to make your quilt top into an 18" x 18" pillow, quilt the top, batting and backing (feel free to use muslin or a left over piece of scrap fabric (as it will be hidden inside the pillow). This tutorial will show you an easy method for making a back for any size pillow.
And there you go! A super fun and fast mini-quilt skill builder. Perfect for playing with fabric combinations, polishing your quilt block piecing, or experimenting with new quilting styles. If you missed the link above you can:
Download the Free Pattern Here
If downloading from DropBox gives you problems, you can download from Google Drive here.
If you make one I'd love to see it! Tag me on social media @diaryofaquilter and/or use the hashtag #StarBrightMiniQuilt
Big thanks again to Baby Lock Sewing Machines for sponsoring this free pattern. Baby Lock has a few special promotions on new sewing and quilting machines this month.
Happy National Quilting Month!

Nancy B
Every version is lovely! Thank you for the pattern. 😊
Rosemary B
I love this pattern!! thank you so much for sharing this.
Your fabrics are perfect
Angela Markovich
Thank you for the patterns.
Sandra H Paschall
Love all of them. Thanks
Julie Cefalu
This is so nice of you to share this pattern. Thank you for all of the tips too!
Robby
Thank you for the cute pattern Amy. Love your tips and tricks so much.
Nanny Alse
Con tu permiso, Amy, comparto tu post en mi página. Cada modelo es más bonito que el anterior.
SandyMay
So kind of you to share this pattern with your readers. Thanks so much.
Sq_Dancer576@live.com
Thank you.
Alicia Morris
Love your designs. Can’t wait to try this one.
Janet Sinclair
I printed the Star Bright Mini Quilt pattern from the link but it doesn't have the word "updated" after it as the link suggests? I hope I have the updated version.
Amy
Yes - the updated version is the one in the link. Thanks for the reminder - I'll remove that obsolete warning.
Paula
Generous as always, thank you for the sweet pattern!
devonnatabor
Thank you for the adorable mini quilt. I love quilts with Stars because they always strike me as fresh and "bright"! Makes sense, right! Hope you are having a super good day! Also thank you
for the refresher of the Castle Beach quilt pattern. Have the pattern, fabrics, just finishing other projects before I get started! Can't wait! Devonna Tabor
Judy Ducrou
Thank you for the cute little pattern Amy, I have some Newport fabric which will be great for summer wall hanging. Judy Ducrou
Gretchen
Thank you for the free pattern, it's really cute! Here in northern Indiana we don't consider it 'spring' until the first of April. But I have a vivid memory of driving to a nephew's wedding in April in a snowstorm! Happy stitching!