

Today I'm sharing a tutorial for a simple messenger bag, designed for the Riley Blake blog. This design was inspired by teaching my kids to sew. It's also perfect for beginners. It's an easy method for making a lined messenger bag with a cover flap.

Easy Mod Messenger Bag tutorial
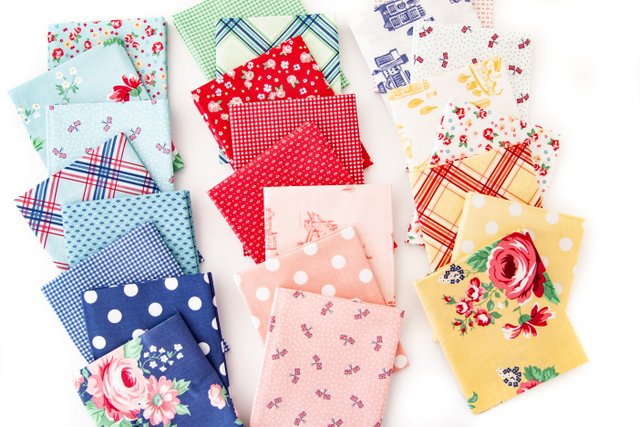
I used fabrics from one of Riley Blake's latest collections, Mod Studio by Holli Zollinger. These modern, graphic prints are really cool. The simple bags really let the fabric do the work to create a chic accessory.
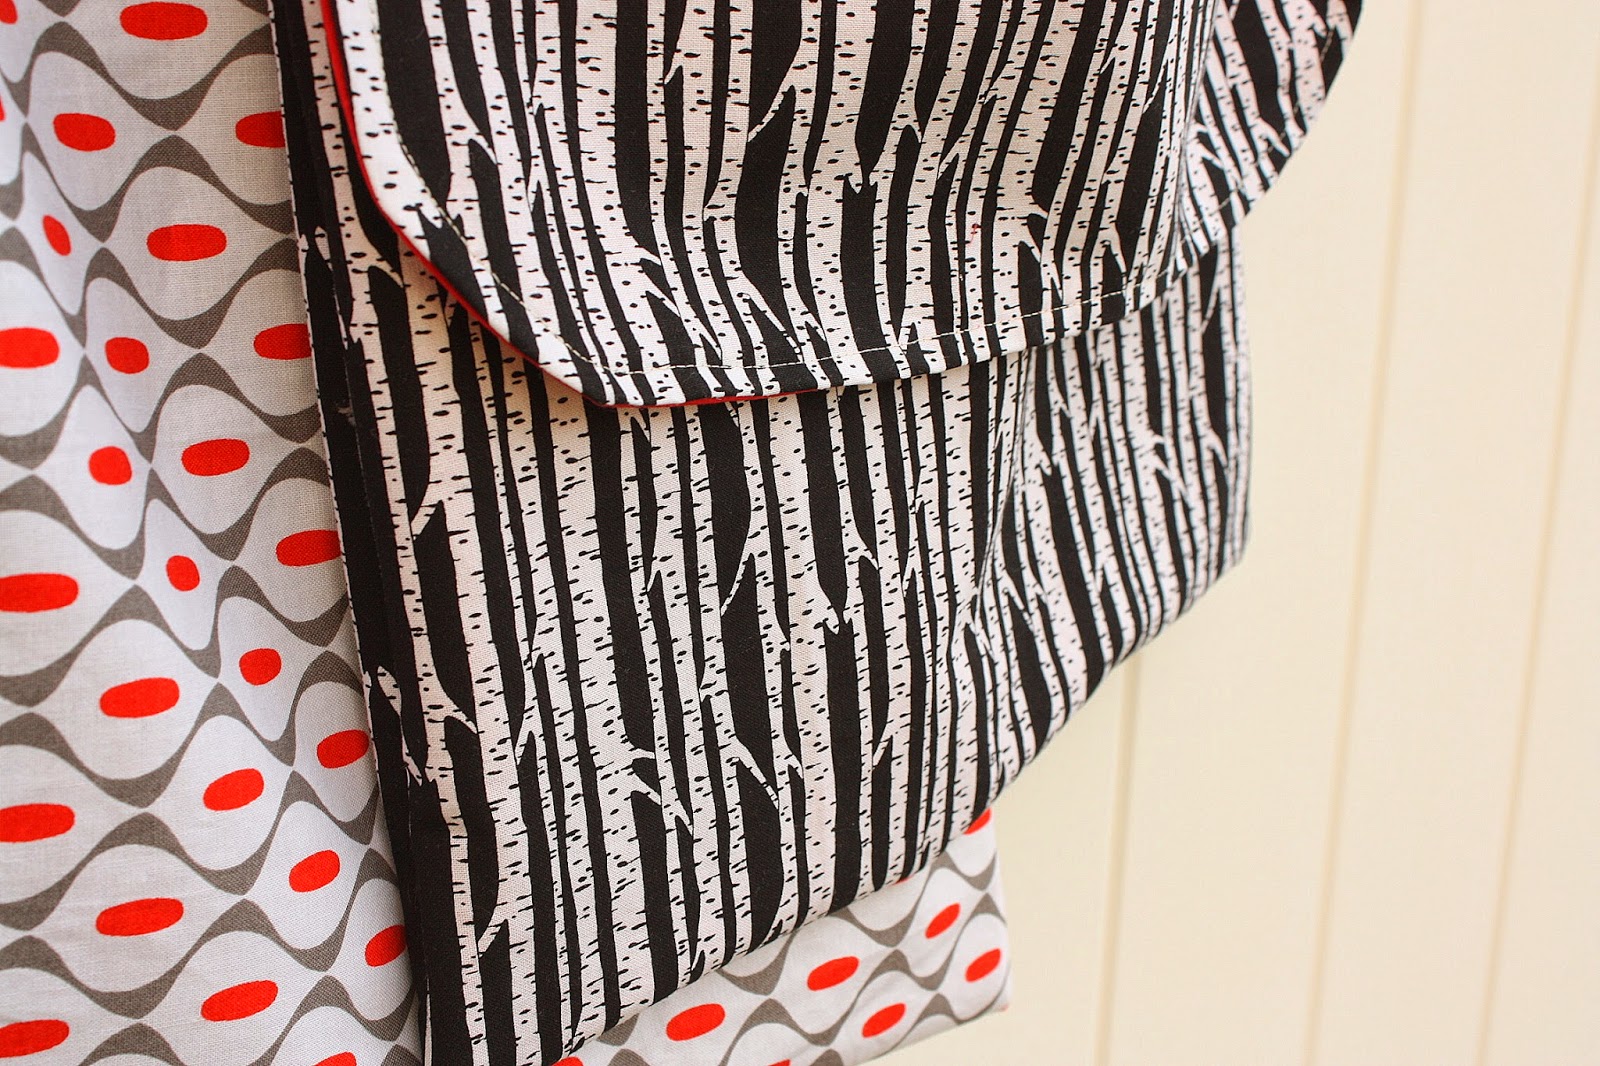
I'm especially smitten with the aspen looking "branches" print. (It also comes in red and black on white.) The other prints in the collection are really cool too, with lots of creative potential. (The black branches is available from JAQS Fabrics and Fabric.com)

Fabric Requirements:
Outside of bag: 14" x 42" print (⅝ yard - this will give you enough for the strap pieces too.)
Lining: 14" x 41" solid (or contrasting print) (½ yard)
Pocket: 9" x 20" print (¼ yard)
Strap: 2 pieces 3 ½" x 42" (or width of fabric)

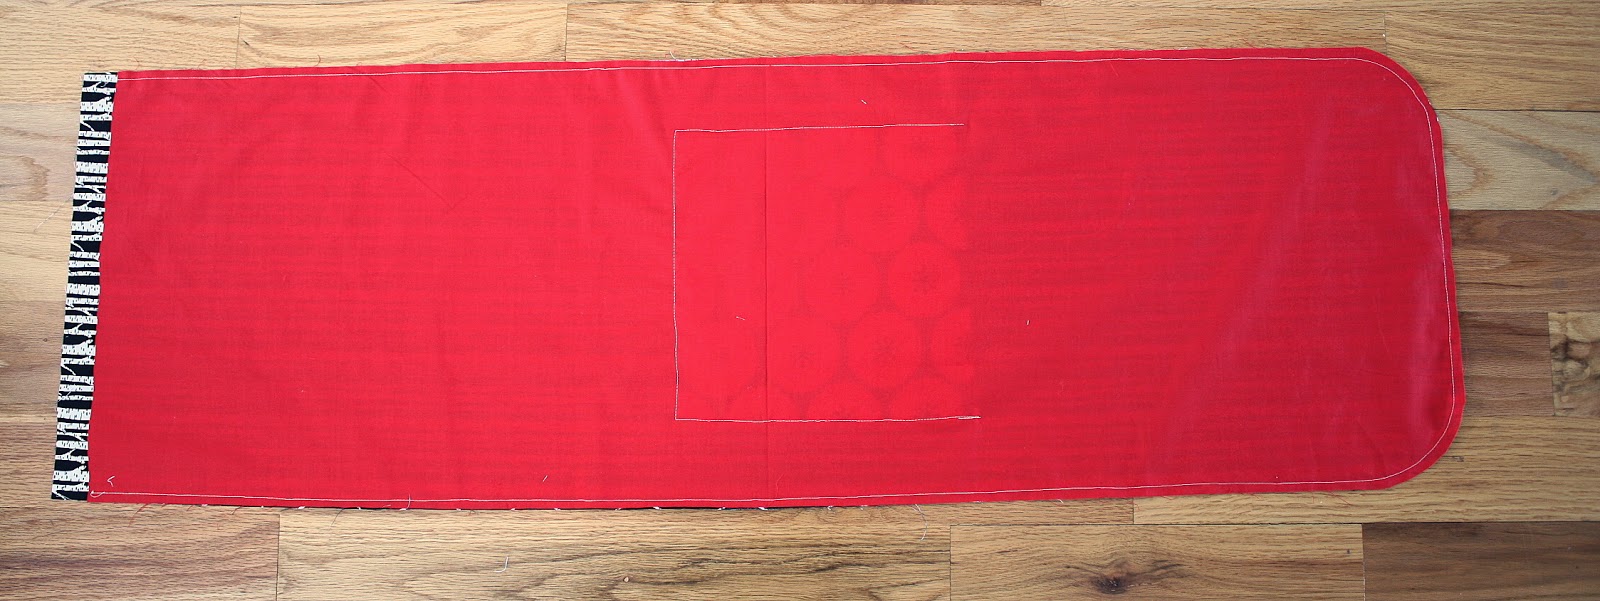
Match-up bag exterior and lining and trim off selvage edge. Trim lining width 1" shorter than exterior fabric.

Open up fabrics and match right sides together. Round-off the two corners at one end of the the exterior/lining pieces. (I used a super technical plate as my guide.)

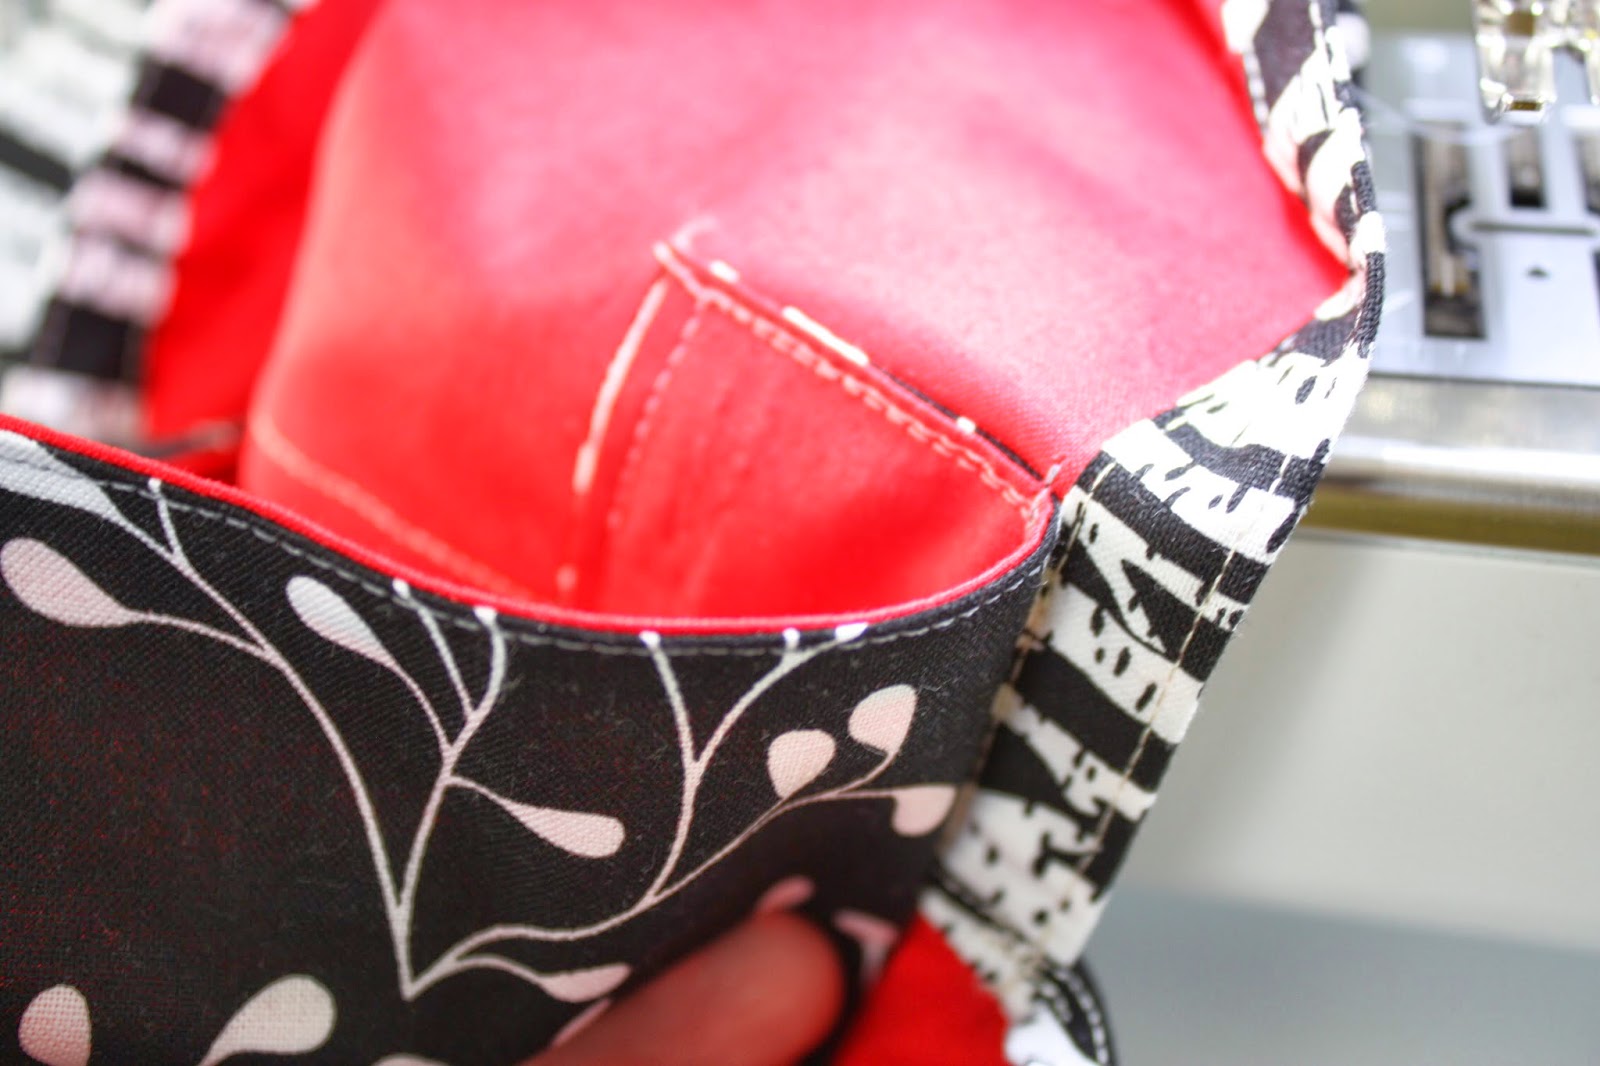
Pocket (optional): The Pocket is not required, but it is a handy feature and a fun way to show-off another cute print. Fold the rectangle in half width-wise and sew ¼" seam around three open sides, leaving an opening for turning right-sides out. Trim corners and turn right-sides-out, tuck open edges inside and press. Top-stitch along folded edge.

Center pocket and pin top-stitched edge of pocket 15" from the edge with the rounded corners. Stitch pocket in place around three remaining edges, closing opening in the process.
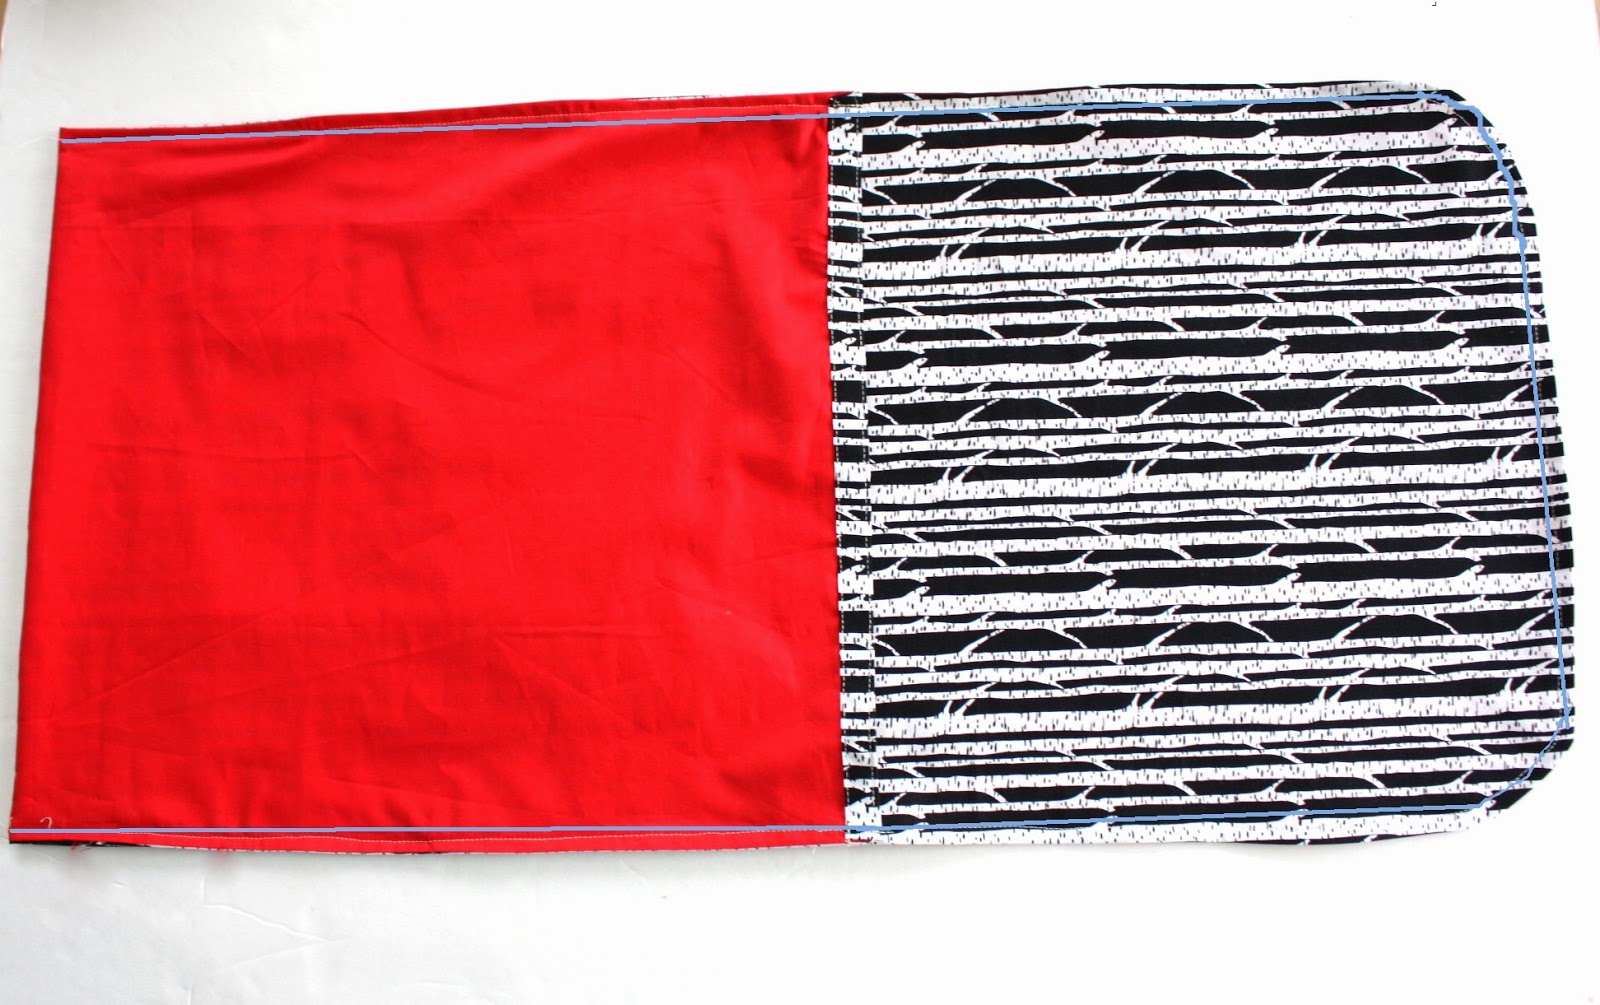
Match up lining right-sides-together with exterior fabric. Sew pieces together using a ¼" seam, starting at the end of one long side, around the rounded corners and down the other long side. Leave other short-end open for turning.

Clip notches in rounded corners before turning right-sides out.

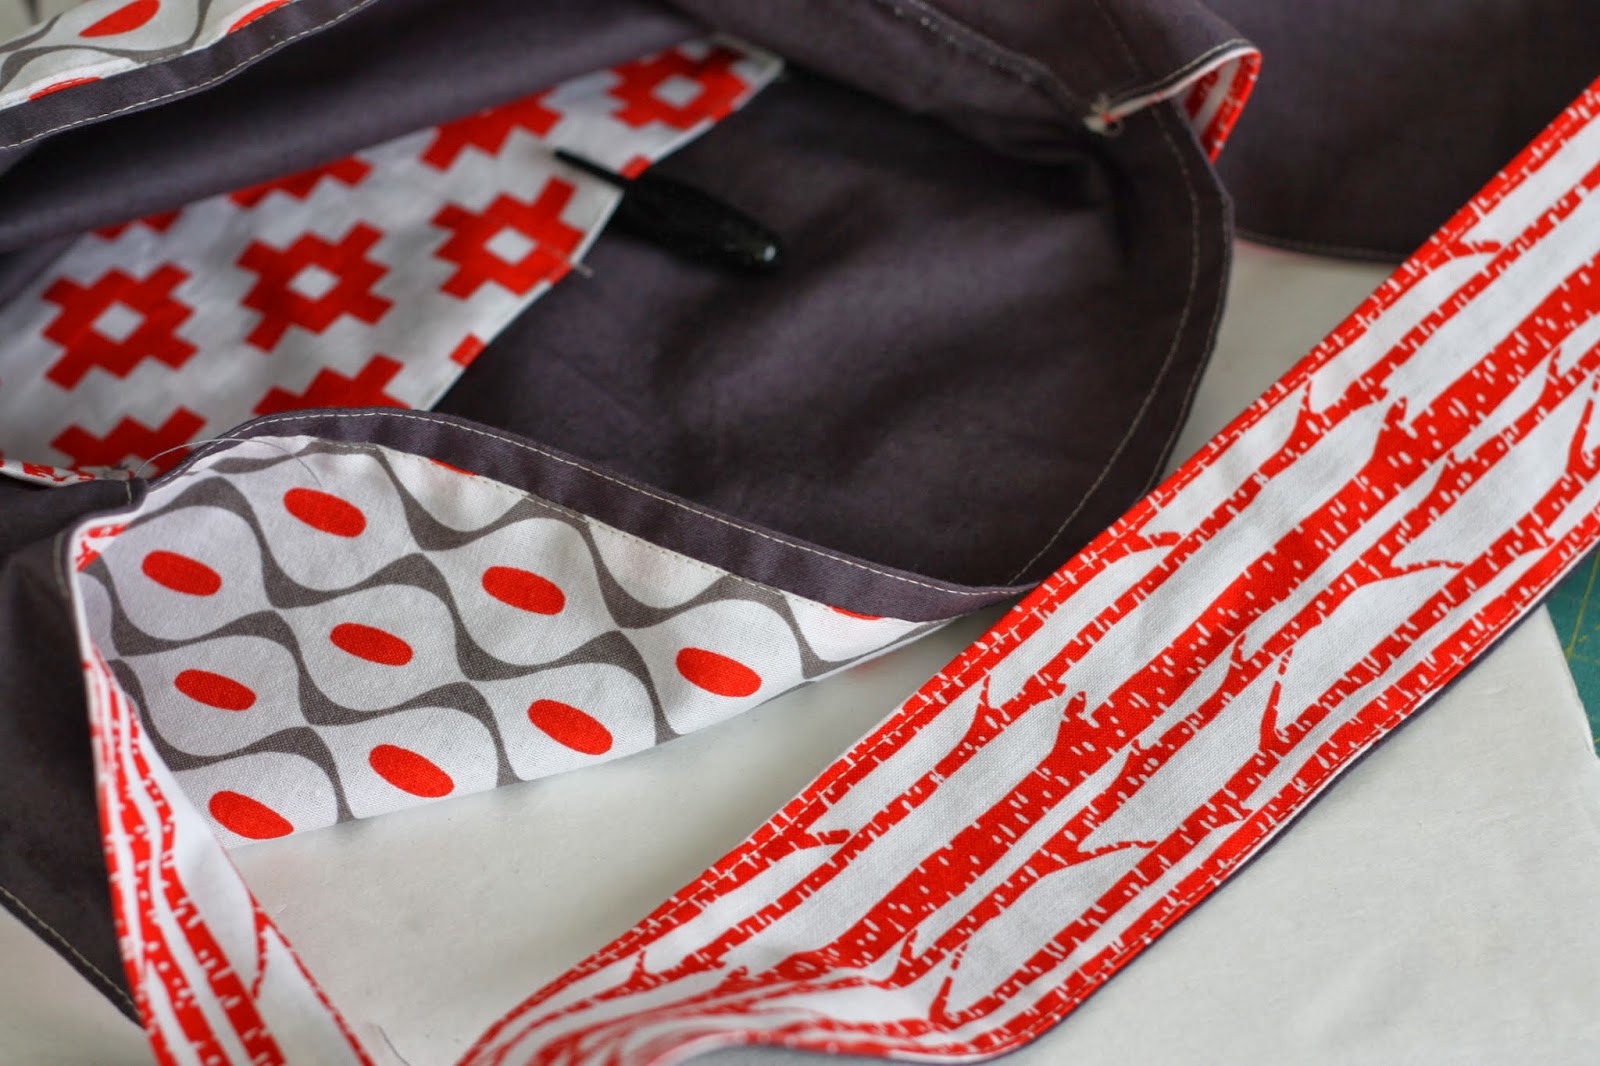
Turn bag right-sides out. To finish the open edge, fold the exterior fabric down ½" (make sure sides are tucked in to match seam allowances. Then fold again at the edge of the lining fabric. Top-stitch exterior edge in place to hold it down.
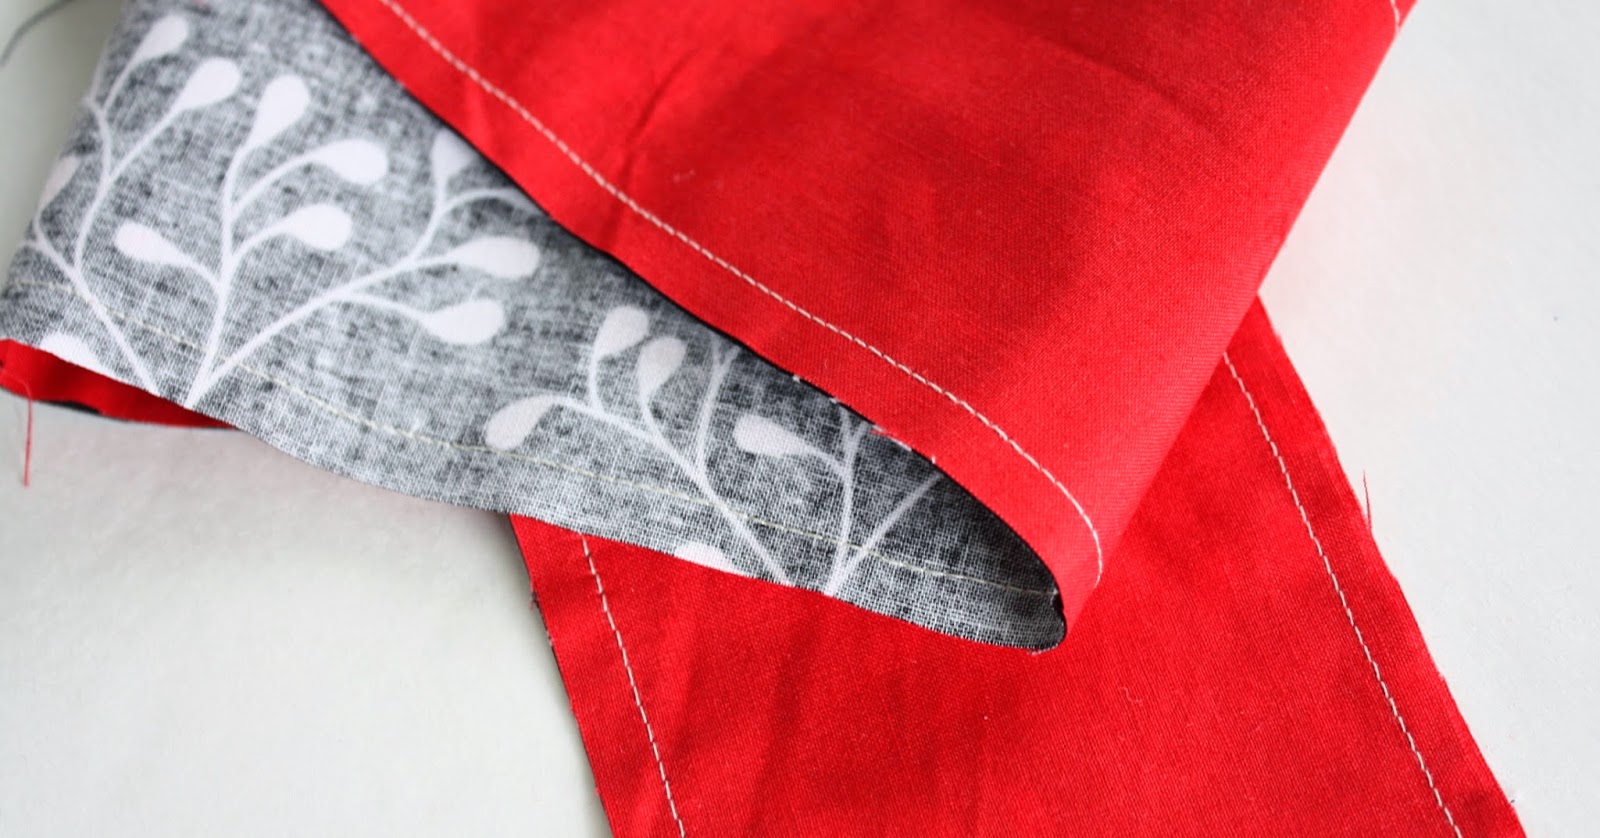
Fold bottom (non-curved) edge of the bag up on itself 15" with exterior fabric facing out. This should leave about 10" of bag that will become the front flap. Pin sides together. Using a ¼" seam, start sewing a seam on one side of the folded edge. (See blue line.)

Sew sides together and continue seam around flap with rounded edges to top-stitch together and down second side sewing other second side together and ending at the folded edge.

Turn bag right-sides out. In side seams will look like "french-seams".
Strap: Match up two 3 ½" x 42" right sides together and sew sides together using ¼" seams. Leave ends open. (The 42" length seems just right for adults, but it's very easy to shorten the strap and custom fit it to your height.)

Turn strap right-sides-out, press sides, tuck in ends and top-stitch edges.

Fold ends in half and finger-press to find center.

Use finger-pressed crease to match-up strap with inside-side seams of the bag. Pin in place about 3" down from the front edge. Sew a rectangle to secure strap in place.
I sewed mine in place below the front edge of the bag.

And that's it! A surprisingly-sturdy bag for very little effort. A great lined-bag project for someone who is just beginning to sew. And very easily customize-able. You could make the same style bag smaller by just starting with two smaller rectangles from the beginning.

If you are looking for an even easier beginner version (without the front flap) I made a second bag using my original 32-minute Messenger Bag tutorial.
Plus, it was a fun excuse to play with more of the Mod Studio prints!


Melissa Corry
This is such a cute bag Amy!! So fun!!!
Farm Gate Creations
Wonderful!
Darcy
Love this :-)<br />
Rosa
Pretty nice!
Rebecca Greco
Those fabrics are gorgeous! I absolutely love the pixel-y orange pattern. Those bright oranges are so perfect as a bright pop!
MaterialGirlQuilts
This is great and will be perfect for my son to carry his music books back and forth to piano lessons 🙂 Thanks for the tutorial!<br />Amanda
Lin Marsh
They both look like great bag patterns. Thanks.<br />linsquilts.blogspot.com
Becky
Wow, thanks for sharing! I will be downloading that tutorial for sure. I love your fabric choices for these.
aislinnleondale
i wish to say that this post is really good. i would like to peer extra posts like this. <br /><br />www.n8fan.net
Carla
Thanks for the tutorial. Love the bag!<br />
Grace Tee
Elegant design!..
Liz Baldwin
Great tutorial, thank you. Quick to make after following your instructions and easy after the first one to change the size and add embellishments. A great start for someone like me who has only ever really made cushions and curtains. :)x
sk
What are the dimensions of the finished bag?
Rhonda Stalder
I am a total beginner wish you posted the material in yards needed.
Amy
Oh, great suggestion! I just updated the post with yardage requirements included. Thanks so much for pointing that out!
Violet
Hi Amy! I love easy and fun sewing projects like this! I’ve got a round-up post scheduled for today that links to your tutorial:
https://icansewthis.com/easy-sewing-projects-for-beginners/
Best wishes,
Violet
Ma
Hello,
Is there another way one could sew the straps between the main fabric and lining without having the seam show in inside the bag?
Thanks.
Amy
Yes - probably, but it would require re-working the entire bag construction. I'd search for a similar bag where the straps are already sewn between the main fabric and lining.