
I'm so excited to have Christa Watson return as a guest poster. Christa is an experienced quilter and talented teacher who really knows her stuff. Today she's sharing a tutorial for Spray Basting a quilt - which I will admit - is still one of my least favorite parts of the quilting process. But reading her tutorial has me excited to try her technique. It's one I never would have thought of. That Christa is a clever girl! And she has a free pattern to share!
Hi all! It's Christa Watson here from Christa Quilts and I'm happy to be hanging out on Amy's blog today. A quick note about me: I love empowering others to find joy in quilting their own quilts. To help educate as many people as possible, I've written 3 books on the subject, have filmed two Craftsy classes, and I travel the country meeting up with fun folks to share my methods in person.
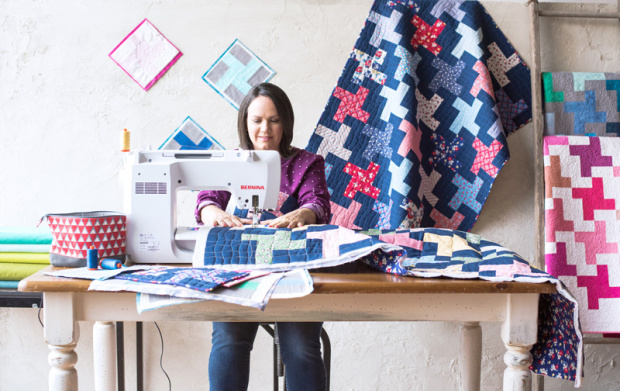
I love quilting my own quilts and I enjoy teaching others to love it, too!
The biggest trouble spot my students run into is basting, so I'm here to share the process I use - spray basting on my design wall. Please note that although I do this on a large flat wall (so I can get super close to the quilt), you can apply the same techniques on your dining room table, even if it's not very big. Just focus on one area at a time until it's done.
I'll be demonstrating how to baste my Modern Puzzle quilt, made from my Modern Marks fabric collection. Click here to get the free PDF pattern to make one for yourself!
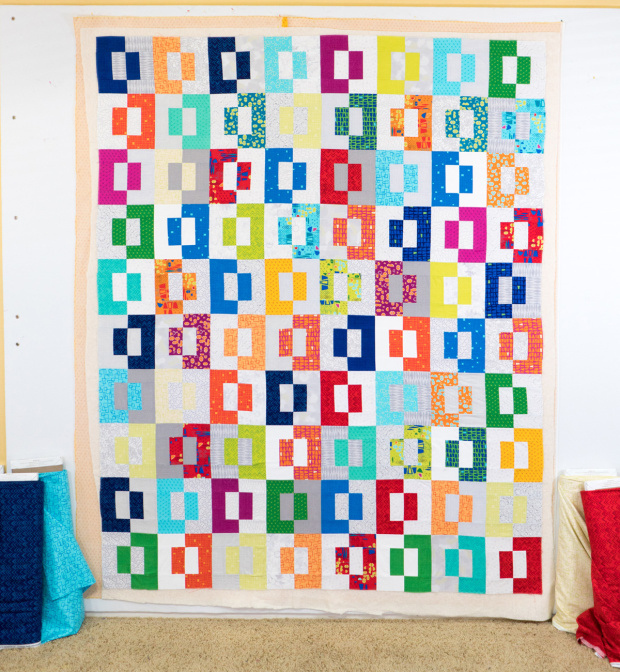
Wall basting is my favorite way to baste! I can get up close to make it smooth and flat.
Wall Basting Tutorial
Ensure that all 3 layers of your quilt (top, batting, and backing) are nice and flat. The batting and backing should be a few inches larger than the quilt top on all sides.
Give the top and backing a final press and clip any stray threads. Relax the wrinkles in your batting by throwing it in a dryer with a wet towel for a few minutes, unrolling it from the package to "rest" for a few days, or pressing the batting with a hot dry iron. (For delicate batting, use a piece of fabric to cover it while you press.)
Step 1 - Apply Adhesive to Backing and Quilt Top separately
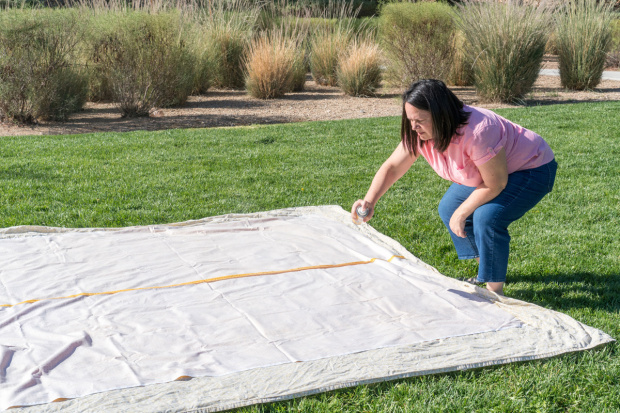
Lay a sheet on the ground to protect your quilt and catch any over-spray. Outdoors is best so that the fumes can dissipate, but you can do it inside in a well ventilated room while wearing a dust mask. Be sure to shake the can and spray a few squirts on the sheet to ensure the nozzle is clean and the spray comes out evenly before you start.
Lay out the quilt backing wrong side up and apply a thin coat of 505 spray adhesive evenly across the surface of the quilt. Walk around the quilt backing as needed to reach all areas.
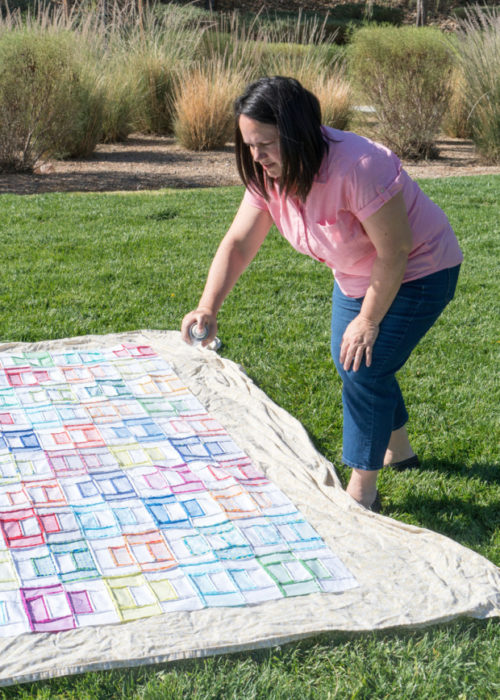
Spray the adhesive on one section of the backing at a time. Use seam lines in the piecing to help keep track of where you've sprayed since it's hard to see the adhesive on the fabric.
Repeat the process for the quilt top, using the design of the quilt to help you keep track of which areas you've already covered. Don't worry if the quilt top and backing have some give or are a bit wrinkly from movement. You will smooth it all out later.

Be sure to lay out the quilt top wrong side up while applying basting spray.
Hint: it's easier to keep track of where you've sprayed if you cover one-two rows at a time, moving methodically over the quilt top.
Try to keep the can spraying out consistently so you don't get any adhesive buildup.
Once the backing and quilt top are sprayed, fold them up and bring indoors to assemble the layers on a design wall. It doesn't matter if you fold them right sides in or out. They will be sticky, but not stuck and you can easily unfold and the layers and peel them apart. You don't need to baste right away, but I wouldn't wait more than a few days to prevent the spray from drying out.

It's okay if the layers are a wadded-up mess. You'll straighten them out next!
Step 2 - Assemble The Layers Indoors
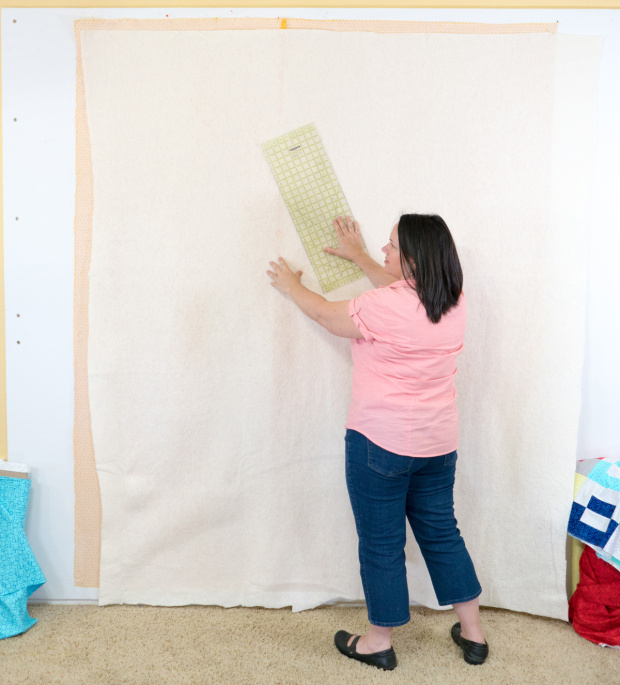
Pin the quilt backing wrong side up to the top of the design wall (mine is made from foam insulation board covered with a white flannel sheet). Let gravity pull the weight of the fabric down. Gently un-stick any of the fabric sticking to itself and spend some time smoothing it all out with your hands or an acrylic ruler.

For shorties like me, use a chair or step ladder to reach the top of the design wall.
Your hands will get a bit sticky, but the residue easily washes off with soap and water. Spend as much time as you need to straighten the backing so that it's nice and smooth and flat on the design wall.

The backing is nice and smooth! Any small wrinkles will get ironed out later.
Fold the batting in half vertically and stick it on one side of the backing. Notice that I didn't cut my batting perfectly straight on one edge and that's okay. As long as the batting is larger than the quilt top, it's easy to trim off any excess.

For this quilt I used Hobbs Tuscany Cotton/Wool blend batting. The cotton gives it a nice drape and the wool adds depth and dimension to the quilting without wrinkling up.
Unfold the batting and spend a good amount of time smoothing it out with your hands or a long acrylic ruler. My ruler can get a bit sticky so I have a separate one that I use just for basting. See the excess batting sticking out on the right side? I'll trim that off with batting scissors before I add the quilt top.
Spend 10-15 minutes smoothing out the batting. It's okay to re-position it if needed. The ruler acts as an arm extension to help you cover more area while you smooth it all out.
Add the quilt backing right side out in the same manner as the backing. Pin generously and let gravity pull on the weight of the quilt top to get it to hang straight. This is why it's so important for the batting and backing to be larger than the quilt top. Then you don't have to make sure it's lined up perfectly in the middle - you'll have a bit of "wiggle room" to maneuver.

The excess batting and backing will get trimmed away later.
Spend a lot of time smoothing out the top layer once it's on the wall. Use the acrylic ruler to help you work out any bubbles and ensure that the seam lines are nice and straight. Once your basted quilt is flat, smooth and straight, machine quilting it will be a breeze!
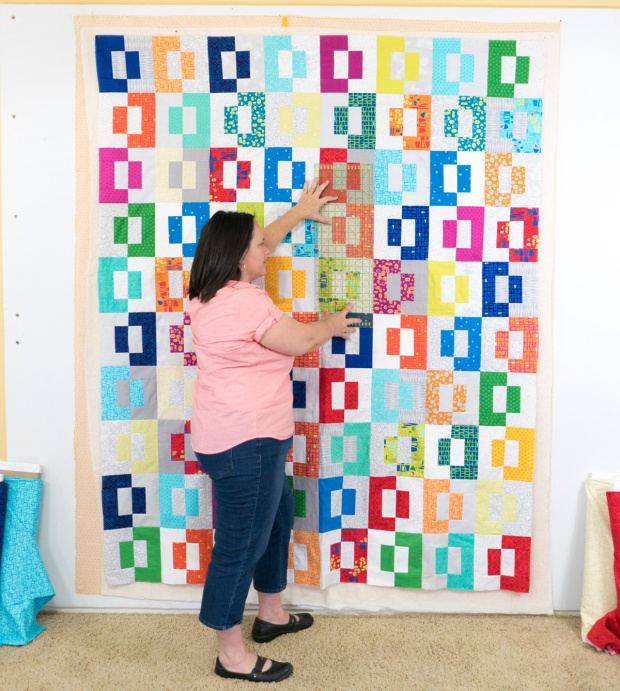
Taking time to smooth each layer will make it much easier to machine quilt!
Step 3 - Iron the Basted Quilt
Here's where the magic happens! Once the quilt is basted, I take it to the ironing board and press both sides of the quilt. This does two things: (1) it's a final chance to press out any wrinkles and work out any fullness in the quilt. (2) It sets the glue and ensures that all 3 layers will stay together without shifting, eliminating the need to add any pins. You can still pull apart the layers if needed, but this process will ensure that every inch of the quilt is sticking to every other inch of the quilt.
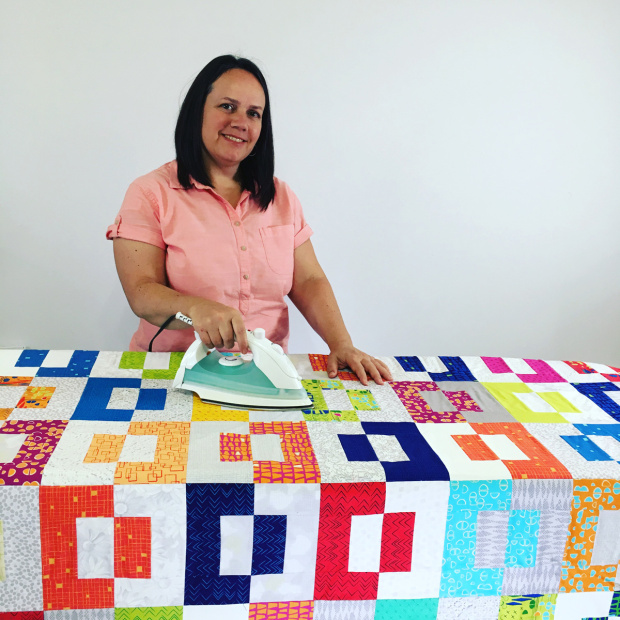
I use a "big board" which sits on top of my regular ironing board and gives me more room!
Once I switched to spray basting, I virtually eliminated any pleats and puckers on my quilt. Because there's a lot of "scrunching and smooshing" going on while quilting, your basted quilt needs to be able to handle a lot of wear and tear while pushing it under the machine. It takes the same amount of time to baste a quilt with spray or pins, but you'll save a huge amount of time by not having to stop and remove pins. Give spray basting a try and let me know how you like it!
I quilted Modern Puzzle using walking foot wavy lines, a technique I teach in my book, Piece and Quilt with Precuts.

I hope you enjoyed this tutorial. If you decide to try this method on your own quilts, please share your progress in my Christa Quilts Facebook group. I'd love to see!
Thanks Christa!
Christa also has a great post with 5 tips for Machine Quilting on your own machine. She's a whiz at it. If you ever get a chance to take a class from Christa - do it! If you're not able to take a class in person, definitely check out her Craftsy classes: The Quilter's Path about machine quilting on your own machine, including techniques for using a walking foot as well as free-motion quilting. She also has a class Start-up Basics which is basically 14 video classes about everything you need to know to make a quilt! (Both classes are 25% off with the above affiliate links. Note: discount show's after you click Add To Cart.)
*This post contains affiliate links.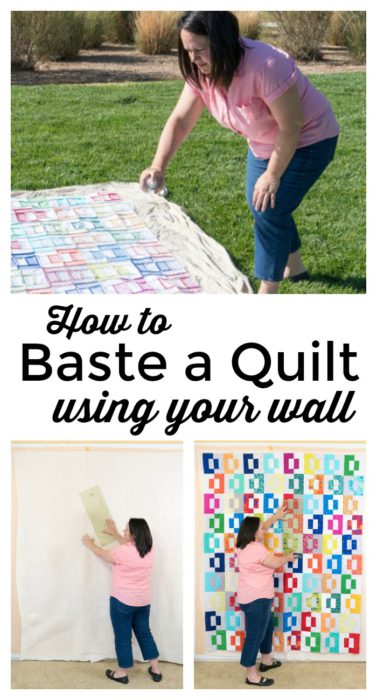


Regina Bohannon
Does the adhesive go through the batting to attach to the quilt backing?
The Joyful Quilter
What an interesting idea... and it takes a fair amount of "back-breaking" out of the chore. Easier on the knees, too!! Thanks for having Christa as a guest blogger.
Donna Weeks
Spray basting with hairspray, aerosol can, is my go to for quilt basting. I also use my design wall for the basting process. Using hairspray lets me baste indoors during any weather. There are no toxic fumes to worry about, and the hairspray is an affordable option. Using hairspray works well with all kinds of batting, but does not work well with polyester batting. I let my work stay on the design wall with a ceiling fan running for a few hours, and then take it down and begin quilting. I can always use a hot iron to make any looseness tighten up. As a quilt instructor, I encourage my students to use this process on their quilts. Faster and easier on your back.
Megen
Hairspray???????? Aqua Net?? I'm off to the store to try this
Kristy
Please don’t...aqua net is not healthy for you or the environment, and especially when heated if you iron it. I have used Sulky KK2000 and I am severely chemically sensitive. It is a bit expensive, but you can get it at hobby lobby with a 40% off coupon.
ladawndalley
does it gum up your machine at all? And do you use firm hold?
Kristy
Donna, What kind of hairspray are using? Aerosol anything is horribly toxic, even if you can’t smell it ?
Pam Arbour
When first saw your tutorial on basting I couldn't wait to try it. I feel like I have won the lottery. Thanks, Christa, and thanks to Amy for showing it again. This has to be one of my great aha moments in quilting.
Trudi
Wow! Looks like a major time saver! I am in the process of stepping into quilting...I get nervous about making a mistake! This looks like something I can do! Love your blog! I always learn something and your work is gorgeous!
Kim
I can’t wait to try this when the weather gets warmer and I can spray outside. Basting is my least favorite part of the process and I feel that stopping to remove pins breaks my flow and I get “Wobbles” in my quilting.
Kathleen
I am excited to try this! When ironing in step three, is steam used? Also, does the adhesive gum up the iron?
Gen
Do you not have to worry about the adhesive gumming up your needle and causing thread breaks?? MANY years ago I used adhesive for a different project which became a nightmare because I was having constant thread breaks. I do not remember the product used because it was probably 12 -15 years ago. I would love to hear if others tried this!
Barb
I had the same problem. My needle kept getting gummy and I would have to stop and clean it..
Jeannette
Barb, did you ever find a solution to the gummy needle problem? im in the middle of a project and am frustrated by this problem. searching for help.
Carrie Casey
I cannot thank you enough for posting this tutorial! I have been so frustrated trying to smooth out the wrinkles and pinning on bigger quilts. I just finished another quilt when I found this on Pinterest and what a difference it made! I ran and got the felt immediately and my husband and I stapled it up in the basement. I did run and pick up a smoothing brush that is used for smoothing wall paper. It $2.98 at Menards and worked like a charm at smoothing out the wrinkles on the wall. 🙂
Amy
Awesome! I'm so glad!
Wendy
Does this method work for hand quilting too? Is the spray put on the bottom fabric and again on the batting?
Paula Justen
I used basting spray and it gums up on
My needle causing skipped stitches. Washing the quilt helped some. I heard 505 doesn’t do this but havent tried it
Drcy
I have used 505 to baste t-shirt blankets, using fleece as the backing, It never gummed up my needle or machine.