
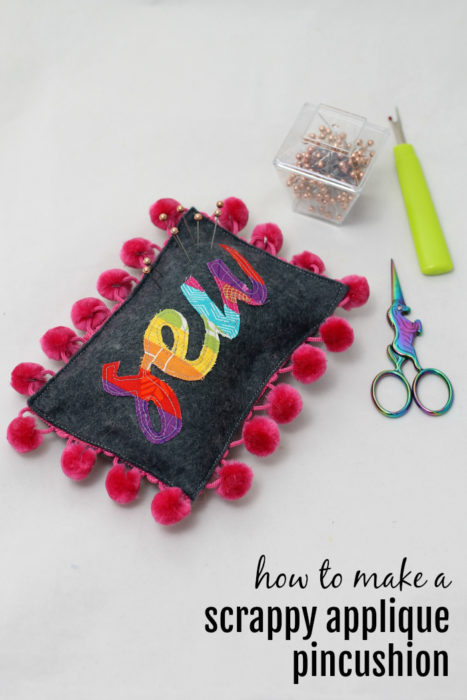
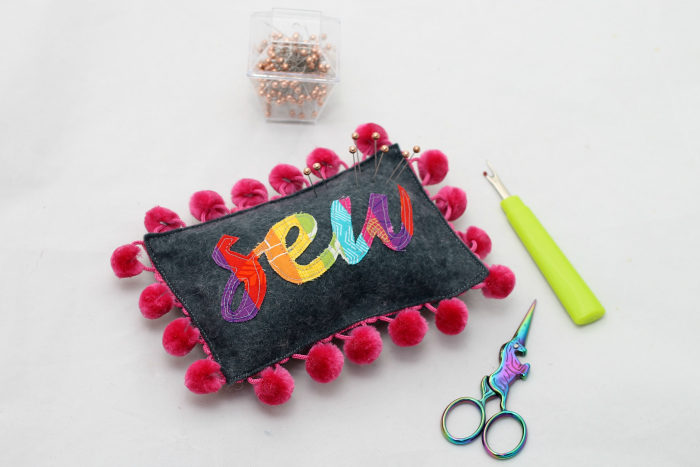
Are you feeling stuck or lacking the attention span to take on a big project? Guest blogger Stephanie of Swoodson Says has the perfect quick project for you. This scrappy pincushion tutorial will give you the satisfaction of a quick finish and get your creative juices flowing. It's perfect for pulling out your favorite scraps. And if you want to try more, she's got lots more cute pincushion ideas on her site too!
Hi! I’m Stephanie from Swoodson Says and am happy to be a guest blogger here today!
With two young kids at home, quick projects are a great pick-me-up when it feels like I have very little time to sew. Pincushions are so fun to make, I thought I’d use up some rainbow scraps and show you how to do scrappy appliques! You can use this technique with any text or shape you’d like, and put it on pillows, shirts, or a quilt.
If you’re motivated to keep scrap busting, go check out my other fabric scrap projects here or see what I did with the patchwork scraps from this project on Instagram.
Ready to make a scrappy applique pincushion?
Scrappy Pincushion Supplies
- ROYGBIV scraps of quilting cotton
- Rotary cutter
- Acrylic quilt ruler
- 1 sheet of wool blend felt
- Coordinating thread
- Quilting clips
- Iron
- ¾ yard pom pom trim
- Microtip scissors
- Heat n bond lite
- Pincushion stuffing of choice (I used poly-fill and glass beads)
- SEW text template HERE
Pincushion Assembly Steps
Step 1

Cut your scraps to 1” wide and at least 3.5” tall - you need 9 strips. Also cut two felt rectangles 4” tall X 6” wide.
Step 2
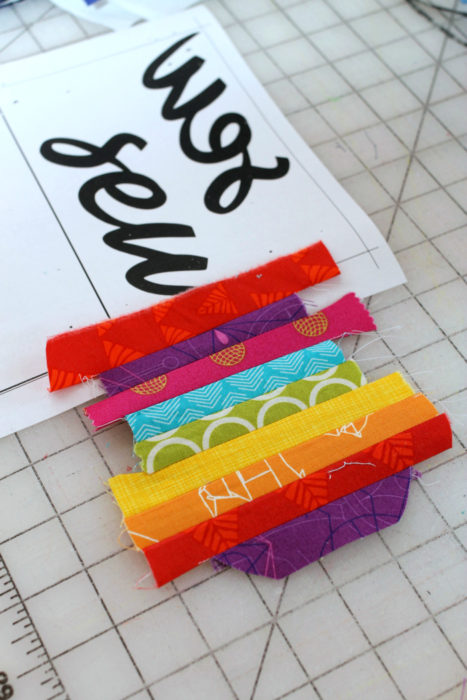
Sew all 9 strips together and press the seams open. Make sure your final patchwork is at least as tall and wide as it needs to be, just laying it over the ‘sew’ text to double check nothing is showing.
Step 3

Use your Heat N Bond and trace the reversed ‘sew’ on the smooth side. (You can find SEW text template here.) Cut roughly around the tracing.
Step 4

Follow the instructions and use the iron to press it on to the WRONG side of your patchwork, let cool.
Step 5

Carefully cut along the tracing lines, micro-tip scissors help make this easy, peel off the paper backing and adhere it, centered on one of the felt rectangles. Top stitch around the edges of the ‘sew’ applique (Get more tips on how to applique in this post).
Step 6

Sew the pompom trim on to the other felt rectangle, making a tiny fold at the corners.
Step 7

Lay the appliqued rectangle on top of the pom pom rectangle and clip the layers together, sewing around the edges and making sure to catch both top and bottom. Stop with a 2” gap and stuff (I like using a mix of tiny glass beads for weight & poly-fill), then sew to close and you’re done!

I’ll be adding this to my own blog’s list of 25 other free pin cushion patterns if you need more inspiration, they are so much fun to sew!
Thanks Stephanie! Hope you get some time in for some therapeutic sewing. Be patient with yourselves!
xo


Debra Kepler
This machine looks like the perfect machine I need to take with me placed. I currently have a Jazz 2and love it but it is big and heavy. I love Baby Lock support also. They are always there to make things right.
In The Sewing Basket
Love It!!