
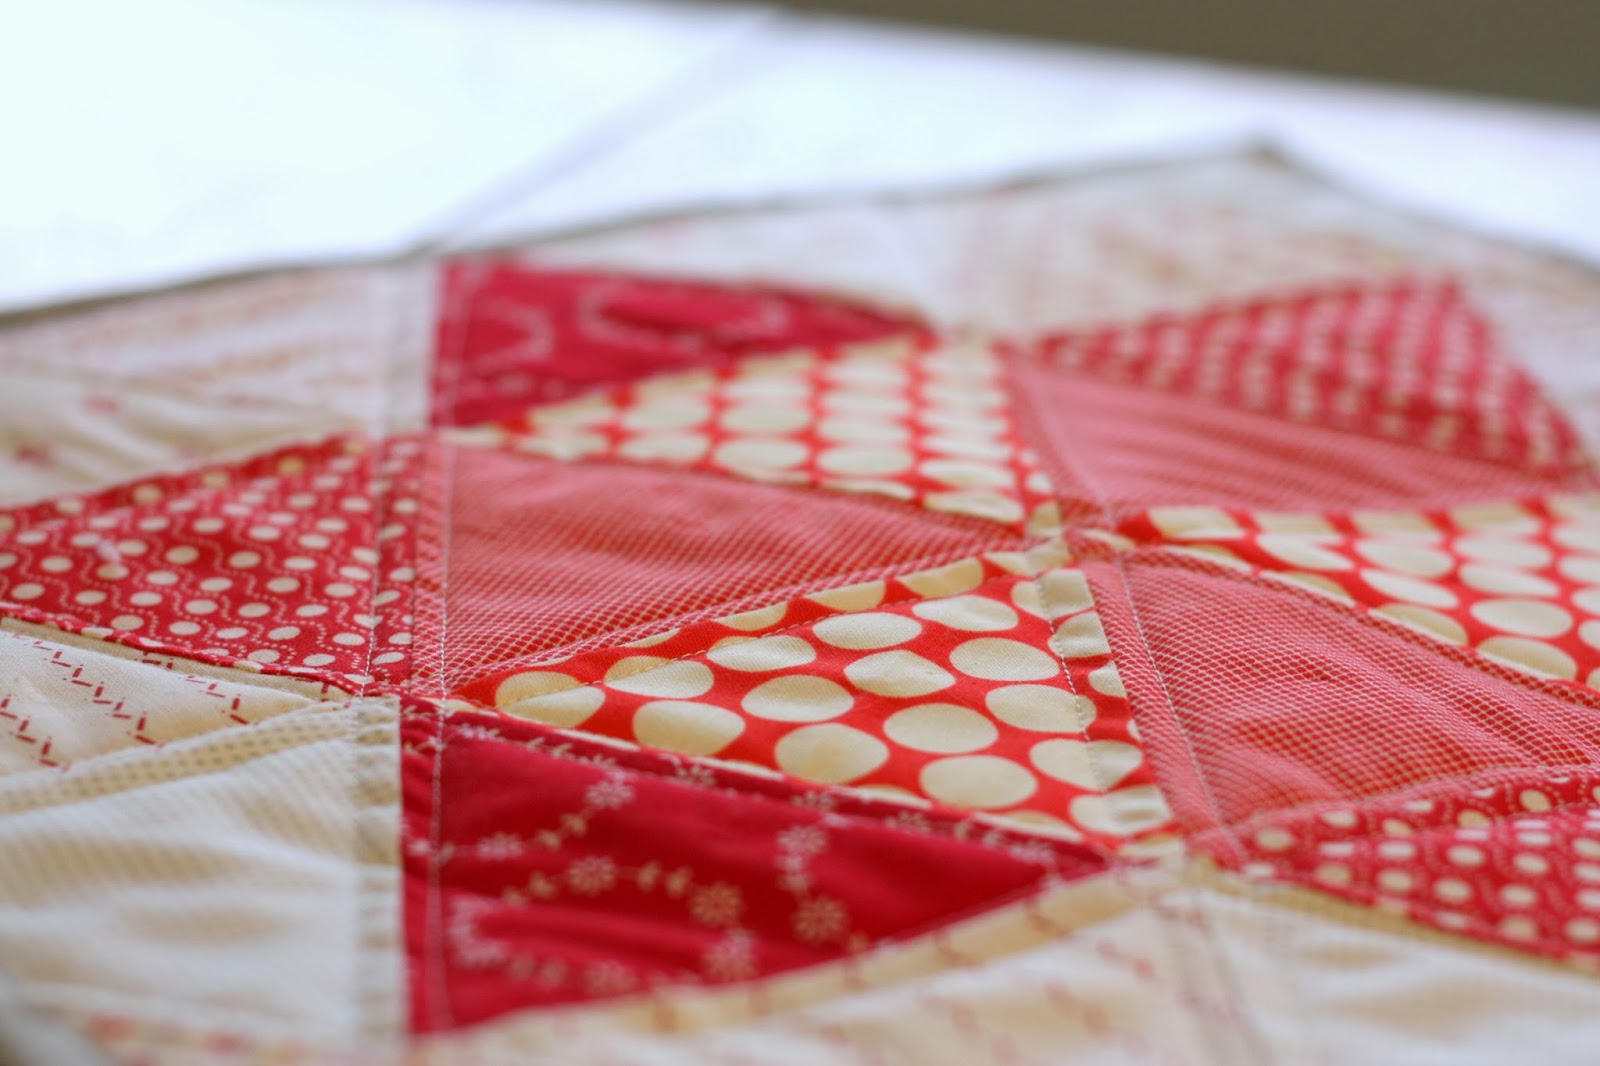
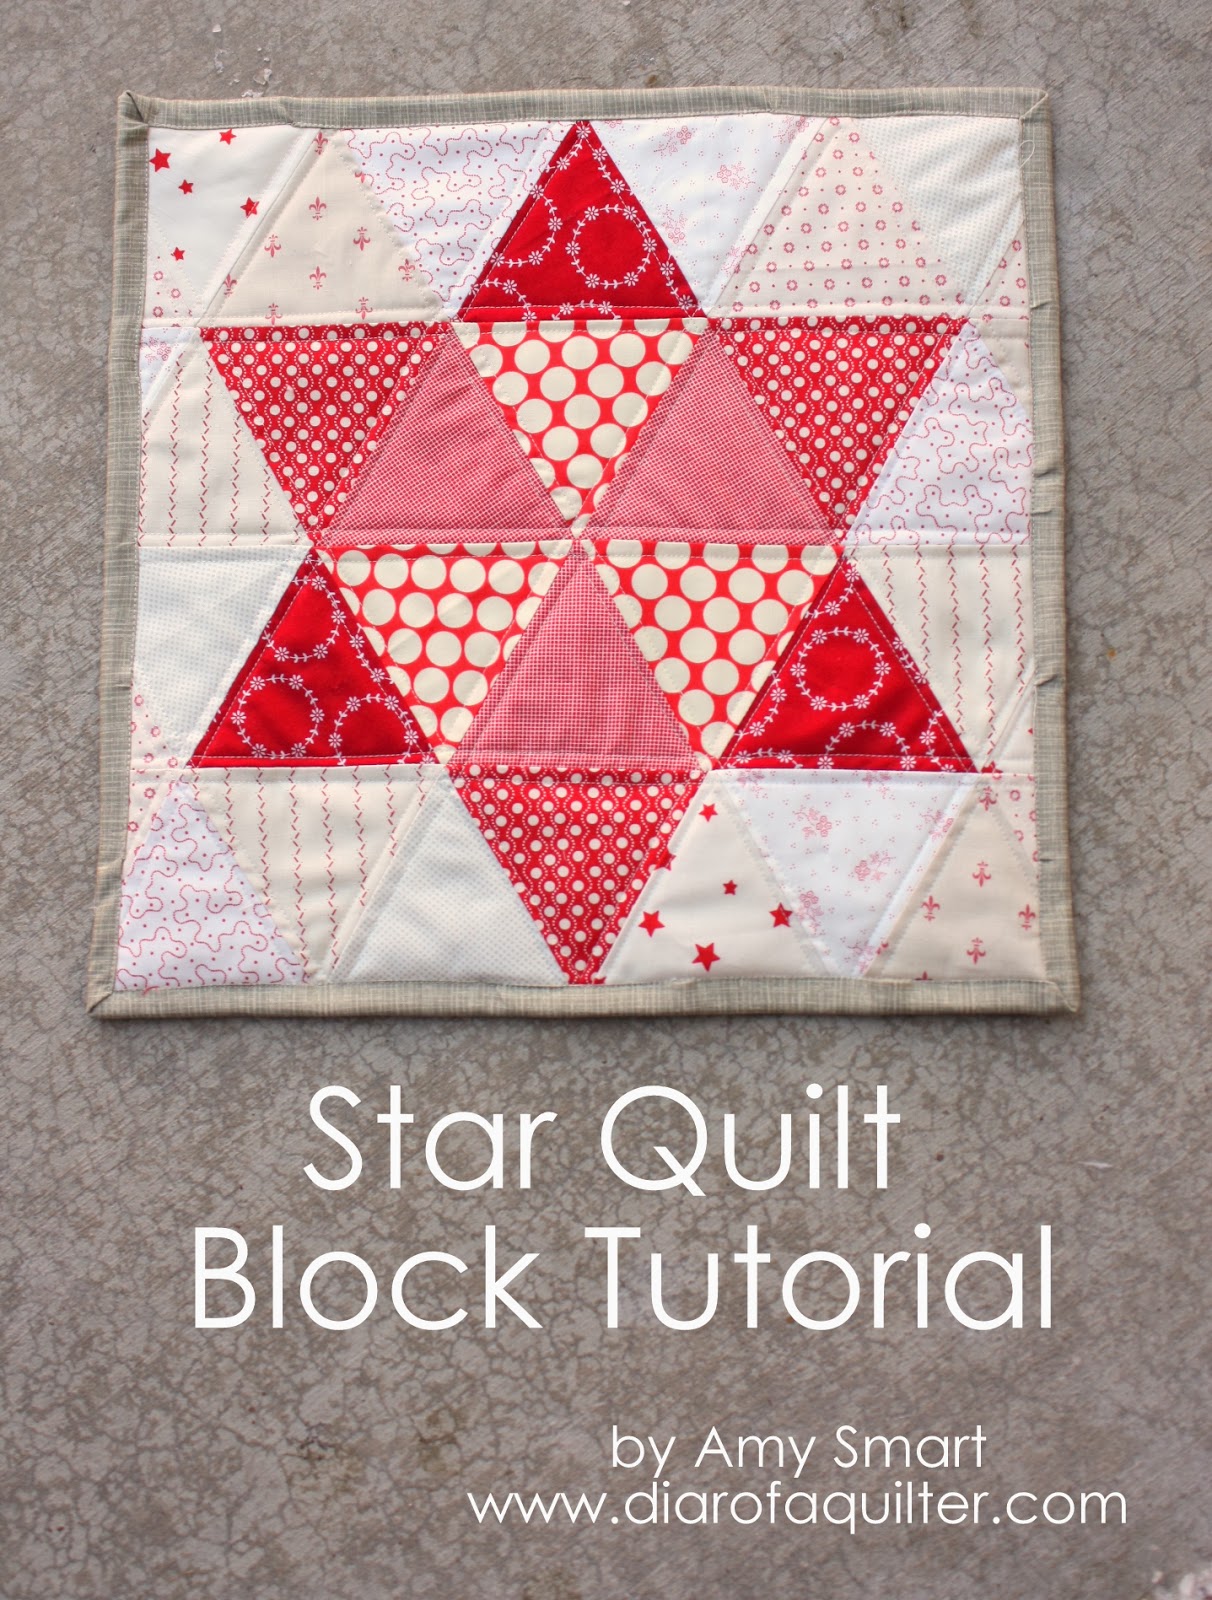
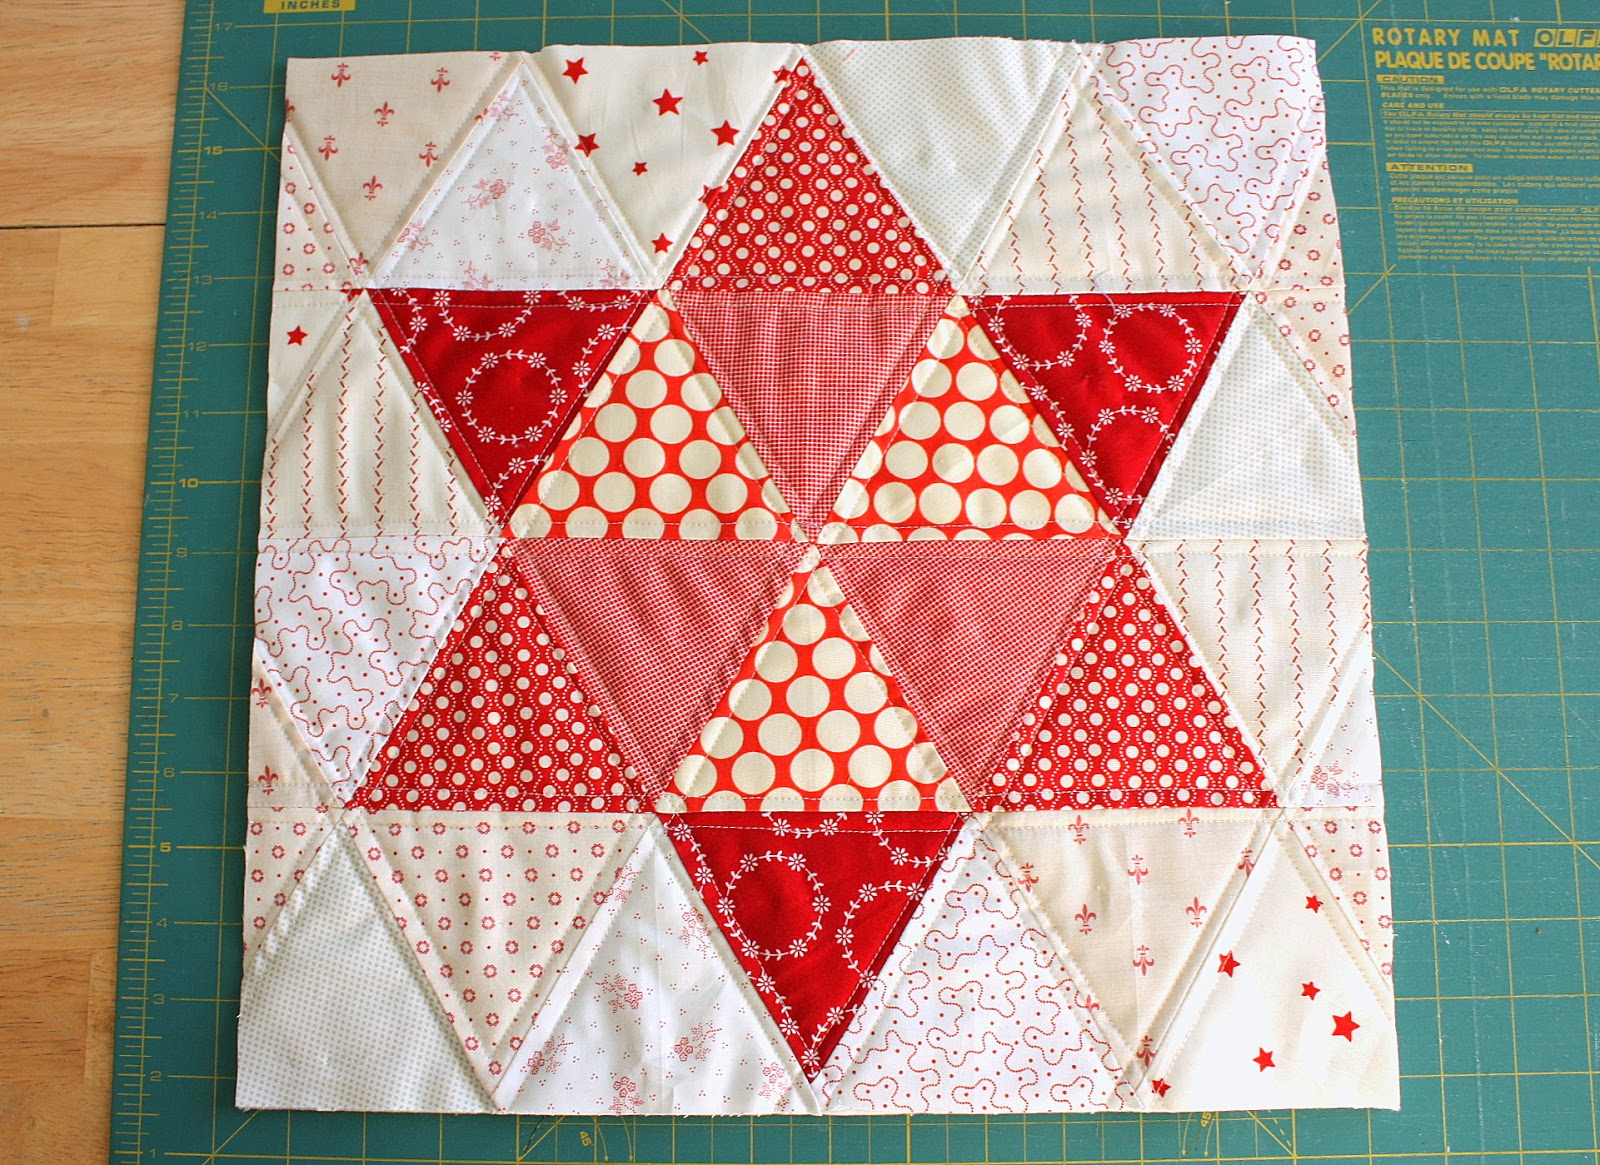
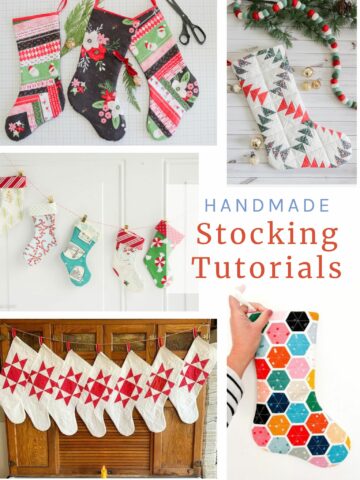
I've been playing with 60 degree - or equilateral - triangles this past week and made a fun little star quilt block.
So while I was at it, I decided to make a quick and simple tutorial to show how I did it. The equilateral triangle is a fun one to play with. The best part is that they're easy to sew together without any Y seams.
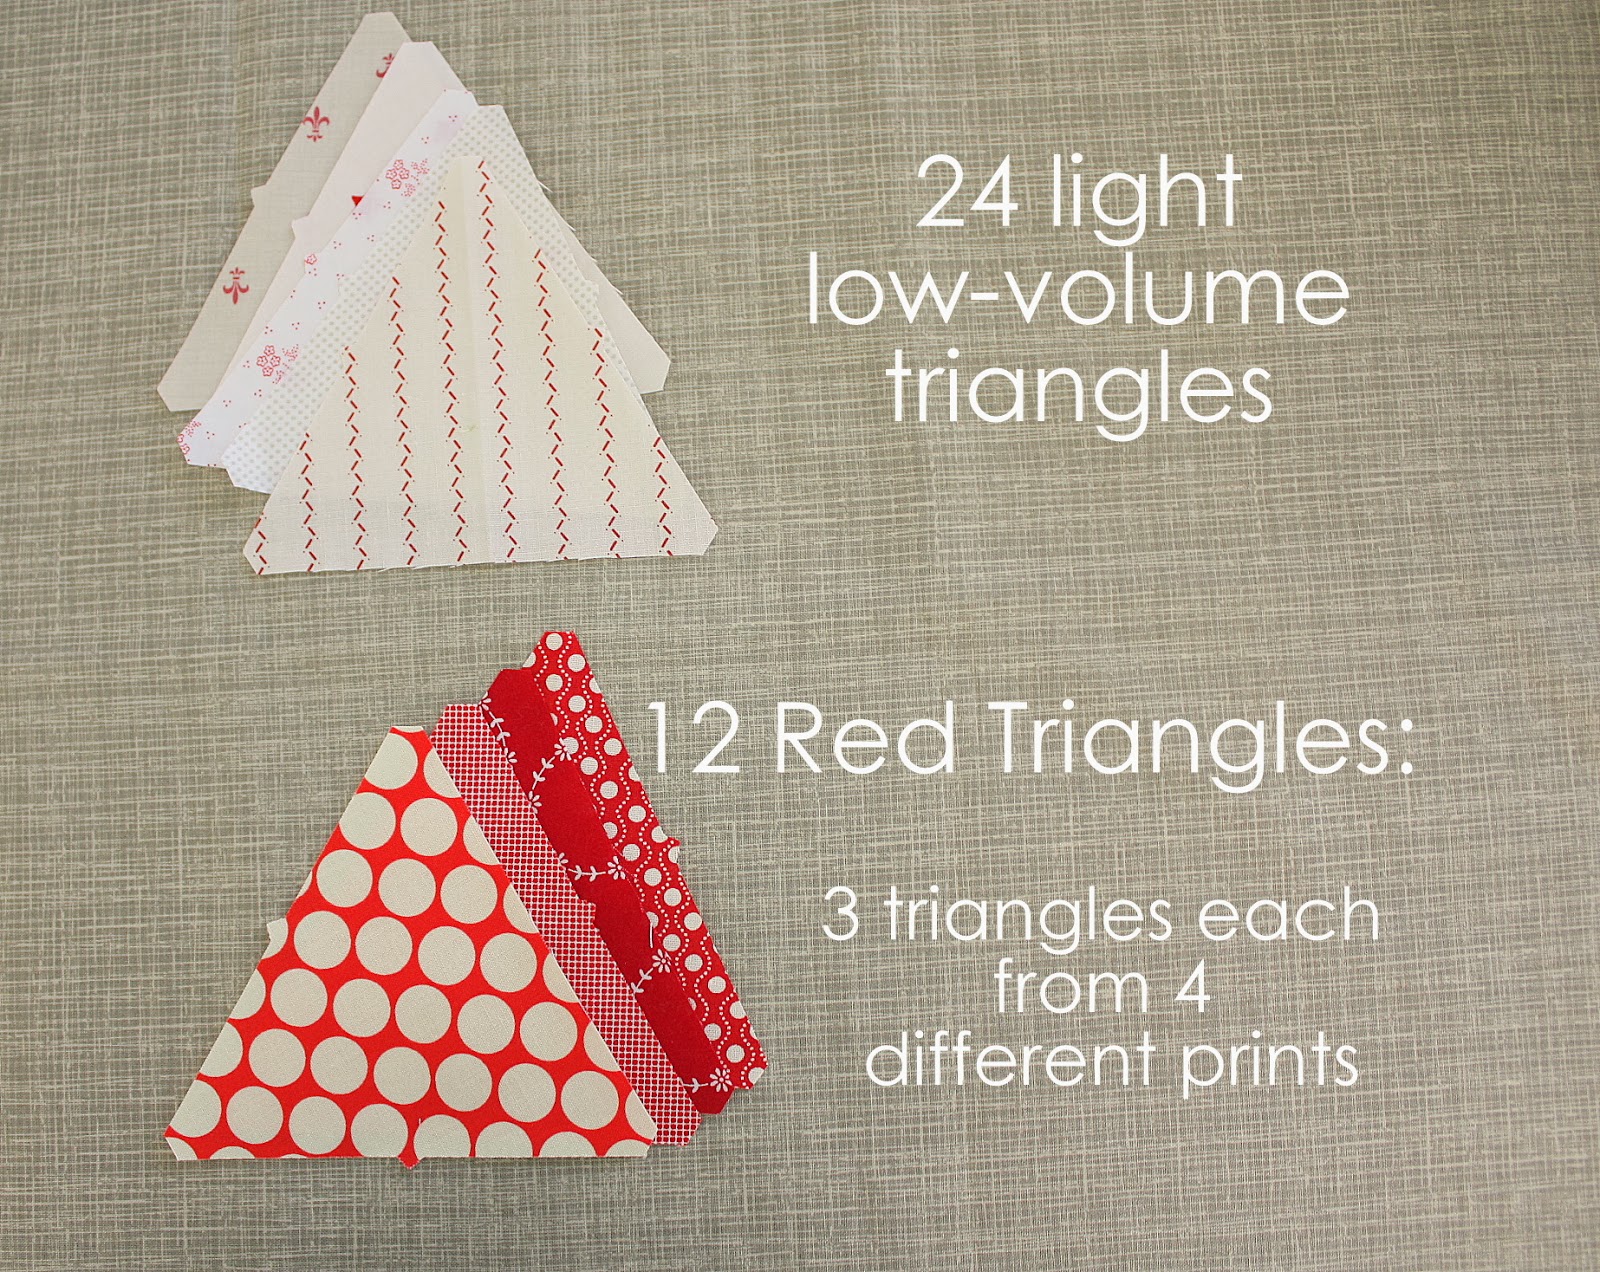
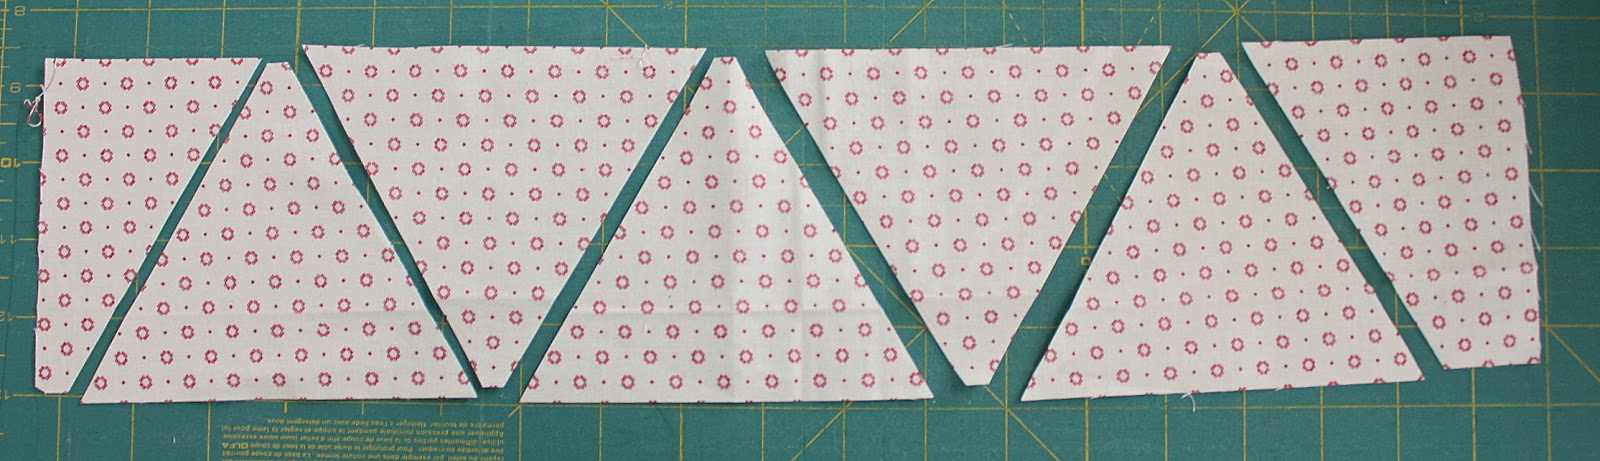
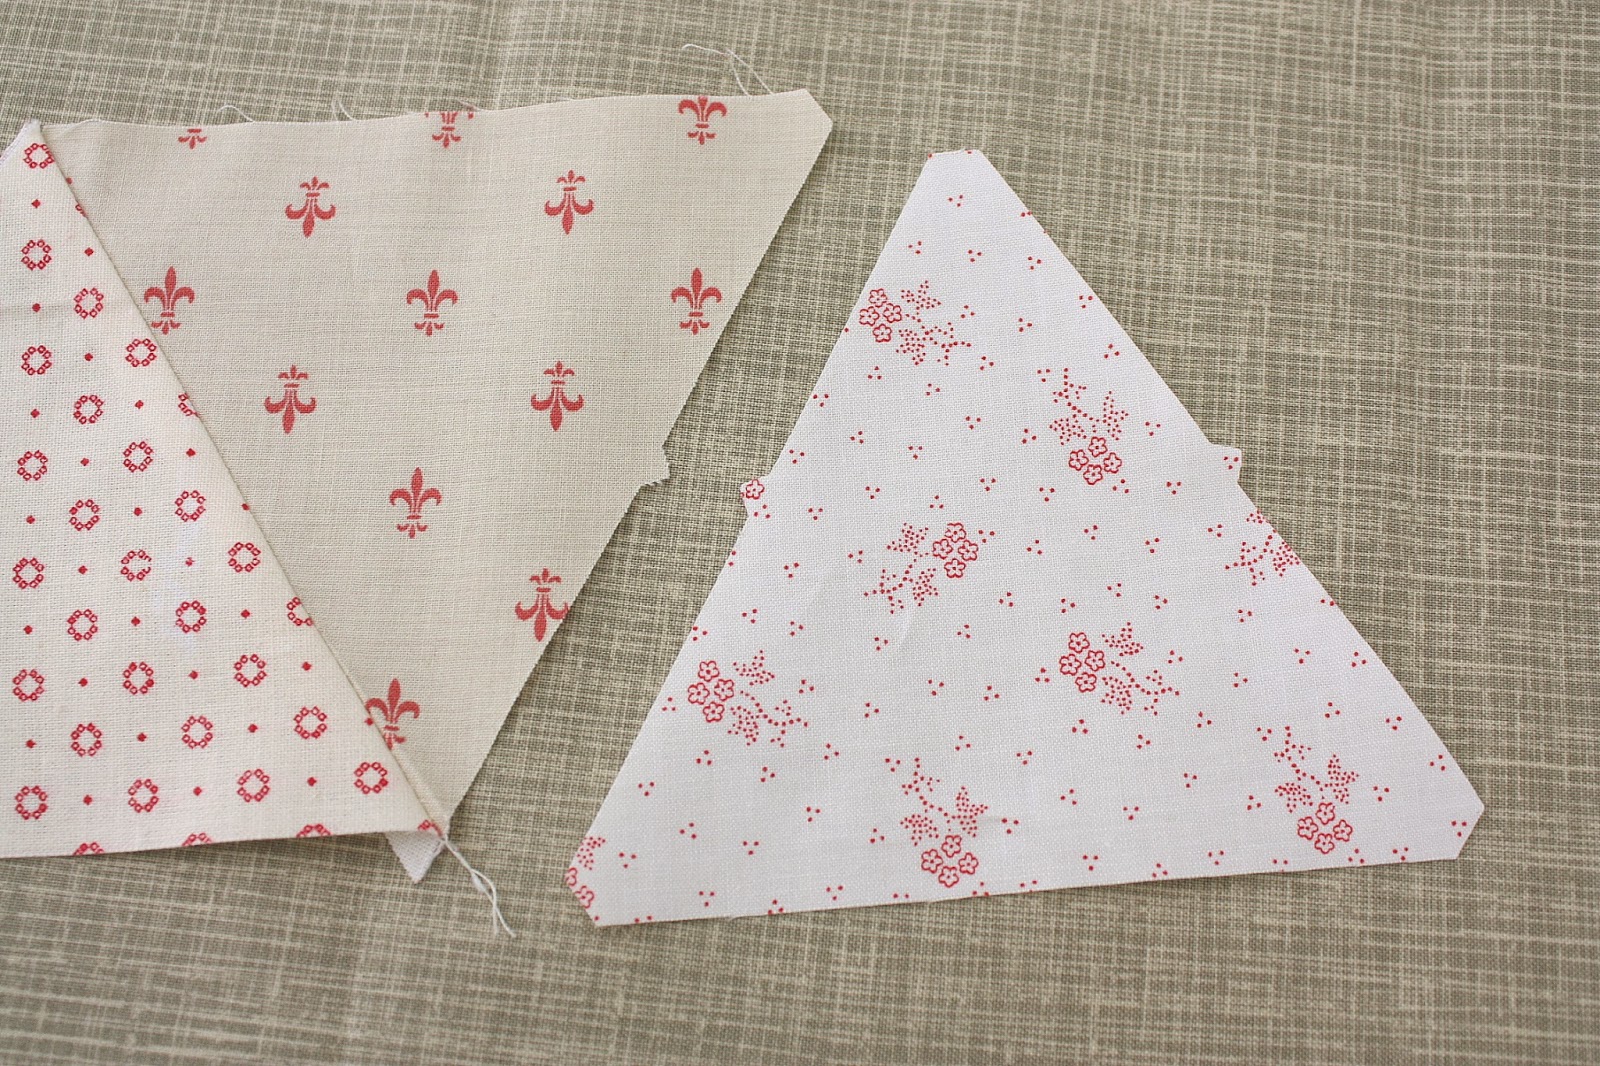
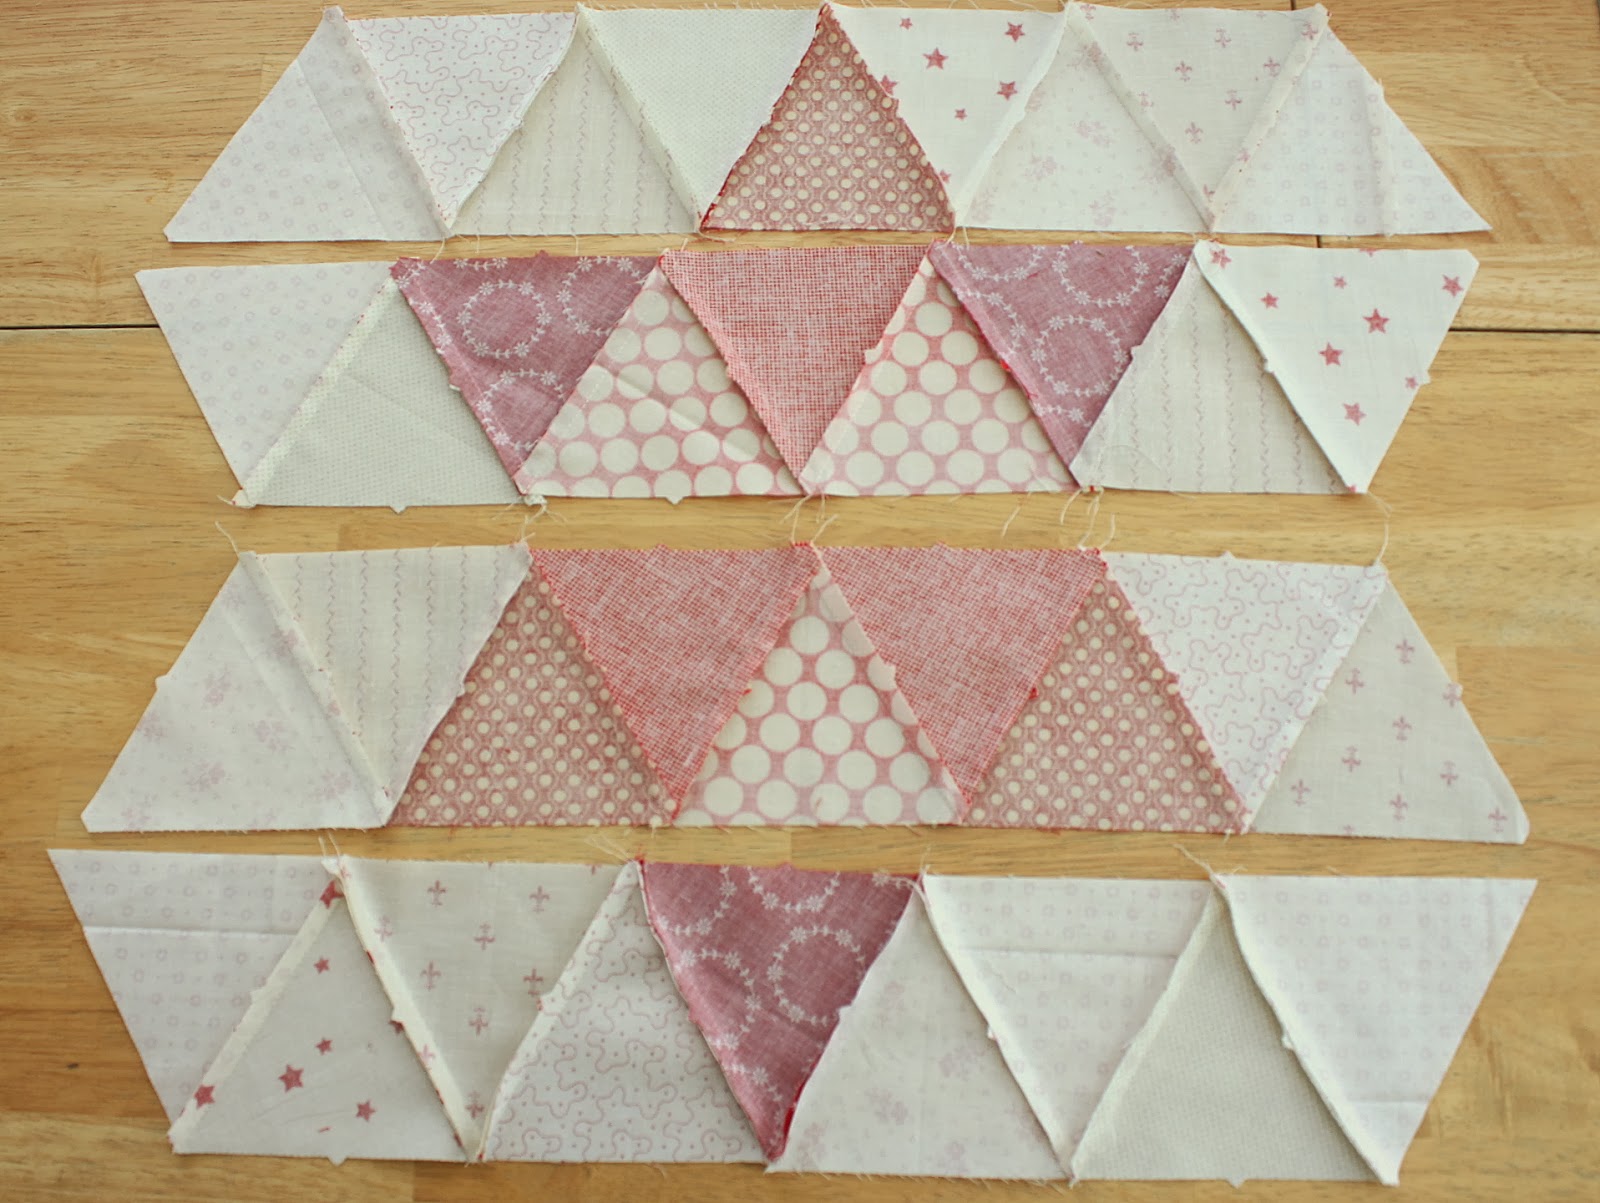
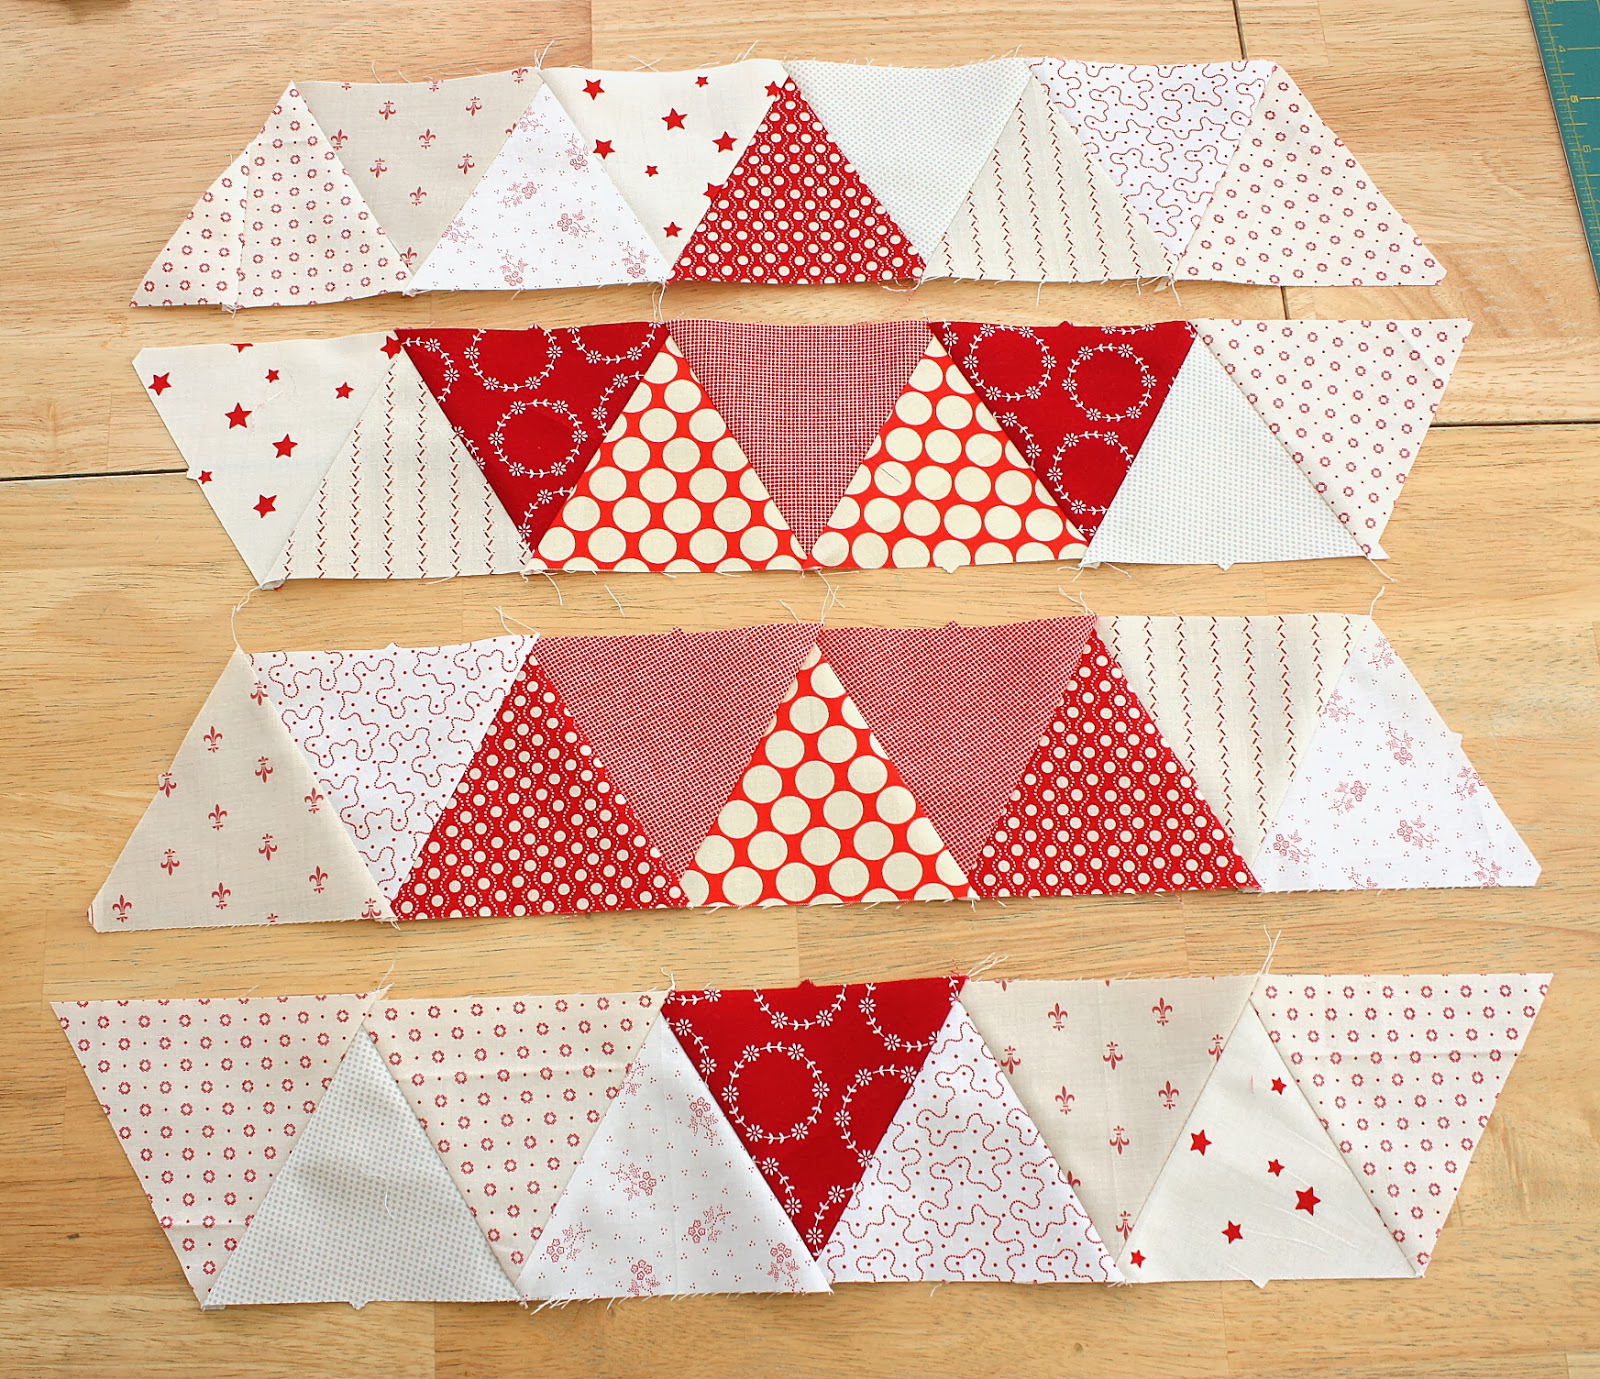
For this project you will want 24 light, low-volume prints, triangles and 12 red triangles, 3 triangles each from 4 different red prints.
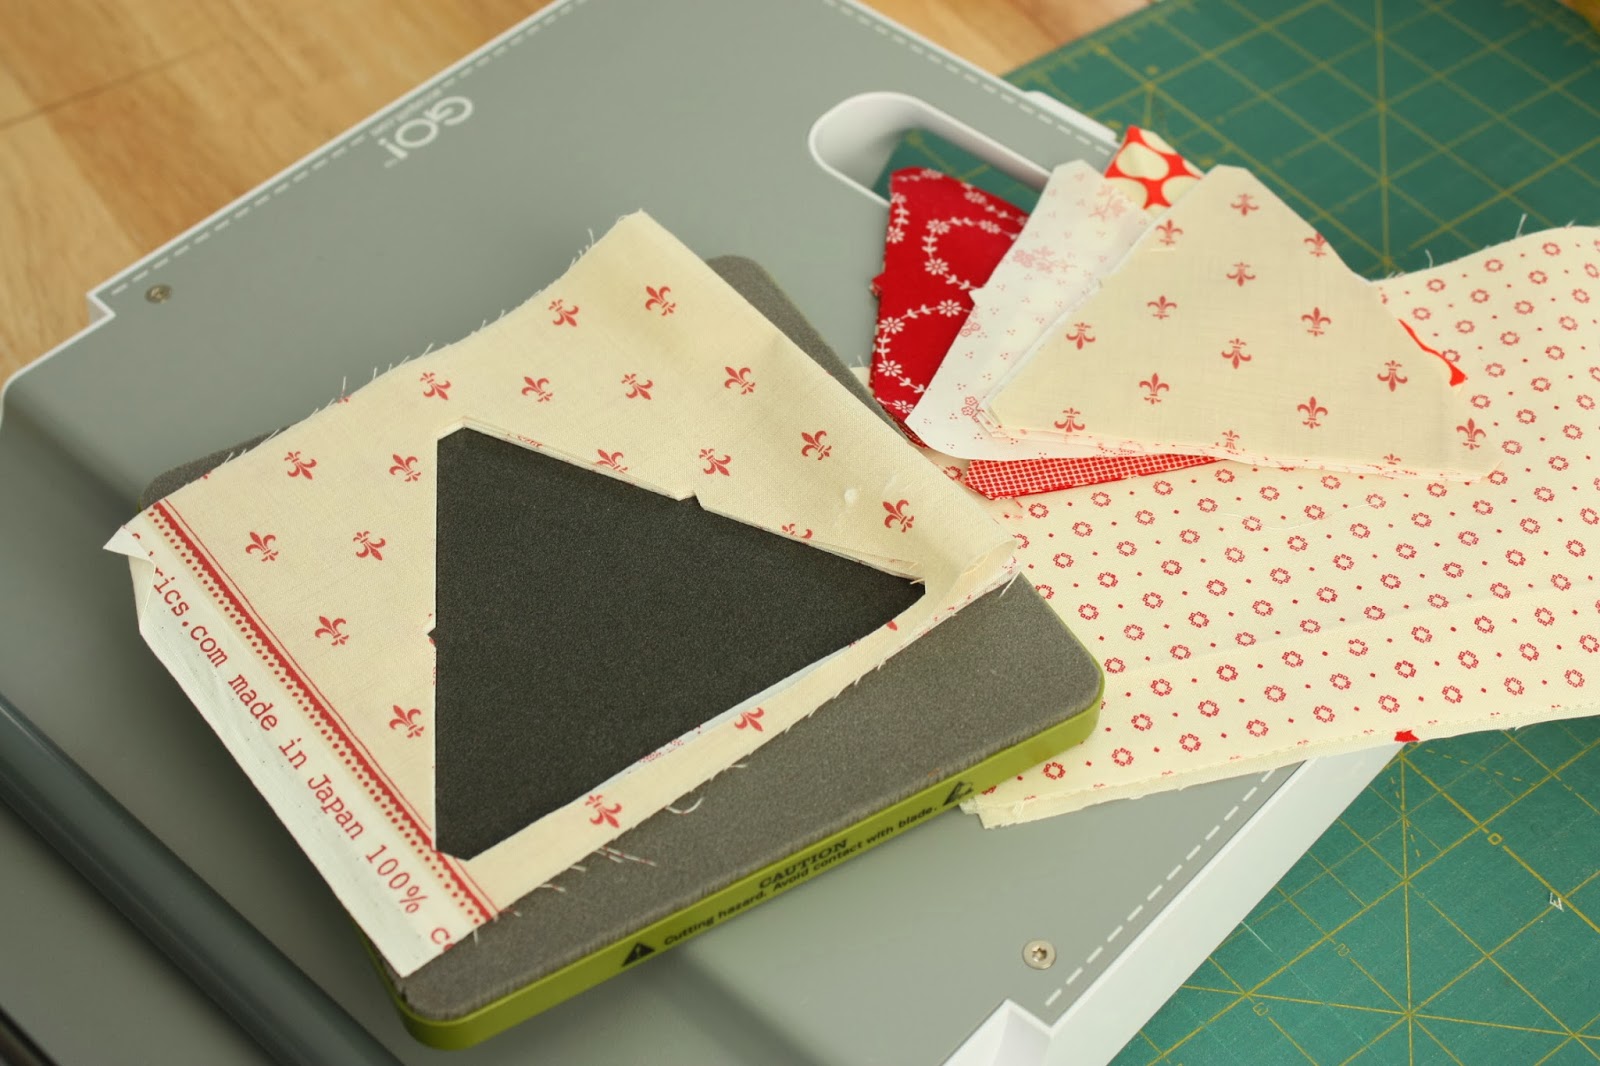
There are lots of ways to cut 60 degree, or equilateral triangles. I used a new 4 ½" triangle die from AccuQuilt, which I love. It makes cutting those triangles so quick and easy. I love that it has the corner tips trimmed, so that you don't have to clip any corners later. There are also little notches on the two bias sides, perfect for helping to match-up seams.
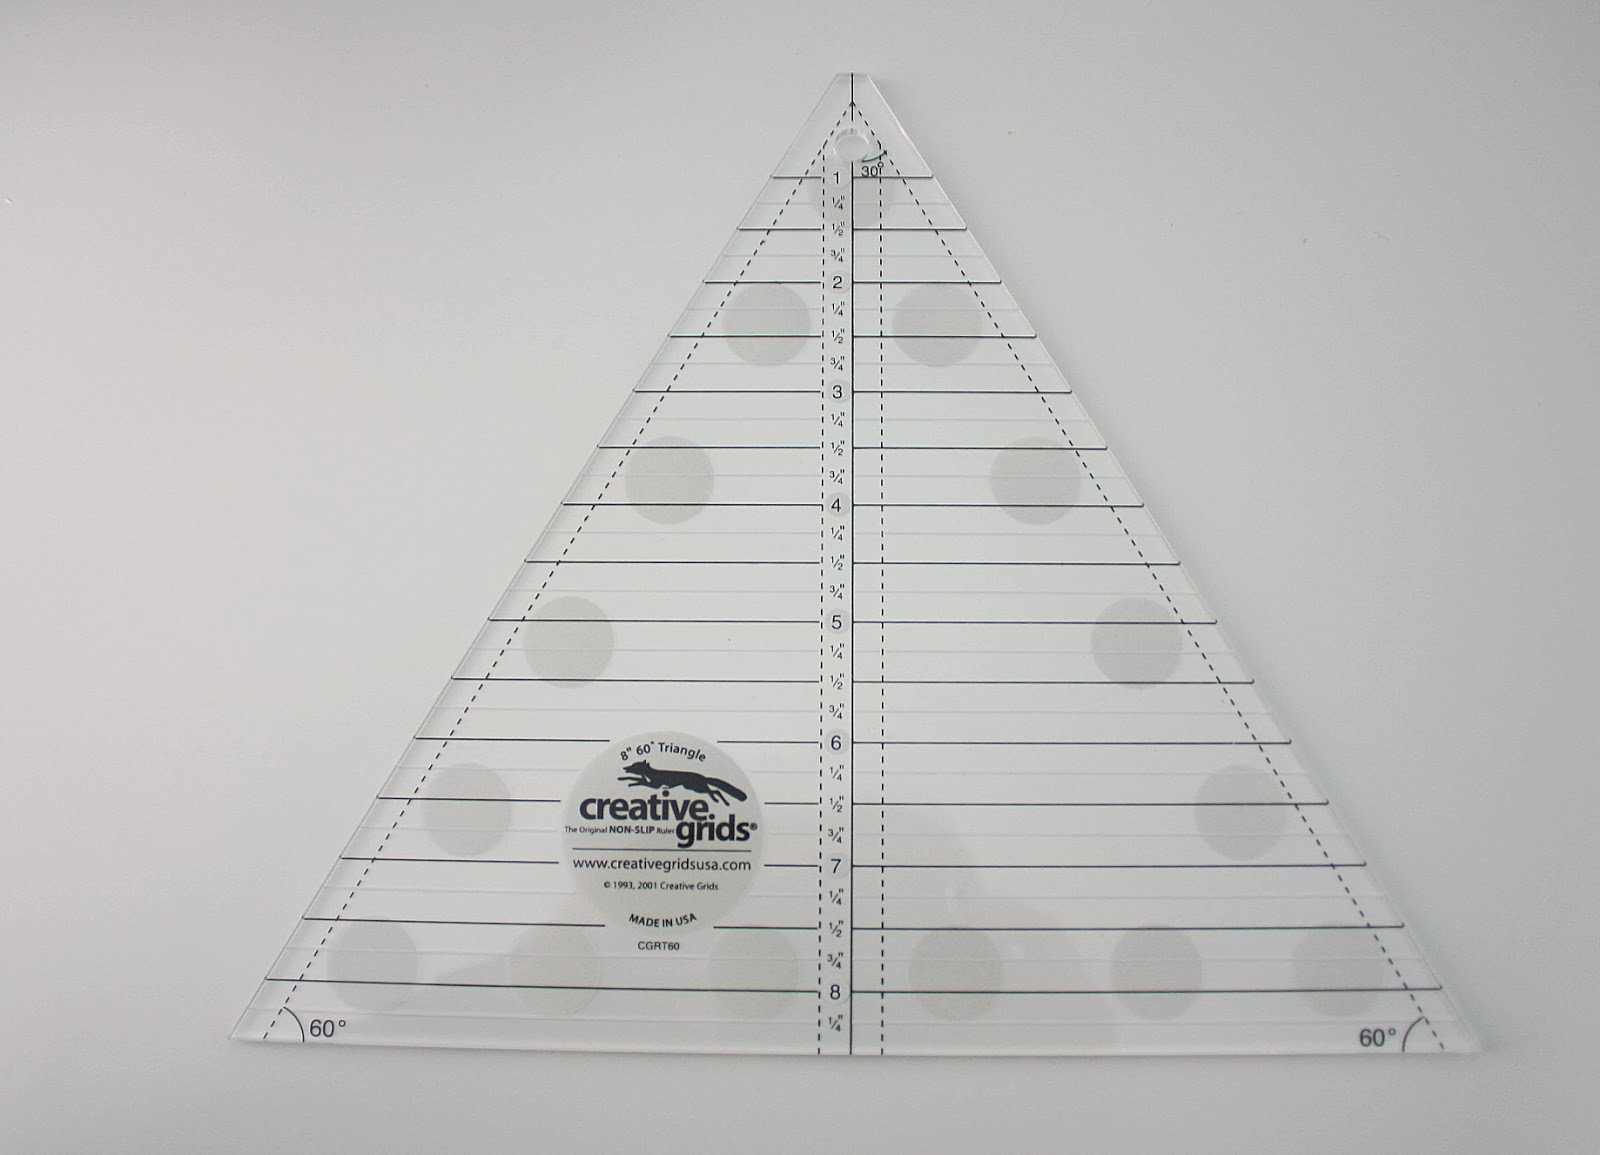
If you don't have a triangle die-cut blade, don't despair! There are some great 60 degree rulers on the market.
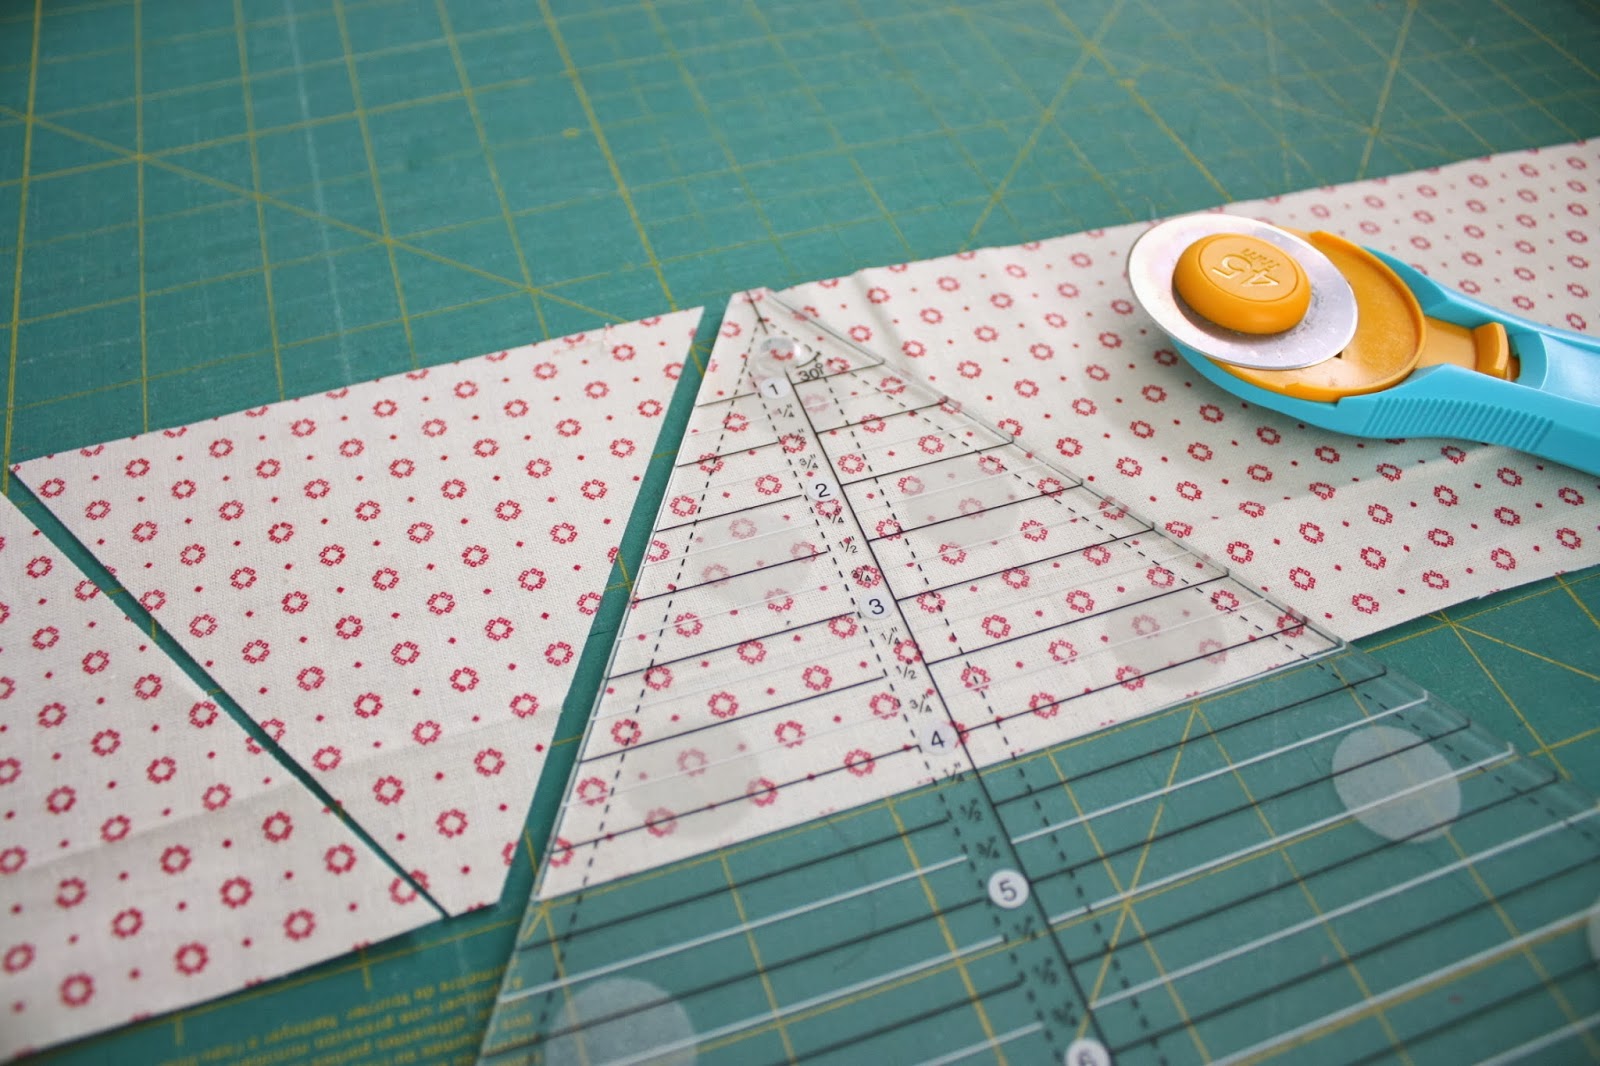
For this project, if you are using a ruler, cut a 4 ¼" wide strip and then use a ruler to cut the 60 degree angles, rotating the ruler to get multiple equilateral triangles from the strip.
Equilateral triangles can also be cut using a regular quilting ruler as long as it has a 60 degree line. Line up the 60 degree lines with the bottom edge of the strip and rotate the ruler to get the equilateral triangle shapes.

Lay out the triangles in the design you want. You will be sewing in them into four straight rows.
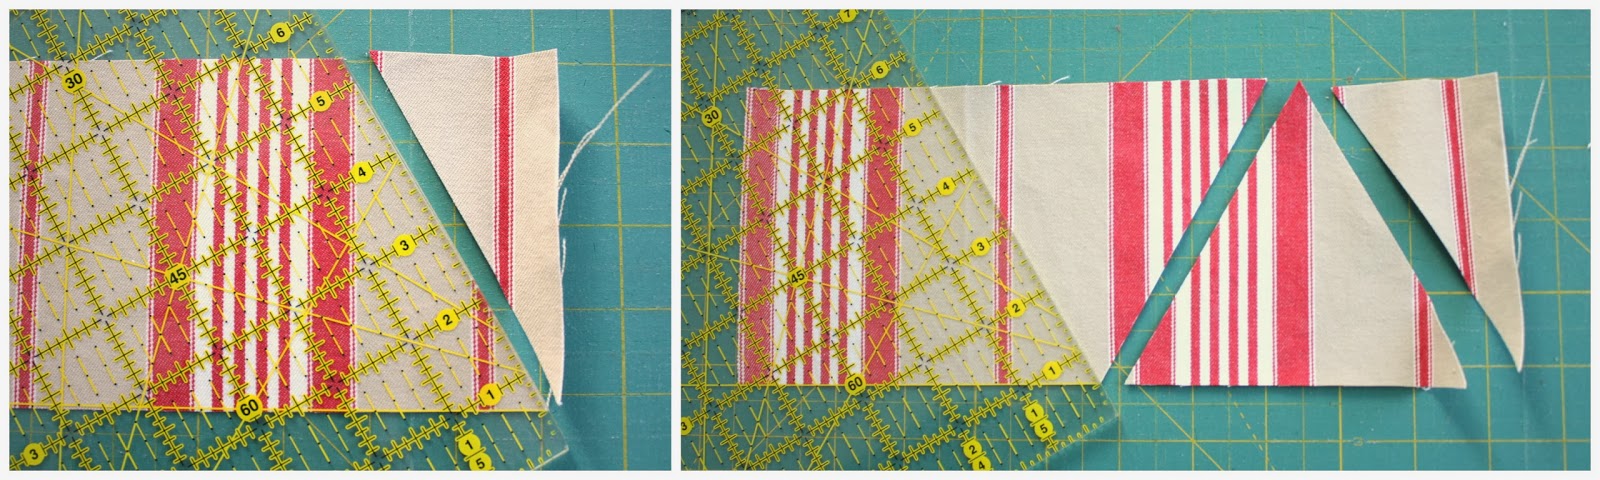
Sew the triangles together, rotating the triangles in the same way you did when cutting them.

Make sure to sew a straight seam using an accurate ¼" seam allowance. Press the seam allowance to one side.
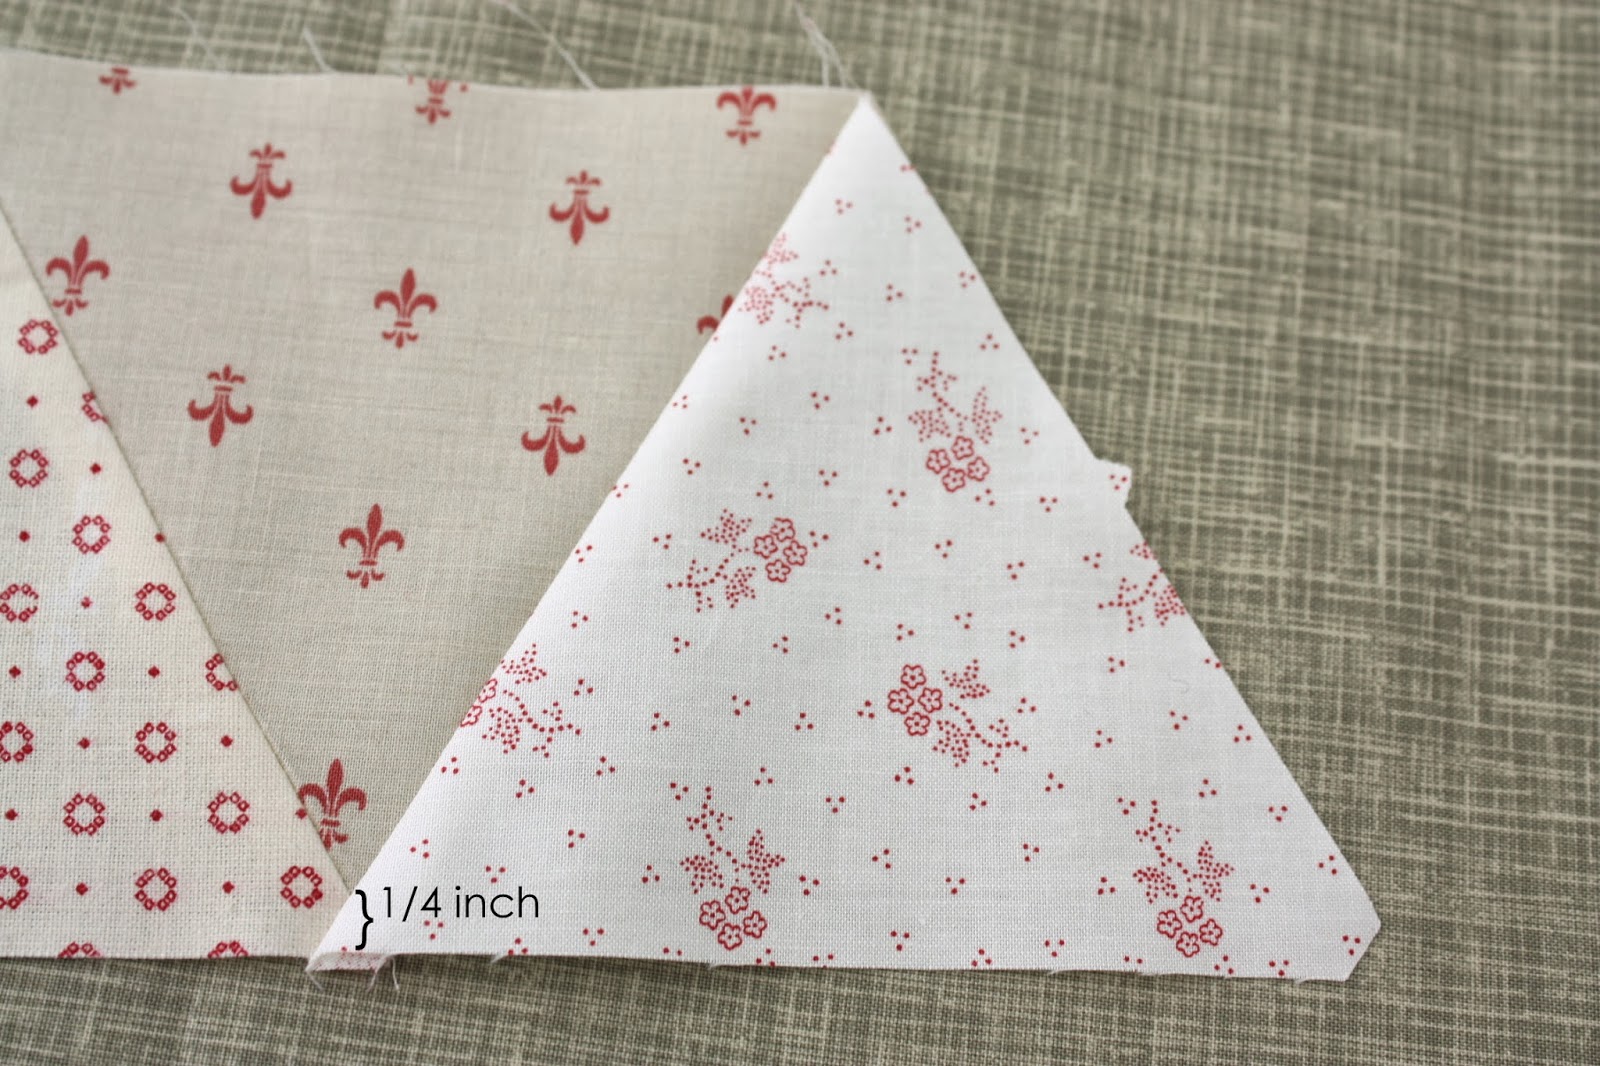
The quarter inch seam allowance will create a ¼ inch space from the point of the triangle, leaving the right space for sewing your rows together without cutting off your triangle points.

If you are sewing triangles without the points removed, use the same method. Line up the new adjoining triangle matching up the long straight edge of the new triangle with the straight edge of the row. The tip of the new triangle will hang down below the row. Sew a ¼" seam and trim the little dog-ear triangle tip.
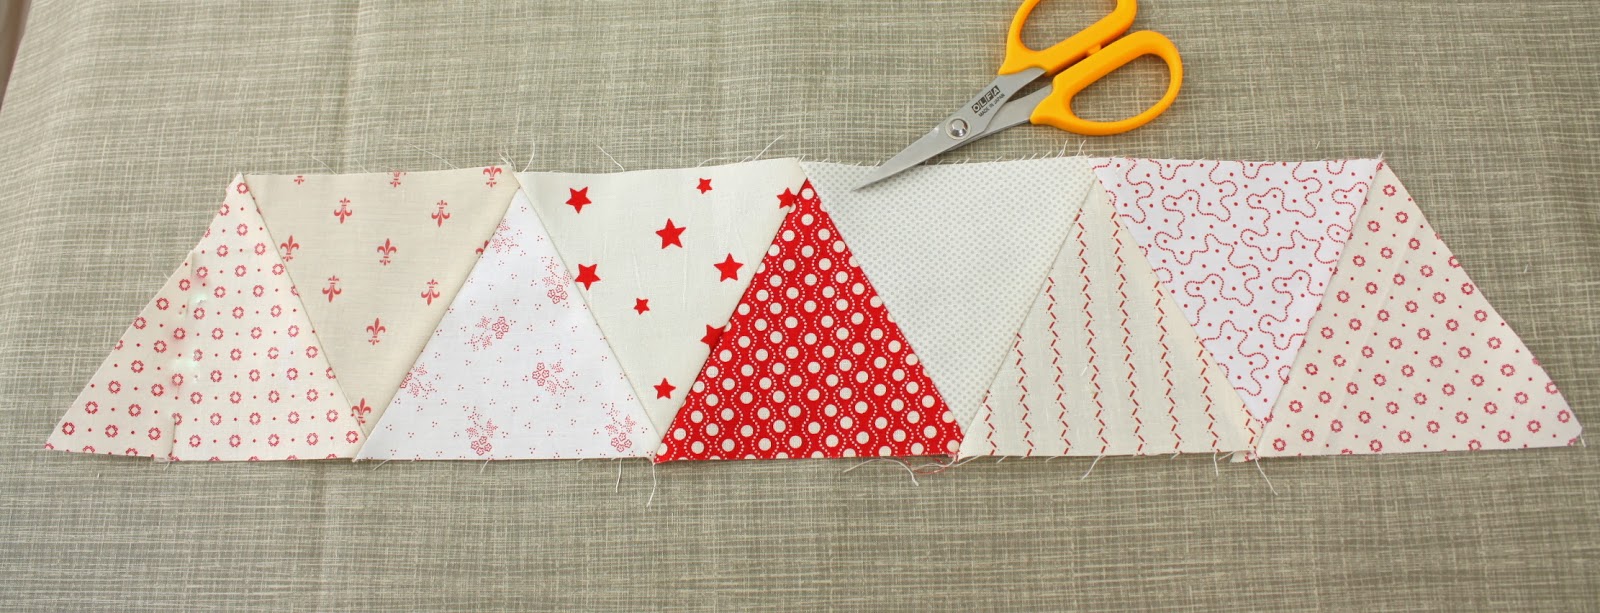
After your first row is assembled it will look like this.
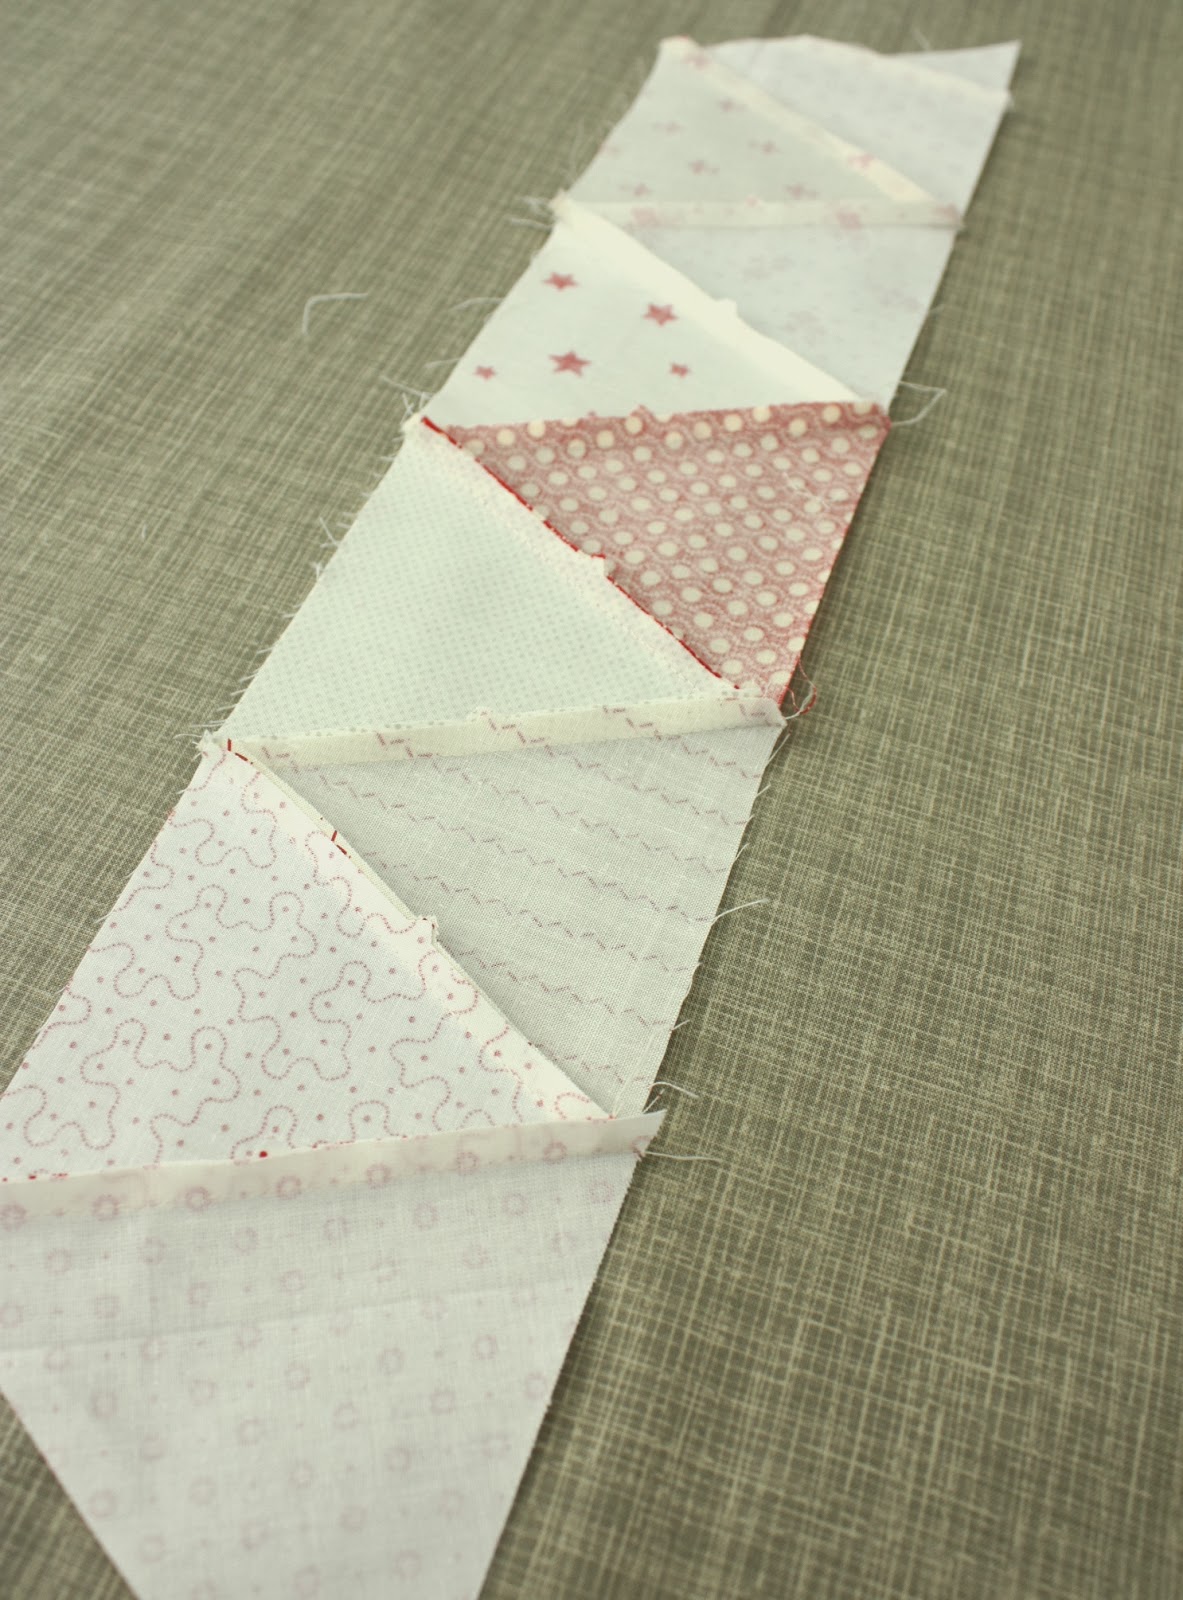
Press all seams the same direction in each row. You need to press the seam in the right direction before you add the next triangle so that the new seam will hold the previous seam allowance down.
Alternate which direction you press your seams with each row. See above where the first and third rows are pressed to the right and the second and fourth rows the seams are pressed to the left.
Pressing the seams as you sew will help the seams nest and points match up more easily when you sew your rows together.
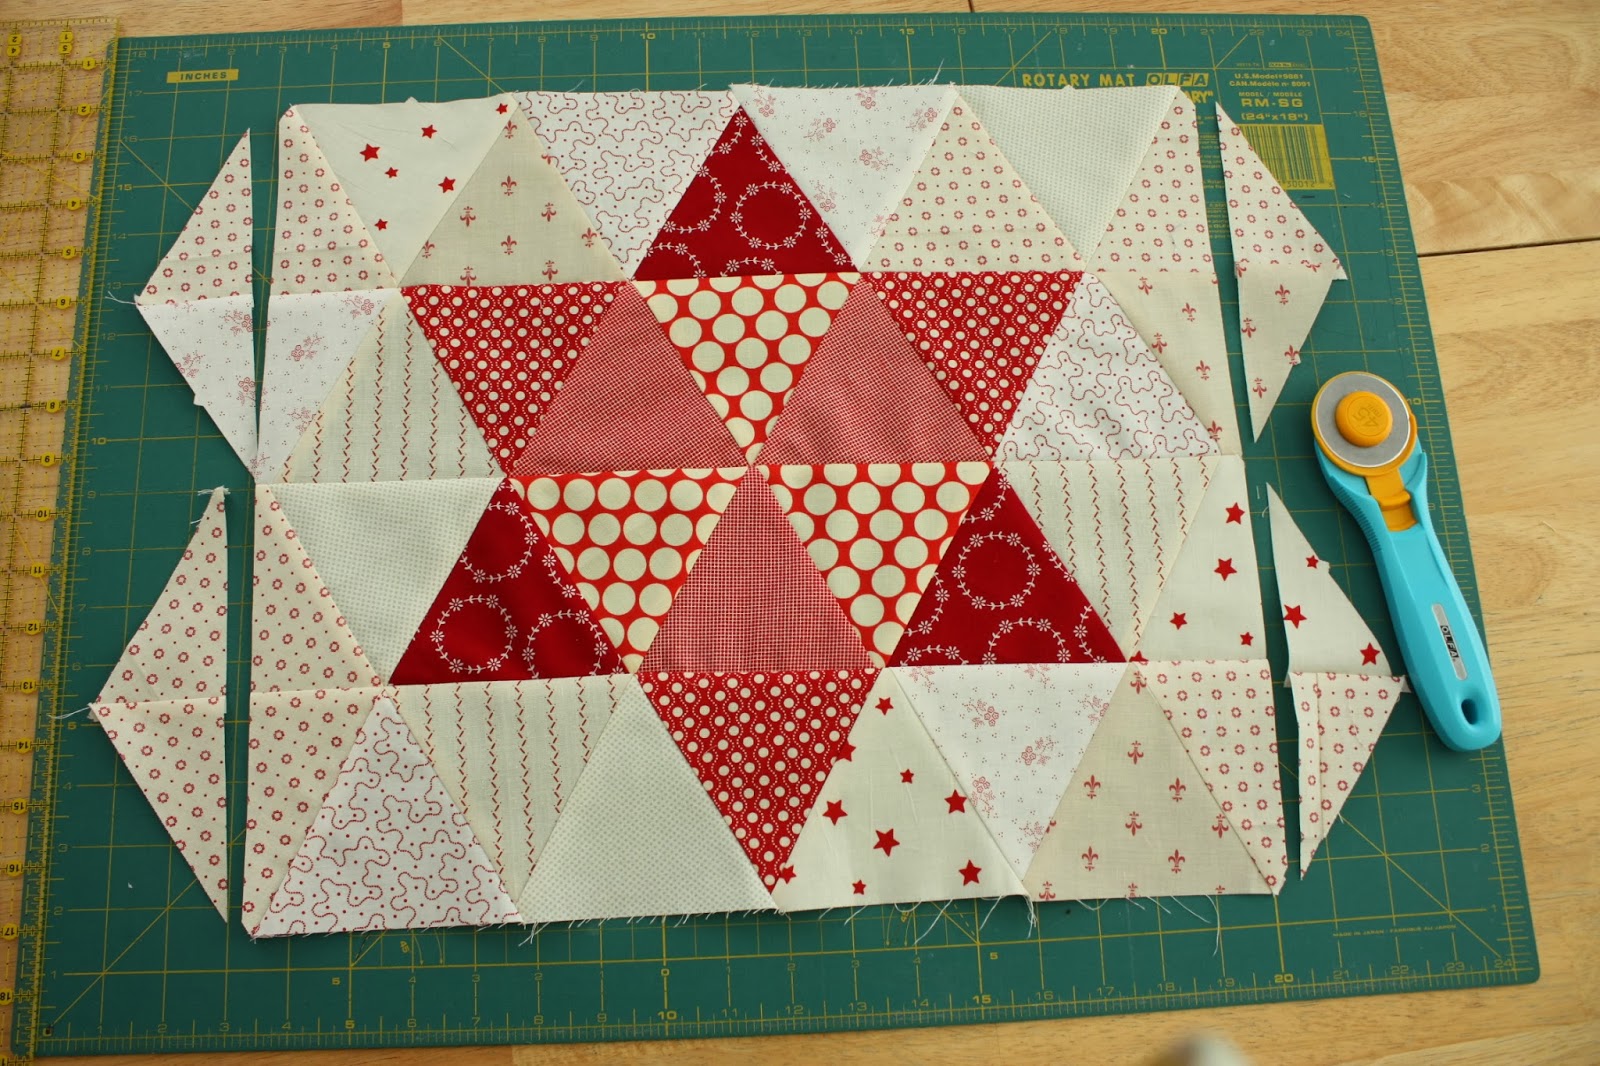
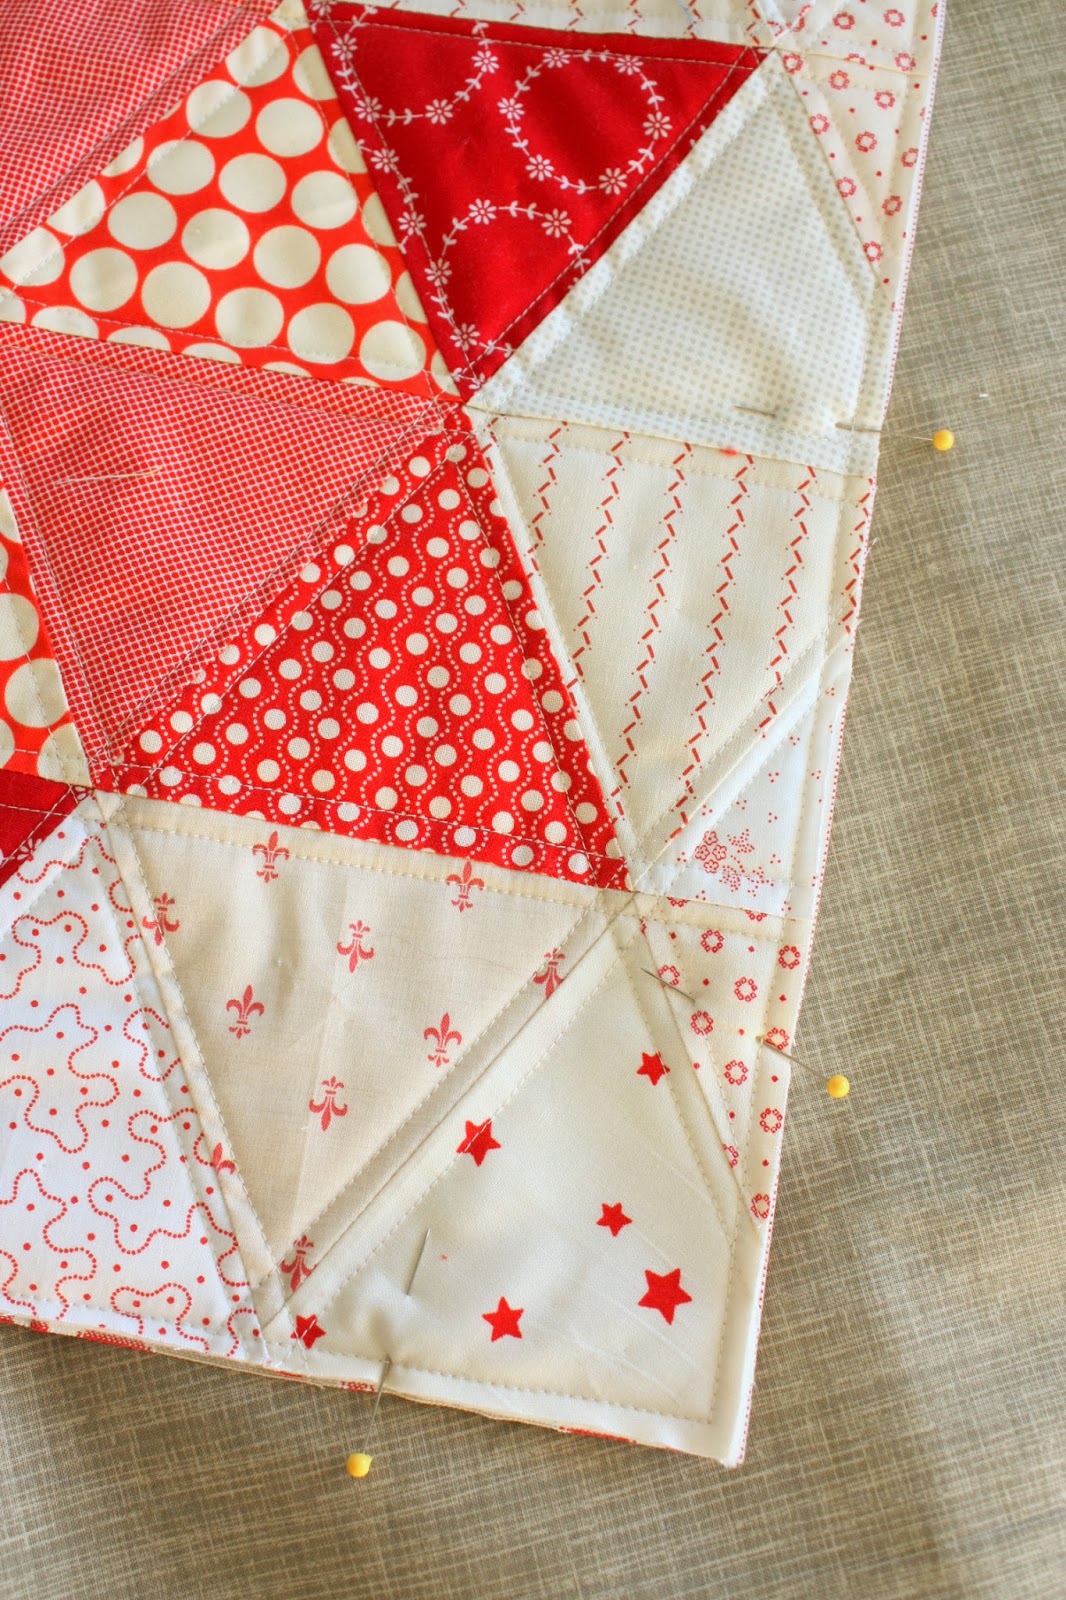
After rows are sewn together, press rows all the same direction. Trim sides.
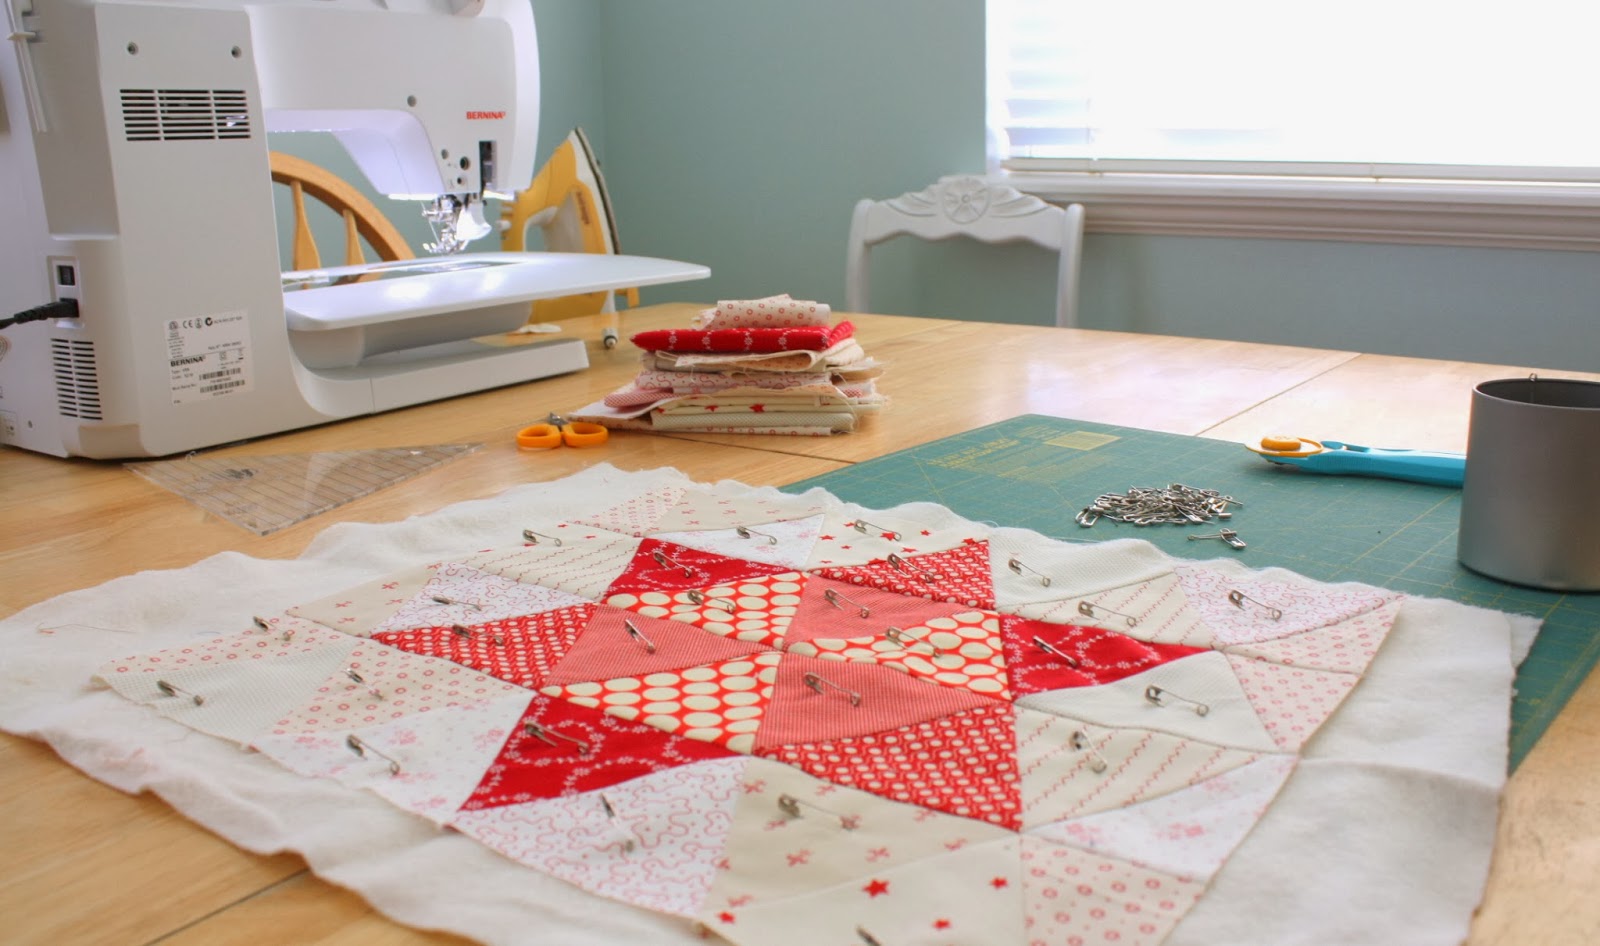
Layer block with batting and backing. (Use a piece of muslin for the backing if you are making this into a pillow.) Baste and quilt.
When quilting is done, square up the block. I squared mine to 15" on all four sides. (Your size might be different based on the size of your triangles, seam allowances, etc.) At this point you can bind for a mini quilt.
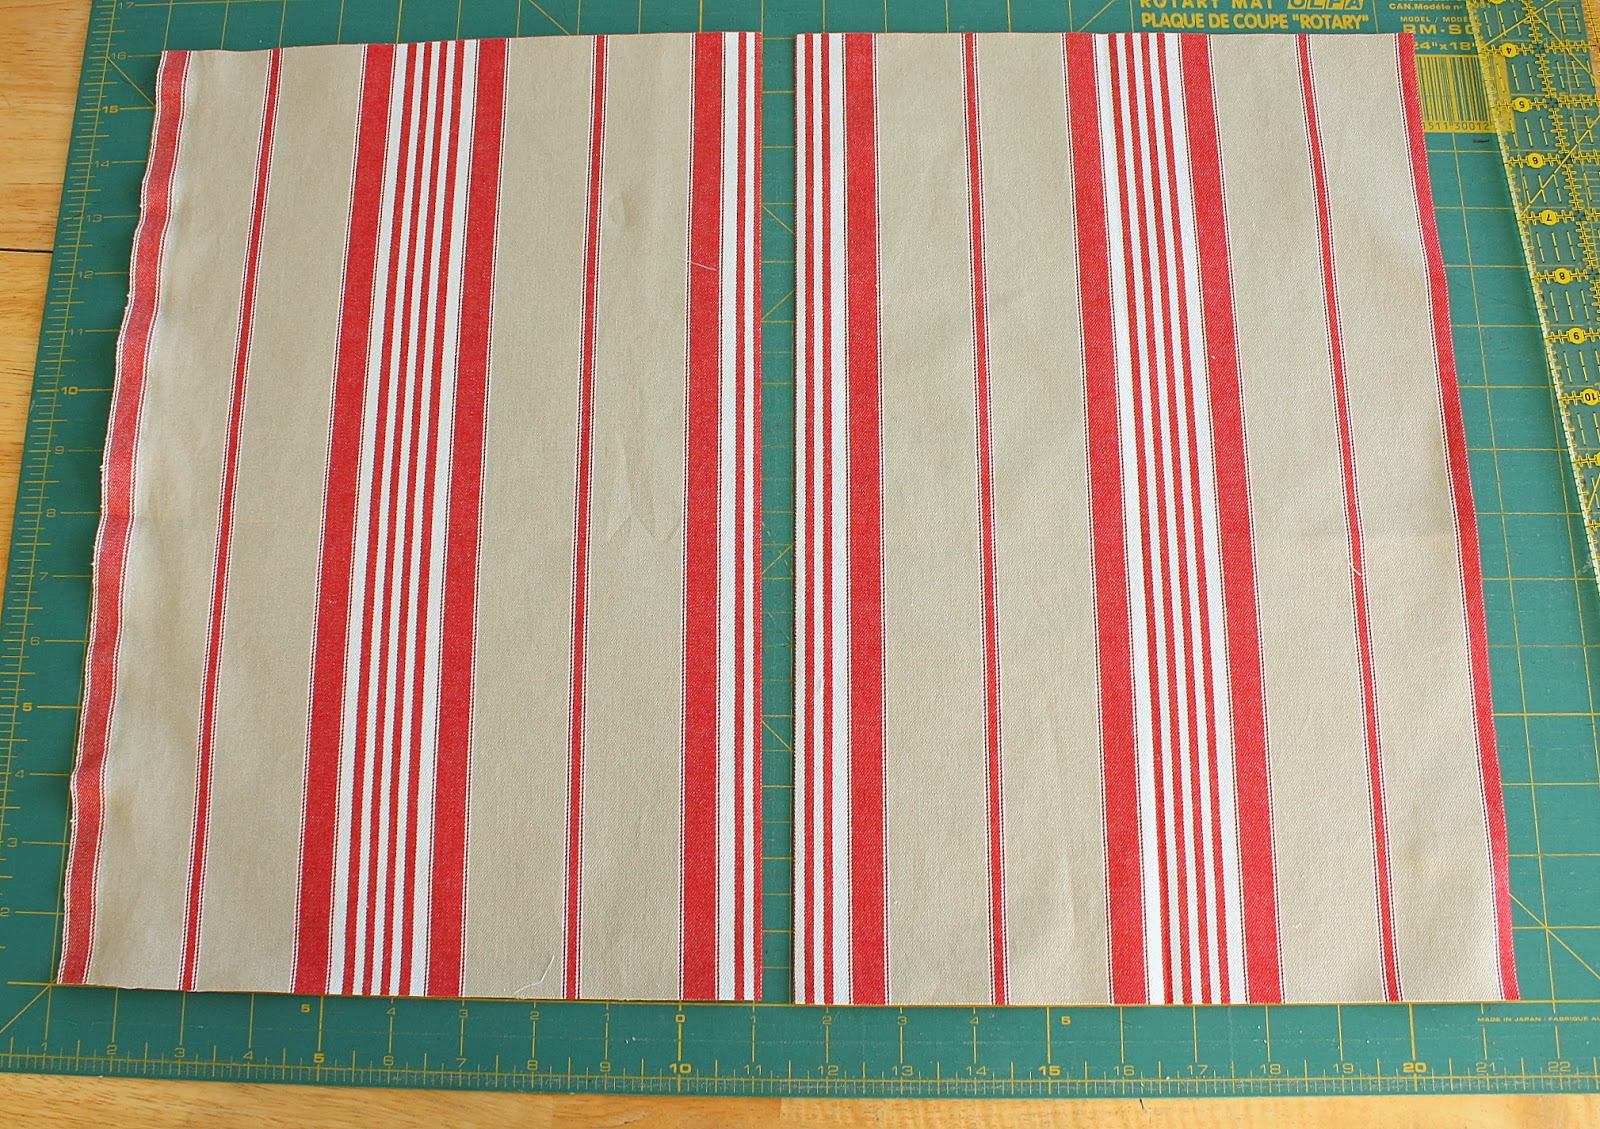
To make an envelope pillow, cut two back pieces 10" x 15". (If your front is different size than mine, cut your back pieces the length of your block and the width being ⅔ of your front measurement.)
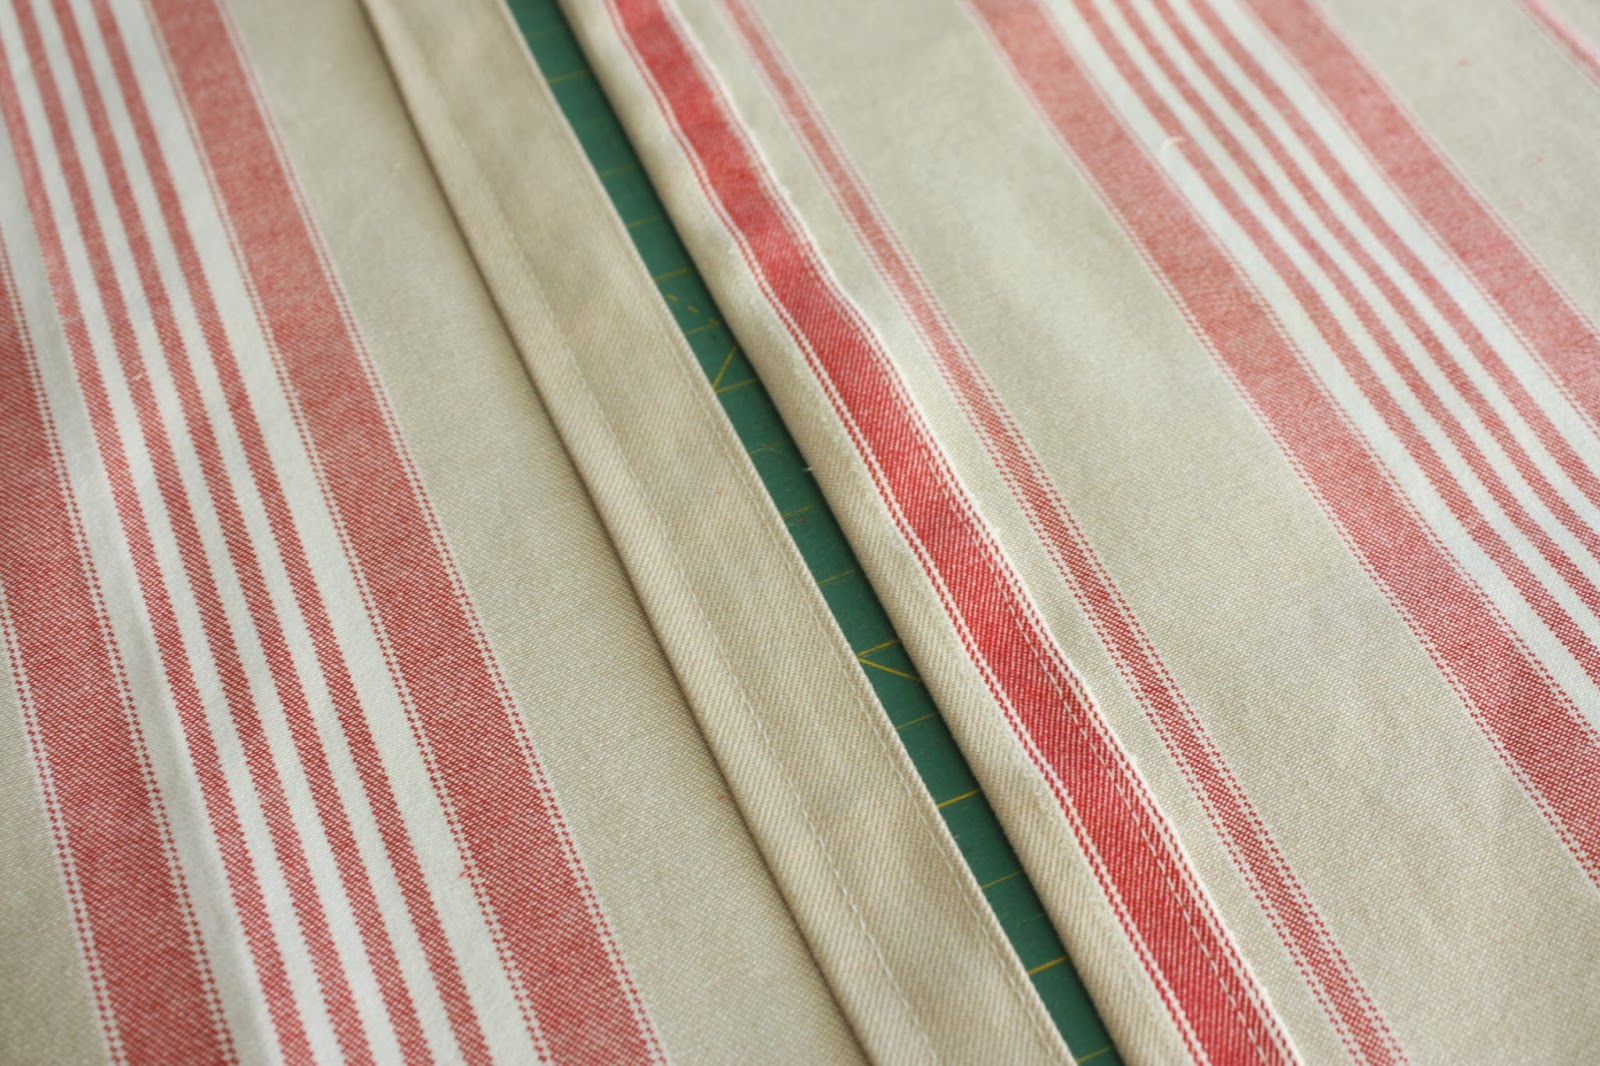
Fold in one long side of each backing piece about ¾" twice and stitch in place.

Place backing pieces wrong sides together with the quilt block.
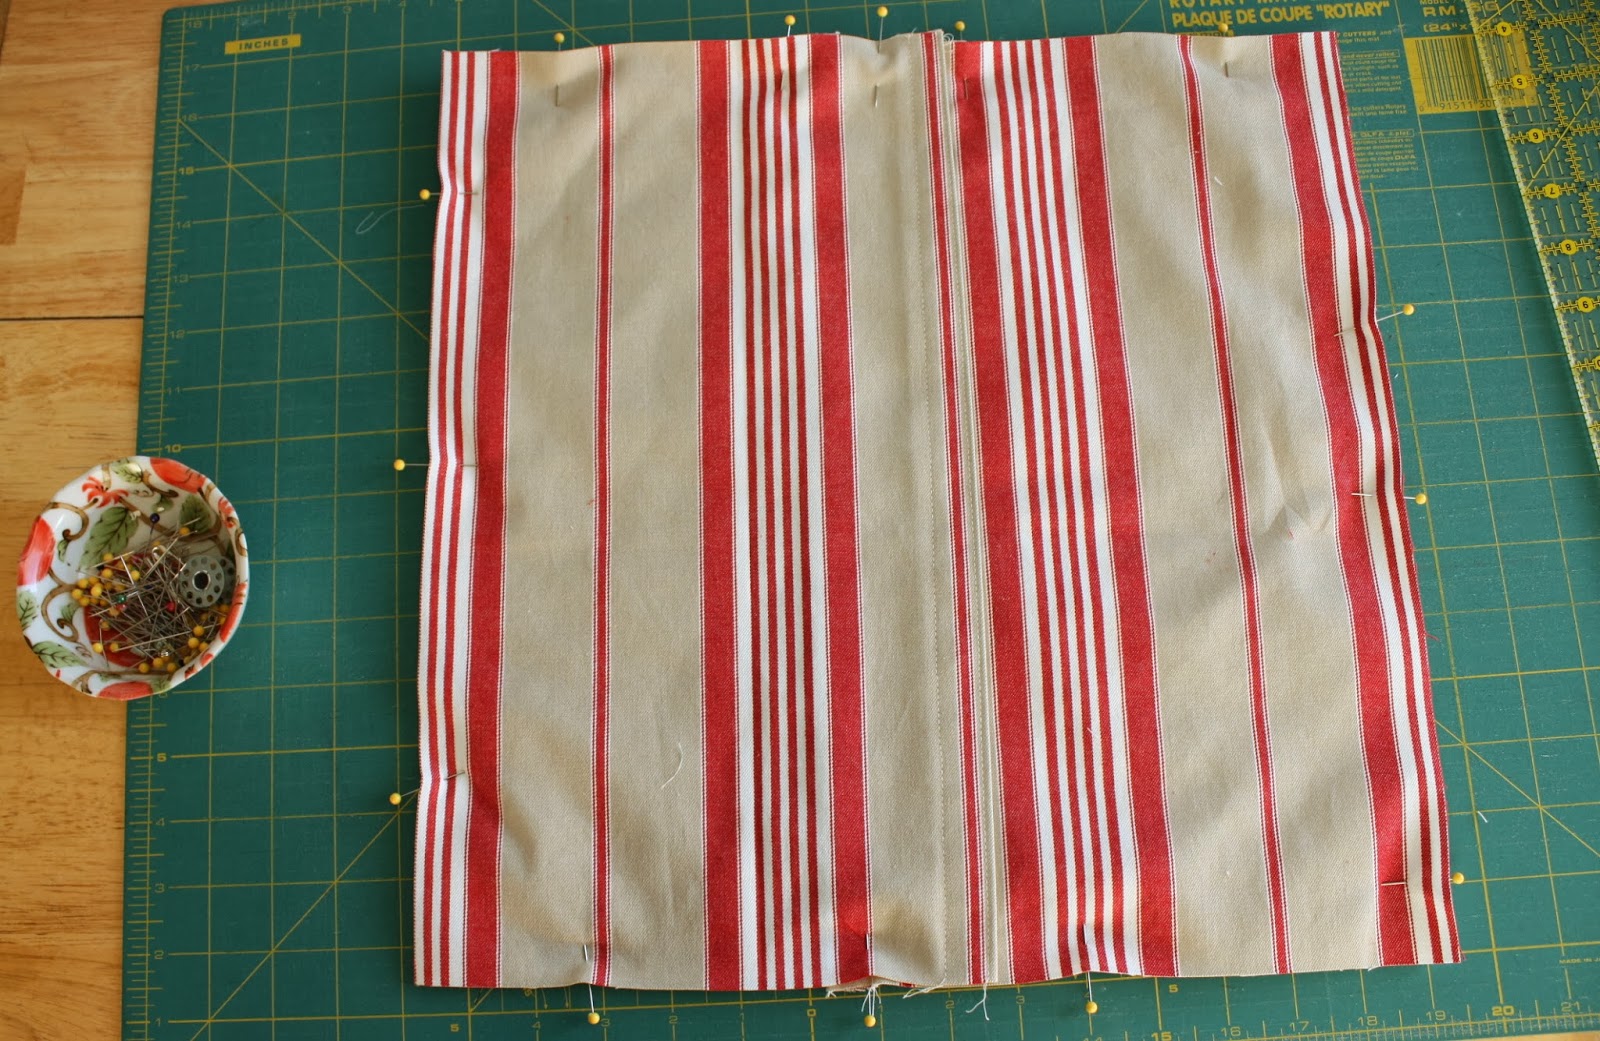
Over lap the two finished edges and pin in place.
Sew wrong sides together (like a quilt) around the edges using a ¼" seam allowance.
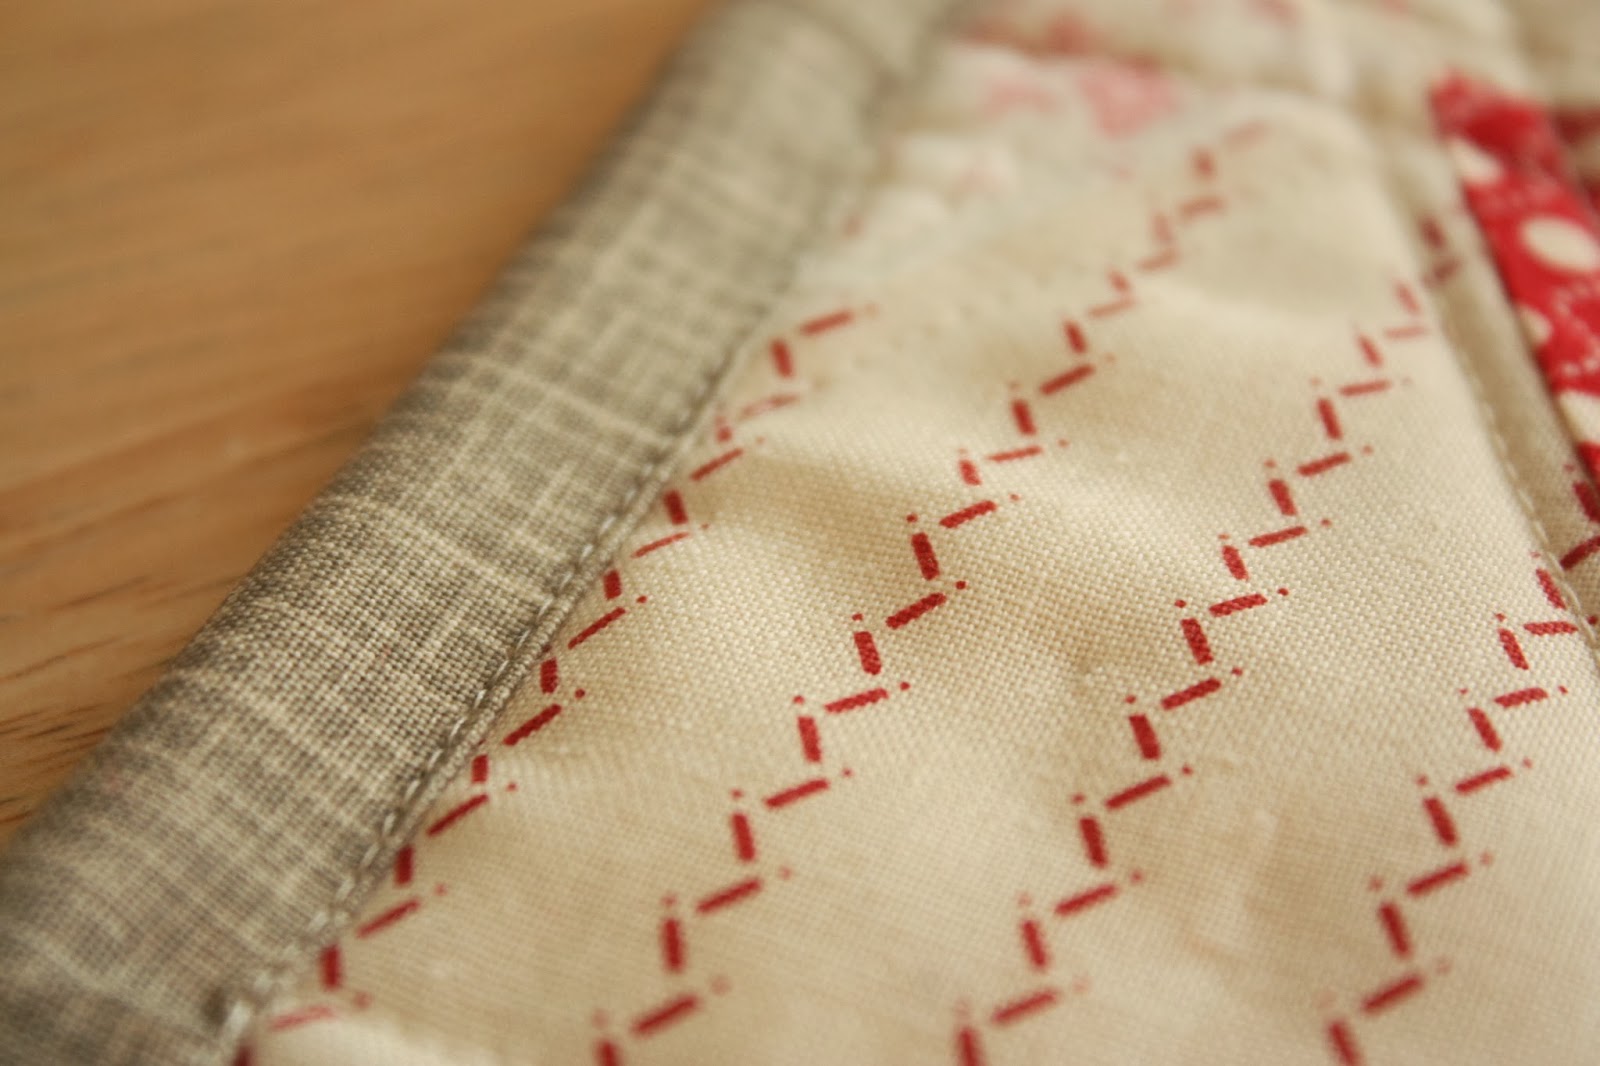
Cut two 2 ½" strips of binding fabric. Sew end to end to create one long strip and bind pillow like you would bind a quilt. I chose to do a machine binding this time.
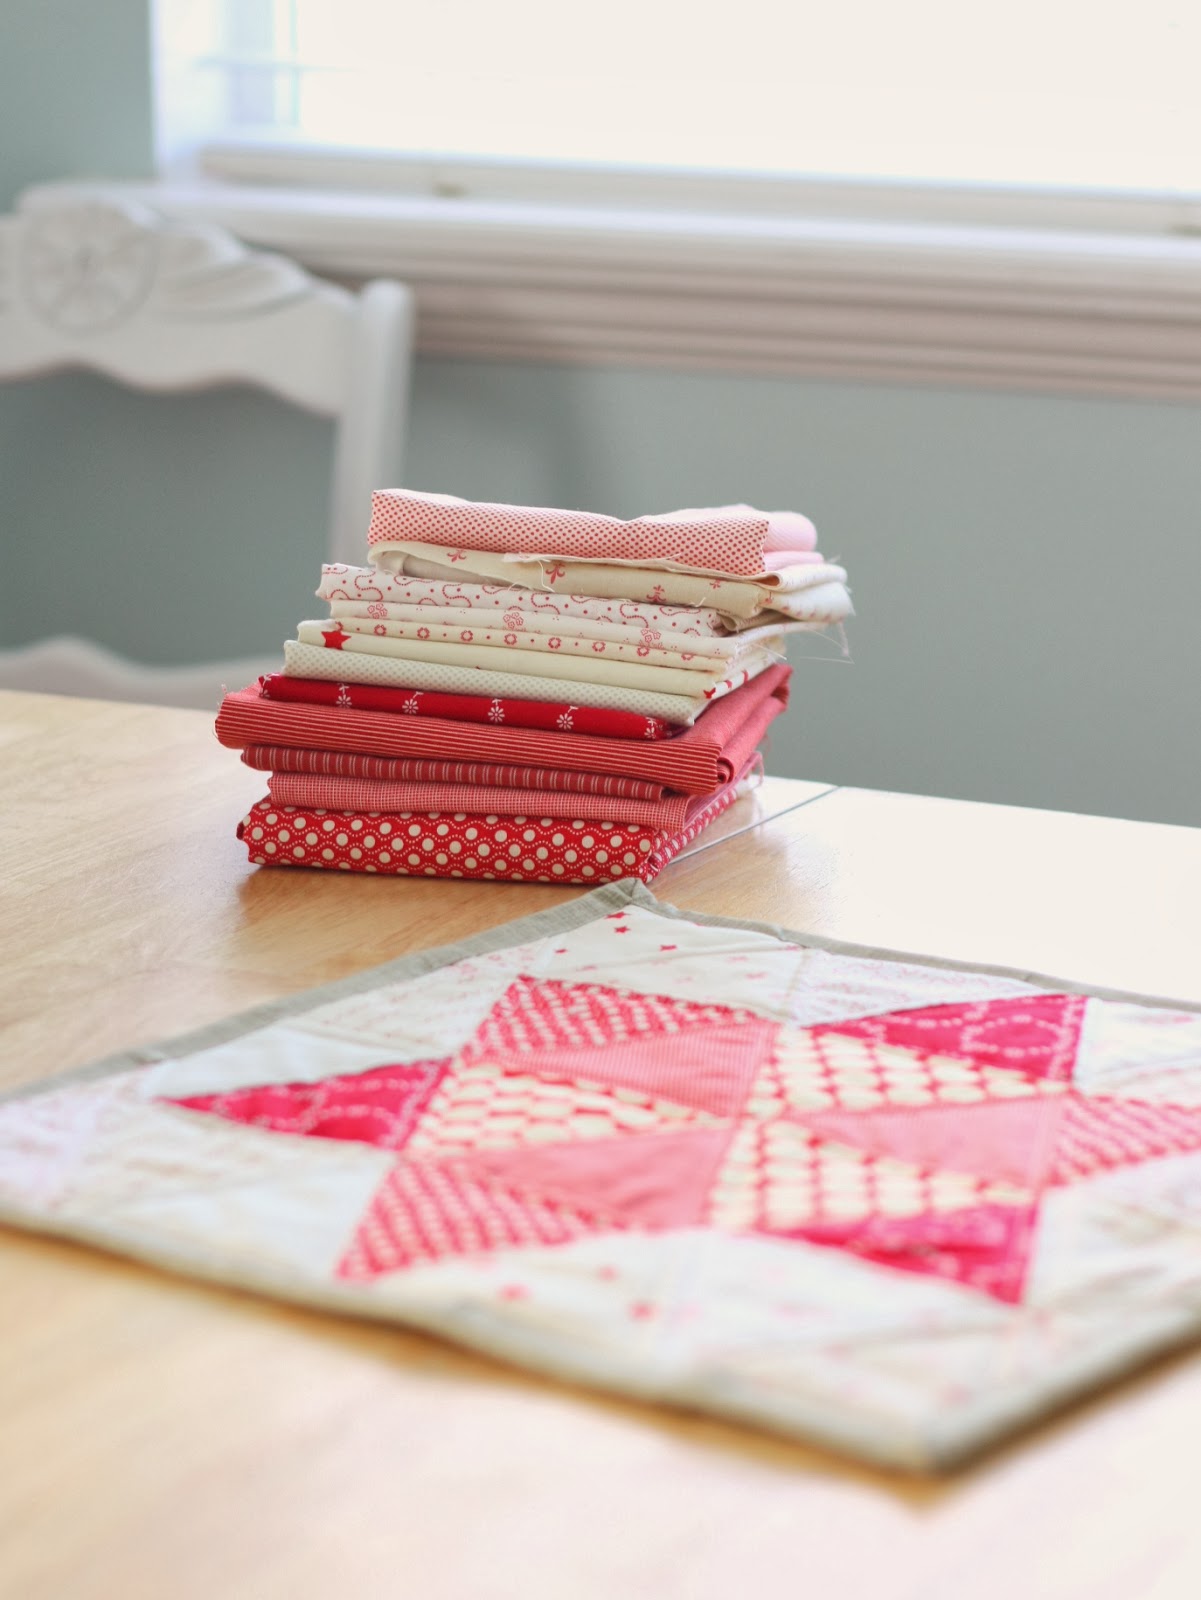
And that's it. I'm such a sucker for red and white.
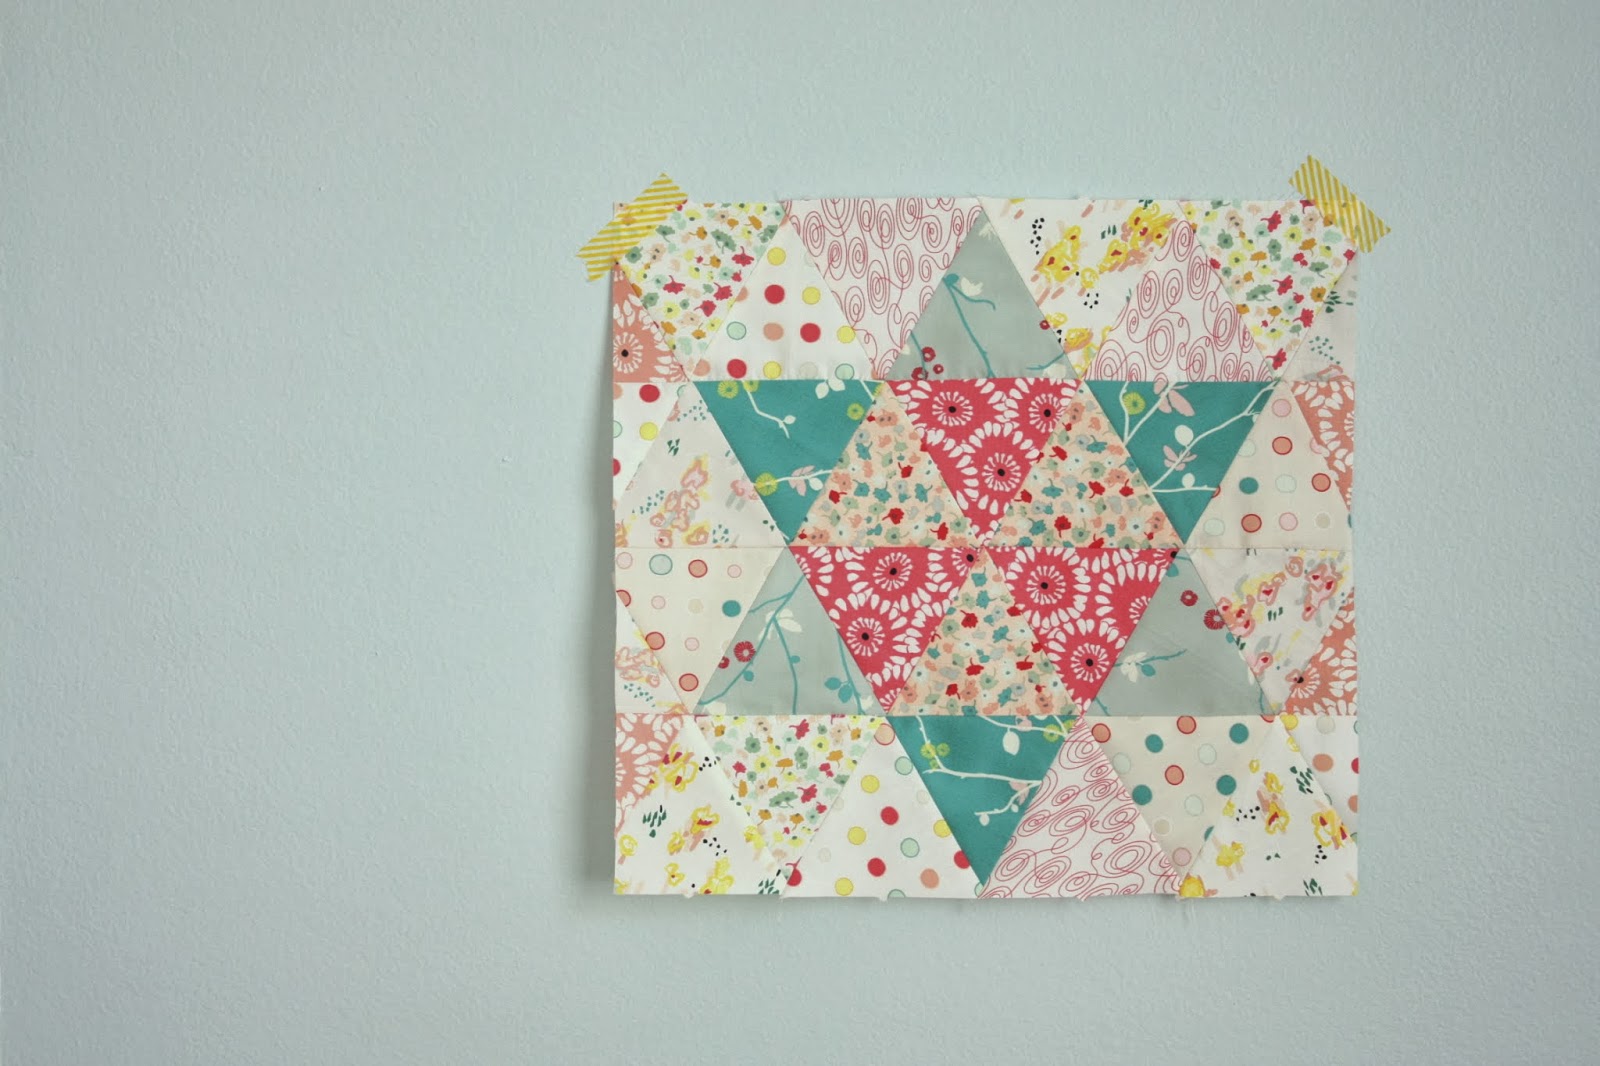
But I also played with this block out of Pat Bravo's new Rapture collection. It's always fun to see the look an entirely different palette of fabrics gives to a block.

I've made my block into a pillow and added it to my red and white snowflake pillows that I pull out at Christmas. The thing that I love about red and white is that I can leave them out through Valentine's Day - they're not just for Christmas.
I also pulled out my favorite Kitschy Christmas Quilt yesterday. That one is made from isosceles triangles and sewn together in the same method. I love how triangles throw in a nice variation on traditional patchwork blocks and they make you look tricky and clever to your friends.

Jeanie
Completely awesome! Thank you:) 🙂 🙂
~Damita's Pretty Wrap~
This is so gorgeous!! Thanks so much for sharing a wonderful tutorial!! 🙂 Have a lovely weekend! xo Holly
Beth
Love it! I may have some leftover triangles I could do this up really quick!
Magnolia Tea
I love this block! I'd really love it in a quilt for my bed. Thank you for the tutorial. 🙂
Amber Colby
This block is absolutely gorgeous and I love your fabric choices! I definitely want to give this one a try :o)
Di~
Gorgeous! Thanks!
~Diana
CUTE CUTE CUTE! I want to make some now! :)<br />www.sewcraftychick.blogspot.com
Christine S
Thank you so much for sharing!
Angela , Jahrgang 1966
So lovely!!!!! all your stars...<br />kindest regards from angela
Rosa
Todas las estrellas son maravillosas, me encantan y dan ganas de ponerse a coser.Gracias por el tutorial y feliz fin de semana!!
Bowbailey
such creativity! I need to learn to play more and go in my own direction - but I think I'll copy you instead
Katy
Very Cute and perfect for Christmas. Great job!
diane
your pillows are very pretty and I love that Kitschy Christmas quilt too
Jenny
This is SO pretty, and thanks for sharing all the tips.
CathyK
Thank you for a wonderful tutorial on a darling pillow!
dolores
Ah....I was looking at the Christmas fabric I got from you a couple years ago....one day, one day!:) But it still made me smile and that's what it's all about right?:)
collectcreatecirculate.com
Excellent tutorial, and thank you for introducing me to the Accuquilt Go! Cutter... That is a new item to add to my wishlist!
Karen
I love this block and your fabrics. Thanks for the tutorial! (I'm working on a Retro Christmas quilt now and hope to find some sewing time this weekend. :-))
Handmade by Hanki
Gorgeous! and great tutorial, thank you for sharing with us!
margaret
thanks fr this tutorial, I will have a go sometime as I have a template suitable so no excuse not to.
nerospost
Hi Amy! Your new pillow is adorable! Fun, that I made yesterday this same star with blue and white. I could say that I made also pillow but it's really mini or it's a big ornament as I left it star shape. It's my North Star to lead to my home country, Finland! I shall link to your great tutorial today in Nero's Christmas Calendar. Happy December! x Teje
Tanichiwa
Wonderful! I have just got this die too - will try your pattern, Amy. Thank you! x
Allie and Me design
♥ W O N D E R F U L ♥<br />thank you so much!<br />dearest greetings<br />Gesine
withajoyfulheart
I just love this tutorial. You've made it all look so effortless. Very pretty pillow...looks great hanging out with the snowflakes!
Sarah Elliott
Awesome tutorial. Thank you!
Myra
Love your star! I think you have convinced me to get a fabric cutter! Those little tabs on the sides of the triangles would be so helpful.
June D
What a fun idea! Thank you for sharing. The triangle quilt on the wall is really wonderful too. Another great idea.
Atelier Blanc nord-ouest
Merci. Cette étoile est superbe !
Marianne
Thanks for the great tutorial. Love the star block!
Rita Ferber
Star of David! I've been looking for a tutorial for this for a while! Thank you!
Lori Landenburger
Splendid! love the fun and bright pillows. I thought I was the only one who left my red out thru Valentines! 😉
pandchintz
Great tutorial!
Katy Cameron
Great addition to your Christmas cushion collection :o)
Michal Woodruff
I need Christmas pillows and cushions. This is so pretty. Must make. Thanks for sharing.
Annette - MyRoseValley
Thank you for sharing this. I haven't been up to much sewing lately... I'm not sure why. But seeing this cute triangle pillow makes me want to have a go again. And I simply adore the wall hanging Christmas Quilt. I want to make one just like that. Thanks for sharing Amy. <br />xxx<br />Annette<br />My Rose Valley
margaret
another tutorial I will have to find time to do more hours in the day please
Sue Cleek
How great! Thank you for sharing!!<br />
Doro von Hand zu Hand
That's really pretty!<br />thanks for sharing your tutorial! i set a link and hope you agree.<br /><br /><br />best wishes, <a href="https://handzuhand.blogspot.de/" rel="nofollow">doro von Hand zu Hand</a>
Phyllis Malone
I made this as a Chrisrmas wall hanging. I decided it needed another row on the top and bottom to have an even border around the star. I'm working on one like that now for myself and hope to hand quilt it.
SwimmingTiger
I have been saving my new blue poppy flower fabrics just for this triangle project. Taxes are done and this is my reward sewing / quilting project. Mine will be the new cover for my wicker chair's seat cushion. Curious how the round cushion shape will look with triangles in it. Time to do math!!!
Rebecca DePanicis
I am a beginner, but found your directions very easy to follow. I am using blues and whites to make a Hanukkah pillow for a dear friend.
Amy
I love it! What a thoughtful gift.