
I've been so excited tor this helpful tutorial. Guest contributor Holly Lesué is sharing a super handy tip/trick for piecing patchwork quilt blocks. It's a great shortcut and time-saver for piecing simple squares efficiently. And great news! Holly also has a free printable version of this tutorial that you print and reference at any time while you sew!
Hello everyone! My name is Holly Lesué. I’m a quilter, fabric collector (hoarder?), and girl mom. Together with my graphic designer husband, Dave (a.k.a. Stately Type), I own and operate Maker Valley, where we design and sell quilty tees, quilt patterns, quilt kits, fabric bundles, and fun, quilty gifts (stickers, enamel pins, greeting cards, etc).
If you follow me on Instagram (@makervalley), you might be familiar with my style, but for those that aren’t, there are two things I absolutely love in quilts:
1. I love a simple, classic patchwork quilt.
2. I love scrappy quilts!
So when you combine those two to create a scrappy patchwork quilt, I’m ALL in! The patchwork quilts that I love the most are the ones that have no repeating fabrics. I just throw everything in! I happen to think that it’s hard to make a patchwork quilt look bad.

When I first started making patchwork quilts I would sew them together row by row and I really hated it! It was time consuming and I felt like my rows started going a bit crooked and wonky.
Then I had an epiphany somewhere along the way to break the quilt up into sections. I figured I could chain piece each section essentially turning them into big blocks, and then sew those big block sections together.
Making patchwork quilts became so much easier from this point on and now I love to make them!

Short-cut Method Piecing Patchwork Squares
I have made so many patchwork quilts over the years and have really honed my process. There are so many benefits to doing it this way! Here are a few:
- No more sewing rows! Hooray!
- Better accuracy with seams that line up.
- You don’t have to leave your quilt laid out until you can get to sewing it together! This is a HUGE benefit if you sew in a shared space like the dining room table!
- This process is SO fast. You can seriously knock out a large sized quilt easily in a day or in a number of hours if you don’t have any interruptions!
So let’s get to it!

Download a free printable version of this tutorial with diagrams here: Chain Pieced Patchwork Quilt Tutorial Downloadable PDF

You can also buy a ready-to-sew quilt kit in my shop: Pretty in Pink Patchwork Quilt Kit
These instructions are for a throw size quilt which measures approximately 54” x 67.5”.
You will have 180 total squares in 12 columns and 15 rows.
Step 1: Cut the Squares
Use a rotary cutter and ruler to cut 5-inch squares. You will need a total of (180) 5” x 5" squares.
Step 2: Arrange & Section
Using a surface like design wall or board (other good options include a table, bed, or the floor), arrange your 5-inch squares in a pleasing pattern to form 15 rows of 12 squares each.

Mentally divide the squares into six sections of 30 squares—with each section consisting of 6 squares across and 5 squares down.

Step 3: Pin & Stack
Use labeled pins to mark the first square in each row (“1” for the first row, “2” for the second, etc.) and to mark the start of the second section within each row (“1A” for the seventh square in the first row, “2A” for the seventh square in the second row, etc.).

Note: I use two kinds of pins for this process: numbered pins to designate the start of each row, and flat-head pins that I write row numbers and section letters on to.

Then, take each row of squares down from the board in order, forming a separate stack for each row (square 1 on the top of the stack and square 12 on the bottom). You will have 15 stacks for each of the 15 rows.

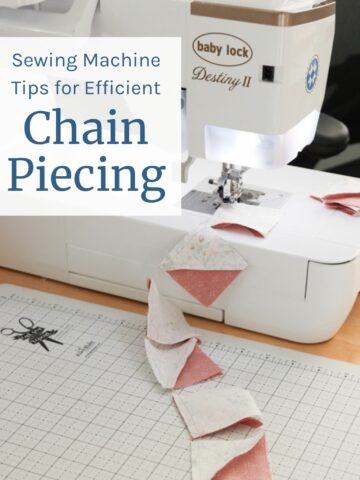
Step 4: Chain Piece
With the first five row stacks nearby, chain piece the top right section together—begin by taking the first two squares from row one and sewing them Right Sides Together (RST).
Without cutting the thread, sew the first two squares of row two together. Continue in that same way without cutting the thread in between each row, sewing the first two squares together from each of the first five rows.

Sew the third square of each row to their corresponding rows. Repeat this process with the fourth, fifth, and sixth squares from each row. Now you should have each row sewn together and chained to the next row.

Step 5: Press Seams
Now you’re going to press your seams. Keep it easy and consistent by sewing all odd rows to the left and all even rows to the right.

This way, all the seams will nest when the rows are sewn together.

Step 6: Sew Rows
Once you have everything pressed, sew the rows together. Once the rows are sewn together, you need to press your new seams that you’ve just sewn.

Step 7: Press Row Seams
For the left section, press your seams up. In the right section, press your seams down. This will allow your seams to nest again when you sew your sections together. Repeat this process for each section.
Step 8: Sew Sections
Sew the top two (left and right) sections together.

Repeat this process with the middle (left and right) and bottom (left and right) sections.
Step 9: Press Section Seams
Press the top combined section seams to the right. Press the middle combined section seams to the left. Press the bottom combined sections seams to the right.
Step 10: Sew Combined Sections
Finally, sew the three combined sections together.
Once those three combined sections are sewn together, you’ll have a finished patchwork quilt top. Yay!
I hope this technique has been helpful! May your future have an abundance of patchwork quilts in it! Happy sewing, friends!
Note: After the quilt top is pieced, I always sew an ⅛” seam all the way around the edge of the quilt top so that my seams don’t pop open.
Download a free printable version of this tutorial with diagrams here: Chain Pieced Patchwork Quilt Tutorial Downloadable PDF
You can also buy a ready-to-sew quilt kit in my shop: Pretty in Pink Patchwork Quilt Kit

Thank you so much Holly! This is such a great technique for piecing patchwork. (And you can never go wrong with patchwork, in my humble opinion.) Huge thanks to Holly for taking the time to document and teach this helpful tip!
There are lots of ways to piece patchwork, but this is definitely my favorite method too. It's such a big time saver and those blocks come together so quick!
Linda
Thank you so much for this helpful way to make these quilts. I can’t wait to use this method. Sure wish I would have known about it before. Ha ha.
dianejohnson
Thank you so much for sharing your directions. Can't wait to give it a try.
Diane Johnson
Bridgette
Thank you Amy and Holly, this is so helpful!
Gwyn
I made Holly's Christmas Plaid quilt kit. I love it! Enough scrap diversity for me to leave it out all winter to stay toast warm on my sofa!
Janet Sinclair
Wow, what a great way to piece a large patchwork quilt! I just finished a very large patchwork quilt and didn't know about this time saving method. I struggled sewing the long rows together and keeping the different blocks going in the correct direction! I said I would never make a quilt like that again. Now, I have a different perspective and may attempt it again. Thank you so much Amy and Holly for the excellent information.