
Are you in the mood for a fun project for Spring? In this post creative contributor Jenni Wingenroth shares a tutorial for a quilted carrot table runner. And it's perfect for using up scraps!
Hello! I’m Jenni - the maker and designer behind the quilting site Nollie Bean. I have always felt compelled to create. Even as a young girl, I would draw, sew, and make jewelry any chance that I found.
My love for fabric started when I was quite young. I dabbled with sewing off and on throughout the years making skirts, purses, totes and pouches, but - like many other quilters - I made my first quilt after having my son and was HOOKED! You mean I get to use how much fabric and all the pretty colors!?!?
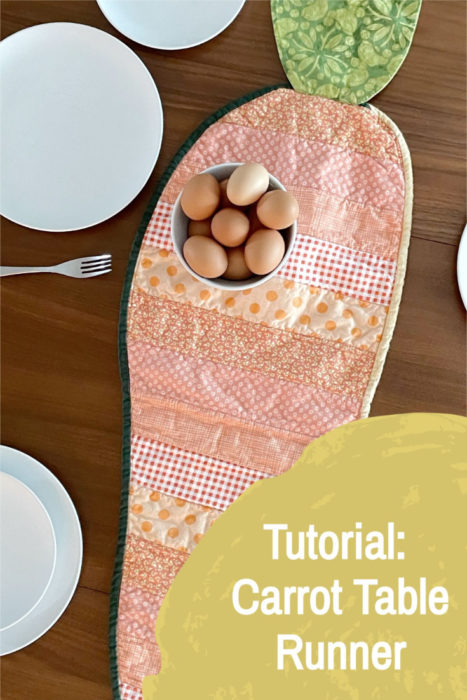
I’m so excited to share this fun carrot table runner project with you just in time for Spring and Easter! You can download the free instruction guide or follow the steps below to make your own super cute carrot! I promise this is a quick and easy project - even adding the carrot top.
The fun of Table Runners
Now that we’ve gathered our supplies, I’d love to take a minute to chat about why table runners are the perfect quilty project and incredibly underrated 🙂 They are fun to make and the perfect size to complete in a day! Table runners make wonderful gifts and can brighten up anyone’s home with some handmade charm.
Fun fact - a table runner was actually my gateway into quilting. My step mom gifted me a Christmas table runner one year when I hosted the holidays and I wanted another one when Valentine’s Day rolled around. I made a simple table runner with terrible appliqué hearts and then dove head first into a queen size quilt after that.
But, enough about why table runners are awesome, let’s get our amazing carrot made!
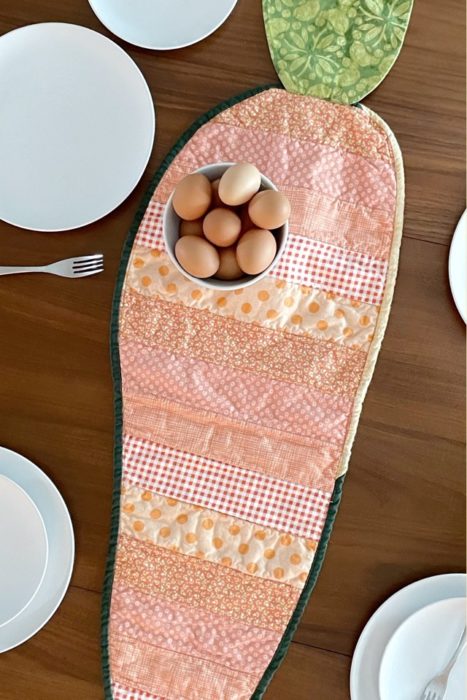
Table Runner Fabric Requirements
First, let’s gather up our supplies! You'll need:
- 15 strips of orange (or color of choice) fabric that measure 3" x 22” for the body of the carrot
- 1 piece of green (or color of choice) scrap fabric that measures approximately 18" x 18” for the carrot top
- 1 piece of batting measuring 26" x 42"
- 1 piece of backing fabric measuring 27" x 43"
- 4 strips measuring 2 ½" x 42" for binding your table runner
Carrot Table Runner Assembly
Step 1: Sew your orange strips together
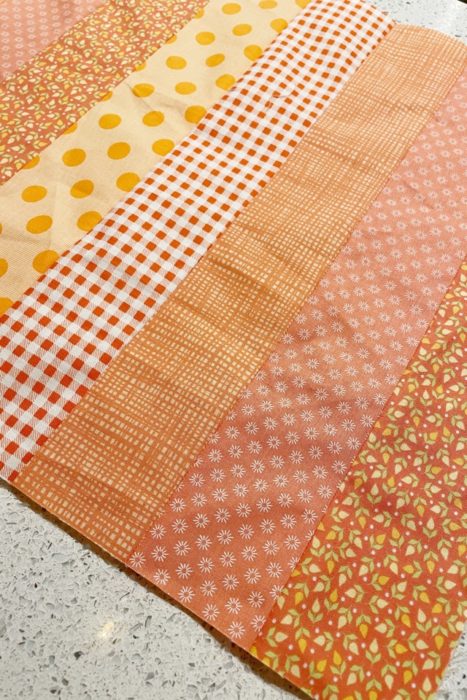
You'll begin by sewing all of your 3" x 22" strips together. Make sure you are sewing the strips right sides together and using ¼" seams. I like to press all of my seams open.
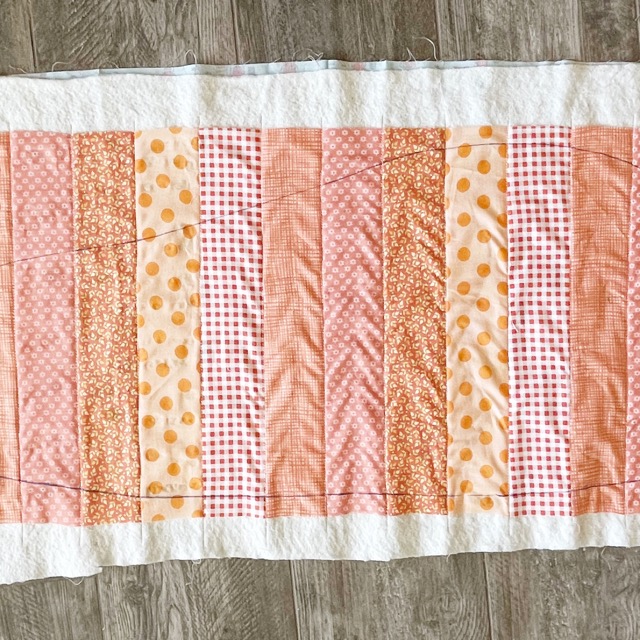
Step 2: Quilt your table runner
Next, create your quilt sandwich by placing your backing fabric wrong side up, place your batting on top, and then your table runner right side up on top of the batting. Baste your quilt sandwich as desired and then quilt as desired.
Tip: For smaller projects like this table runner, I find spray basting to be the easiest basting method.
I quilted mine with a very simple stitch in the ditch in between all of the strips.
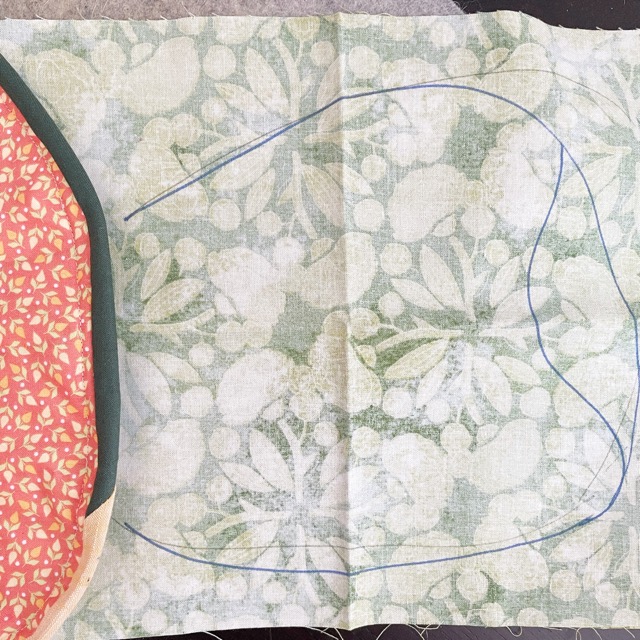
Step 3: Create your carrot shape
After your table runner is quilted, trim off the excess backing and batting to make it easier to work with.
Then, using a marker that is easy to see, but washable, draw the outline of your carrot shape (see photo above). Be creative and fun here. Do you want a perfect carrot, or one that is slightly wonky on one side like mine? Then, cut on your marked line.

Step 4: Bind your table runner
Time to make our binding. Sew your 2 ½” strips together to make your binding and bind your table runner as desired. Be sure to go slow and carefully around the curvy parts.
I decided to machine bind my table runner using some leftover binding scraps from recent quilts I've made. I have always machine bound my table runners, because let’s face it, I’m the mother of a young child - my table runners will be washed….A LOT!
Step 5: Create your carrot top
Here is another fun part - it's time to make the cute carrot top!! Take your green scrap fabric and fold in half, right sides together. Then, using your marker, draw your carrot top shape.
Feel free to use the picture below as a guide. However, you should know that I'm not the best at drawing, so I started with a half circle and then added a dip in the middle :). If you’re not great at drawing, please feel free to do the same, but I’m also hoping you are better at drawing carrot tops than I am. Either way, the result is very cute!!
Once your carrot top shape is drawn, carefully sew on your drawn line, leaving the bottom open to turn right side out.
Once sewn, turn right side out through the opening you left on the bottom and press.

Step 6: Attach your carrot top
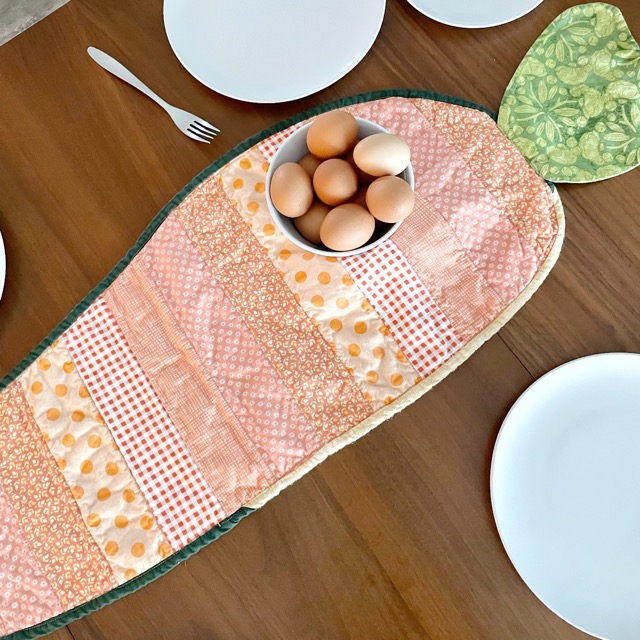
Next take your carrot top that has been turned right side out and align it with the top to your carrot. Have the raw edge of your carrot top just inside the binding as the picture shows below and stitch across your carrot top.

Next, flip your carrot top over your stitched line so that the carrot top is in the correct position, press, and top stitch over where your carrot top attaches to the carrot body. This stitch will keep the carrot top in its correct position hiding the raw edge below.

Step 7: Enjoy your new table runner!
Hooray! Your new table runner is finished and ready to be used and enjoyed.

This table runner is a favorite in my household and I hope it becomes a favorite in yours. Make sure you bookmark this page or download the free instruction guide to make your own!

Thanks, Jenni!
I'm so excited that spring is on it's way. Here are some other carrot or spring-inspired projects you can make:

Try your hand at Foundation Paper-Piecing with these scrappy spring carrots - free pattern from Leila Gardunia.

Fabric Carrots Tutorial from Ameroonie Designs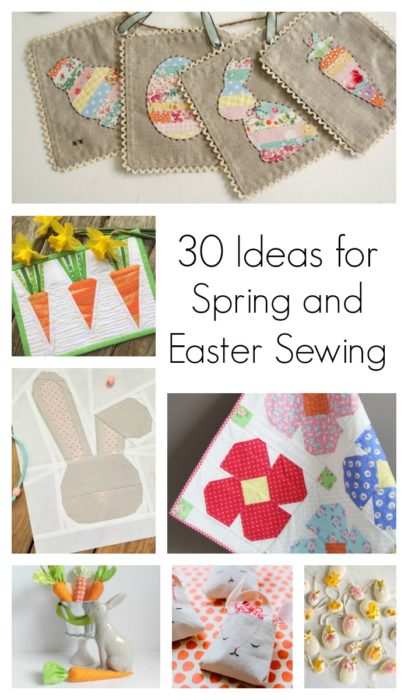
And even more Easter and Spring Sewing Ideas here!
ingridmijares
Gracias por el tutorial! Como para hacer de cualquier tamaño. Me encantó. Gracias por inspirarnos