
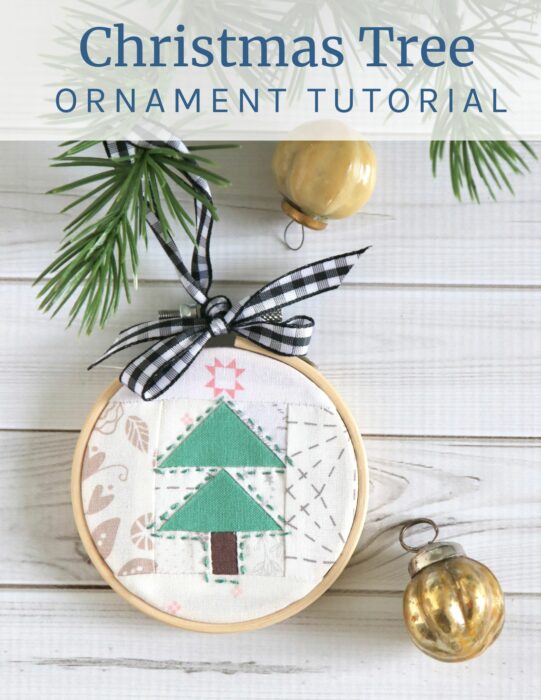
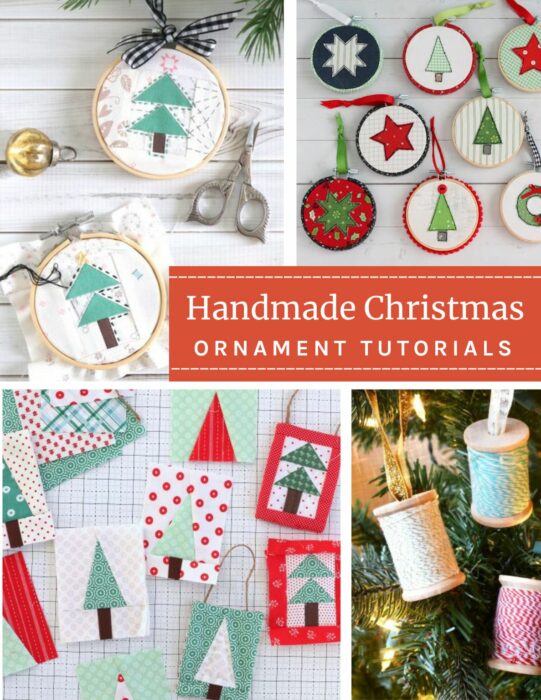
In this post I'm sharing a fun little project to make a mini Tree Christmas ornament in an embroidery hoop. Can you believe Christmas is only 2 months away?!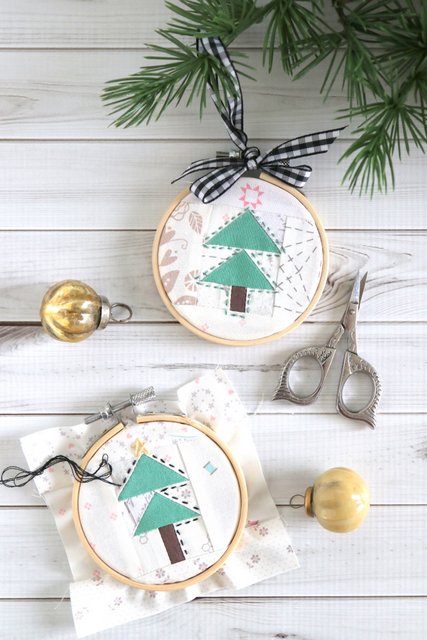
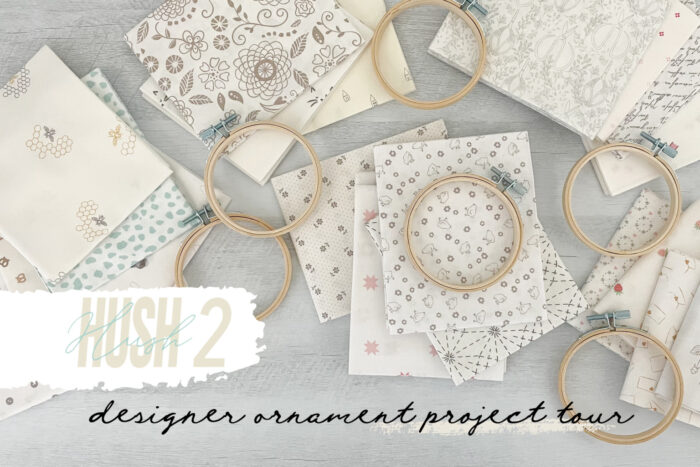
This project is part of a collection of ornaments made by various Riley Blake Designers to celebrate the release of the latest designer collaboration collection of low volume prints called Hush, Hush 2.
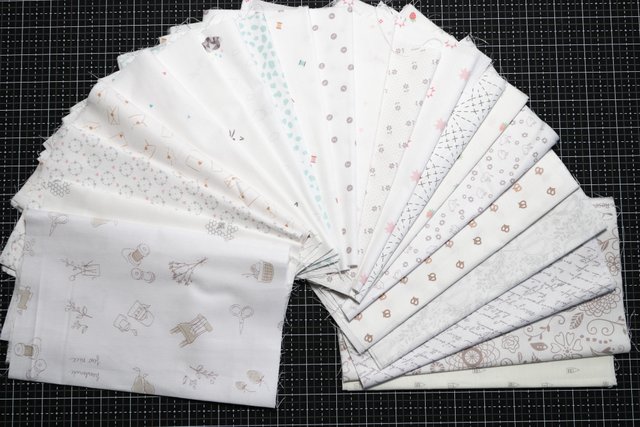
Low Volume (light background prints) are so popular right now and so versatile to use in many projects. They're probably the fabric I collect most these days.

Here's a close up look at some of these fun prints. SO many good ones. And some especially good sewing-themed prints like spools of thread, scissors, sewing machines, quilt blocks, buttons, etc.

Each of these prints was designed by 21 different Riley Blake designers to create this collection. My print is the gray wreaths with the pink hearts in the upper left. 🙂
You can find Hush Hush 2 available in individual yardage or in as a collection in Fat Quarter Bundles or Precuts. Available now from the Etsy, the Fat Quarter Shop, and hopefully your favorite local quilt shop.
Alright. Let's start stitching!
Tree Quilt Block Ornament Tutorial
This little traditional tree is a quick block to assemble. Scroll down for a free printable PDF version of this pattern/tutorial.
Supplies Needed
Here are the fabric requirements for one ornament:
- 2 green rectangles 1¼" x 2"
- 4 white squares 1¼" x 1¼"
- 1 brown ¾” x 1¼"
- 2 white rectangles 1 ⅛" x 1¼"
- 2 white rectangles 2¾” x 2"
- 2 white rectangles 5" x 1½"
- batting scrap 2" x 3"
Other supplies:
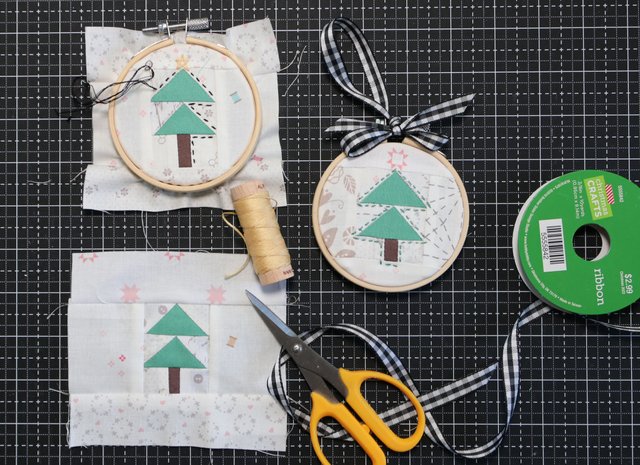
- 3" embroidery hoop (You can find them at your local craft store or in bulk from Amazon.)
- Embroidery floss + Needle
- Ribbon for hanging ornament
Ornament Instructions
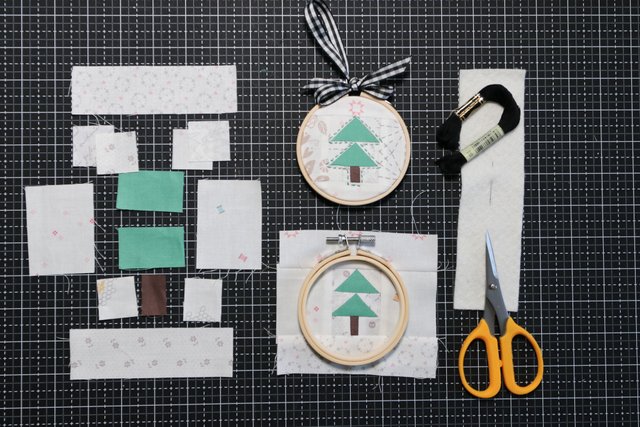
Draw diagonal line on the back of all 4 white 1¼" x 1¼" rectangles. Place one square on the right sides together on top of a green 1¼" x 2" rectangle. Sew seam directly on drawn line.

Trim corner ¼” away from the seam and open up the white triangle and press seam toward the white. Place a second white square on left side of green rectangle, overlapping with first white triangle. Sew seam directly on the line. Trim corner ¼” away from seam, fold white triangle open and press seam toward the triangle. Repeat with second set of white squares and green rectangle.
Using ¼'' seam allowance on the remaining seams, sew one green triangle block on top of the other triangle block to create tree. Sew 1 ⅛" x 1¼" rectangles to either side of brown ¾” x 1¼" rectangle. Press seams toward the brown. Sew this unit to the bottom of the 'tree' triangles to create trunk. Press seam toward the green.

Sew two 2¾” x 2" rectangles on either side of the tree block (continue to use ¼'' seam allowance). Press seams toward the outside rectangles.
Sew two 5" x 1½" white rectangles to the top and bottom. Press seams toward the top and bottom rectangles.
Carefully center tree block in 3" embroidery hoop.

Optional: Add outside stitching
Trim corners of batting scrap. Add a few small drops of glue where seams overlap (and where you won't be stitching) and glue batting in place. This is optional, but I like to do this to add a little more dimension to the stitching.
Stitch running stitch ⅛" away all around the outside of the tree block using 3 strands of embroidery floss.
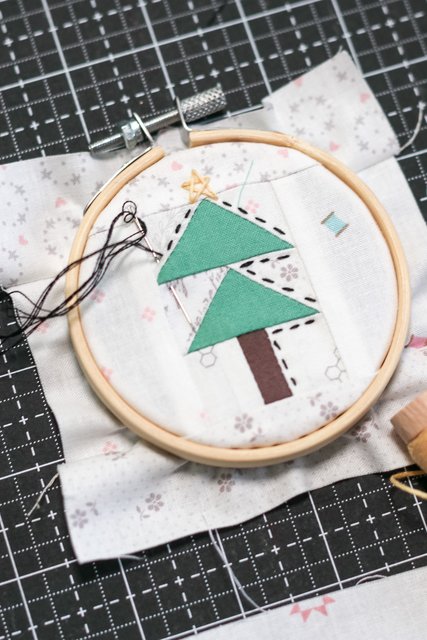
Feel free to use a contrasting or matching thread color. Or embellish with a star on top. The options are endless!
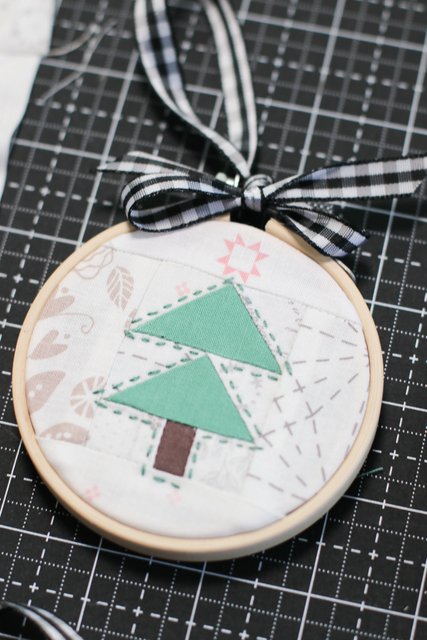
Tack excess fabric and glue behind hoop and tie ribbon to screw to create a way to hang the ornament. (PS - Like my fussy-cut star on this one?)
These would be a fun little project to mass produce as gifts.
Find the Printable PDF of this Christmas Tree Ornament pattern HERE
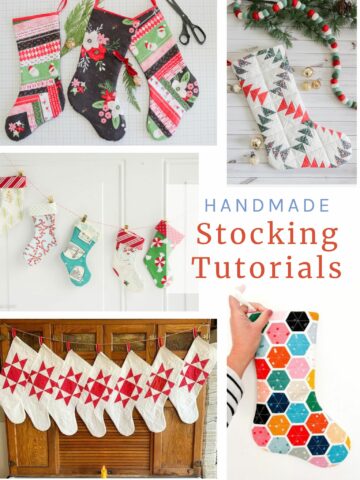
More 3" Hoop Christmas Ornament Free Patterns
And be sure to check out the other ornament ideas and tutorials from other Riley Blake Designers. SO many adorable options in a variety of styles and techniques. You can find those that have shared so far here:
Tara Reed: Embroidered Believe ornament
Sandy Gervais: Pieced Wreath ornament
Kristy Lea: Foundation Paper Pieced Penguin (!) and Baubles
Christopher Thompson: Foundation Paper Pieced Tree
Rachel Erickson: Foundation Pieced Ugly Sweater block
Beverly McCullough: Sweet Christmas Quilt Star
Fran Gulick: Christmas Gift Ornament
Lindsay Wilkes: Pinwheel/Button Ornament
Be sure and check them out. Oh my goodness - so cute and so much fun! You can see all 11 ornaments here.
If you're looking for other Handmade Christmas Ornament Ideas - check out this list of free tutorials.

Sue Hoover
These ornaments are wonderful! Thank you very much for sharing. I grabbed the Christmas Tree ornament as well.
Jan Weicksel
I love this! Thanks so much for making the printable version… I made my copy and will hopefully cut pieces out tomorrow! Thanks again!