
Today I am so lucky to have a guest post from the very wonderful, Sachiko Aldous of Tea Rose Home. I am so grateful that she was willing to share a guest post today as I get ready to head out the door to Quilt Market this spring. (This post was updated in 2019.)
I first met Sachiko last year at a humanitarian event tie-ing quilts for the victims of the earthquake in Japan. The earthquake hit Sachiko's hometown and directly affected her family. I've always admired Sachiko's amazing talent. Since that time I've been able to get to know her personally as well, and she is such a genuine, kind, beautiful person. Sachiko has an amazing collection of ideas and tutorials - including a tutorial for the sweater refashion in the picture below. Oh. My. It is amazing.
I think you will love her tutorial today. Thank you Sachiko!
Hello everyone, I am Sachiko from Tea rose Home! I am visiting Amy's lovely place here today while she is away. I am a busy mom of three kids, but when I am not doing mommy things, I do...
Refashioning...

Make Jewelry...


Make quilts...


Make kids’ stuff...

and much much more. 🙂 I hope you will stop by sometime and say hello.
Today, I am sharing some tips on how to sew with oilcloth/vinyl coated fabric. Do you fear them or don't know what to do with them? No worries, when you know these little tricks you will be sewing with oilcloth in no time. I have made, bibs, bags and pouches in the past, and I just LOVE them.
Here are some tips I can share with you through my experiences;
{Tips}
1. Let's talk about the needle, you want to use a size 16 needle (denim needle), especially when you are going to sew many layers. When I first started sewing with oilcloth, I didn't really think about this and broke so many needles, I am so grateful that I didn't go blind from this.
2. Use larger stitches. Usually I sew with 2.5 stitch length on my sewing machine, but with oil cloth I adjust it to 3.0. When the stitches are too close together, the puncture from the needle might weaken the fabric and cause ripping. Trust me...it happened to me.
3. When you are sewing on the right side(printed side) of the fabric, the presser foot might stick and it is really frustrating to sew. There are many method to help with this, and I tried baby powder once, but I didn't care for it. I felt like the cleaning was a pain. I use tissue paper-the kind you use for gift wrapping. You simply place it between the presser foot and oil cloth. It makes a big difference!
4. Psst... The great thing about these types of fabrics is that they don't fray, so if you want to serger it, or use pinking scissors that's fine, but you don't have to!
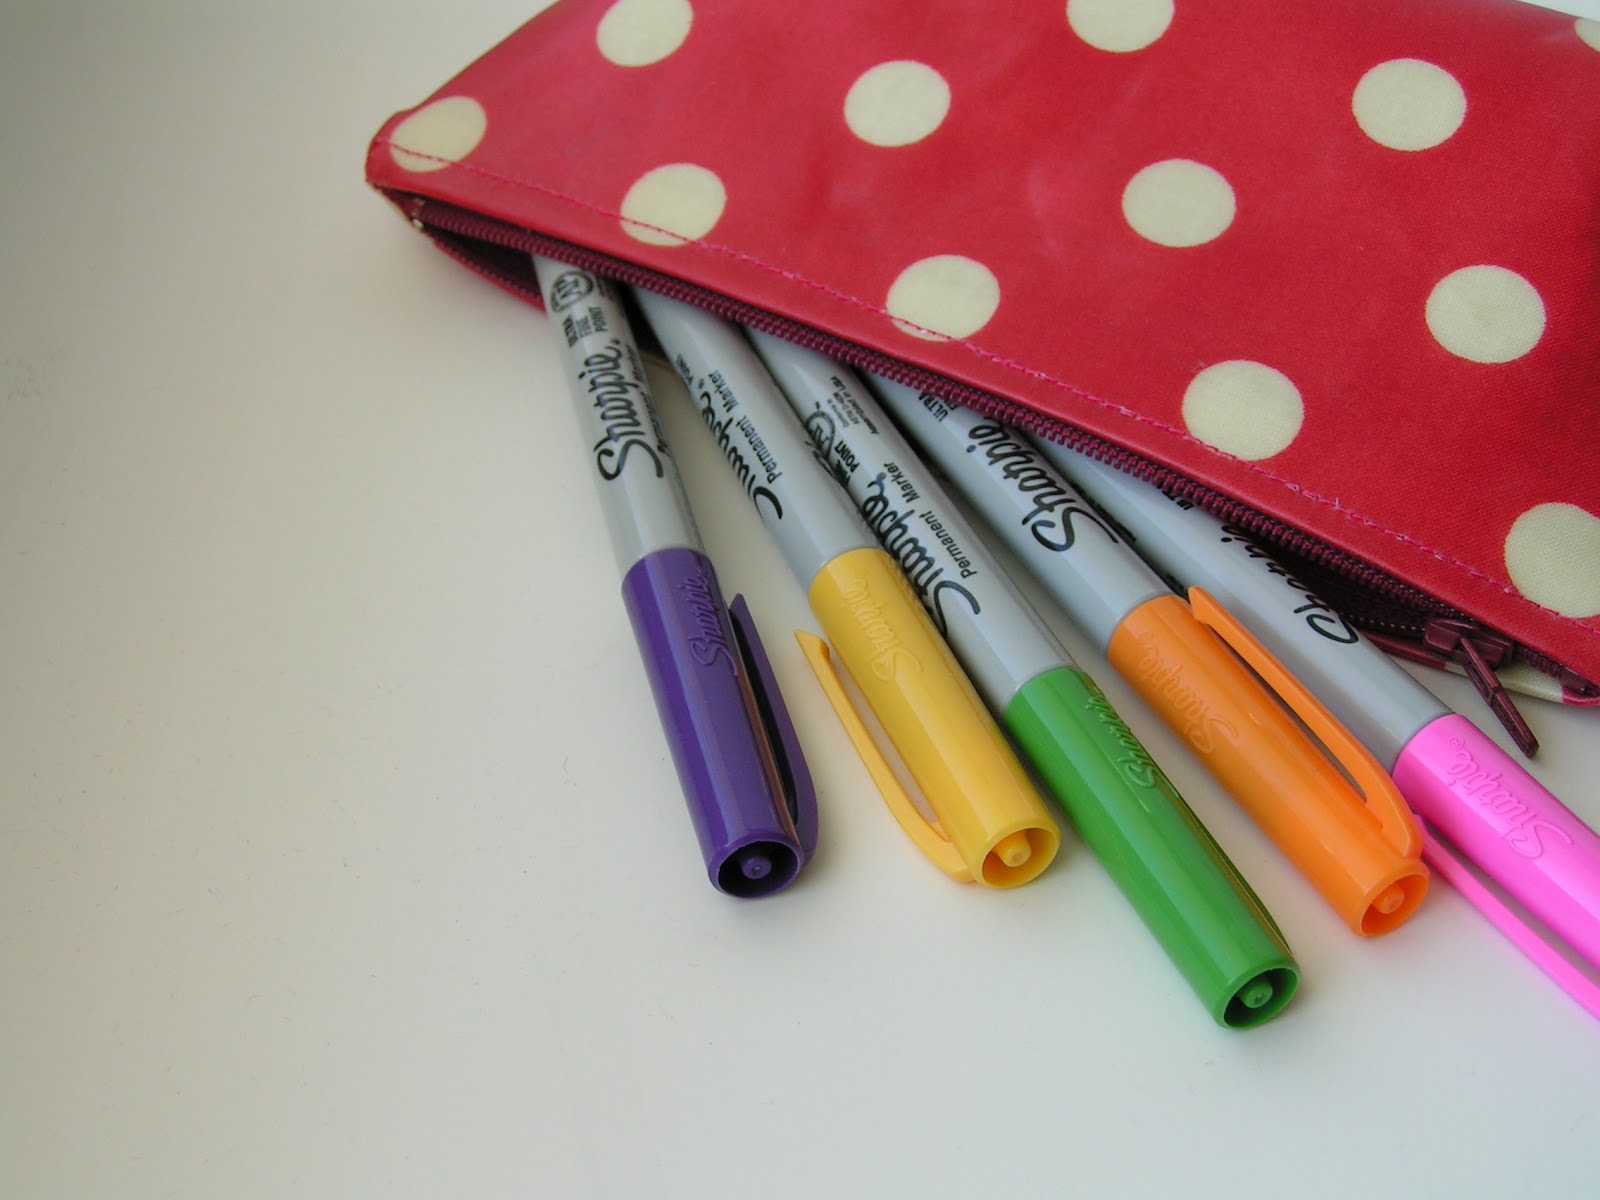
{Project}---Little Pen case
* You need (I used what I had on hand, so you can always change the measurements of the fabric and zipper)
2 --- 5 ½" x 8 ½" oilcloth
7" zipper
Matching thread
How to
1. Mark ⅝" from outer edge on the 8 ½" side of the fabric. Leaving the middle part open, just sew both sides.

2. Lay the fabric flat as the picture shows, open the seam. Pin the zipper onto the seam.

3. Change the presser foot to the zipper foot, and place tissue paper between the presser foot and oil cloth.

4. Sew all around the zipper.

5. Tear off the tissue paper.


6. First, open the zipper (otherwise you can't turn the fabric inside out after you sew all around it), Put together the right sides of the fabrics and pin. Sew all around it.

7. Pinch the corner of the bottom to give the pouch a boxed bottom. Mark 1" from the tip of the corner and sew.


8. Turn the fabric inside out. Sew to the end of the zipper


Time to have fun!
I hope you enjoyed my post. Thank you Amy for letting me come over today!
I love it! Now I want to make a dozen little zippy oilcloth purses. (She makes it so simple!) Thanks, Sachiko!

Summer Killebrew
What a darling little pouch! I'll admit it...I'm so intimidated by fabrics that aren't cotton, so I really appreciate you breaking it down and offering some tips! I just may give this project a try...my girls could use a couple of these. 🙂
lisa
can you show a photo of the finished boxed bottom...I don't quite get it without the visual. Otherwise, amazing instructions and tips!
Katy Cameron
Cool wee tute :o)
vintage grey
Great tutorial!! I need to get some fun oil cloth!! Thanks, and hope you are having a great day!! xo Heather
Calli Makes Do
So cute. What a great tutorial! Thanks Sachiko. You always make the most lovely things.
Epesse
Hi! Thanks for sharing the tissue paper tip for sewing oilcloth. I've made a little lunch bag using oilcloth and my stitches are... well, let's say not too straight! 🙂 I'm gonna try using tissue paper. I think I still have some oilcloth scraps.