
I'm gathering all of my quilting tips and tricks and this is good one. We all make quilting mistakes at times. For example, have you ever ended up with a quilt block that is too small? Don't you hate that? In this post Leila Gardunia shares a super simple tip for resizing a quilt block. This method is particularly useful for a block that is part of a larger sampler quilt.
Help! My quilt block is too small!
Hi! This is Leila Gardunia. I live in St. Louis, and I am addicted to audiobooks, a chocolate snob, and quilt designer. I specialize in scrappy foundation paper pieced patterns and Block of the Month quilts. You can find them all in my shop at LeilaGardunia.com.
I don’t know about you, but sometimes my blocks don’t come out to the correct size. This is a super common problem, especially if you are trying out a new piecing method. If the blocks are slightly too large, I sometimes trim the blocks down to size. This cuts off some of the points in the seam allowance, but it allows the blocks to fit together nicely.
But more often, my blocks are too small. For the blocks to fit together without puckering, they need to be under-sized by no more than ¼”. It is possible to “ease in” that amount of fabric. However, if they are any smaller, they will need to be remade - and that makes my want to rip out my hair.
Out of desperation, I discovered another option. It won’t work with all quilts, but tends to work well in sampler style quilts. Before I show you how to do it, let me give you a bit of background.
In Japan, there is an art of mending broken pottery called kintsugi. Lacquer is mixed with gold, silver, or platinum and used to glue the pieces of pottery back together. The breakage and repair of the object becomes something to hide to highlight not hide - part of the object’s history. I loved this idea and decided to embrace it in one of my quilts a few years ago.
It all started when I got my new sewing machine. I was so excited that my new machine had a ¼” setting, and I knew it would help me keep an accurate ¼” seam allowance throughout my blocks. But when I finished making two blocks, I measured them and found they were over a ½” too small! I could not believe it! I went back and measured the seam allowances, and they were all just a hair over ¼”. All of the slightly large seams added together made my blocks ½” too small! It was so frustrating that my brand new machine had let me down. I called the shop, and they showed me how to change the settings so the ¼” seam would be a scant ¼" (just under a ¼” instead of just over), and thankfully, I haven’t had any problems since.
Instead of remaking the blocks, I decided to frame out two sides with bright contrasting fabric to bring them up to size. Like kintsugi, I decided to highlight the flaws and celebrate the history of those blocks. I will always remember how they were one of the first things I made with my new sewing machine.
How to Resize a Quilt Block that is Too Small
This technique works well with blocks that are ½” or more too small.
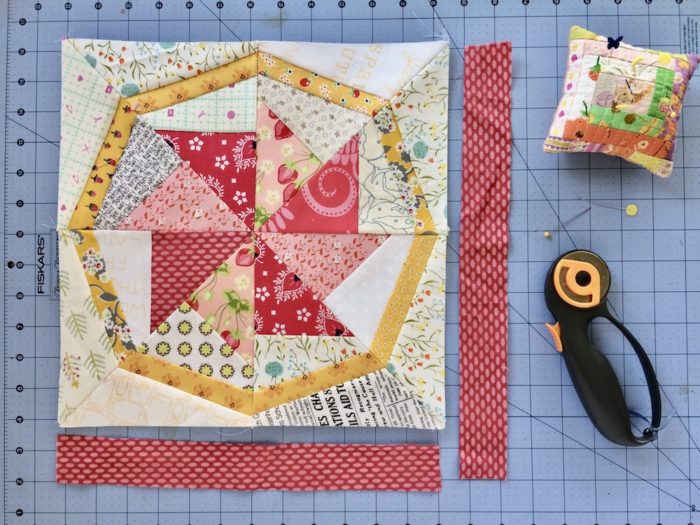
Simply cut two strips of contrasting fabric at least 1 ½” wide: one strip the same length as the block and the other 1” longer than the block width.
Sew the strips onto adjoining sides of the block and press away from the block.
Then trim the block to the correct unfinished size.
This block is part of my State Fair sampler quilt.
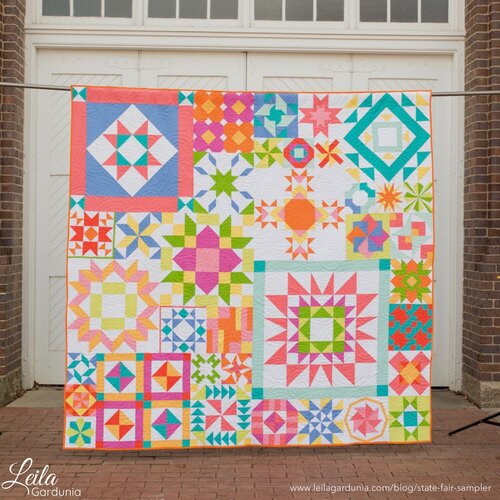
Here’s my State Fair Sampler quilt. Can you spot the modified quilt blocks? I think they actually add a bit of interest to the quilt.
If worse comes to worst and you have quilt blocks that are ½” or more too small, consider embracing the fact and adding fabric strips to bring them up to size. You might find you like the look!
Good luck, and may your seams always be a perfect ¼”!
Such a simple solution to a oft-needed problem. Thanks, Leila! Be sure to check out Leila's excellent variety of quilting tutorials on her blog.
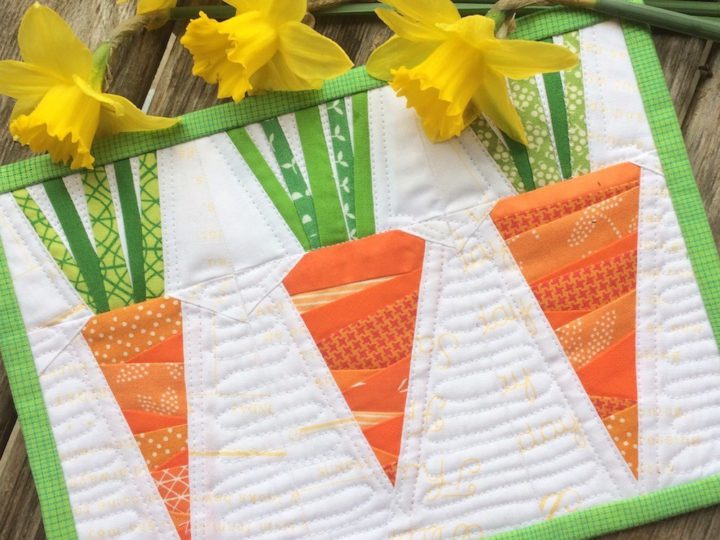
One of Leila's specialties is foundation paper piecing. Here are a few of her free foundation paper-piecing projects including these fun springtime scrappy carrots with handy tips for determining what size fabric you need for each piece
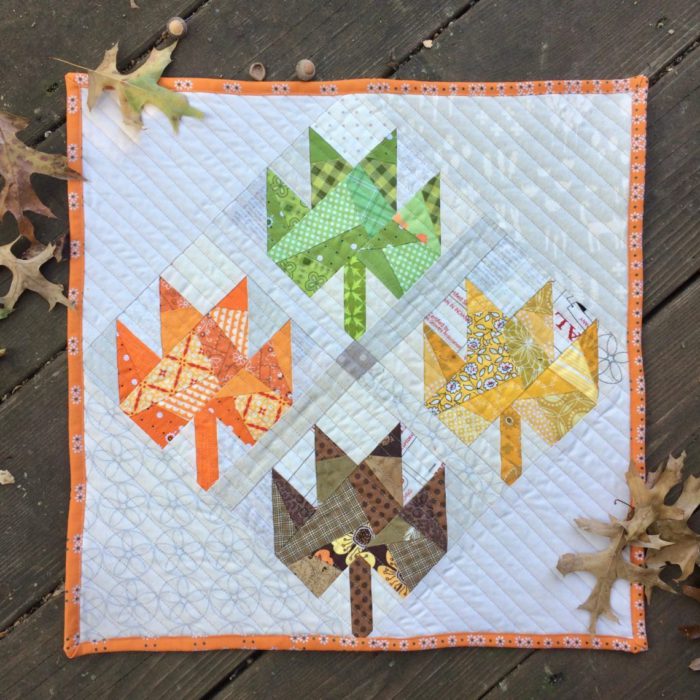
and this scrappy maple leaf mini quilt. So many fun possibilities with foundation piecing!

Leila also has an upcoming quilt along for her Hello Geese quilt starting February 26. You can find all of the details at LeilaGardunia.com.
Miss Daisy
Thank you for that helpful information , it pops with the added border . I I love the two mini quilts and will be checking out her site. Have a Blessed weekend.
Deb S
This post couldn't have come at a better time - new sewing machine and adjusting to sewing on it too! Was planning on re-doing all my star blocks and now can just adjust with this sewing trick. Thank you, thank you, thank you!
Mary Rogers
Thanks Amy. I went to Leila's blog and signed up for the free 52 triangle FPP patterns. Lovely item to have and use for my crumb pieces. I enjoy your emails and your sharing of wonderful quilting information and tidbits. Have a great weekend,
Rosemaryflower
I love Leila. She is so zippy and creative.
Thank you for sharing her quilty knowledge
Amy
Doesn't she have great ideas?
Jen
Love this! I’ve done this before but did celebrate it with a contrasting color. I don’t seem to have the problem anymore. Sometimes when I make a new pattern. It’s never boring 💖
Judy
On my machine I need to adjust it each time I want to change the seam allowance. Usually I leave it alone as I for one don't use 1/4" especially on baby quilts but use the machine setting which is probably 3/8". Well for some strange reason this time I decided I would change it to the1/4", bad idea as I misread what the setting was suppose to be and didn't realize I had a way to small seam allowance and didn't realize it until after I went to baste my quilt. I went back and reinforced each seam that I could with a zig zag stitch but it made the seams stand up instead of laying down. I didn't have time to redo the entire quilt so I used iron on interfacing about 2 1/2 " wide on every seam. What a job that was but is seemed to work somewhat and by the time I got my backing back on and did some hand quilting it was better but not perfect. I am going to stick with my slightly larger seam allowance and feel if all the seams are the same it will work, it may not be the finished size the directions say but I feel it doesn't matter and for me it is better to be comfortable know my seams are not going to pop open with all the laundering a baby quilt gets. I know a lot of quilters won't agree with me but that's ok .
Cindy Wiens
This is a great tip.
Jude Dealy
Um, if the blocks are all the same, I think it would be acceptable but if the blocks have a different number of seams, then there would be a discrepancy.
it's all good healthy fun.
Marly
Thanks. This was just what I needed to read. I'll be putting it into practice very soon.
peggy
Thanks for your tips! I'll be using them. I'm adding something for you to fix in your text...if you want to ;-). Above it says "...the object becomes something to hide to highlight not hide – part of the object’s history" and i think you meant "the object becomes something to highlight not hide – part of the object’s history"
Bear Creek Quilting Company
Great tip. I think the final product is that much more special for it, too.
beadgirl
I do the same thing! For my first bed quilt, I chose 9-inch blocks -- mistake number one. I also used these blocks to teach myself how to do patchwork -- mistake number two. I ended up with a pile of blocks ranging from 8 inches to 10, but not enough of them to make a queen-sized quilt. Then inspiration struck; instead of sashing, I added frames around each block to size them up to twelve inches.
Amy
so smart!
ingridmijares
Hola!!!
Gracias por los tips y los enlaces. Han sido de mucha utilidad. Guardaré esta información. Saludos desde Venezuela.
Bear Creek Quilting Company
What a great tip! Very creative and resourceful.