
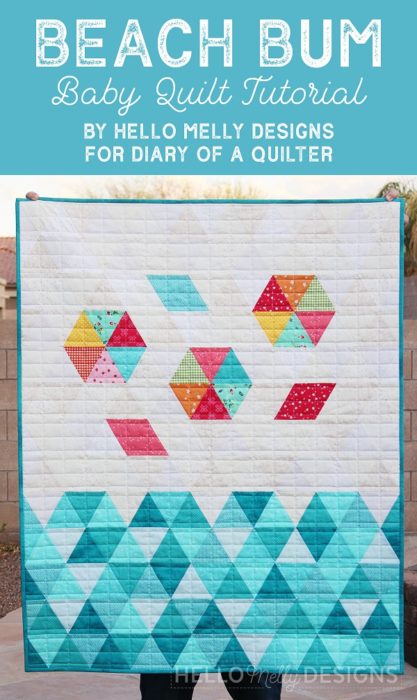
I'm so excited to have Melanie Collette of Hello Melly Designs sharing a guest post making this super cute "Beach Bum" triangle baby quilt tutorial.
In this tutorial Melanie also clearly teaches how easy it is to piece a patchwork quilt using 60 degree equilateral triangles - a quilting technique that is so useful in so many quilt designs.
Hi everyone, it's Melanie of Hello Melly Designs here with a fun tutorial for you that is perfect for summertime! This Beach Bum baby quilt is just what this Arizona girl needs... some ocean front property 😉
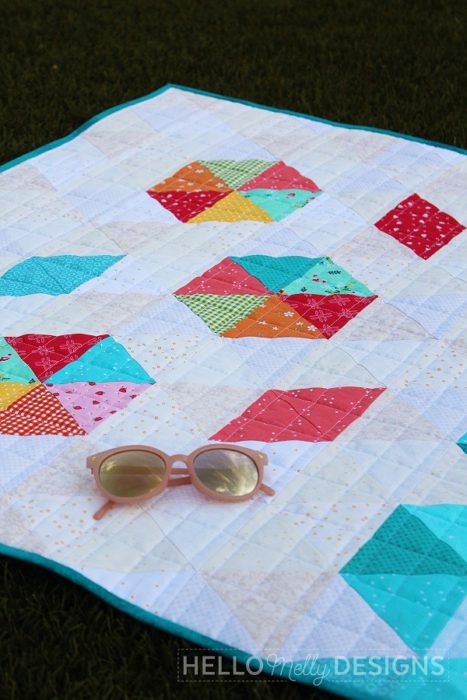
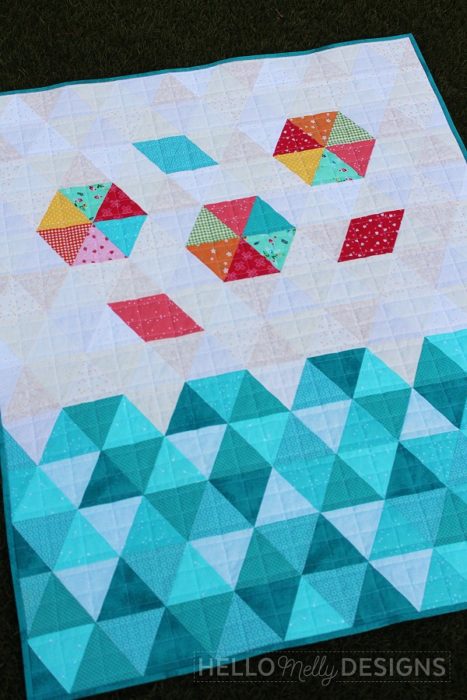
Today's baby quilt tutorial uses a fun geometric favorite... the equilateral triangle! Triangle quilts are a really fun version of the basic patchwork quilt. It requires a special ruler or template, but it is still quick and it has a great modern twist to it. With this version, the arrangement of the colors reveal beach umbrellas and towels on that sandy beach, with lazy waves and a glittering ocean along the bottom. Scrappy fabrics are what really show off the different shades in the sand and the ocean!
Triangle Baby Quilt Fabric Requirements:
- 5 Fat Quarters "SAND" fabrics, for a total 133 triangles
- 4 Fat Quarters "WATER" fabrics, for a total 90 triangles
- 24 various 5" squares of UMBRELLA/TOWEL fabrics, making sure there are 2 of the same prints for the towels.
- 1 ⅜ yards backing
- ½ yard binding
The ruler I use here is a Fons and Porter 60 degree ruler.

Cut the Fat Quarters into 4" strips, and using the triangle ruler, cut the selvedge and throw it away. From this point, you'll rotate the ruler to get the triangle cuts, for about 8 triangles per strip.
Once you have all the required triangles cut, use a design wall or floor to lay out your quilt, using the diagram below.

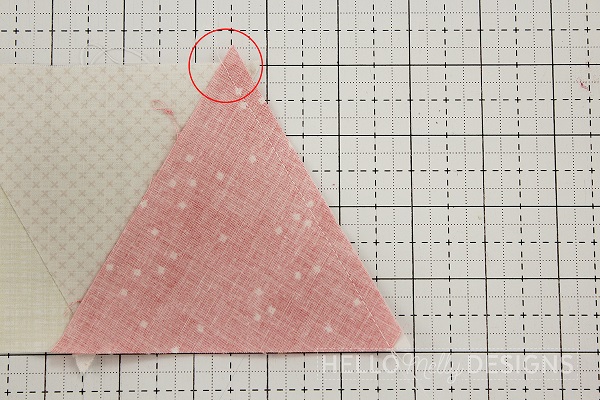
Then, start sewing those triangles together! With the ruler, the triangles will have a blunt corner. I like to line up the blunt edge with a pointed edge so I can more easily tell if my ¼" is on track, since the blunt edge is ¼" from the point.
After you sew one triangle to another, you'll need to press the seam (pressing each row in opposite directions will help you line up the points, but will have a little more bulk. Pressing seams open will reduce bulk, but it is harder to line up points.
Whatever your preferred method, stick to it for the whole quilt). Now it is a matter of just sewing, pressing, and sewing again until the row is complete!

Once you have a whole row together, trim those threads and, if you want, trim those points off too. Put your row back on your design wall/floor and move on to the next row!

Once the rows are all sewn, it is time to get those rows together. My seams were pressed in opposite directions, so I nested those seams and sewed with a scant ¼" in order to avoid losing my points. Press your seams open, regardless of how you initially pressed your rows.

When all the rows are together, you'll notice the jagged edge on that quilt! Just trim those sides off, leaving ¼" seam allowance from the points. After trimming, that quilt top is done!

Baste quilt layers together. I machine quilted this with a straight line grid pattern.
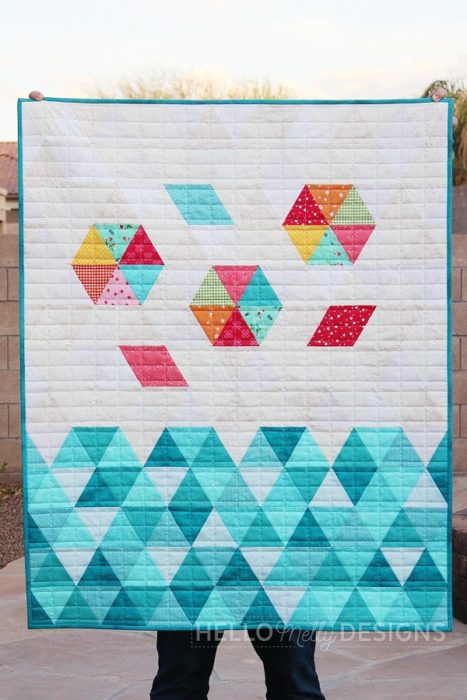
After some quilting, your end result is a delightfully scrappy aerial view of life on the beach.

The baby quilt finishes at 37" x 45.5".
(Whale fabric backing is from the Deep Blue Sea fabric collection.)

If you can't make it to the beach, whether because of changes in travel plans or because you are land-locked like we are in Arizona, this might just hit the spot for you too!
Happy quilting 🙂
Thank you Melanie! Be sure to check out Melanie's blog at Hello Melly Designs for other project, patterns, and printables, including one of my favorite free printable Quilt Care Instructions cards.
Melanie also designed this adorable patchwork Butterfly pocket pillow tutorial.
This quilt is so perfect for summer. If you're looking for more summer sewing inspiration, check out this list of 25 Ideas for Summer-themed Sewing Projects.
If you're looking for more triangle quilt inspiration to use your new triangle piecing skills, check out this Pinboard of Triangle Quilts.

Julie Vogel
I love this quilt! Thank you for the cool tutorial! I always enjoy your blogs!
Marsha Loewenberg
Too cute and fun!
KatieQ
Thank you Melanie for sharing the fun design. I appreciate that you showed the back of the quilt top to show the best way to iron the blocks.