
I'm excited to have a new guest post writer today! Welcome Melanie Collette. She writes the blog Hello Melly Designs and has a slew of cute quilt patterns (including this amazing Popsicle Quilt!) and is a brand new fabric designer for Riley Blake Designs. Today she's sharing a tutorial for this adorable quilted butterfly reading pillow and she's also included a darling free printable bookplate!
(This post contains affiliate links.)
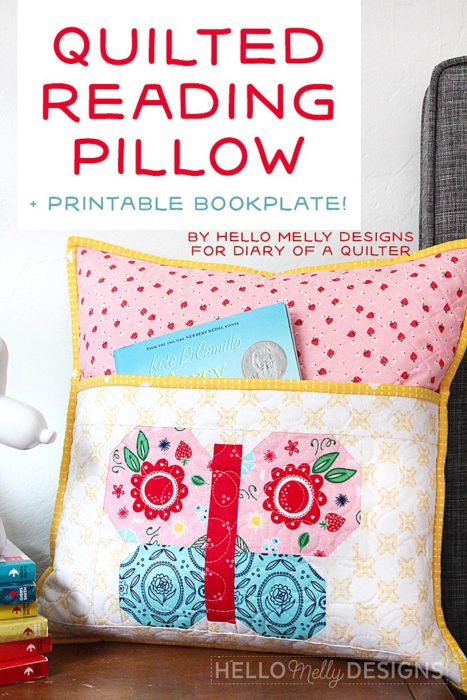
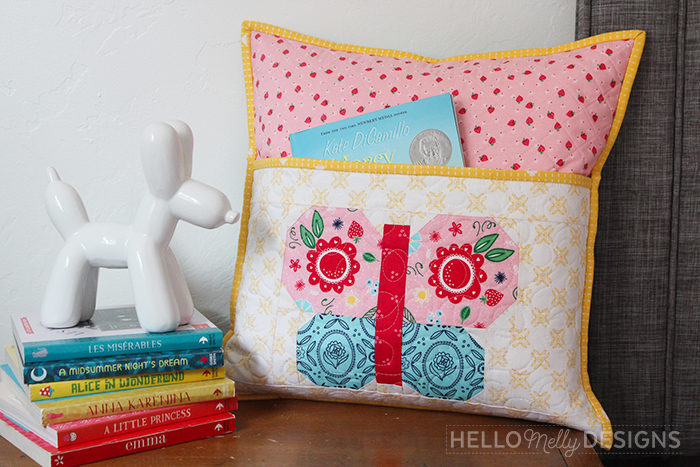
Hi there! I'm Melanie, from Hello Melly Designs. I love quilting, and as a busy mom, sometimes I really need a quick finish- so I've got one for you today! If your house is anything like mine, we have a few kids who *love* reading time and a few kids who... don't. We try every trick in the book to make reading special, and a reading pillow is one of those tricks! A special pillow to make reading comfortable that doubles as a book holder? Yes! That's special! And if that pillow just happens to have a cute butterfly pieced on the front pocket, that's all the better!
I decided to make my girls a new reading pillow with my Flutter and Shine fabric (recently released through Riley Blake Designs), and they are big fans. The books inside have been on frequent rotation, and when it sits on their bed, it is a good reminder that any time is a good time to read a book.
Want to make one? I've got a detailed tutorial here for you today!
Butterfly Reading Pillow
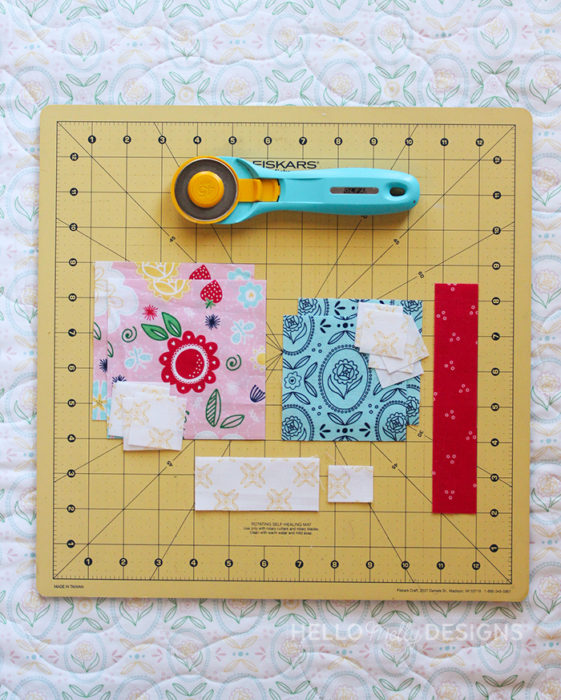
Fabric Requirements:
- (2) 4 ½"x 4 ½" - Upper wing
- (2) 3 ½" x 3 ½" - Lower wing
- (1) 6 ½" x 1 ½" - Butterfly body
- (6) 1 ½" x 1 ½"- Background piece A
- (2) 1 ½" x 3 ½"- Background piece B
- (6) 1 ¼" x 1 ¼"- Background piece C
- (2) 1" x 1 ½" - Background piece D
- (2) 7 ½" x 4" - Background piece E
- (2) 16 ½" x 2"- Background piece F
- (1) 18" x 18" pocket lining
- (1) 16 ½" x 16 ½" Main pillow fabric
- (1) 18" x 18" main lining fabric
- 1 FQ backing, cut to (1) 16 ½" x 14" and (1) 16 ½" x 3 ½"
- ½ yd batting
- ¼ yd binding fabric, cut into (3) 2 ½" x WOF strips. Prepare binding.
- 14" zipper
- 16" pillow form
Quilted Butterfly Reading Pillow Making Instructions
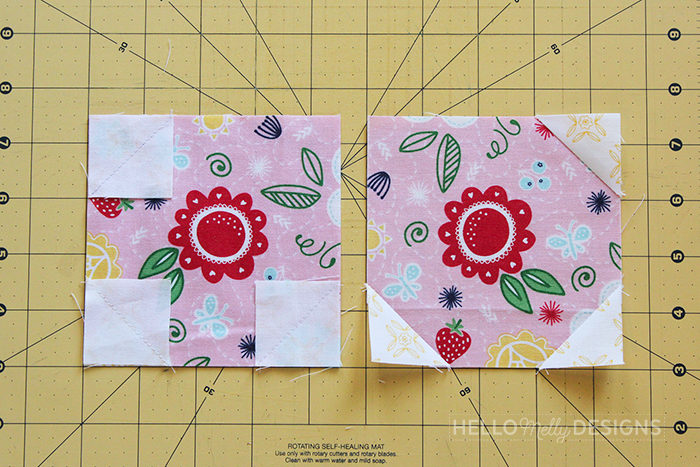
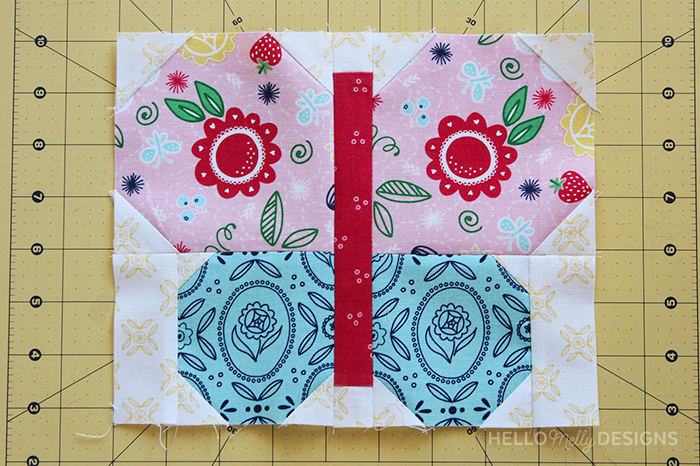
Begin by marking a diagonal on the wrong side of background pieces A and C. Then, place the background piece A squares to the corners of the upper wing pieces, mirroring the corner placement. Sew along the marked line, trim, and press. Repeat with background piece C squares on the lower wing pieces.
First...
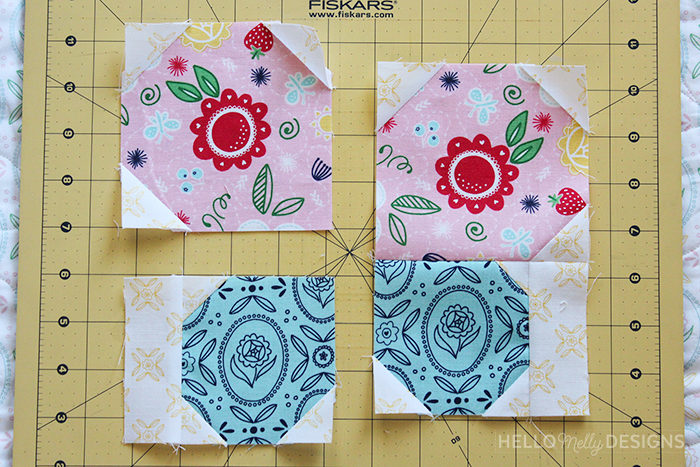
Sew the background piece B to the lower wing pieces, as pictured and press toward piece B. Then, sew the upper wing pieces to the lower wing pieces. Press seam open.
Second...
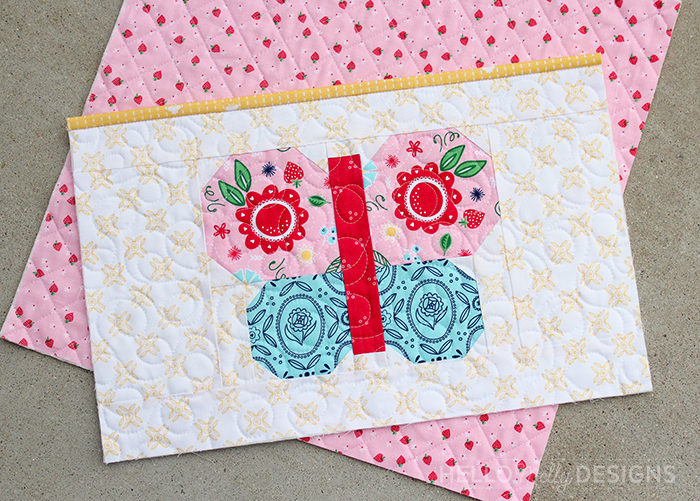
Sew a background piece D to either end of the body piece and press towards the body, and sew the wings to either side of the body. You are done with the butterfly main block! Next, add the background E pieces as side borders, and F pieces as top and bottom borders. It should finish at 10 ½" x 16 ½". Make a little quilt sandwich with the pocket lining fabric as the backing, quilt as desired, trim to 10 ½" x 16 ½" and bind just the top section of the block.
Third...
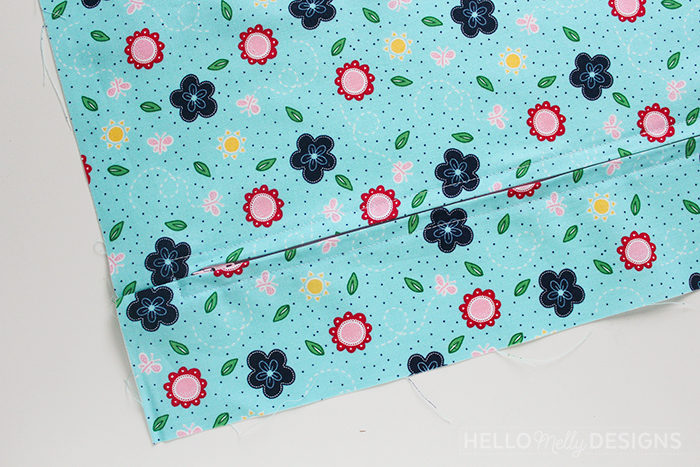
Make another quilt sandwich with the main pillow fabric, and the main lining, and quilt as desired. Trim it to 16 ½" x 16 ½.
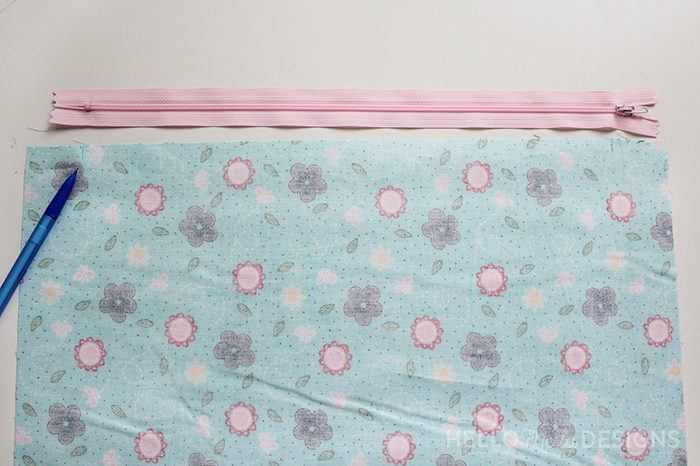
Mark 1 ½" from both 16 ½" ends of the pillow backing. Sew the 14" width to the 3 ½" width on both these marked ends, stopping at the marked line.
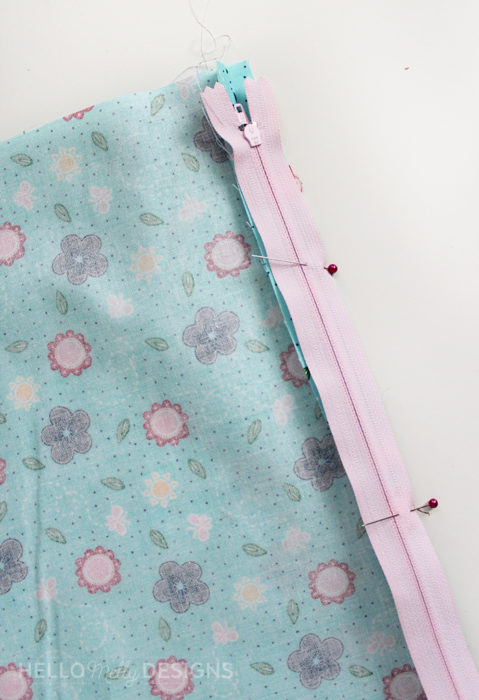
Using a zipper foot, sew one side of the zipper to the 3 ½" backing piece, and the other side of the zipper to the 14" backing piece.
Turn the backing over, and still using the zipper foot, top-stitch around the zipper, being careful not to hit the metal pieces on the zipper with your needle.

Lay the zippered back wrong side up, then the main pillow right side up, and then the pillow pocket right side up. Pin or baste together.
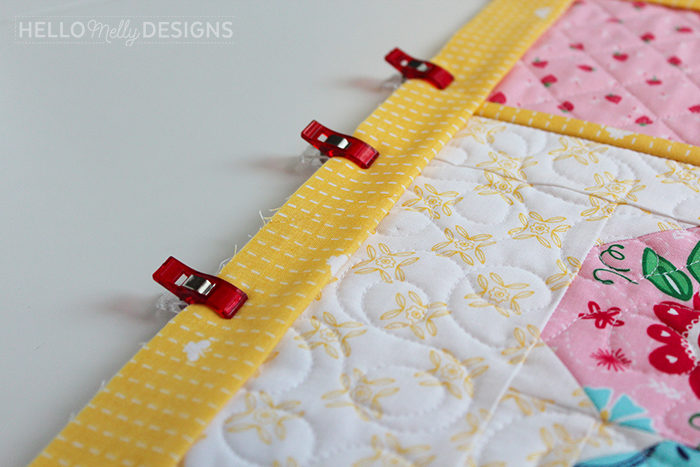
The final step is to bind all the way around the pillow, and I suggest a seam allowance slightly less than ¼" to account for the thicker layers along the bottom half of the pillow. Once the binding is done, insert the pillow form, plop in a book, and enjoy!
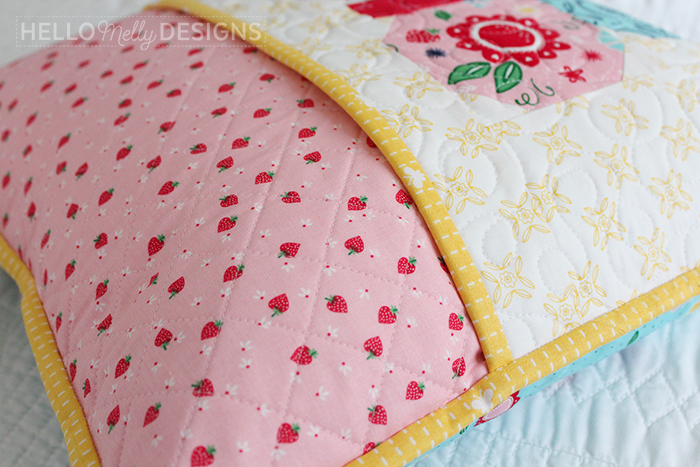
I chose to quilt the main pillow and the pocket in different designs- the pocket has a fun loopy pattern to echo the butterfly paths illustrated in the fabric, and the main pillow has a diagonal grid pattern. I love how both turned out!
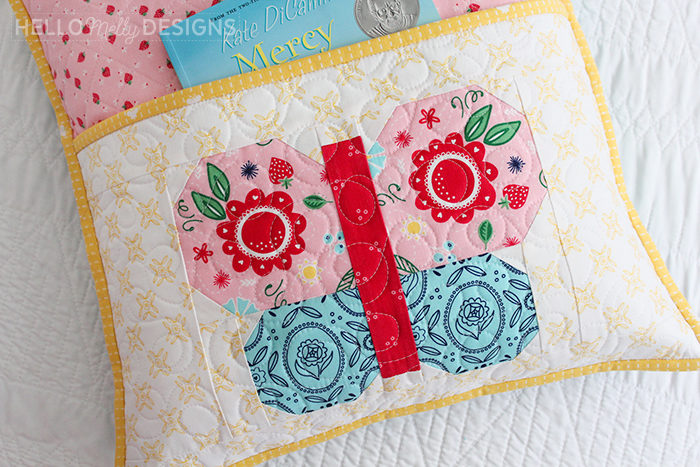
So cute, right?!
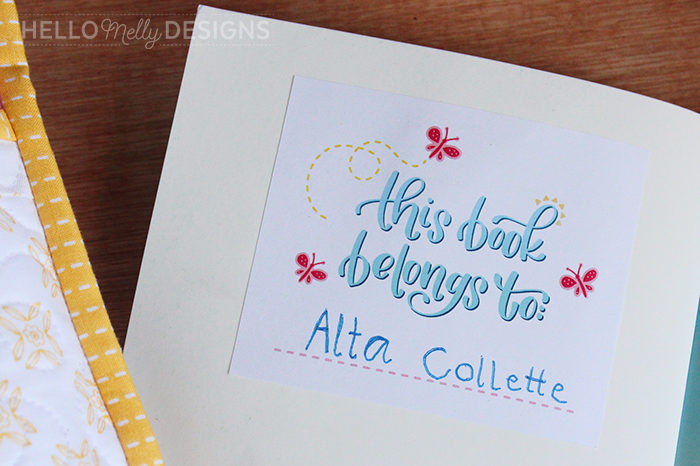
The pillow is a definite hit, but want to know what my kids were *really* excited about?! The bookplates I made for the inside of their favorite books! Aside from quilting, I love hand lettering so it was fun to combine both hobbies into one purpose for this project, especially since some butterflies from my fabric line flew their way in! These bookplates (or, book labels) are printable- 6 to a sheet- and can be used with Avery 8164 label paper if that's easier, although I simply used a glue stick 🙂
You can grab the free Bookplate download here --> Flutter and Shine Bookplates Printable
I'd love to see if you make one of these pillows, or if you use the bookplates! Tag me on Instagram @hellomellydesigns and let me know what you think of your new pillow! Come and say hi on my website as well, where I have tutorials, printables, and free quilt patterns for you to enjoy!
Thanks for having me, Amy!
Oh my goodness - what an butterfly reading pillow is an adorable project! And Melanie makes it feel so doable.
Normally I'd feel intimidated by a quilted pillow, but reading through her steps, I feel confident I can make my own!
And what a fun gift this would make for a friend.
Flutter and Shine fabrics are hitting stores now! You can also find them available from the Fat Quarter Shop, and Etsy.
I think this color palette is so sweet - and I'm especially smitten with those strawberries on pink!
Have you made a reading pillow before? Share in a comment below!


Leave a Reply