
This is my favorite quick tip for sewing borders onto a quilt. It's important that the borders are measured to keep the quilt 'square' but this trick for measuring will save you so much time!
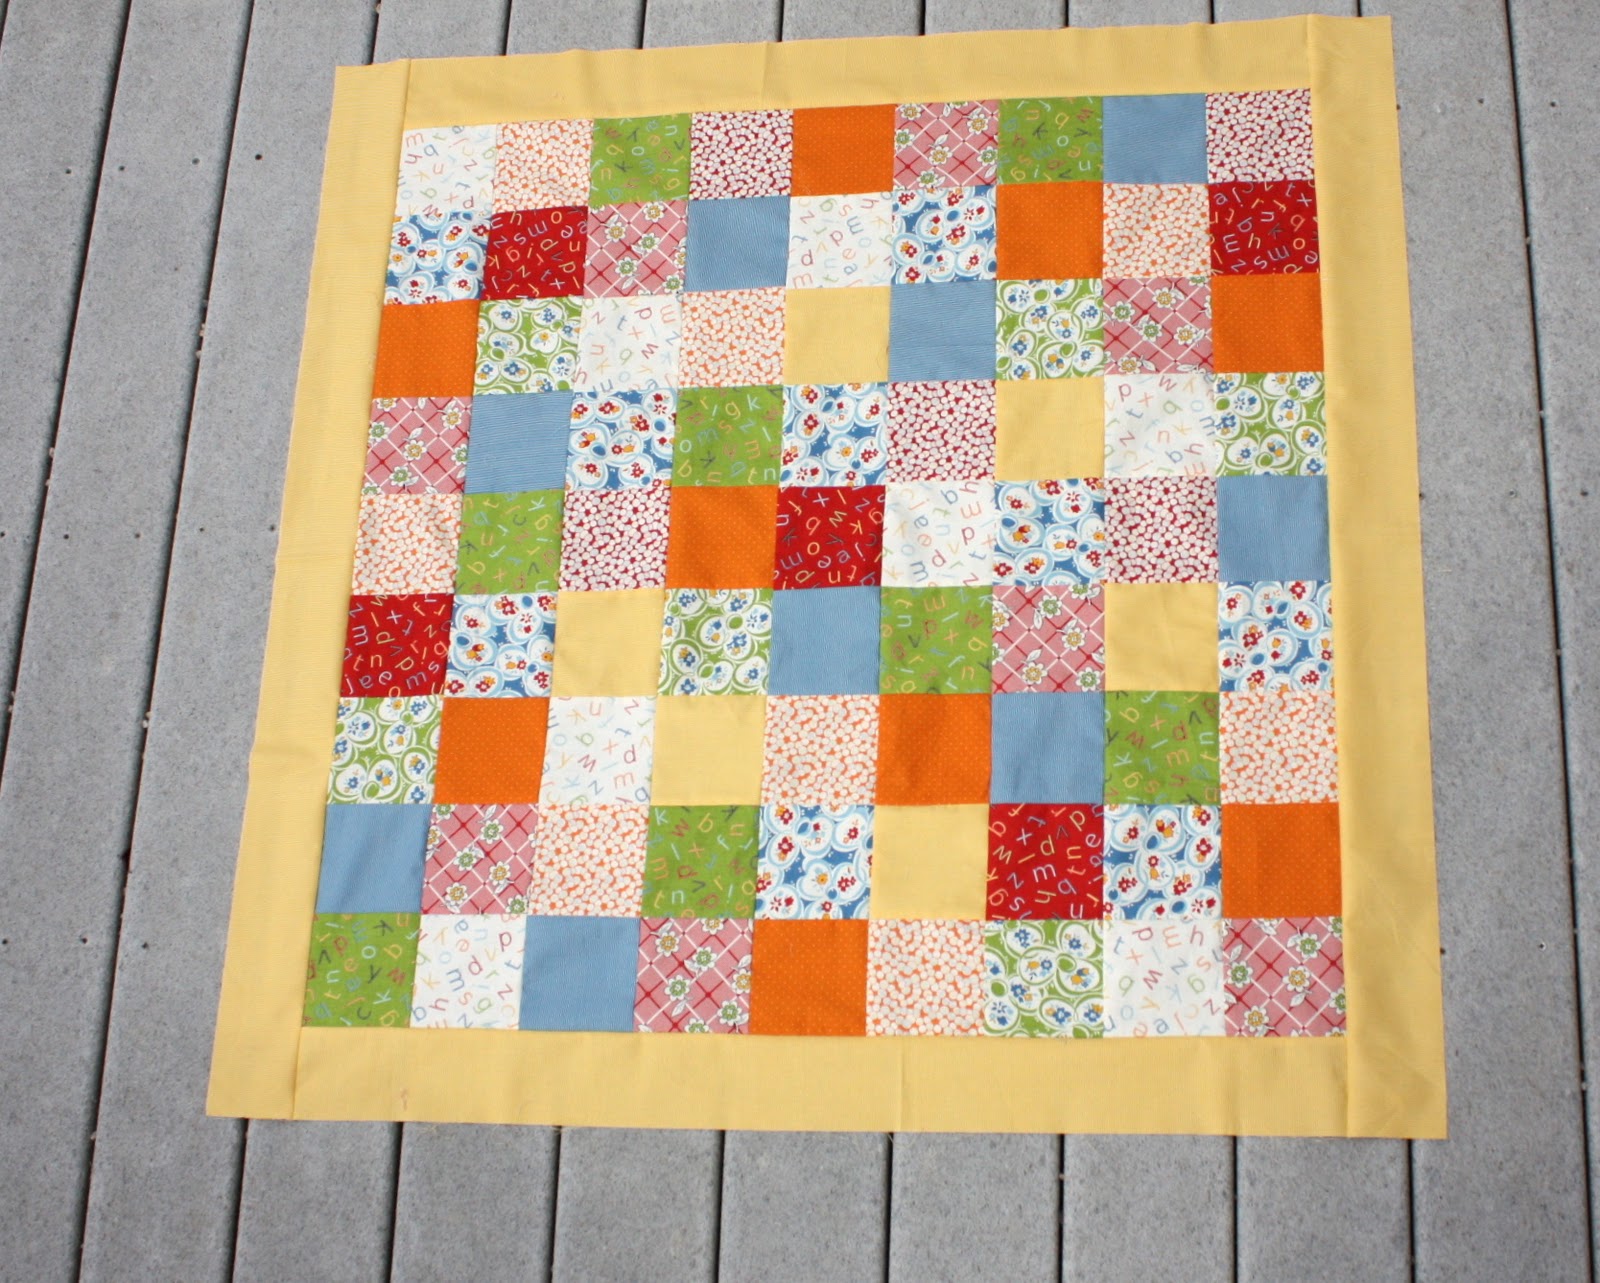
It’s important to have borders that help keep your quilt square – otherwise your pieced top will be more difficult to ‘quilt’ and it will not lie flat – instead it will have little ripples in the edges of the quilt.
For this project you will need four strips of fabric measuring 3 ½” x 42″ (or the width of the fabric as it comes.)
It’s a good idea to measure the length of the quilt sides before you sew, rather than just starting at one end, sewing on a strip, and cutting-off the excess after. This will help to keep the quilt ‘square.’
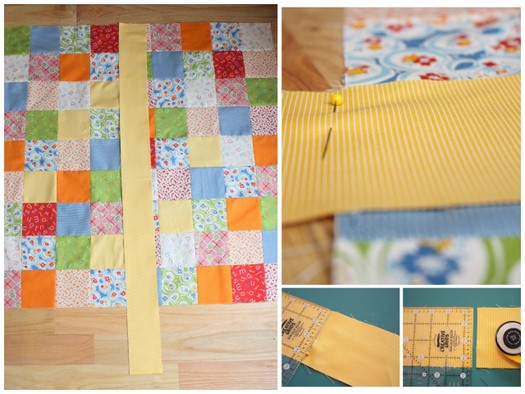
This is the easiest and fastest way I’ve found for measuring your border lengths. Before you measure your borders, carefully trim off the selvage edges of the borders themselves. Then lay 2 of the border strips across the middle of your quilt, lining-up one end of the strips with the edge of the quilt. The other strip edges will hang over the side. Place a pin in the border strips where the quilt ends. And then carefully trim with your ruler and rotary cutter where that pin marks.

Then fold the border strip in half, end to end, to find the center. Pin the center of your strip to the center of the edge of your pieced quilt top and pin the ends of the strip to the ends of that quilt side. Then space pins along the strip to secure the strip in place. (It is not bad if your strip is slightly smaller than the pieced part of the quilt, but this is why starting at the center and the ends when pinning is important.)
Pin opposite side of quilt and sew both borders on to the edges of the pieced portion. Press the borders open and flat working from the front side of the quilt.
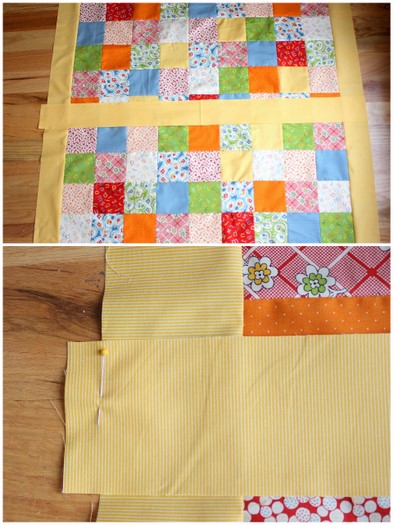
Repeat the process on the other edges. Lay the 2 remaining border strips across the center portion of the quilt. Place a pin to mark where to trim, cut off remnant, pin and sew. Press. That’s it!
Now, this project worked out nicely size-wise – we didn’t need longer strips. If you are working on a larger quilt, cut your border strips the same way (just cut more of them) and sew the strips together end to end to create a longer strip of fabric. The process for measuring is the same. Measure, trim, pin, sew, press. Same goes for adding multiple borders to one quilt.
Up next Tuesday in our Quilt Along Series: Batting and Backing fabric


Michelle
Duh I never thought about doing it this way I will give it a go next time I add borders. I'm like you and borders are my least favourite part of the quilt too! I am not participating in this quilt-a-long as such but I am still picking up a few hints here and there, Thanks
Kitty
WOW I learn somehing new each time I read a page/gkitty
Jackie
That is the best way!! I always measure through the middle. It makes it nice and square. Love it!
Jen
Can I join the "I Hate Borders Club" too?! I'll try this trick next time, thanks!
Karen
Great idea. Thank you so much for sharing.
Stray Stitches
Good advice! And advice I will take - lol!
The Clip Cafe
I love your blog - so clear and full of colour and good posts 🙂
WildHair
That is a good tip, I love your creativity!
searchfamilies
A lovely quilt simple but so nice<br />Hugs Janice
Monica McNeill
Used this tip last week & it worked great! Thanks 🙂
Steph Zerbe
Thank you for this tutorial! I have made two little quilts now. I am new to sewing and your tutorial is very user friendly. Now, on to a bigger quilt, just for me!;) Have a great day!<br />I will post the quilts this week and add your Quilting 101 link, if that's okay.<br />Thanks again,<br />steph zerbe
Kaitie
Thanks for all your tutorials, tips, and advice! I'm currently working on my first quilt ever (for my niece!) and I'm so excited with how it's turning out so far!
Karli Blake
I have one question about the sewing part of this. How big is the seam? Is this a 1/2 in seam?
amy smart
No. All seams are 1/4 inch.
Andrea
Hi Amy! I finally remembered to try your tip. I HATE doing borders - I guess I'm too much of a perfectionist. I always use a tape measure and measure down the center, or on a larger quilt take 3 measurements and take the average, but that method always leaves room for error. Laying the fabric strips out worked perfectly - no slipping of the tape measure. Thanks for all you do for us!
Amy
I had been throwing around the idea of making a quilt. After reading your quilt series I knew I could do it. So far I just added my boarder, I need to get to the store for some more supped before I can move on. I am working on a baby blanket to give it a try but I would like to make twin size quilts for both of my kids. Thanks for the easy to follow directions.
Amy Smart
Good for you!!