
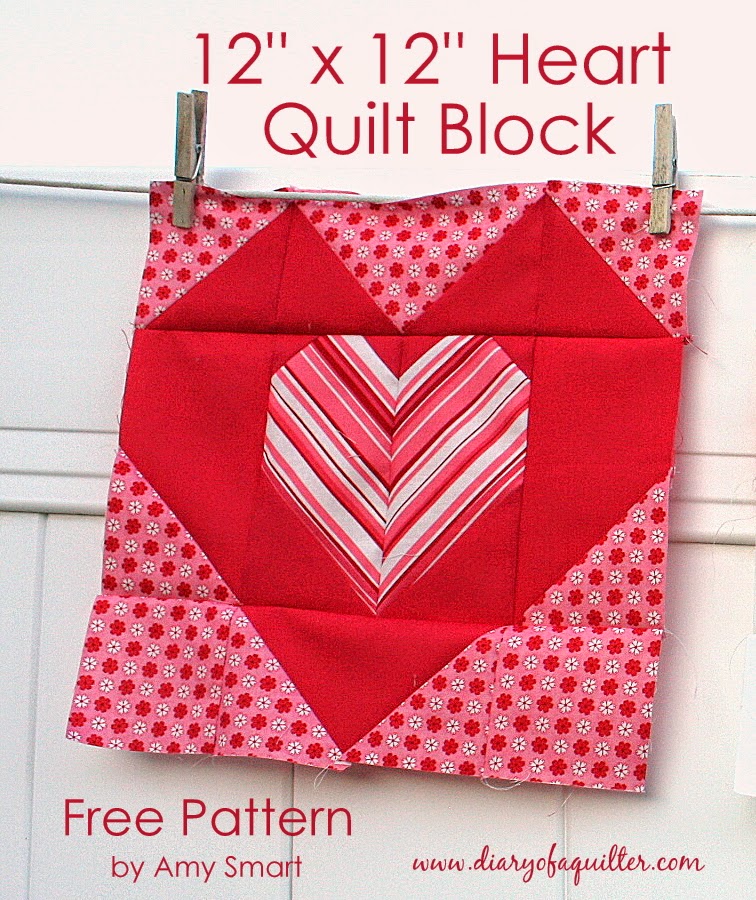
This free heart quilt block tutorial is perfect for Valentines Day or any other sampler quilt calling for a finished 12" x 12" quilt block.

A quick, simple tutorial for a 12" (12.5" unfinished) heart quilt block.
CLICK HERE FOR FREE PRINTABLE PDF VERSION
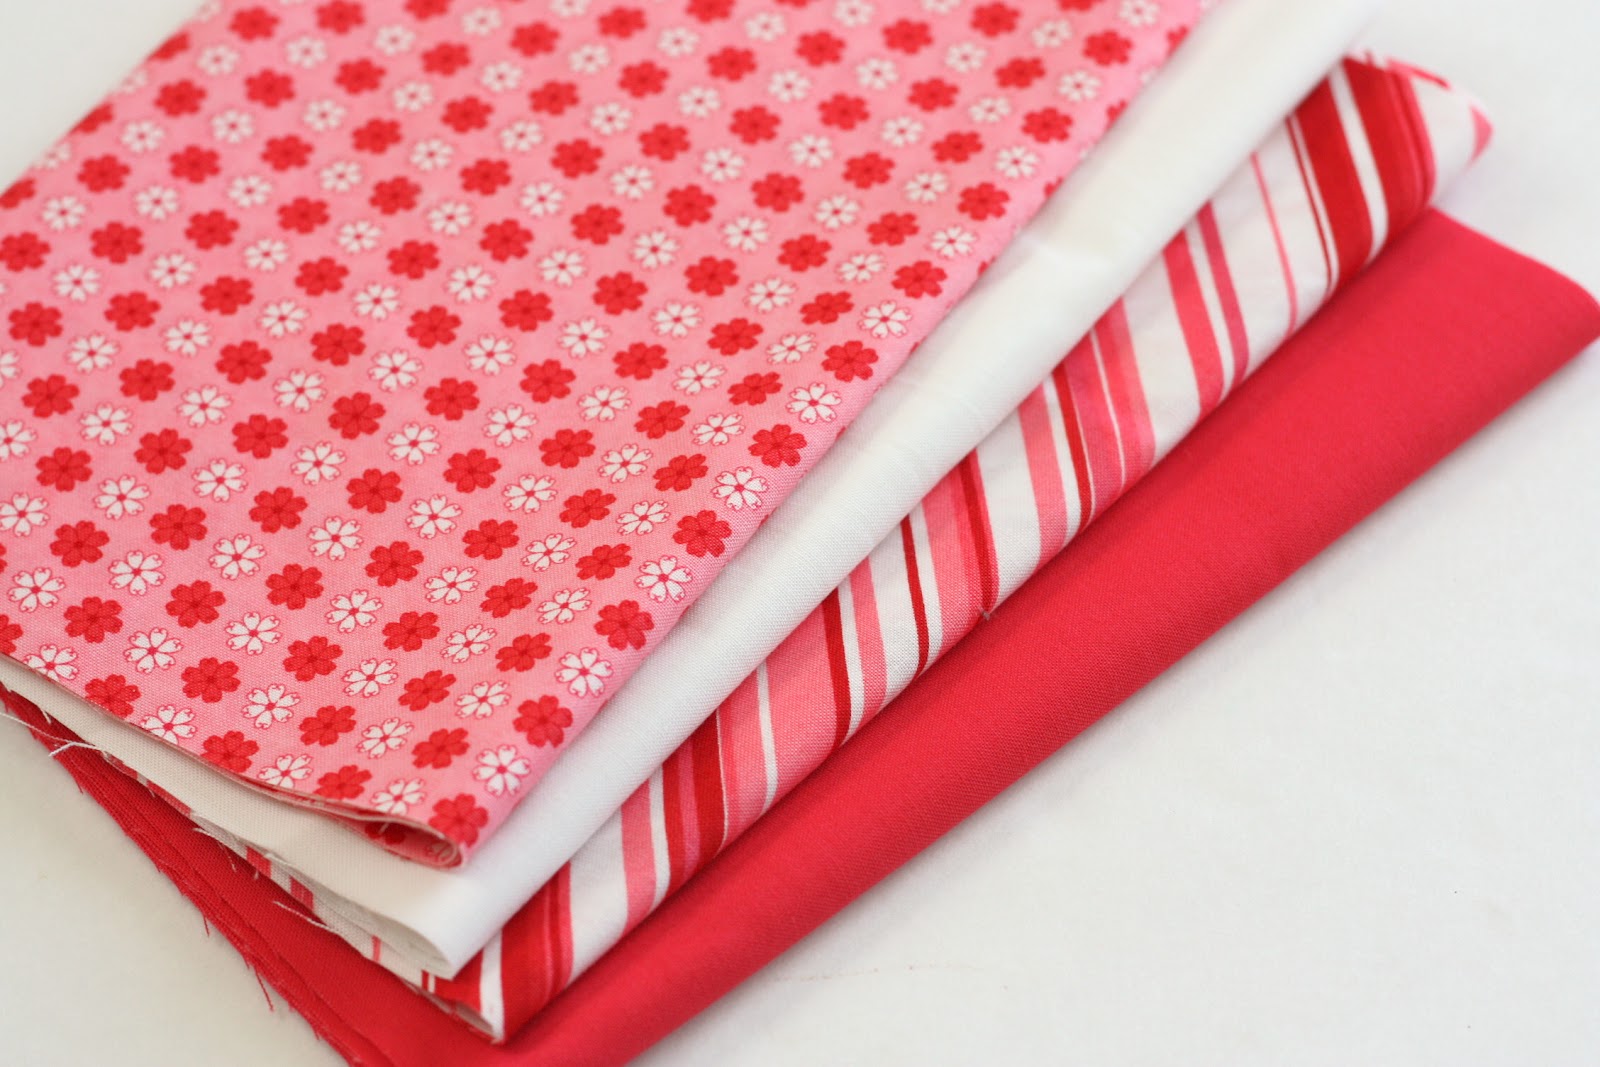
I used four different ¼ yard cuts to create my three 12" x 12" (finished) quilt blocks.

Fabric Cutting instructions per 12" finished block
Fabric A - small heart
- (2) 3.5" x 6.5" rectangles
Fabric B - Large heart
- (3) 3.5" x 6.5" rectangles
- (4) 3.5" squares
- (4) 1.5" squares
- (1) 4" square
Fabric C - background
- (1) 3.5" x 6.5" rectangle
- (6) 3.5" squares
- (1) 4" square

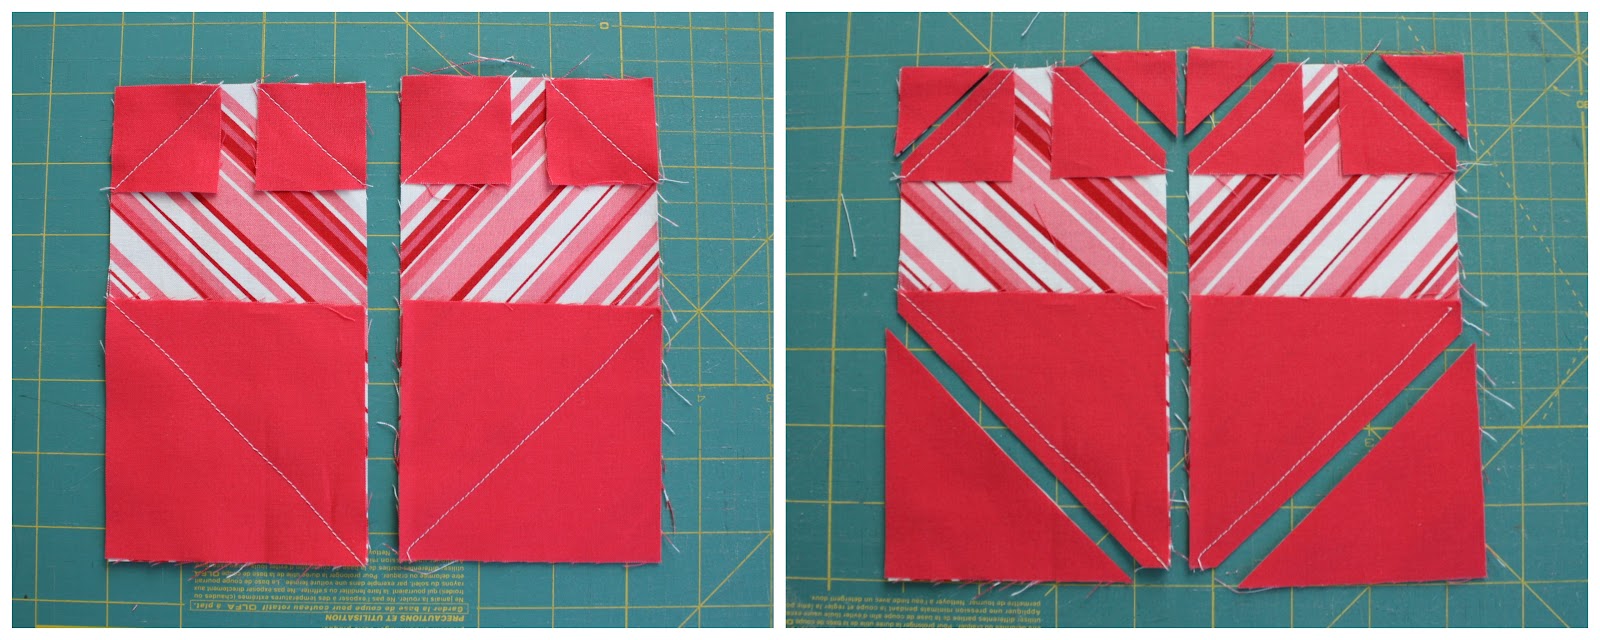
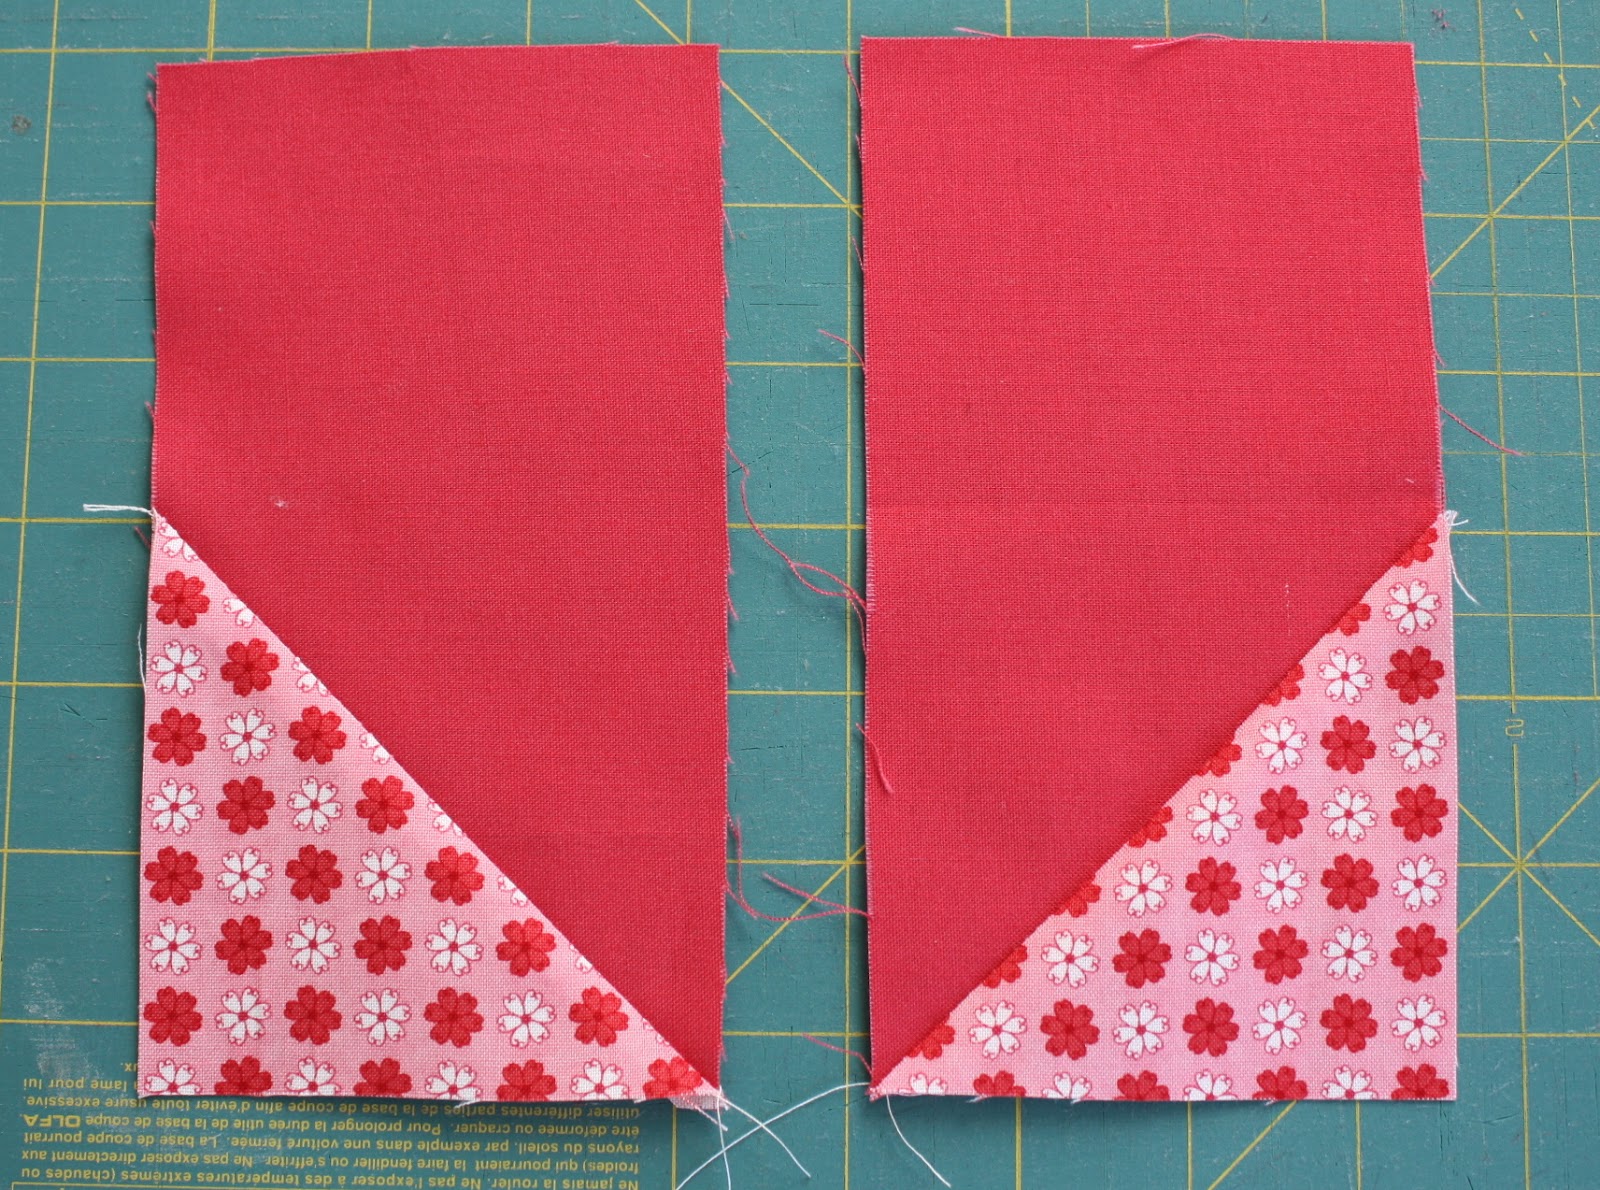
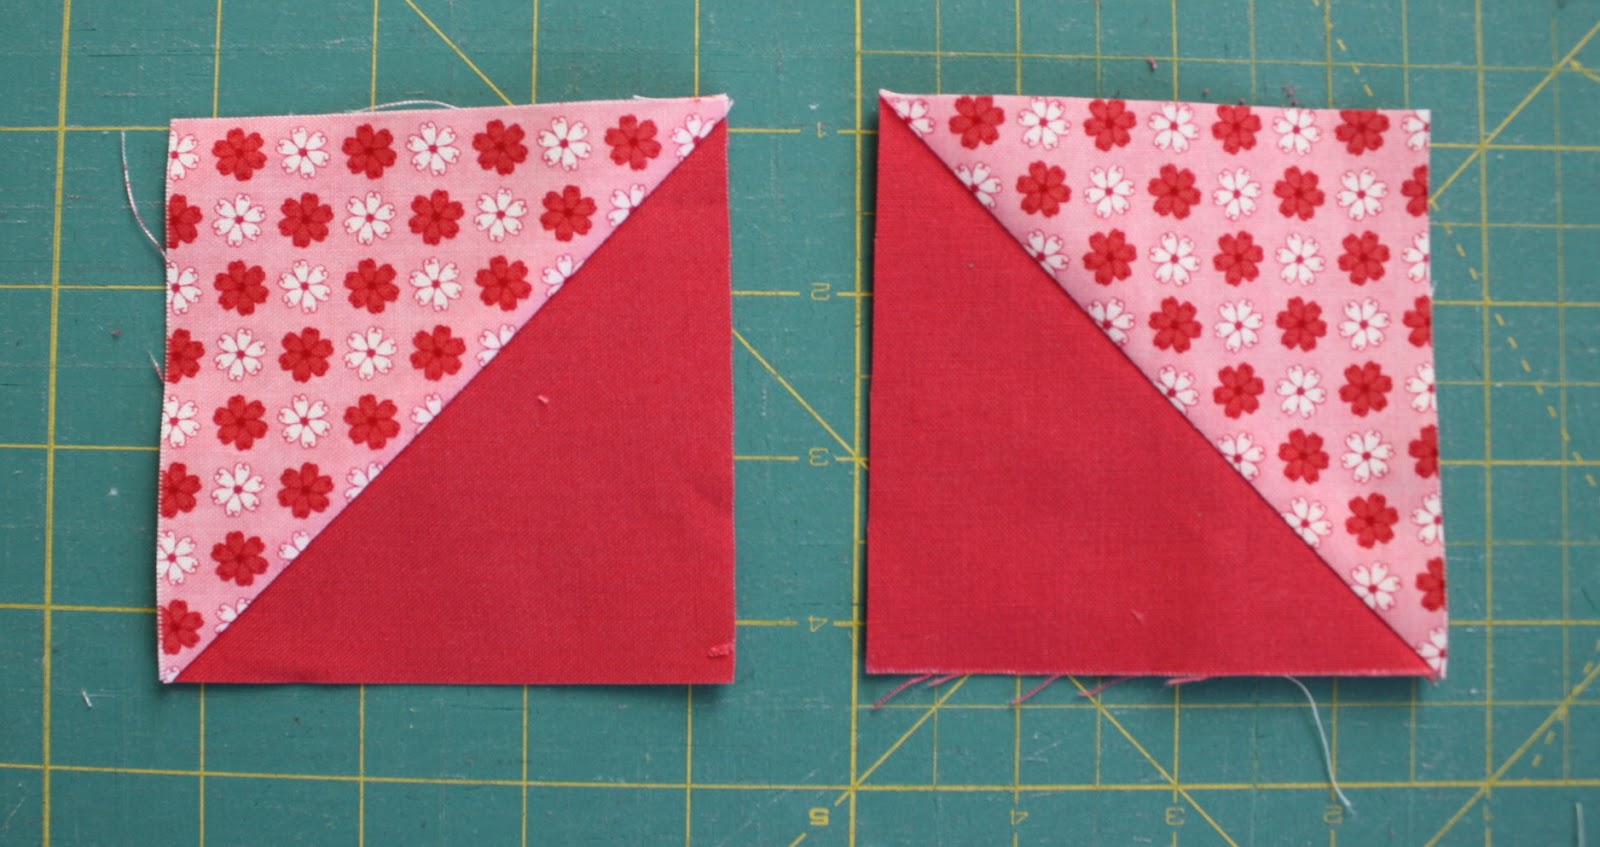
1 - From Fabric B take (4) 1.5" squares and (2) 3.5" squares and draw a single diagonal line on the back of each. Place them on top of the (2) fabric A 3.5" x 6.5" rectangles as pictured above and sew them in place directly ON the drawn line. Carefully trim excess fabric ¼" away from the seams as pictured above.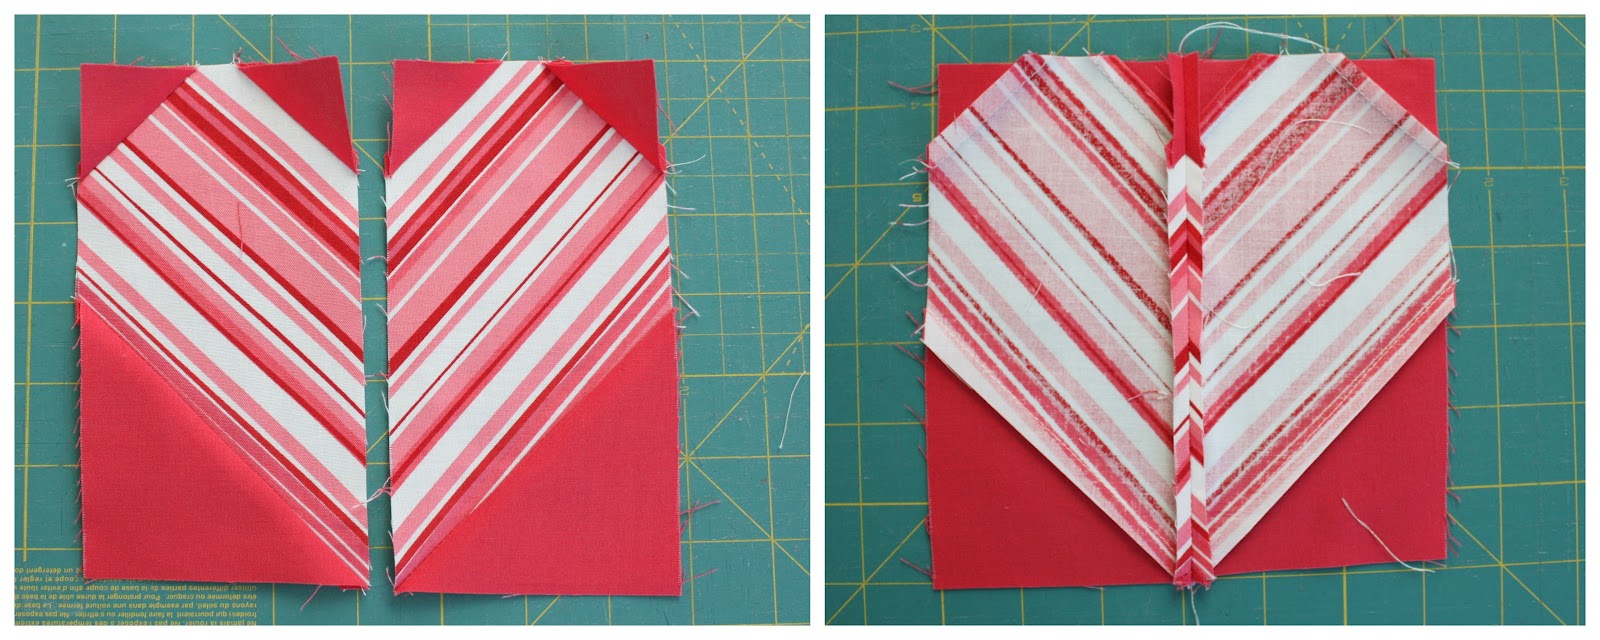 2 - Press seams open to create blocks as shown. Carefully sew 2 rectangles together. Press this seam open.
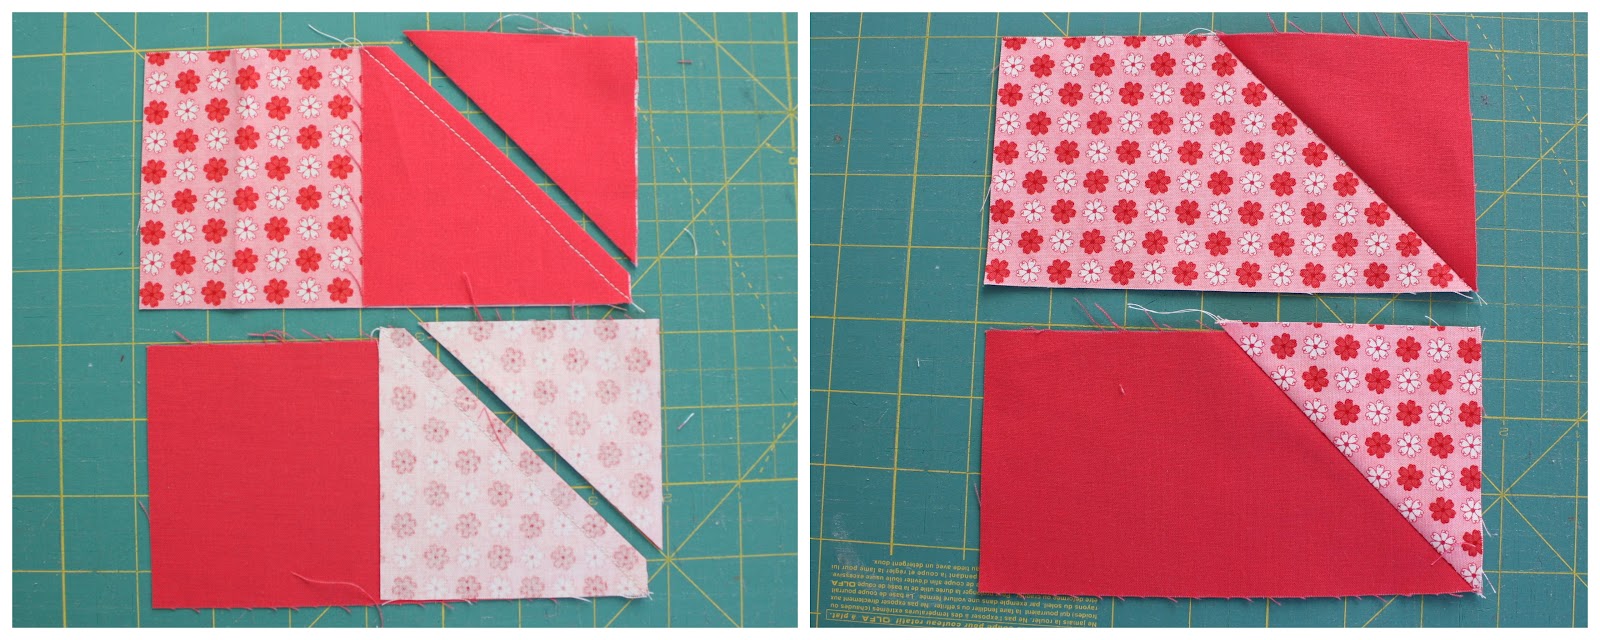
3. Take (2) Fabric C 3.5" squares and draw a single diagonal line on the back. Place them on top of the bottom half of (2) Fabric B 3.5" x 6.5" rectangles. Sew seam directly ON the drawn line and rotary cut off excess fabric.
Press Blocks open to look like this.
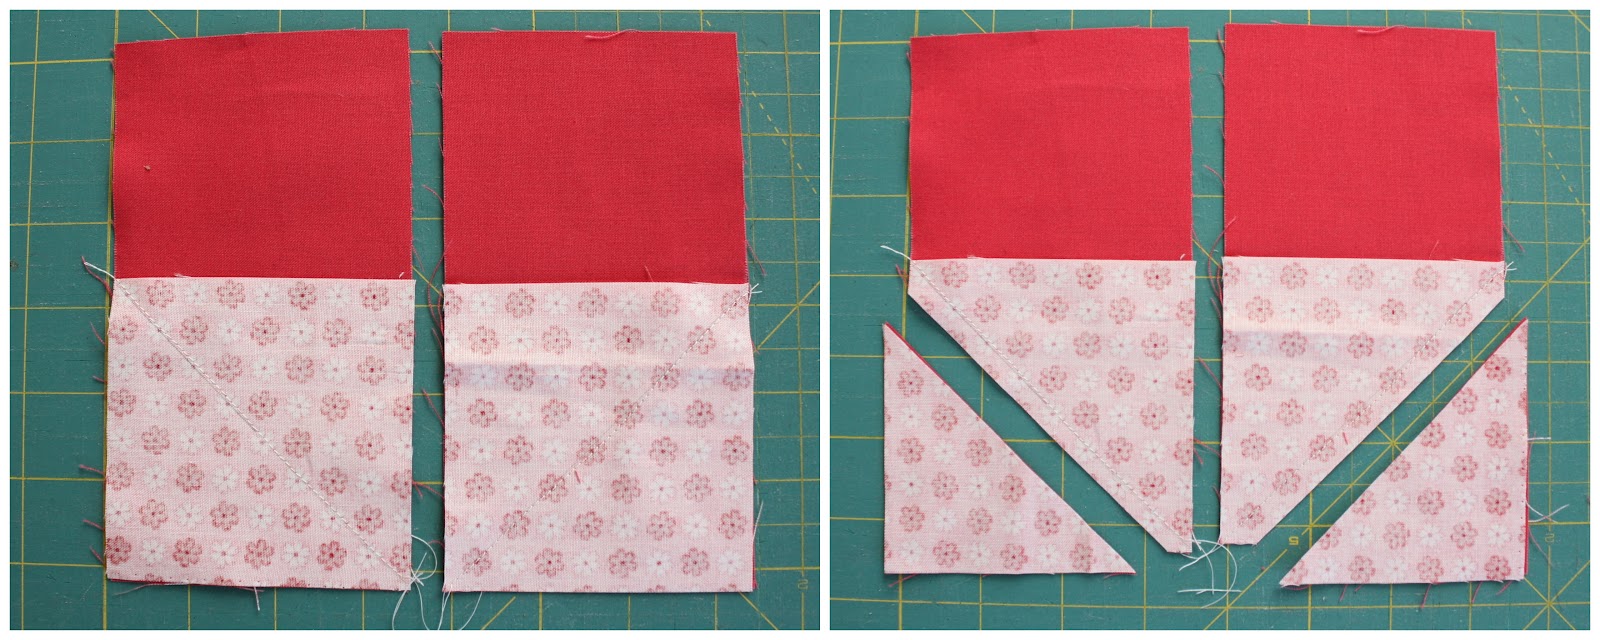
4 - Create (2) Flying Geese blocks using opposite prints from Fabrics B and C. Draw diagonal lines on the back of (2) Fabric B 3.5" squares and (2) Fabric C 3.5" squares.
Line up a 3.5" Fabric B 3.5" square on the right side of a Fabric C 3.5" x 6.5" rectangle and sew seam directly ON the drawn line. Repeat with a Fabric C 3.5" square placed on a Fabric B 3.5" x 6.5" rectangle. Carefully trim off excess fabric and press sides open.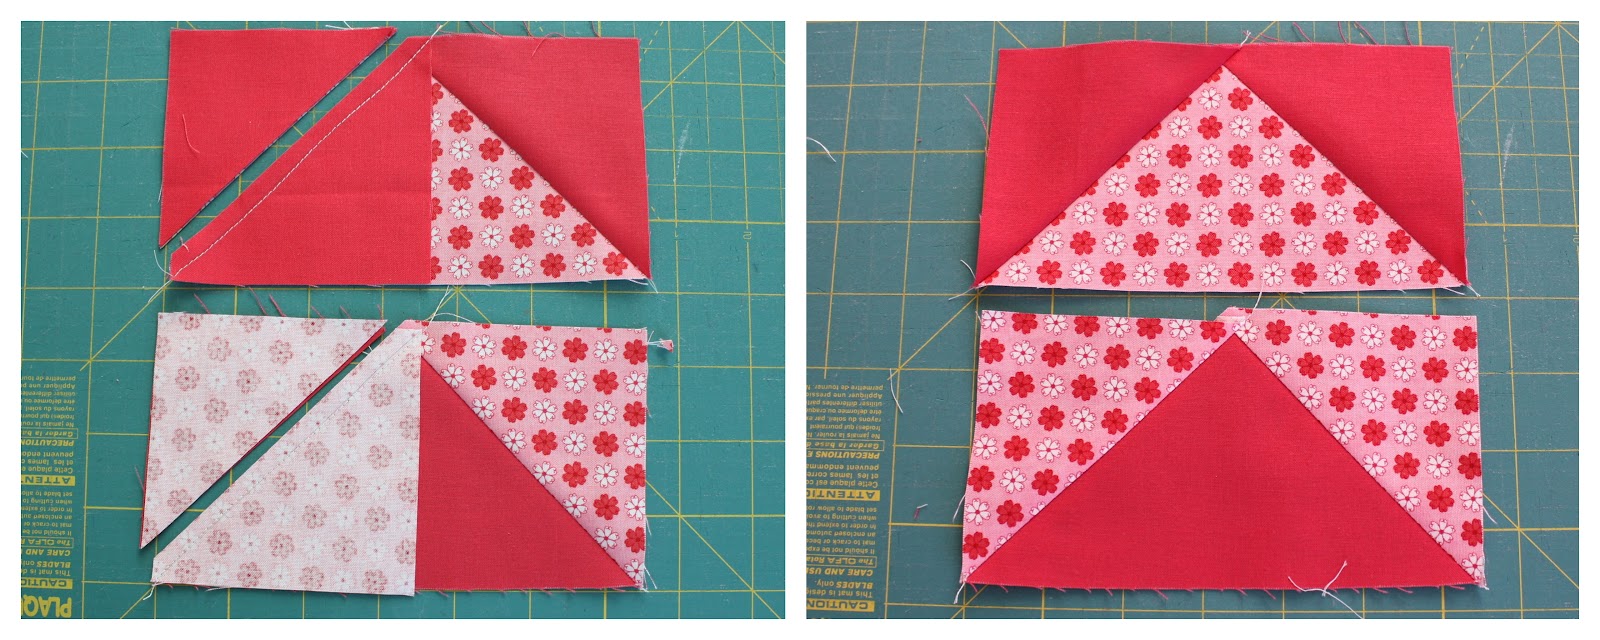
5- Repeat using 3.5" squares placed on 3.5" x 6.5" rectangles on opposite sides. Sew seam along line, trim excess fabric and press open sides to create two flying geese units.
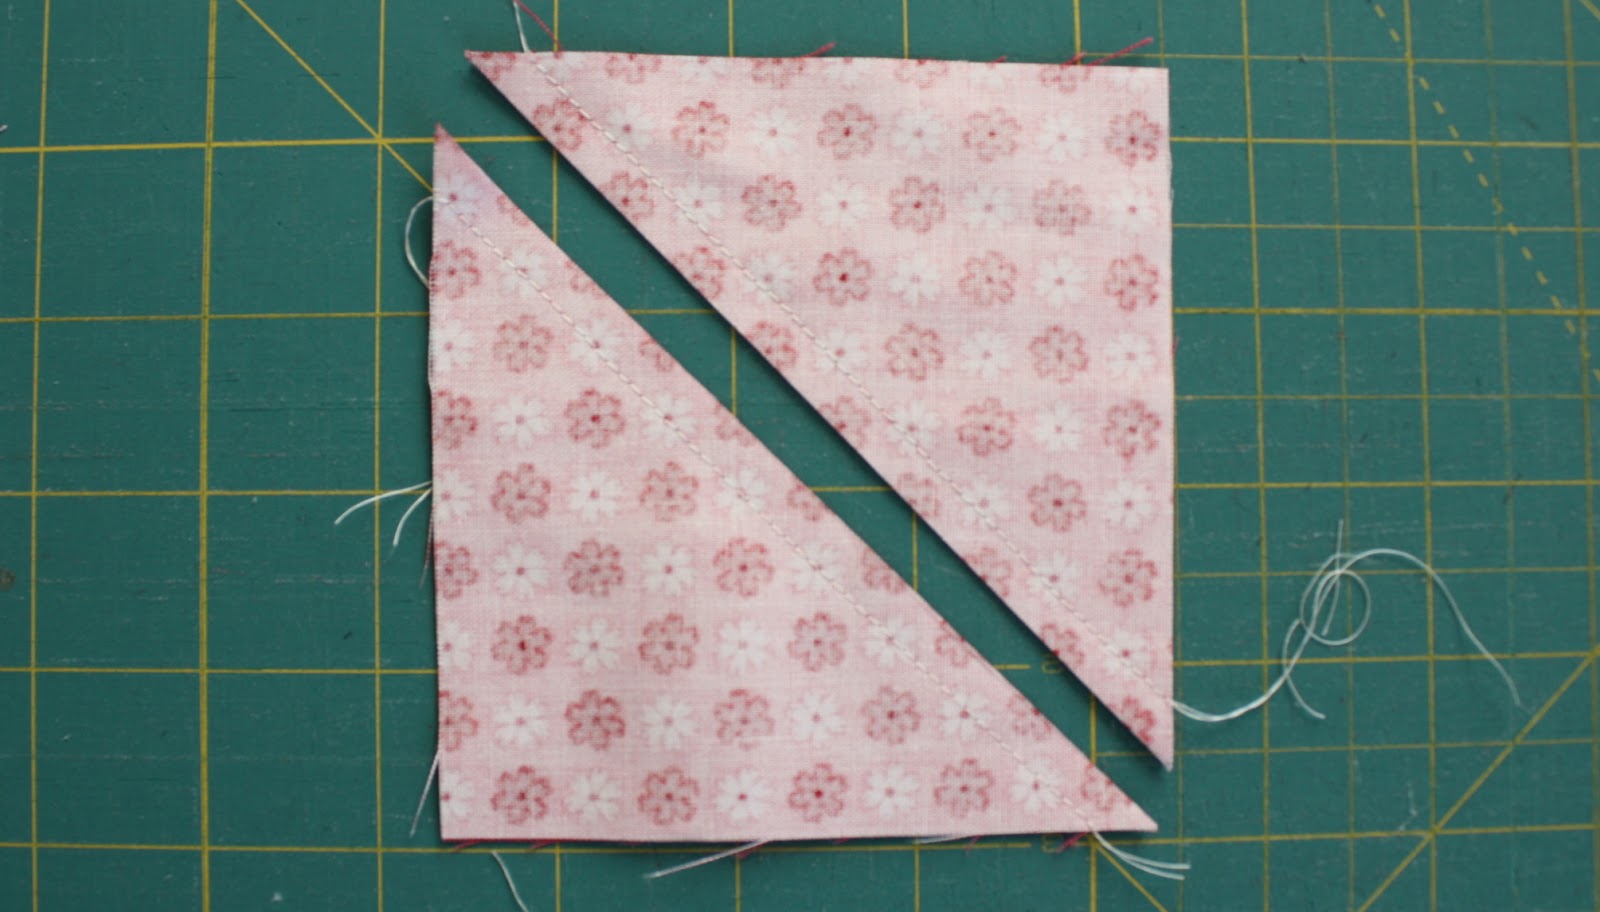
6. Match up Fabric B and C 4" squares right sides together. Draw a diagonal line on the back of the lighter fabric. **This step is different than previous seams!** Sew a seam ¼" away along BOTH SIDES of the diagonal line then rotary cut right on the line.
7 - Press both units open and square-off the excess fabric to be exactly 3.5" squares.
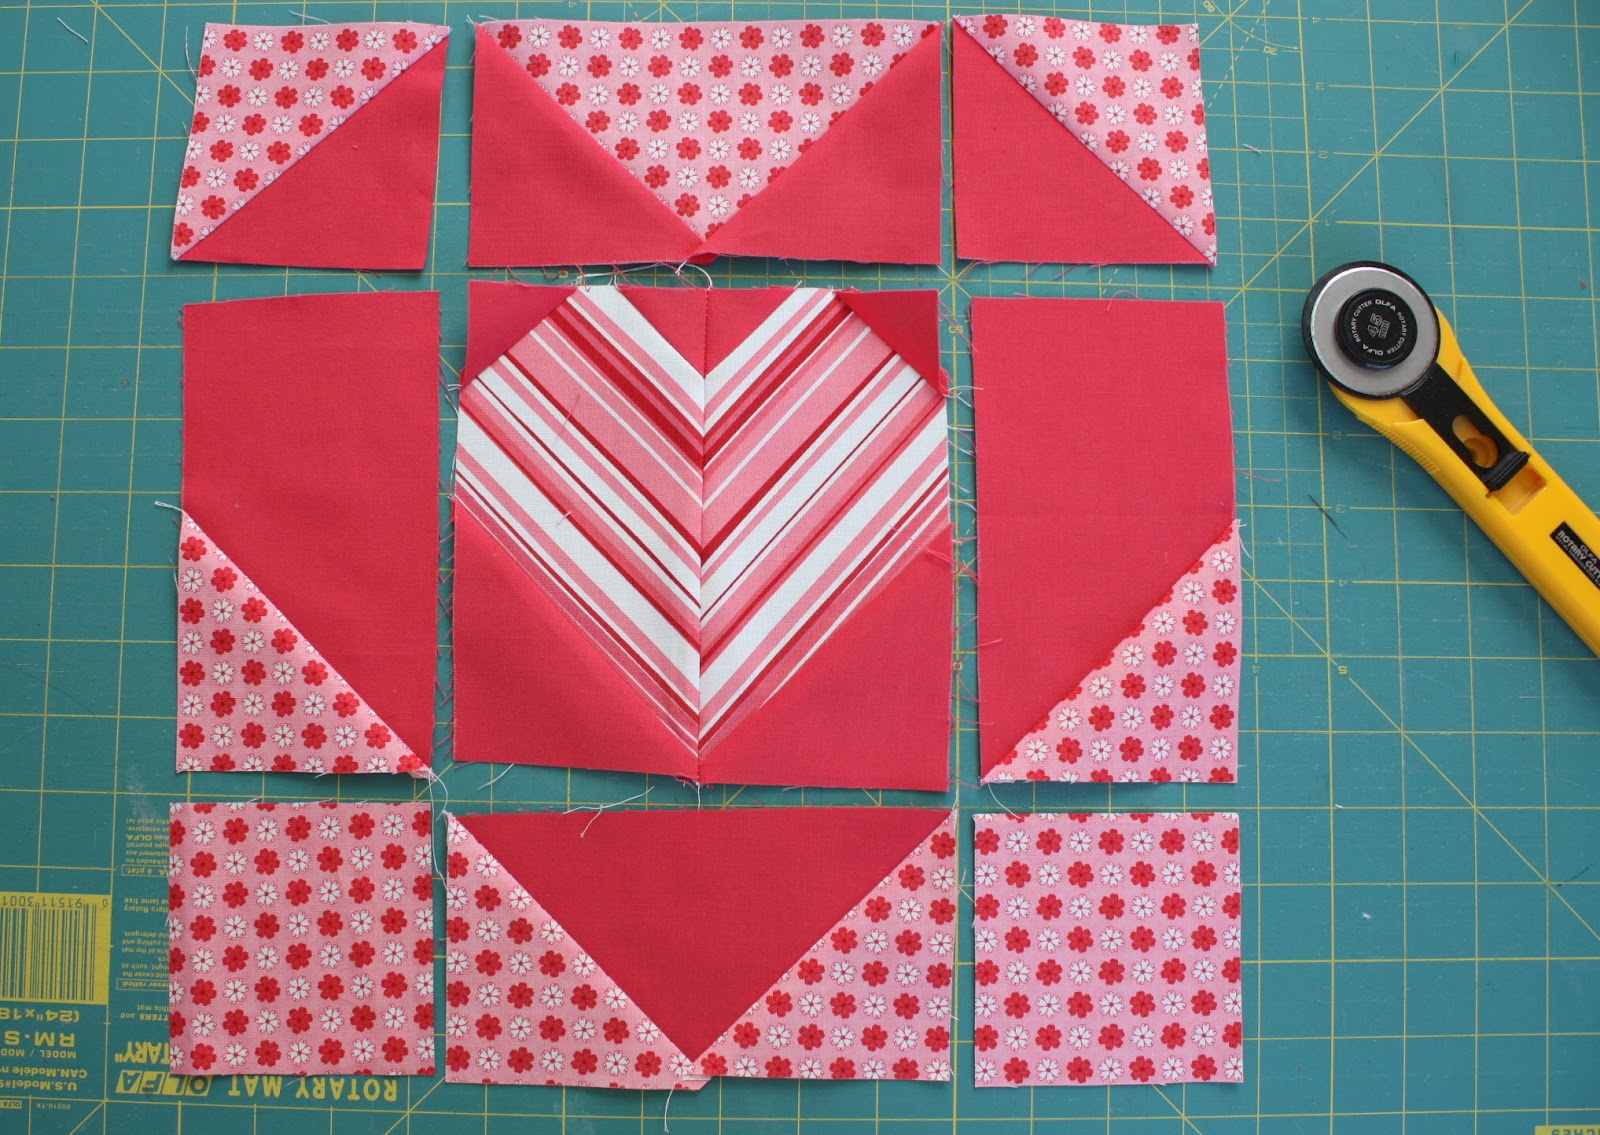
8 - Using all of your assembled units and the remaining Fabric C 3.5" squares layout the block to look like this. Assemble the units in three rows and then carefully sew the rows together.
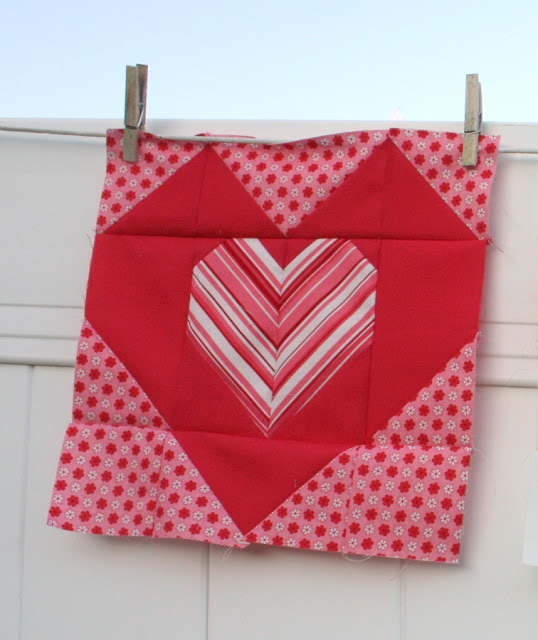
And voila- a big heart-shaped quilt block.


Jennifer Rodriguez
What a grèat cause! Love the block..so fun for Valentine's day.. may have to make a whole quilt of these! XO
robin chapa
I'm not a "heartsy" person.... but these blocks are amazing! There is a Valentine's Day quilt in my future featuring this tutorial-- THANK YOU! And thanks for helping to raise awareness 🙂
Mary on Lake Pulaski
Great block Amy! Thanks for the tutorial.
Tracy
Love them and a great cause! Thank you for the tutorial!
Lori Holt
What a great cause to participate in...I love your heart block Amy.<br />I'm sure I will be seeing lots of quilts made using your fun tutorial:)
Chris
VERY CUTE BLOCK!! I am doing the Sew Red For Women blocks and this is really PERFECT! You did a nice job bringing out the theme. 🙂 Looking forward to making it!
Maria
Thanks for the tutorial they are adorable.
Märchen und Meer
wonderfull .love red .. I m a newscomer in this area .. but I love it
Anita
Lovely block and excellent tutorial. Thank you.
Amber
Cute blocks! Great tutorial!<br /><br />Amber
Kim Walus
I LOVE your block Amy and hearts are my favorite so, WELL DONE!!!
Tracee
Thanks for sharing those blocks look amazing.
Katy Cameron
Love how you used the striped fabric in these :o)
Gina
Your post led me to look at all the other blocks on the tour! They are all fantastic including yours!!
Shontelle
Lovely block - thanks for the tutorial!
Heather
That is a really nice block, thanks so much for a tutorial 🙂
CathyK
What a great block! Thank you for the tutorial! P.S. I like your new blog look! (Unless I am crazy, it looks different?)
Leah
Love the block! Super pretty!
Shop Girl
My, My, haven't we been a busy girl! Great tutorial, great cause & love the new look of your blog. Your quite something (special) Thanks for the inspriation!
Shabby Marilyn
Newest follower! Thank you for the heart block, love your choice of fabric and colors!
Nanny
Great tutorial!.. Thanks!.
Casey Kiley
Thank you for this great tutorial. I used it to make wall hangings for the Grandmas this past Christmas, paired with blocks with the kiddos' hand prints.
Val Spiers
Love this block. Just discovered it on pinterest. Thanks for the tutorial.<br />valspierssews
Mandy
Looking for a block for a heart exchange and came across your blog tonight. Awesome tutorial!
Merry
Thanks so much for your wonderful tutorial for this block. I really enjoyed making it for my swap partner. Off to check other blocks on this wonderful site.
Lynn H.
Very nice!
Jean
Love the hearts...love everything you do, really ? Thanks for the inspiration.
Lea
These blocks are so pretty. Thank you for sharing your tutorial. This one is a keeper.
Diane Offerman
Thank you for the heart tutorial. What a cute pattern! Can't wait to try this.
Susan Brehm
Cute cute block! And thank you so much for the PDF!
Susan Bajdek
Thank you so much for the free Valentine pattern. You are so generous with your quilting skills. I also took your Craftsy class and loved it. Guess who is my visiting Teaching companion? Your sister Laura Miller. What a sweetie. Thanks, Susan
Amy
Laura mentioned that her companion was a quilter!! Such a small world. Thanks for your kind words and support and for looking out for my little sister!
Bobbi Lu Bennett
Thank you for sharing this. I live the pattern and the fabric you used. Saving this one for later!
Bobbi Lu Bennett
*love
Editor@CraftyLikeGranny
Hi Amy, this is such a lovely design. Thank you for sharing. Our readers will love it. I have included your post in our latest Top 10 in Craft inspiration for Valentine's Day. https://craftylikegranny.com/valentine-crafts-adults/ Cheers Jodie