
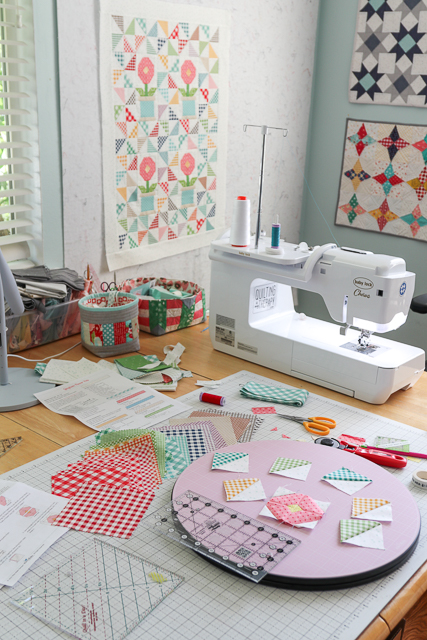
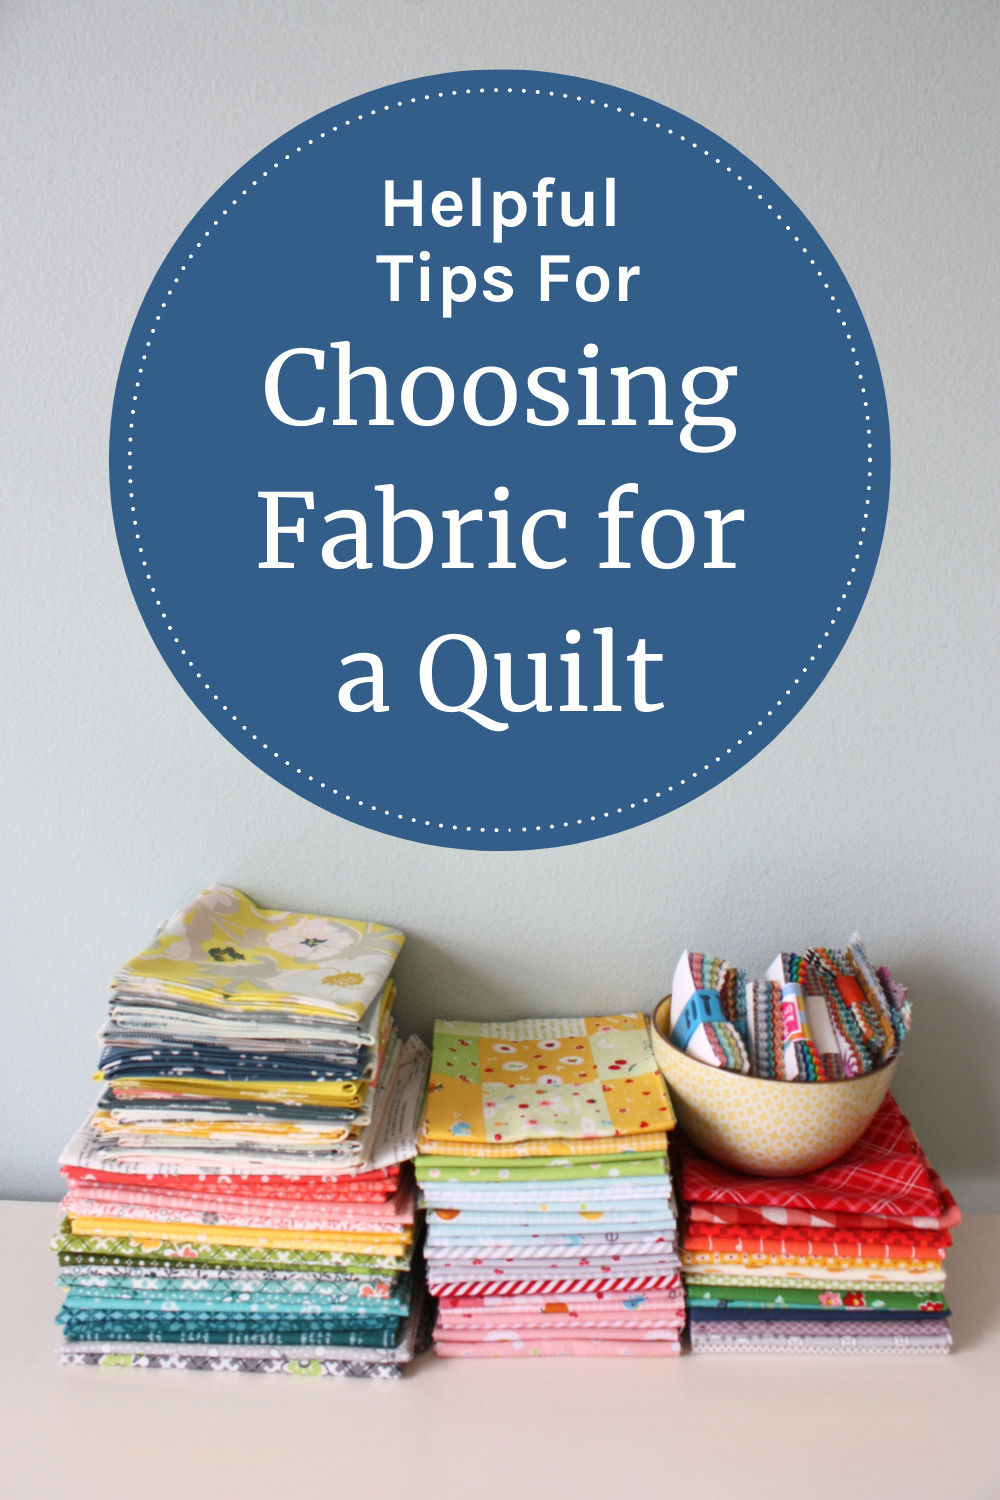
This summer Baby Lock sewing machines released an exclusive mini quilt kit featuring Lori Holt's Gingham + Basics collections to make a fun, scrappy project. This quilt features a lot of half-square-triangle blocks as well as corner-flip-triangles so I thought I'd share a few different tips and short cuts for sewing these go-to quilt-block basic techniques.
Half Square Triangles Short-cuts
Half-square triangles (or HST) are a basic staple of many, MANY quilt blocks - both basic and elaborate. Here are a few of my favorite techniques for making perfect half-square triangle blocks.
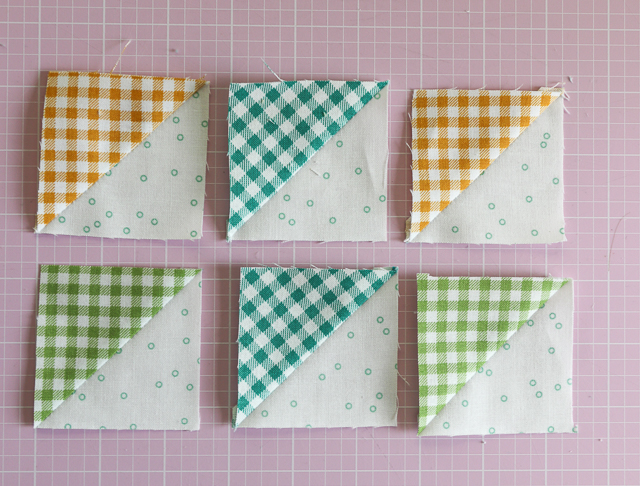
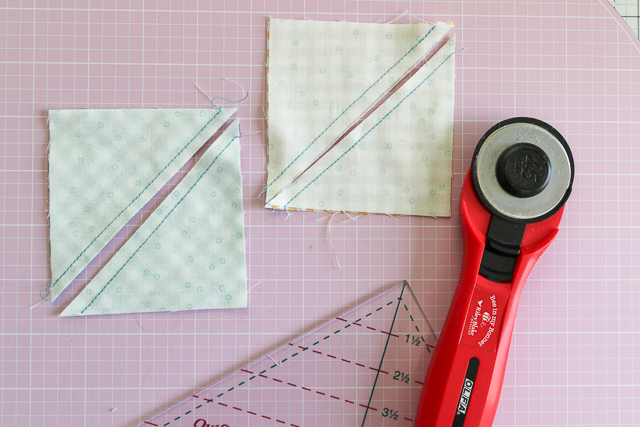
Many patterns - including this one of Lori's - features a technique for making two HST's at once by placing two squares, right-sides-together and sewing two diagonal lines ¼" seam allowance away from the center line.
The traditional way to do this is to draw a diagonal line on the back of one of the fabric's and use the line as a guide for running the edge of a presser foot to get a ¼" seam allowance.
Another benefit (in addition to making two blocks at once): sewing the diagonal seam before the fabric is cut can help prevent unwanted stretch and fabric distortion when sewing on a bias edge.


Line up edge of the presser foot (I'm using this quilter's ¼" foot with guide - it's my favorite) and sew a ¼" seam away from the diagonal line. (I'm also purposely using a dark thread so that you can see the seams.)
Rotate the block and sew a seam along the opposite side.
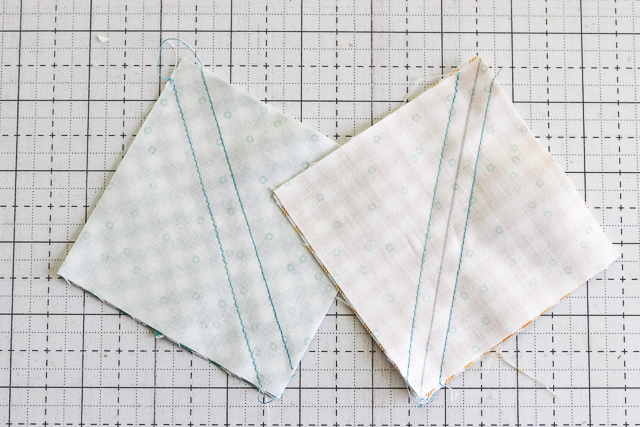
Cut along the drawn line to get two HST blocks.
Here are a couple of other short-cut options for making two-at-once HST blocks without having to draw a line. One high-tech option might be built into your sewing machine.
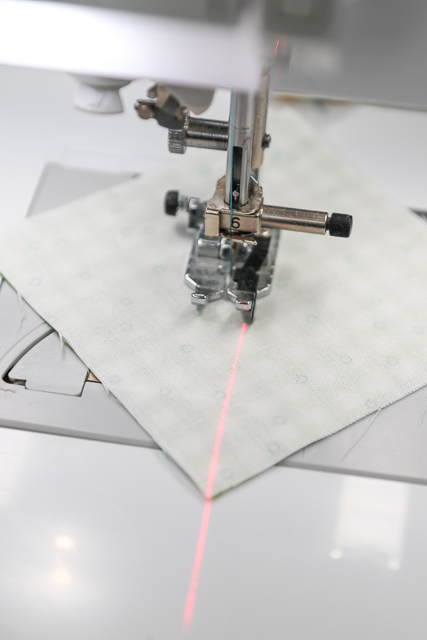
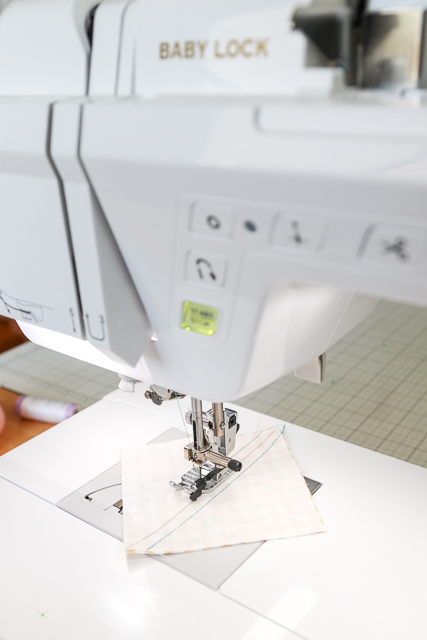
Many Baby Lock sewing machines have a built in laser guide beam that is a convenient and innovative feature that aids in precise stitching. By projecting a laser guide line onto the fabric, it helps users maintain straight seams and accurate stitching placement.
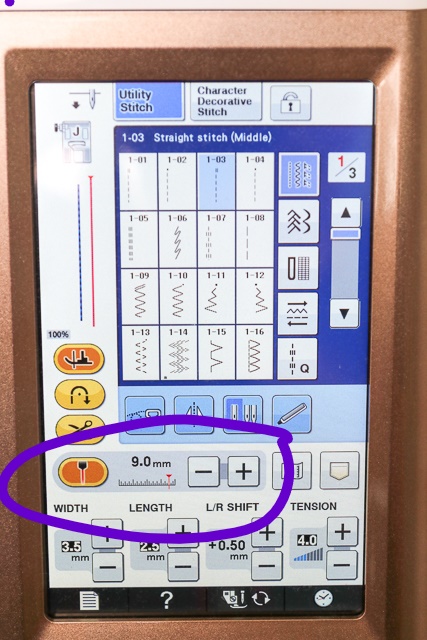
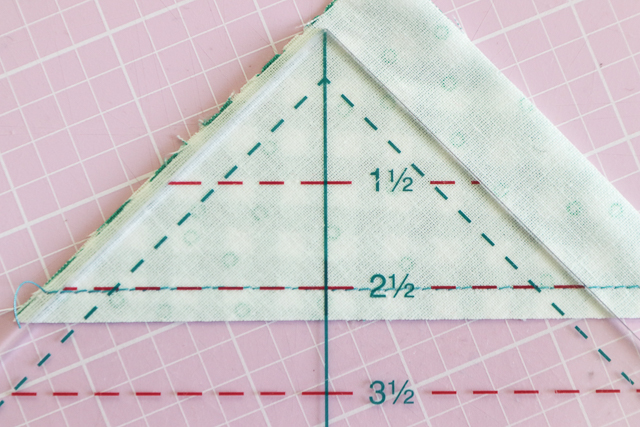
And the laser guide line is adjustable - you can move it to the right or left. For making HST blocks I moved the line 9.0 mm to the right so that the guide beams lines up with the ¼" line on the machine plate.
(On the screen below you can see the blue stitch line and the red laser line to the right.
Then line up the top point of the of the square ¼" away from the needle (to the right) and align the bottom point of the squares on the laser guide line. Sew, keeping the bottom point on the laser line the whole time sewing a diagonal line ¼" away from the center diagonal point.

Rotate the block to the other side and repeat the process sewing the seam on the opposite side of the center point.

Another similar short-cut and simple option, if your machine does not have a laser guide beam, is to use the Cluck Cluck Sew Diagonal Seam Tape which you can learn about here.
And there you have way to simplify your process by not having to draw diagonal lines on the backs of multiple blocks.
Squaring-Up Half Square Triangle Blocks
Another important facet for making HST blocks - especially if using the 2-in-1 method shown above - is the fact that typically you will need to trim some excess fabric from the edges of the block - or square-up - to make sure the HST measures accurately.
I know squaring-up can seam like a tedious process, but it really does make the difference in accurate and well-pieced quilts.
One option is to piece the HST block, open up the two sides and press it flat, (I press typically press the seam allowance to one side) and trimming all four sides of the block. It's important to keep the diagonal line running centered from point to point. To avoid having to trim four sides, you could put your ruler guide flush against two right edges of the block (if they are square) and just trim the other two sides.
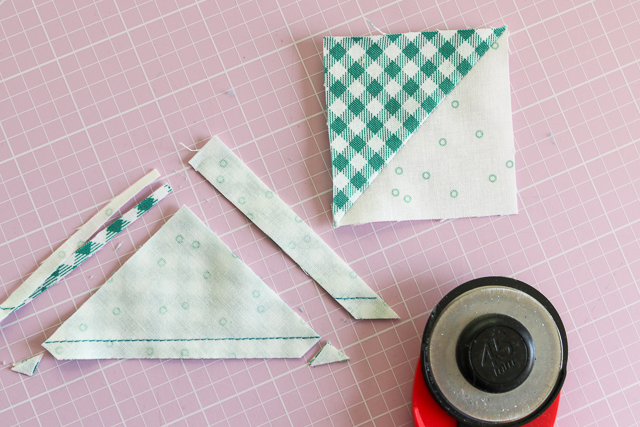
Another short cut is to use a specialty ruler such as my favorite Quilt in a Day HST ruler for squaring up your block while they're still folded in half. This way you only ever trim 2 sides, cutting your square-up time in half!


And you don't necessarily need a specialty ruler. For example, I had this little 2 ½" ruler (which is the finished size of these HST blocks). I laid the diagonal points of the ruler a couple of threads above the seam and then trimmed the raw edges.
You can read more details on my favorite tips and tools for squaring up Half Square Triangle Blocks here.
Sew-and-Flip Corner Tips
This tip also works great for sew-and-flip corners. This method typically is made by drawing diagonal line across the wrong side of a square or rectangle, place it in the corner of another piece of fabric with right sides together, stitch along the line, then trim the excess fabric ¼" away from the seam and press the marked piece open.


The laser beam guide is another great option here as well, to save having to draw diagonal lines - especially helpful if you're making a lot of blocks. Only in this circumstance, leave the laser guide beam in the center of the machine plate as the seam you're sewing would be directly ON the diagonal line, rather that ¼" away from the line.
You can also use the Cluck Cluck Sew Diagonal Seam Tape for Sew and Flip corners.
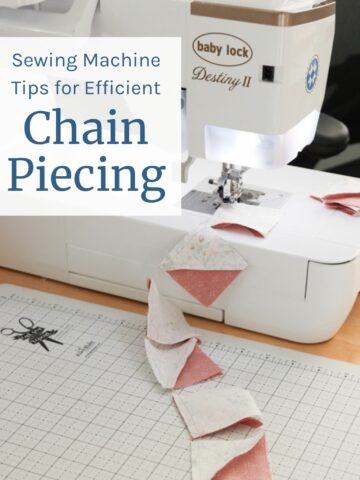
If you're making a lot of the same block at once, you can also chain-piece your blocks through the machine, one block after another.


With the blocks lined up on your cutting surface you can save another step by trimming all of the blocks at once.
Joining Blocks with Sew-and-Flip Corners
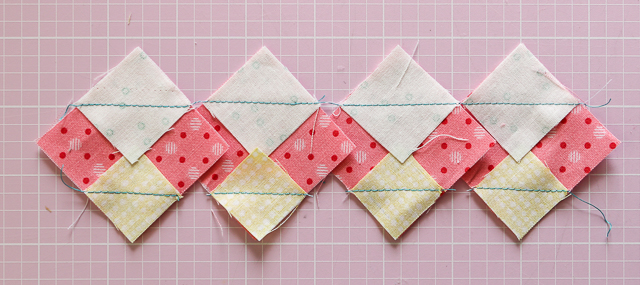
Sew-and-Flip corners create a lot of creative possibilities for quilt blocks, but they also come with a lot of extra seams. Especially if the blocks are small. Here are a few tips that will help reduce bulk with all of those seams.

If joining a lot of intersecting seams such as with these little flower-head blocks, press the seams going in alternating directions. The nesting seams will help also help intersections match up perfectly.

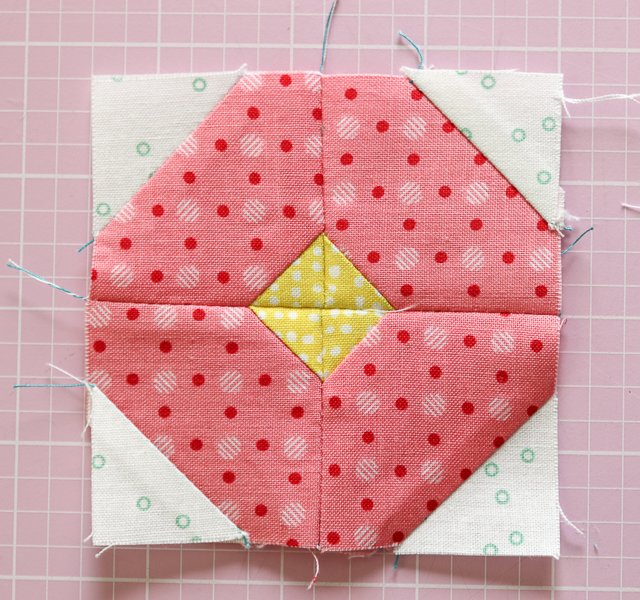
Typically I press all of my seams to one side, but if I'm working on small, intricate blocks with a lot of intersecting seams, I will press my seams open. Not only does this help the block lie flat it helps with accuracy.
I also HIGHLY recommend using a scant ¼" seam allowance when piecing quilts, especially small quilt blocks.
In this post I'm using the 16" Rotating Cutting mat by Sue Daley for Riley Blake Designs.
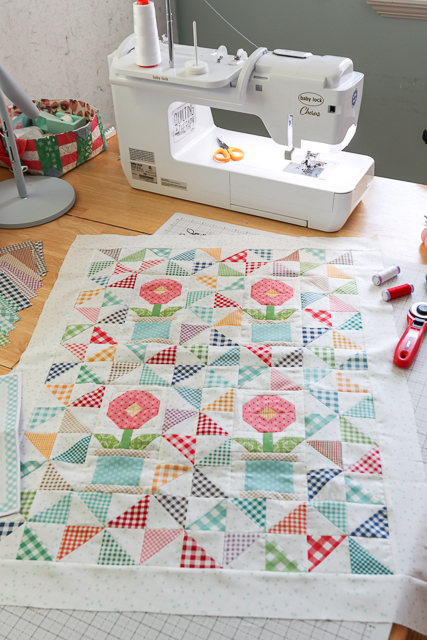
Where to Find the Gingham Flower Pots Kit
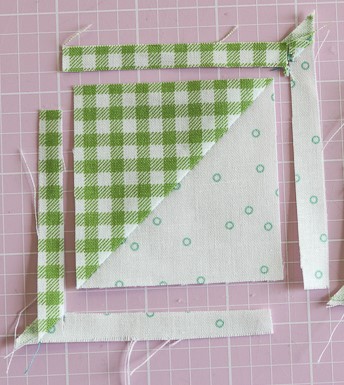
Here's how this project is coming together. It's pretty cute!

This Lori Holt Gingham Flower Pots mini quilt (24" x 32") is an kit exclusive to Baby Lock Sewing Machine dealers or you can find it online HERE.

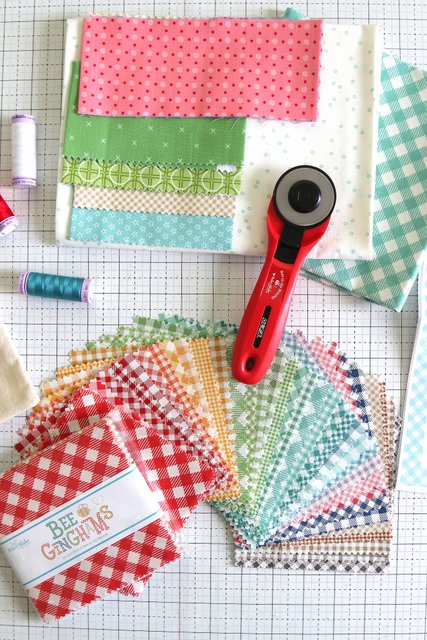
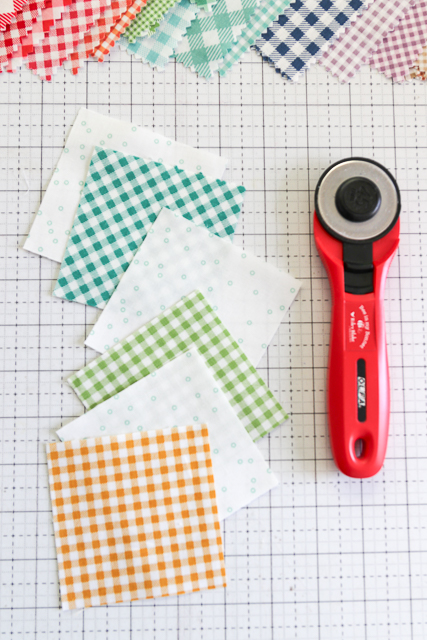
The kit includes 2 sets of Bee Ginghams 5" stackers as well as coordinating Lori Holt Basics from Riley Blake Designs.
This post is sponsored by Baby Lock Sewing Machines. I have been working exclusively with Baby Lock since 2017, trying and using multiple different sewing machines and have loved every one! Each one sews beautifully.

If you’re also looking to buy a sewing machine, I have a post here with tips to help you find just the right machine for your budget and skill level. Baby Lock has a fantastic collection of Beginner Level machines called the Genuine Collection.
You can read more about the Genuine Collection in my post about choosing a sewing machine or at any local Baby Lock retailer. Baby Lock machines are also available online from Sewing Parts Online.

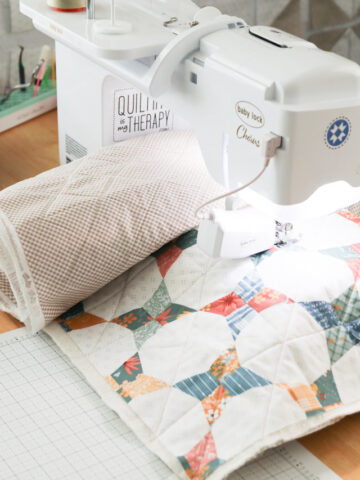
Thanks so much for checking in. I hope you'll find these tips for sewing half-square triangles and sew-and-flip triangles helpful for all of your future quilting projects! Next week I'll be sharing tips for quilting and binding this mini quilt!

quiltingnana12
Thanks for the great tips & techniques!