
I'm so excited to have a new guest writer today: Rachel of Wren Collective. I am inspired by Rachel's modern style, color palette, and creativity. If you haven't met Rachel, I'm excited for you to get to know her and for her to share a fun, graphic modern quilt tutorial with all of you.
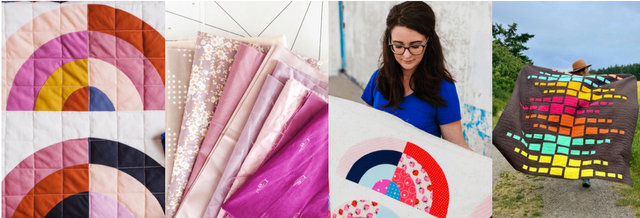
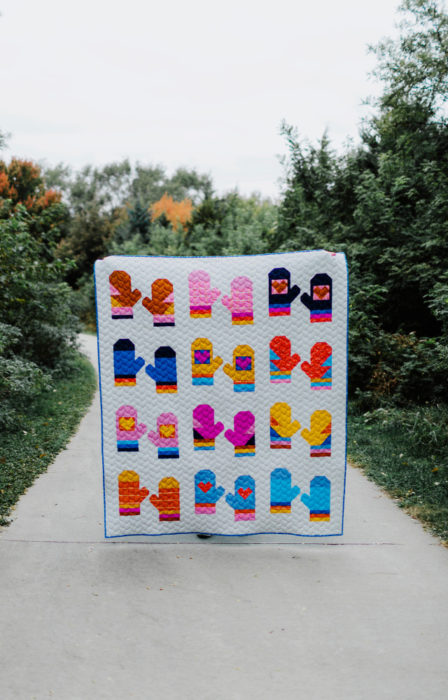
I'm also loving Rachel's latest pattern release: Cold Front with these adorable mitten quilt blocks! This would be fun to pattern to make with Christmas colors or colors to last all winter long. You can read more about the Cold Front Quilt here as well as see color versions by other makers here.
And now, a warm hello and big thanks to Rachel for this cool, modern quilt tutorial called Double Edged. If you're new to modern quilting, this simple, graphic design would be a fun place to get started!
Hi there! My name is Rachel of Wren Collective. I made my first quilt (heavily assisted) when I was 8 years old, took a very long hiatus, and picked it back up when my oldest child was a toddler. I haven’t stopped since!

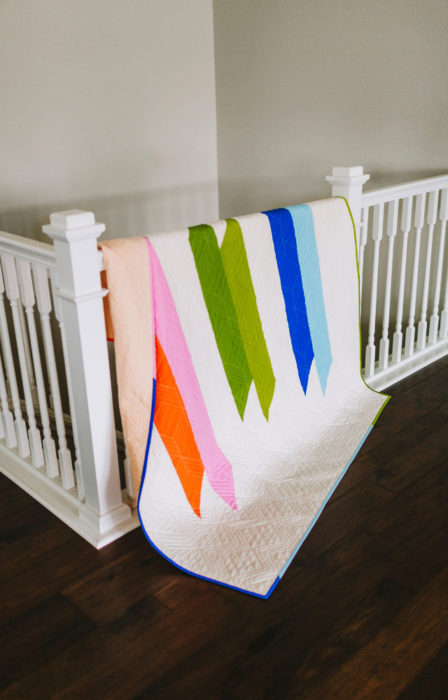
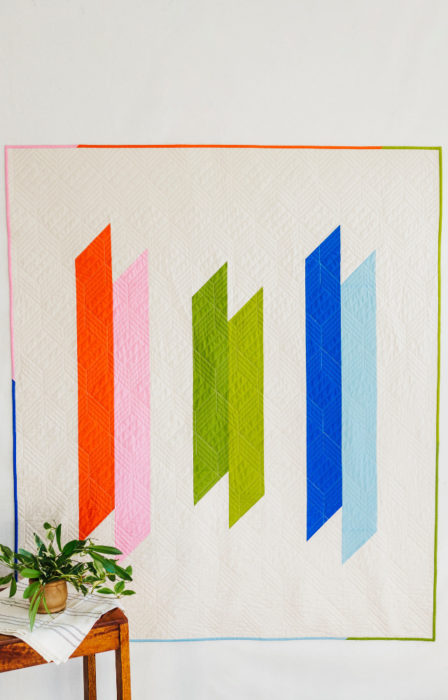
Designing quilt patterns brings me great joy, and today I’m thrilled to share a quick, easy, beginner friendly throw quilt pattern with you. This throw quilt finishes at 60” x 70”. It is the perfect weekend project!
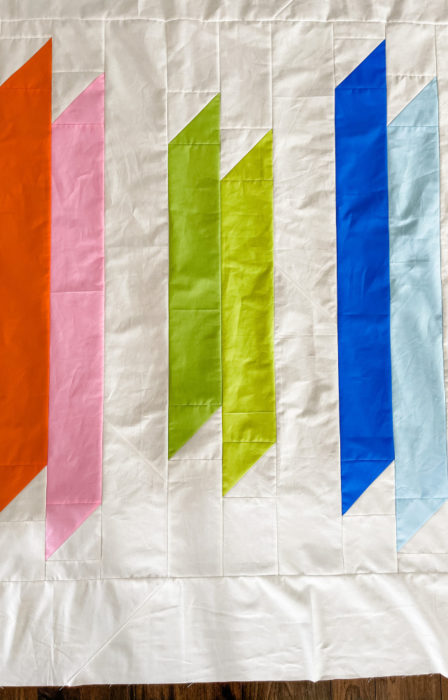
Double Edge uses six colors + background to create a bold, yet simple, design. For my version, I opted for solids, but a non-directional print or blender would also be really neat! The colors I used are listed in the photo below.

SUPPLIES NEEDED TO MAKE 60” x 70” THROW SIZE QUILT:
- ¼ yard of six different colors/fabrics for the “double edge” elements
- 2¾ yards background fabric
- 4 yards for backing (allows for 4” overage on all sides and assumes fabric is non-directional)
- ½ yard binding fabric
- Typical quilting supplies (rotary cutter, cutting mat, iron, sewing machine, etc.)
JUST A FEW NOTES BEFORE BEGINNING PROJECT:
- Please read all instructions and review all diagrams before starting project
- Width of Fabric (WOF) is assumed to be 42"
- RST = right sides together
- HST = half-square triangle
- All seam allowances are a ¼" unless otherwise stated
LABELS
For this tutorial, I will be referring to each piece by a letter/number combination. This helps to stay organized. Feel free to make your own labels, or you can download and print pre-made labels for this pattern here.
CUTTING INSTRUCTIONS - COLOR 
From each of the (4) ¼ yard cuts of fabric that make up the outer four “double edge” elements:
(1) 6" x WOF strip, subcut:
C1: (1) 6" x 6"
C2: (1) 35½" x 5½"
From the (2) ¼ yard cuts of fabric that make up the inner two “double edge” elements:
(1) 6" x WOF strip, subcut:
C1: (1) 6" x 6"
C3: (1) 25" x 5½"
CUTTING INSTRUCTIONS - BACKGROUND
(1) 6" x WOF strip, subcut:
B1: (6) 6" x 6"
(2) 5½" x WOF strips, subcut:
B2: (4) 5¾" x 5½"
B3: (4) 2¼" x 5½"
B4: (2) 11" x 5½"
B5: (2) 7½" x 5½"
(3): 6½" x WOF strips (B6)
(6): 9½" x WOF strips (B7)
CUTTING INSTRUCTIONS - BINDING
(7) 2½" x WOF strips
HALF-SQUARE TRIANGLE ASSEMBLY INSTRUCTIONS
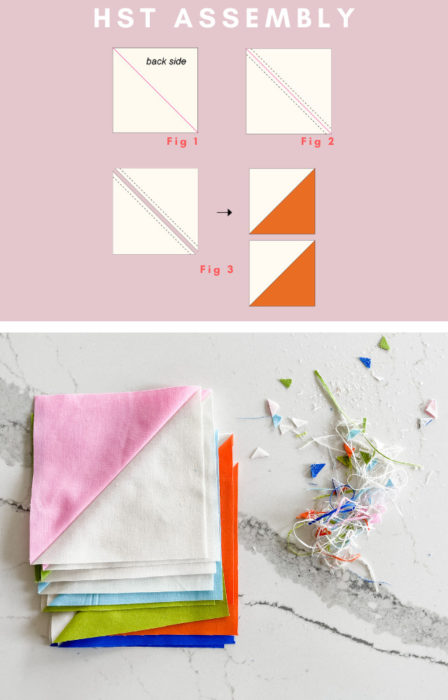
1. Pair a C1 + B1 square. Mark a diagonal line, corner to corner, on the wrong side of the lightest fabric in the pairing. Fig. 1
2. With RST, sew a ¼" seam on both sides of marked line. Fig. 2
3.Cut along marked diagonal line to yield (2) HST pieces. Press seam open or toward darker side. Fig. 3
4. Repeat steps 2-3 with the remaining C1 and B1 squares.

5. Trim all (12) HSTs to 5½" x 5½"
B6 ASSEMBLY
1. Sew B6 strips into one long strip. Tip: to make stronger seams, line up the strips at a 90° angle, RST. Sew a diagonal seam from corner to corner. Trim the fabric ¼" from the seam and press open. Fig. 4

2. Cut (2) B6 pieces measuring 6½" x 52½"
QUILT TOP ASSEMBLY

1. Refer to the diagram below to lay out pieces to be sewn together. Pin and sew pieces RST to form (8) columns, pressing seams open or to the side.

2. Pin and sew columns RST. Press seams open to complete quilt top. Fig. 5

BORDER ASSEMBLY
1. Sew the B7 strips together into one long border strip in the same manner as in Step 1 of B6 assembly instructions above.
2. Measure the two vertical sides of the quilt top. Cut (2) B7 border strips to the average height of the quilt top, approximately 9½" x 52½".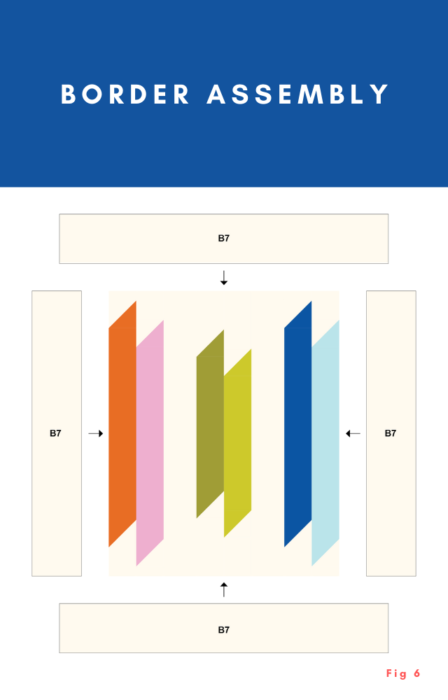 3. With RST, pin and sew the border strips to the sides of the quilt top. Press the seams toward border strips. Fig. 6
4. Measure the top and bottom of the quilt top. Cut (2) B7 border strips to the average width of the quilt top, approximately 9½" x 60½".
5. With RST, pin and sew the border strips to the top and bottom of the quilt top. Press the seams toward border strips to complete quilt top. Fig. 6
6. Baste, quilt, and bind quilt using your desired methods. Enjoy! If you make one, I would love to see! Share to social media using the hashtag #DoubleEdgeQuilt and/or #WrenCollectivePatterns
IF DOWNLOADABLE PDF PATTERNS ARE PREFERRED
If you prefer to have your patterns as an instant download, an extended version of this pattern is available in my shop. It includes detailed instructions/diagrams for wall, baby, throw, and twin sizes.
Use the code DIARY50 for 50% off the Double Edge pattern. Code is valid through December 15, 2021.

QUILT DETAILS
This quilt was pieced, bound, and photographed by me, Rachel of Wren Collective. Quilting was done by the amazing Paige of The Dogeared Quilt. The pantograph is called “Coal Ombre” by Rebecca Verrier-Watt.
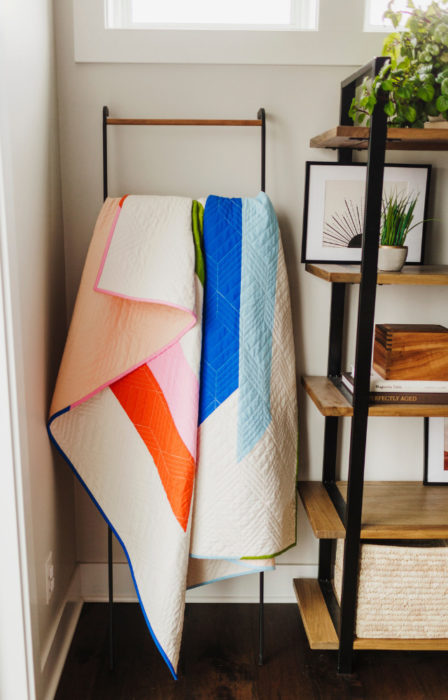
Fabric is all Kona cotton purchased from Sewtopia. Carrot, Carnation, Lime, Peapod, Blueprint, and Lake are the “double edge” element colors. Bone is the background, Ice Peach is the backing, and I did a scrappy binding using the double edge colors.

Thank you so much, Rachel! Here's another version of that cute Cold Front mitten quilt pattern.
To see more of Rachel's creations and style, check out her website and tutorials, as well as her Pattern Shop. You can also find her on Instagram at Wren Collective.

Bear Creek Quilting Company
Great modern quilt! Thank you for the inspiration
Gwyn
What a smart, easy quilt! I am loving the mittens!!! Thanks Amy and Rachel.