
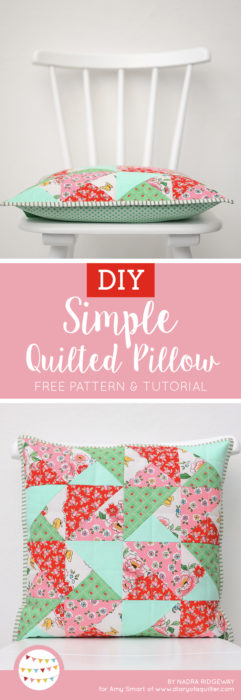
I'm excited to have Nadra from ellis & higgs here to share with us a sweet quilted patchwork pillow tutorial. This pattern would be a fun one to make in a variety of color and fabric combinations. I love everything that Nadra creates. Seriously, be sure to check out her Tutorials page for so much inspiration!
Hi, it's Nadra here from ellis & higgs, I am so excited to be back again with a fun and easy tutorial for you!
A few words about myself for those of you who don't know me: I am a fabric designer for Riley Blake Designs, quilt pattern designer and teacher from Germany. Creating quilt patterns is one of my passions – you can find a large selection of various designs and motifs in my Etsy Shop.
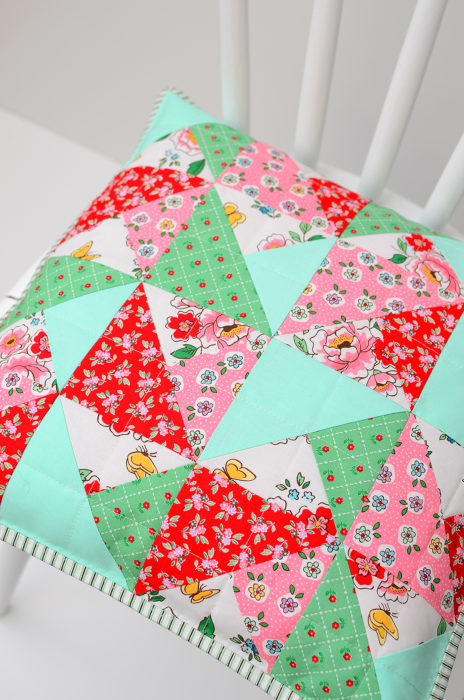
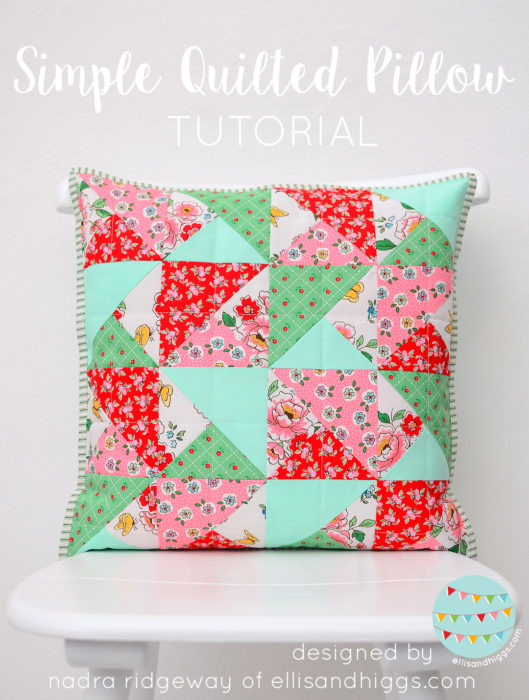
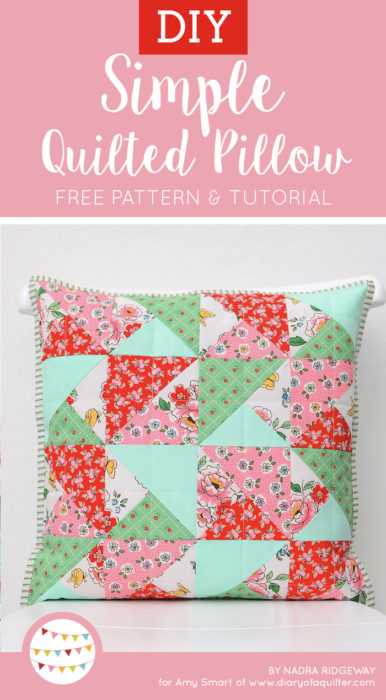
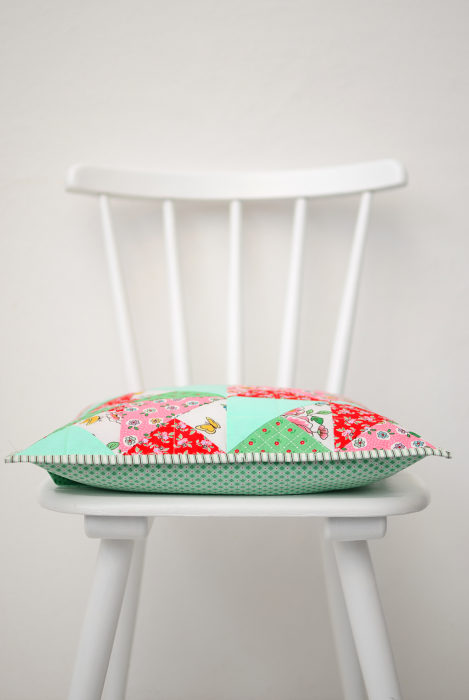
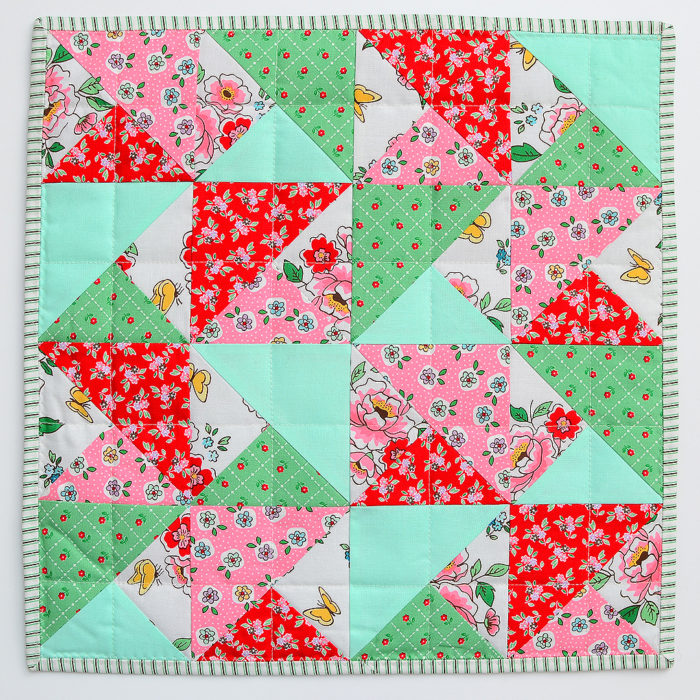
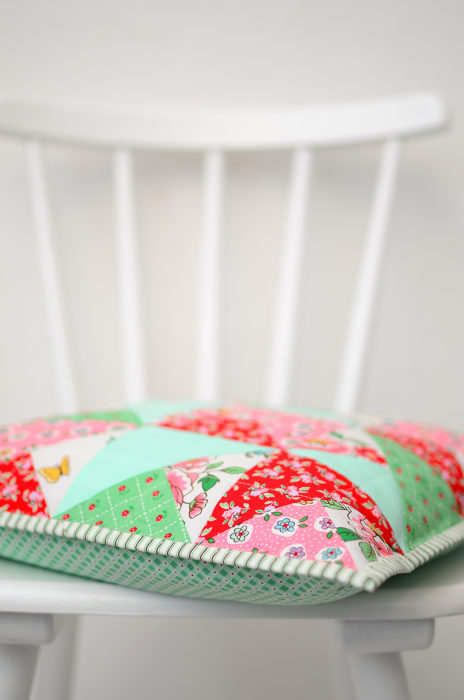
Quilted pillows are my go to project when it comes to creating a handmade gift for a special person. Today I'll be showing you how to make the Simple Quilted Pillow which is made from Split Square Triangles, a variation of the popular Half Square Triangles. These blocks are easy to make and so versatile. Depending on your fabric choices and block placement, you can create many different variations of this design!
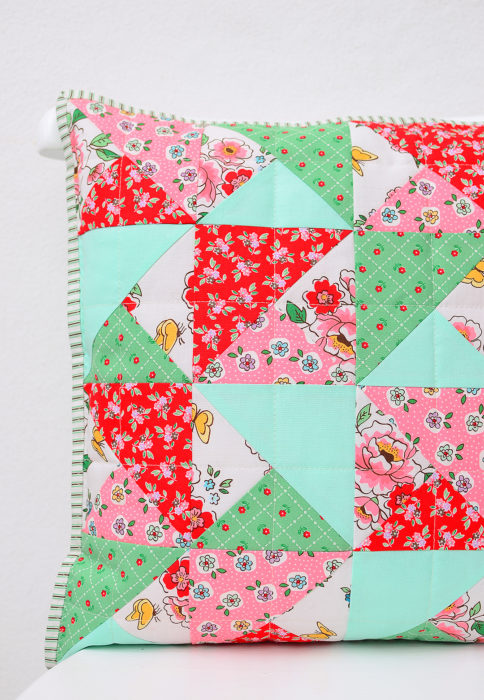
For the Simple Quilted Pillow I've used fabrics from my current fabric line Mon Beau Jardin for Riley Blake Designs, together with a light green solid to set off the prints.
Simple Quilted Pillow Finished size 16½'' x 16½''
Materials needed:
1 each Fat Eighth red, pink, light green and green fabric for the blocks
- 1 Fat Quarter white fabric for the blocks
- 1 Fat Quarter backing fabric
- ½ yard for the envelope closure
- ¼ yard binding fabric
- 18'' x 18'' batting
- One 16'' x 16'' pillow insert
Cutting mat, quilting ruler, rotary cutter, fabric marker
Cutting:
From each red, pink, light green and green Fat Eighth cut
- (1) 6″ x 6″ square (Fabric A)
- (2) 5 ½″ x 5 ½″ squares (Fabric B)
From the white Fat Quarter cut
- (4) 6″ x 6″ squares (Fabric C)
From the Fat Quarter for the envelope closure cut
- (2) 12 ½″ x 16 ½″ rectangles (Fabric D)
From the binding fabric cut
- (2) 2 ¼″ x Width of fabric strips
Instructions:
Follow the steps below to assemble the pillow. Use a ¼″ seam allowance and press the seams as shown by arrows. Pair your fabric pieces by color and size as shown in the diagram below.
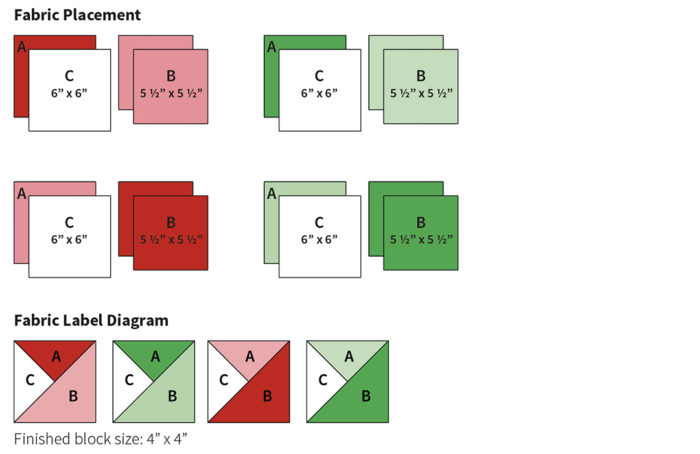
STEP 1: Draw a diagonal line on the back of the B and C squares. Place a C square on an A square with right sides facing and pin in place. Stitch ¼″ from each side of the drawn line. Cut apart on the drawn line and press the units with the seam allowance towards the darker fabric. At this point you have created two Half Square Triangles (HST) which should be a bit larger than 5 ½″ x 5 ½″.
STEP 2: Place a B square on one HST unit with right sides facing and the drawn line laying opposite to the seam. Stitch ¼″ from each side of the drawn line. Cut apart on the drawn line and press the units with the seam allowance towards the B fabric. Repeat with your second HST unit. At this point you have created four Split Square Triangles.

STEP 3: Trim the Split Square Triangles to 4 ½″ x 4 ½″. First line up the diagonal line of your ruler on your diagonal seam and the 4 ½″ mark of your ruler on the second seam, as shown in the diagram below. Trim the right side and top of your block. Next line up the two sides you just cut at your 4.5″ mark on your ruler and trim to the exact size.
Repeat the above steps with the remaining A, B and C squares according to the fabric placement in the diagram above and make a total of 16 Split Square Triangles.
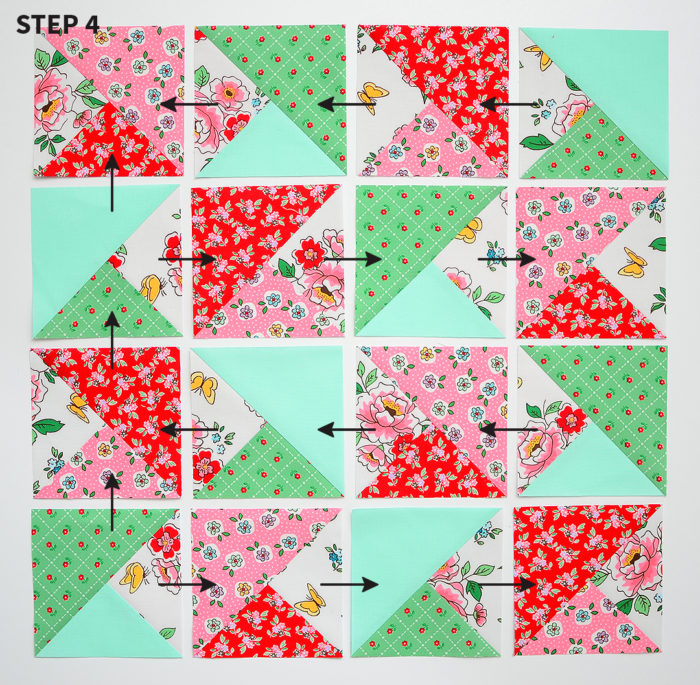
STEP 4: Lay out and assemble the blocks as shown in the image below. Your pillow top should measure 16 ½″ x 16 ½″.
Pillow assembly:
Make a quilt sandwich with your pillow top, batting and backing fabric and quilt as desired. Trim excess batting and fabric.
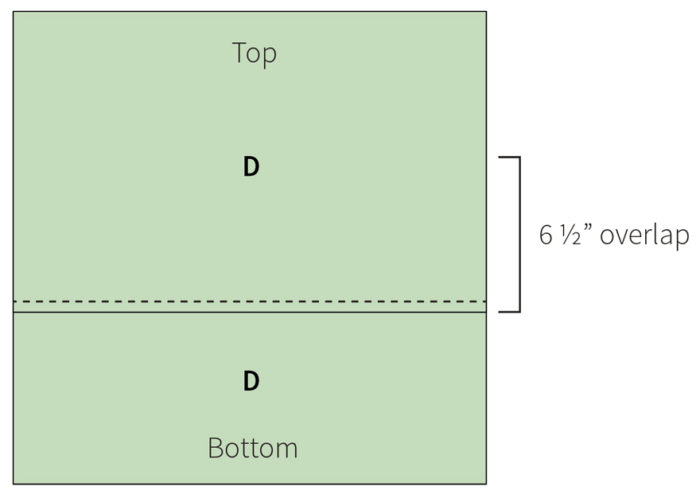
To create a hem, place a Fabric D rectangle wrong side up, fold over the long edge ½'' twice, press and stitch in place. Repeat and make two. Pillow Backing should measure 11 ½″ x 16 ½″.
Align the backing pieces, right sides up and raw edges aligned, against the back of the Pillow Top. The hemmed edges should overlap 6 ½″. Pin the backing in place and machine baste ⅛″ from the edge.
Finishing:
Piece the binding strips end to end and bind the pillow using your favorite binding method.
I hope you've enjoyed my tutorial - thanks so much for stopping by!
 Please come visit me over on my blog www.ellisandhiggs.com where I share more ideas and inspiration! You can also follow me on Instagram, Facebook and Pinterest.
Thank you Nadra! As I mentioned before, be sure to check out Nadra's Tutorials page. There is so much beautiful inspiration to be found!
And with summer coming, it would be a fun time to make some adorable Strawberry coasters using this tutorial.
Nadra is also a creative genius when it comes to fresh new quilt pattern ideas. You can see all of her beautiful patterns in her Etsy shop.
An

Shirley Clark
Beautiful! Great tutorial too!
Rosemaryflower
Amy, Thank you for sharing this beautiful result of Nadra's creativity and her adorable use of her sweet incredibly pretty fabric. I love her fabrics.
Amy
Hi Amy,
I have a question. I am seeing 5 different types of fabrics on the front of this pillow, but on the pattern I only see directions for 4 fabrics. Please advise, am I misunderstanding?
Amy
Check list of fabric requirements. You need Fat Eighths of 4 of the fabrics (pink, red, green and solid green) and a Fat Quarter of the white. That is the 5th fabric. 🙂