
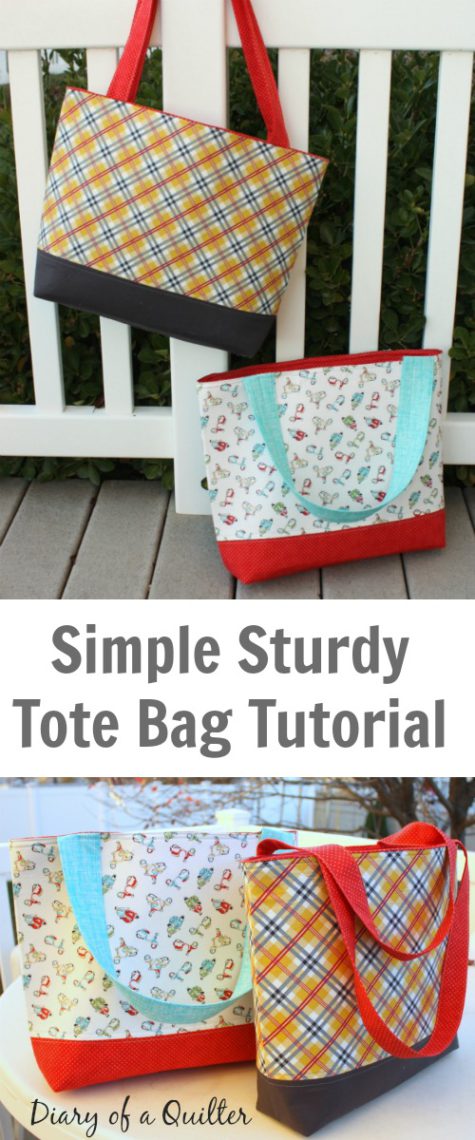
Are you looking for some practical hand made gifts for Christmas presents? Well, here is an idea for you - a simple tutorial using fusible Peltex to make a sturdy tote bag, big enough to hold a lot of stuff, but a good size for easily carrying around.

Simple, Sturdy Tote Bag Tutorial
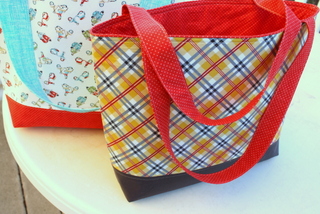
This Tote bag is a simple project, easy to complete quickly, and the perfect size – large enough to haul lots of stuff, but comfortable enough to carry around town. Doable in an afternoon, this bag is perfect for making multiples as gifts!
Materials:
- ⅜ yard - exterior bag fabric
- ¼ yard - exterior bag accent fabric
- 1 yard Lining fabric and handles
- ¼ yard Pocket fabrics
- ⅞ yard Fusible Peltex 71F
- Thread
Supplies:
- Sewing Machine with a walking foot (preferable)
- Rotary Cutter and Mat
- Basic sewing supplies
Assembly Instructions
Cut:
From exterior bag fabric cut two pieces 10 ¾” x 18 ¾”
From exterior bag accent fabric cut two pieces 5 ¾” x 18 ¾”
From lining fabric cut two pieces 15 ¾” x 18 ¾” and two straps 7” x 27”
From pocket fabric cut one (or two) pieces 7” x 21”
From Peltex 71F cut two pieces 15” x 18”
Sewing:
All seams are ⅜”
 Pocket: Fold pocket(s) strip in half and stitch around three sides, leaving a 3” opening for turning on one long side. Clip all four corners. Turn pocket right-side-out and press well. Tuck in opening and topstitch along open side.
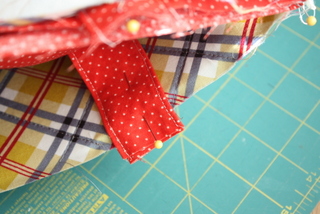
Pin pocket to one of bag lining pieces 4 ½” down from top edge and centered equally from both sides with top-stitched edge up. Sew pocket securely on three remaining edges to the lining piece. Optional, sew an additional seam 3” away from one side to create a divided pocket. Repeat if adding a second pocket to other lining piece.
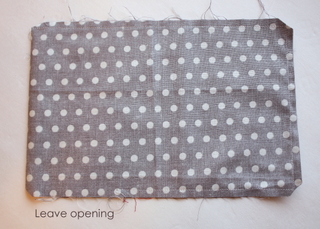
Pin lining pieces right sides together and sew together two short sides and bottom side, leaving a 10” opening on the bottom side for turning bag later.
Measure a 2” square in each corner of the bottom of the lining and cut. Press seams open.
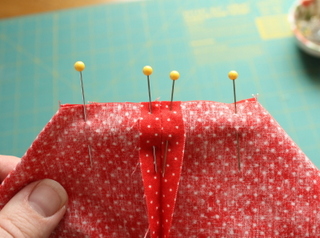
Measure a 2” square in each corner and cut. Pinch bottom and side seams to match and sew across opening to create the bottom gusset. 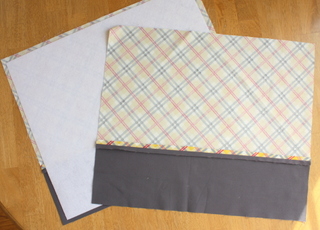
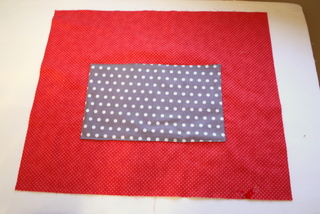
Sew together each exterior bag fabric with exterior accent fabric. Press seams open. Center Peltex 71F on backside of exterior panels and fuse in place.
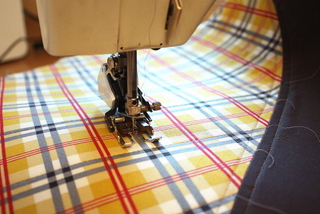
If desired, quilt the fabric to the Peltex by sewing over the two layers. Repeat with second panel. 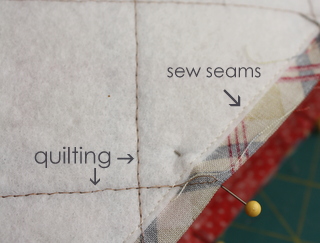
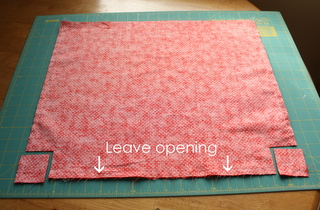
Place exterior panels right sides together and sew one side, across bag bottom, and up second side, leaving top open. Sew seams right on the edge of the Peltex 71F like you are topstitching it in place. This will help hold the Peltex in place but not bulk the seams.

Measure a 2” square in each corner and cut.

Pinch bottom and side seams to match and sew across opening to create the bottom gusset.
Making Bag Straps:
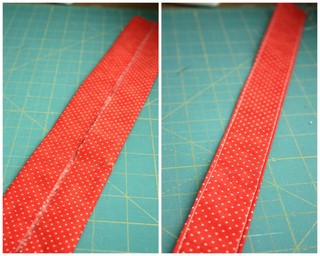
Fold 7” x 27” strips in half lengthwise and press. Open strip and fold in sides toward center, press. Fold strip in half again with sides folded in. Topstitch both long edges.
Bag assembly:
 Pin straps to the bag exterior 3” from side seams.
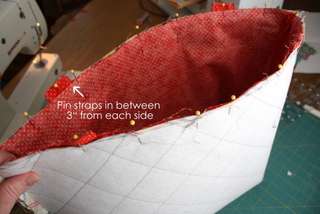
Turn lining piece right-sides out. Place lining piece inside the inside-out bag exterior, right sides together with straps in between. Sew ⅜ seam all the way around the top of the bag.
Using opening in the bottom of the lining, turn the entire bag right-sides out. Give the bag a good press. Topstitch around the top edge of the bag. Topstitch together the hold in the bottom of the lining.

I'm sharing this tutorial as part of the Handmade Holiday series for Pellon. You can find the free PDF pattern for this Tote Bag Tutorial Here.

I need to make a few more of these as Christmas presents this year. This is the one I'm most excited about so far. It's for an Italian loving friend who drives a Vespa. When I saw this Va Bene fabric by Dear Stella I knew I had to make her something with it.
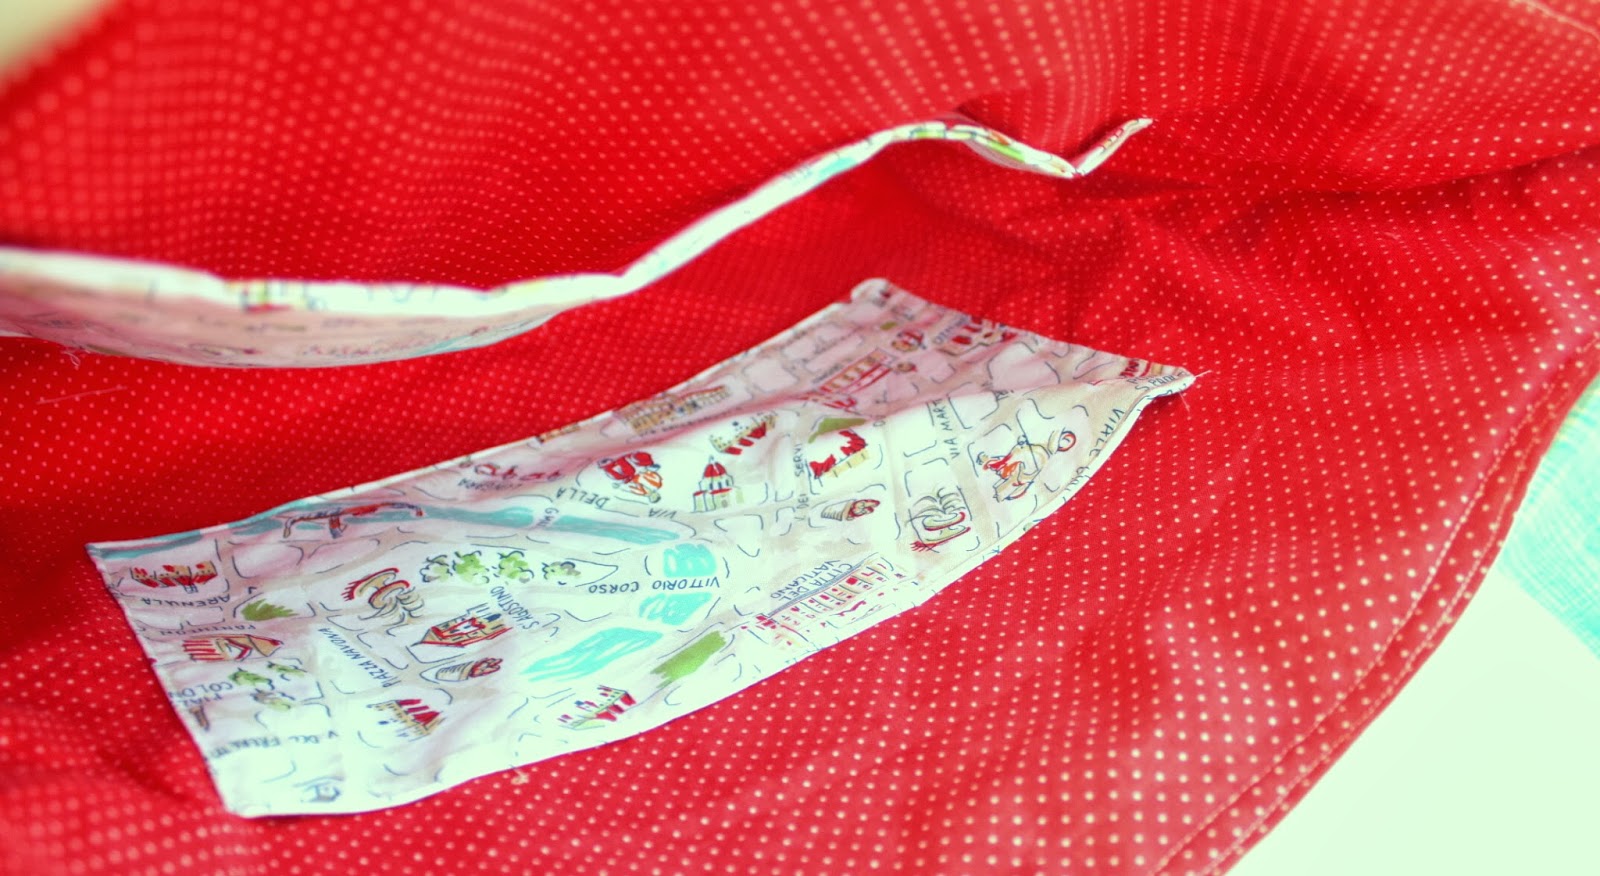
I used the Italy Map fabric for the pockets. It's so great! I made these bags and took the pictures about 3 weeks ago. It's crazy to see how much my backyard has changed in that amount of time! Today it's an icy, snowy wasteland.

If you are looking for other ideas for Simple Handmade Christmas gifts tutorials, you may want to check out this post as well. I have a few more handmade gifts I want to make this year and the calendar is telling me that I'd better get crackin'.

AikaMaku
Thanks!!! 😀
Friederike
The perfect bag with just the right size. Thank you for the tutorial, maybe I'll find time to make one for Christmas.
Acorn to Oak
Great bags! A nice tote bag for my knitting and crochet has been on my to-do list for a while now. I like this one. And, even better...I love that there are directions. Thanks for sharing them. 🙂
Pinspot
Thanks Amy! This tute arrive just in the nick of time for me! Exactly what I was looking for!
margaret
great tote bag and other christmas ideas very nice too
Thimbleanna
That little vespa bag is adorable Amy. You have such a great eye for coordinating colors!!!
Kris
Wonderful and easy-to-follow tutorial. Thank you so much!
Linda
Great idea for my granddaughter! Thank you for for the easy to use tutorial!
Lucky
What is the finished size of this bag?
Sophie Atkinson
Hi Admin,
Your post is very interesting to read and providing useful information for us. I want to draw your attention toward a wonderful article based on “How to Make a Bag: Easy Tote Bag Pattern”. Go ahead and check more information at https://craftbuds.com/easy-tote-tutorial-with-custom-fabric/
Maaike
Found this pattern a couple of weeks ago and it is great! Thank you for sharing! Iadded a little magnet lock, so you can kind of close at the top.