

Hello and welcome to any new friends. Today is my turn to share a block tutorial for the
I was so excited when Jackie asked me to participate. Fun times!

This block is the 6th block in the series. If you haven't joined the fun yet, it's definitely not too late! You can find out more about this free Block of the Month party here.
I'm going to share a tutorial for this very traditional star block. I certainly don't claim any credit for making it up, but I'll show you how I made this classic design into a finished 8" block (unfinished 8.5").

Cutting list:
From your background fabric cut:
- [4] 3" squares
- [4] 2¼” squares
- [4] 1½” x 4” rectangles. (not pictured. D'oh! Sorry)
From each of your 4 'point' fabrics:
- [1] 3" square
- [1] 2¼” squares
Center square:
- [1] 1½” x 1½” square
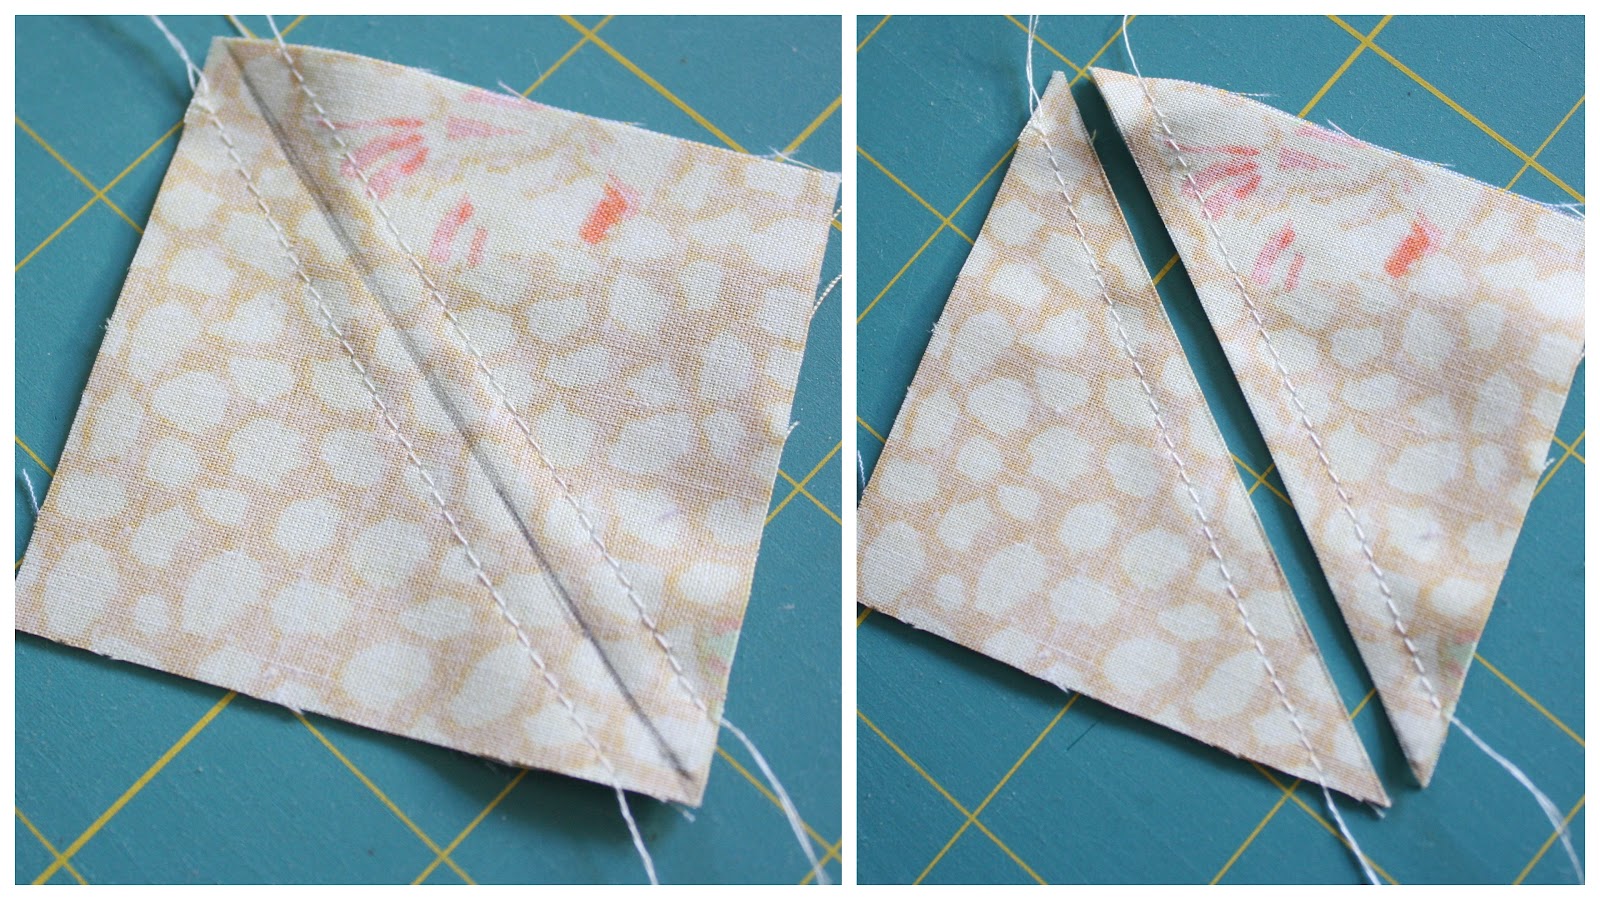
Start this block by making each of your 'points'. Begin by matching up a 3" colored square with a 3" background square. Draw one diagonal line on the back of the lighter fabric. Carefully sew a scant ¼" seam along both sides of the drawn line.
Using a rotary cutter, carefully cut directly on the drawn line. Press both blocks open, pressing seam toward the 'point' fabric.

Carefully 'square-up' both half-square triangle blocks to 2¼”

Take both half-square triangle blocks and match them up with the coordinating 2¼” colored square and 2¼” background square in this layout.

Sew top two squares together and bottom two squares together. Press seams away from the half-square blocks.

Now sew two rows together, butting the seam allowances up against each other to help line-up that center point. *Optional: when pressing this portion, 'pop' the first couple of stitches in the center seam and open up where those four seams intersect to make it lie more flat. Press the seams as shown.*

Repeat the same process to make all four of the points. Take your [4] 1½” x 4” rectangles and your center 1½” x 1½” square and lay out the block like this.

Sew the blocks together in three separate rows as pictured. Press the seams toward the center rectangle on the points rows, and press away from the center square on the middle row. Sew three rows together.

Voila!

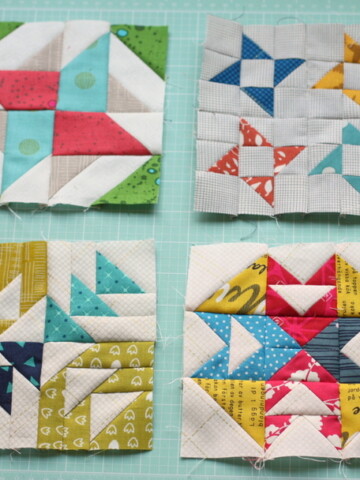
And here is my version in a very different color scheme. I love how versatile this block can be - modern or traditional, depending on the colors and fabrics used.

I have loved ALL the blocks so far. To see more block versions - or to upload your own - visit the BBOM flickr page.
Here are the other designers and their corresponding months:
September - Sherri McConnell - A Quilting Life
October - Vicki Welsh - Field Trips in Fiber
November - Stephanie Dunphy - Loft Creations
December - Pat Sloan - The Voice Of Quilting
January - John Adams - Quilt Dad
February - Amy Smart - Diary of a Quilter
August - Amy Ellis - Amy's Creative Side
September - Sarah Fielke - The Last Piece

It's also a great way to bust some stash.
Have fun!
Andy
Love it Amy!
Linda
Too cute! Love this month's block. Thanks Amy. Also, your 6 blocks look wonderful.
Lesley
I love your block and tutorial! It's a wonderful way for me to bring together the contain colors in my quilt. Your blocks are beautiful as are your fabric choices. Thanks for sharing!
Jackie
Great tutorial, Amy! Thanks for being part of the BOM!! Love the block!
Katy Cameron
Fun block, and looks like it would be a good scrap buster
Nedra
It's so fun to see that you are the designer this month! Great job on the block. I'm looking forward to making these ( I make 2 of each one) and having it be part of the line up. I will think of you every time I look at it!
Mama Bell
Love the block and your tutorial. I am especially impressed by the way you lined up the stripes in your color scheme block! I tend to be OCD about that...looks like somebody else might be too 🙂 But, it looks soooo good, it's worth it! Awesome!
quiltretreat namawsbuzyquiltn
Yes I do love your block and wait anxiously for the 25th of the month to roll around. I also make 2 blocks, Time to get started
Mary
YES, I like your Block. I had to come back to see what you came up with to share with all of us. THANKS!
Kim
Thanks for the tutorial, I came by to get the BOM and had a nice visit at your bloghome. I like the superhero cape idea and I'm thinking of ways to make it into a "princess" cape for my granddaughter :0).<br /><br />Happy Sewing
fiberchick
Beautiful block! Am going to have fun making this...
Claire Jain
Such a pretty block! Thanks for sharing the how to.
Venus de Hilo
Love this block, and how you've used Jackie's fabrics.<br />Look forward to playing with this one.
Bente-I like to QuiltBlog
Thank you, your block is lovely!<br />Liebe Grüße<br />Bente - Germany
ecuakim
Hi Amy! I’ve followed your blog for years! And you’ve inspired me to start my own quilting blog. I’m sponsoring a contest there, and I’d be honored if you would keep this link in your comments section: https://sweetapplequilts.blogspot.com/2012/02/vote-for-leslie.html<br />I’m trying to help my friend win the American Family Go Get Your Dream contest. Thank you!
Yolanda
Bonito tutorial,no dudare en hacerlo servir. muy bien explicado.besos yolanda
PamKittyMorning
Super cute, can't wait to make mine! Love all your blocks!
Jay
Love it!! going to look great!!! Starting tomorrow!!
Karen (nybird) (KMello)
Looking forward to making this block!
Kimberly
I really love these and want to make a set too... I'm thinking of using my Ruby layer cake! I clicked over to Pat Sloan's site but can't find her block. Do you know where it might be over there? Thanks!
Miriam
Great tutorial. Thank you Amy. I just finished my blocks.
Valerie
Hello Amy! Thank you for the warm welcome. I discovered your blog late Friday night...sometimes my only "alone blogging time" and have instantly fallen in love!!! I am totally new to quilting. Long time lover and purchaser of quilts, but until recently had never tried the art of quilting myself. At the coaxing of some friends and neighbors and a super sweet "Intro to Quilting&
Debbie J
I really love this block. This is one star block I've never made before. I really love the floral/pastel fabrics you used.<br /><br />Thanks, Debbie J.
Jytte R
Thank you. I look forward to make this block.<br />I just returned from England yesterday evening.
daisy and jack
cool block - thanks !
Melody
Somehow, even though I follow some of the previous blogs, I'd missed this. I love your block. I finally used my sweetwater cuts for the last bloggers quiltalong. I have the perfect one for this. Can't wait to start and get caught up.
Drucilla's Stitches
I love this block...thank you for sharing. I made two Friday night...yahoo!
Nicole
Have you tried making half square triangles using this method? I just discovered this and made a video for it. Hope this helps! The blocks are great!<br /><br />https://www.buzzellis.com/2012/02/so-few-weeks-ago-i-posted-how-to-on.html<br /><br />You get 8 HST at one time!
Jay
I think this may be my favorite so far of the BOMs!!!
Maria
Thank you Amy. Great eay to follow tut for your lovely block.
Sharon Dawn
Your block and samples in your choice of fabrics have inspired me to make a set of my own. I have one more to go and I will be caught up! <br /><br />Thanks for sharing them,<br />Sharon<br />dexterdays-sdk.blogspot.com
Mila@Rimbun
Thanks for the tutorial... seems complicated but after trying it once, I love this block pattern.
Deuzuite Ardasse
Fiquei encantada com teus trabalhos. Sou apenas uma iniciante, com vontade de prender. Obrigada pelos lindos trabalho.<br />Bjs ITE
Jennifer Mathis of Ellison Lane
Such a pretty block Amy! Thanks for linking up to my quilt block round up! 🙂