
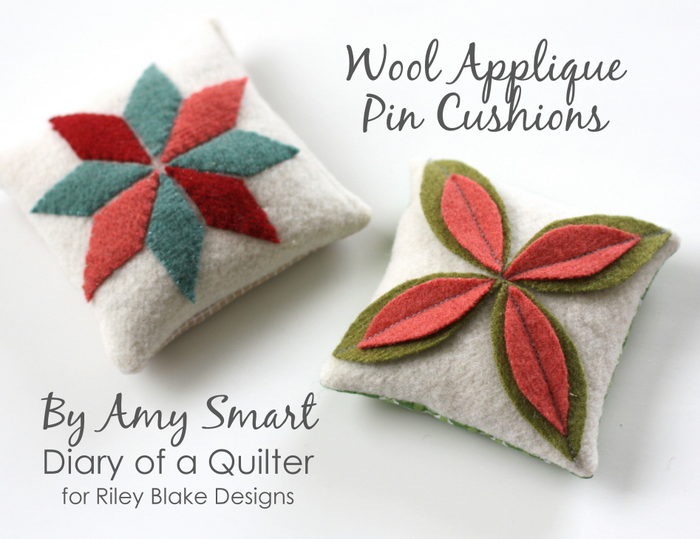
I love working with woven wool. I first started sewing with wool about 14 years ago and I love it for a few reasons. First, it's so forgiving. It looks good no matter what you do. Second, real wool feels so nice in your hands and is so easy to work with. It's like sewing through butter. Third, I love appliqueing with wool because you don't have to turn under any raw edges. You can simply cut out the exact shape you need because there is no fraying.
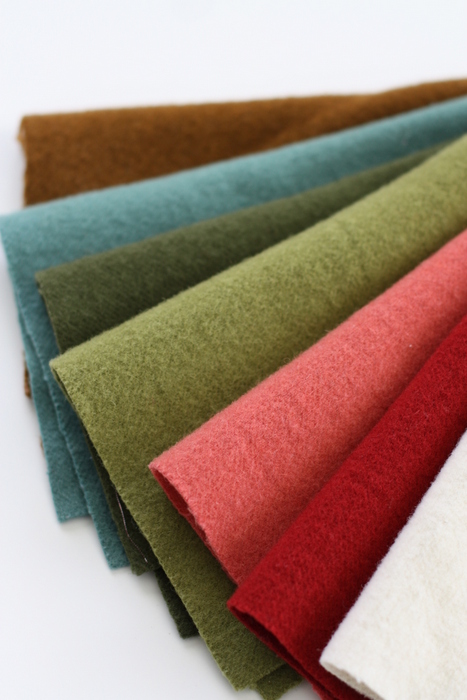
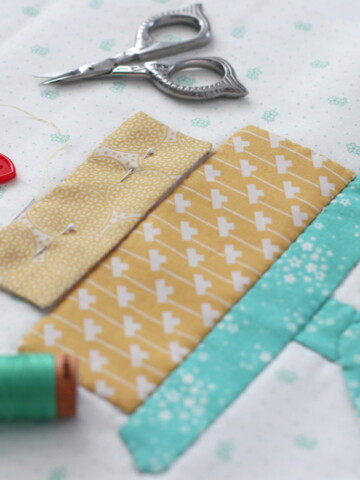
Today I'm sharing a couple of easy projects made with wool using Penny Rose Fabrics' latest release of woven wools. Their selection comes in eight pretty classic colors (including black, which is not shown.)
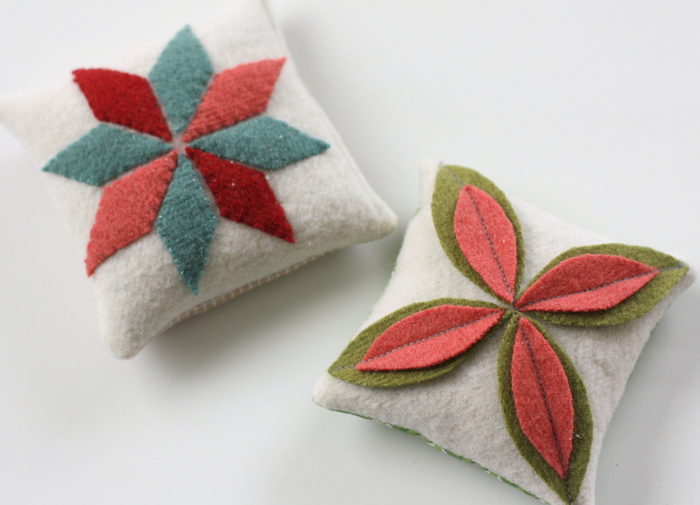
Before working with real wool, I like to 'felt' it - or make it thicker and softer by washing and drying it. The process makes the wool so luxurious to work with. These simple pincushions are quick and easy to make. First is this simple 'orange peel' inspired block. A few years ago a friend gave me a similar pincushion filled with lavender and I wanted to recreate it.
The easiest way to cut your wool shapes is to draw or trace a pattern onto Reynolds Freezer Paper. This is available in the grocery store in the same aisle as the aluminum foil or wax paper. It's a roll of paper that is coated with wax on one side. A roll will last your years. You trace or draw the shapes on the paper side and cut them out with paper scissors.
Then, gently press the shapes to your wool with an iron (on wool setting). The heat will help the wax side of the paper gently stick to the wool so that you can accurately cut out the shape, but then will easily peel off. (It's genius, I tell you.)
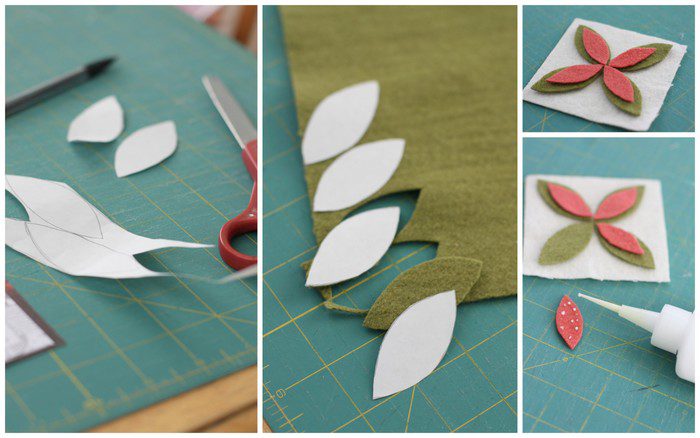
From there place your shapes on the background piece where you would like them to be. You can pin them in place, but I like to glue-baste so that I'm not dealing with pins. You do not need much glue at all and just put a little in the center. Set/dry the glue with a warm iron, and the pieces should stay in place so you can sew them down.
For this little orange peel block, I cut my white wool square 4 ½" x 4 ½". The green petals are 2 ¼" long and the pink petals are 1 ¾" long. You do not need to cut any seam allowance because you are not turning anything under.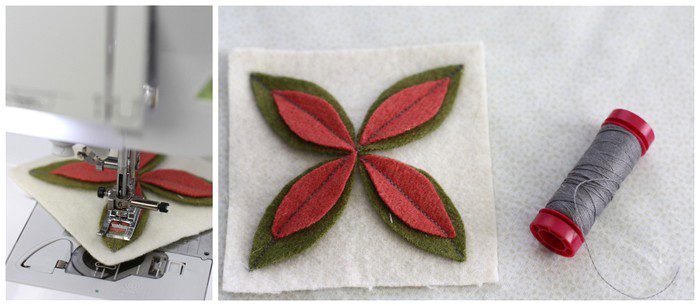
I then machine stitched a straight line across both diagonals to permanently secure the leaves in place. I used an Aurifil wool thread in my machine (worked beautifully!) as it gives a little more texture and depth. Another trick - I used my zig-zag foot on my machine because it didn't catch and start pulling up on the tips of the petals like my open foot did.
From there, cut a backing piece (I used cotton, but you could use wool) the same size as my front. Pin right-sides together and sew all the way around, leaving a 2" opening. Turn right-sides out. I filled my pin cushions with crushed walnut shells to give them some weight. Whipstitch the last 2" closed. I love making pin cushions with wool because the repeated pin holes don't show.
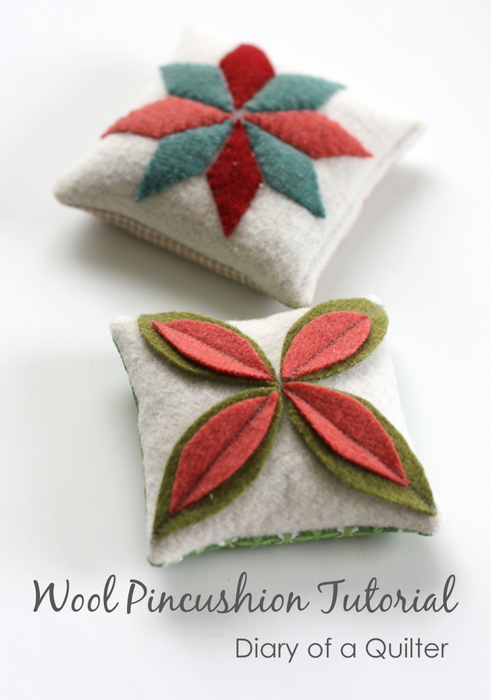
For the star variation, I cut 8 45 degree triangles at ¾" wide. (Tip - make a template. With pieces that small, it's easy for the wool to get distorted if you're just cutting them with a ruler. Ask me how I know...)
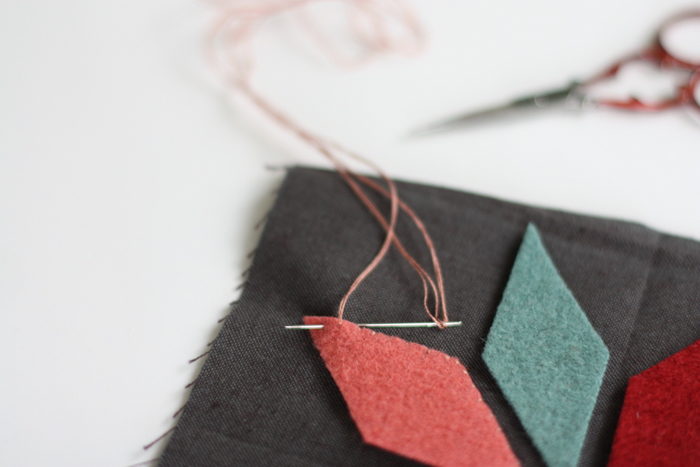
I hand stitched the diamonds in place. I love hand stitching with wool - again it's so forgiving! Sometimes people use a button-hole stitch to make the stitches a little more decorative. My preference is a simple whip stitch, very close to the edge. The stitches aren't visible like a button-hole stitch, but it still gives the edge some nice texture.
And as you can see in the above picture, you can use lots of options for backings for wool besides wool itself, such as cotton and other wovens.
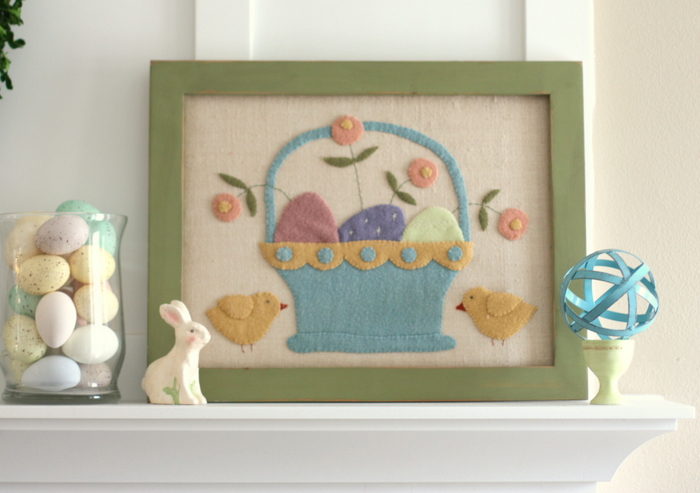
Working on these pincusins this weekend reminded me to pull out this wool Easter piece that I made about 12 years ago. At the time I couldn't find any blue wool in that robin's egg blue color so I actually dyed some white wool myself to get that color. Makes me glad Penny Rose is producing that color! I'm afraid I don't have the pattern for that wall hanging any more - or know where to find it. But I did see some pretty wool easter eggs and basket on the Purl Bee site that will inspire you!
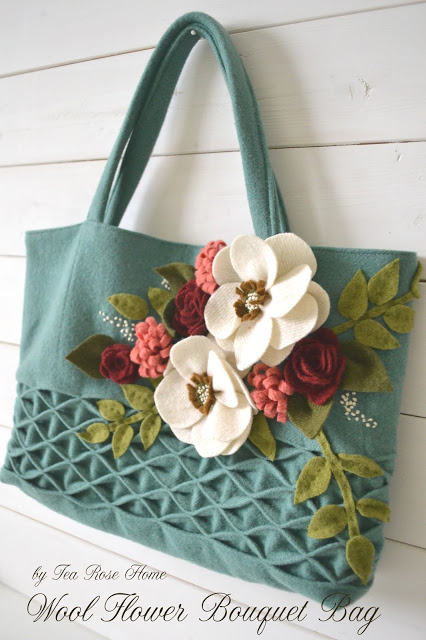
For other inspiration using wool, visit the Penny Rose website for other stitching blogs sharing new projects including this gorgeous wool floral bag tutorial from Tea Rose Home. I just think it's stunning!
Michele T
I love working with wool too! Your projects are so sweet!! Thanks for sharing!
Violette
These are absolutely lovely wool projects for home. I love wool as it is so nice and warm:) Especially, at winter, when it is cold outside I love to grab some warm pillow or blanket, sit down and spent evening with cup of hot cappuccino:) I am sure that this article will provide me with nice mood to complete my assignment for http://www.pinkelstar.com about getting inspiration for DIY projects. Thanks a lot!
Sandra B
I have never worked with wool, but love the look....your Easter basket piece is beautiful!
Thanks for sharing!
Ali
Love the pin cushion!
julierose
Oh I LOVE this little tutorial so much--These would make such super gifts...thank you for your clear and concise directions...Happy Easter--hugs, Julierose
carol n
I think I should try working with wool, thanks for sharing.
Buffy
Where o Where do you get crushed walnut shells for filling?? I have looked to no avail!
Karen Seitz
What great, simple pincushions! I love working with wool and tell people it's perfect for beginners to applique because it is so forgiving.
LJ
I've never worked with wool but this hop is certainly making me 'itch' to try a project. Your pincushion might be just the thing for a beginner to tackle.
Carol s.
Your pincushions are adorable and look amazing in those wool colors!
Marlies Mansveld
Thanks for this great tutorial. I would love tot try this on a quilt I'm working on. I wonder if the quilt is washable when using wool applique?
Amy Smart
I was just wondering the same thing because I tried a 6" block and thought it would be fun to add to my Splendid Sampler blocks. I don't know for sure, but I do think if the wool is pre-washed, it would probably be fine. Don't quote me on that if it doesn't work though. 😉
Mary
Those are so sweet and I imagine the pins glide in and out with the greatest of ease. Thanks for the tutorial.
Katy Devlin
When you say you like to wash them... do you mean in the machine?
Amy Smart
Yes - I wash them on cool in my washing machine.
Lara B.
These pincushions are so adorable Amy! So is the Easter basket mini! I love wool too. Thanks for the great tips on using freezer paper templates and glue. I was wondering...When you felt the wool by washing and drying it, do you do that by hand washing and air drying, or do you use your washer and dryer?
Mara
So pretty,
Robby H
I'm a knitter, too, and know all about felting wool. I have no idea why it never occured to me to do that with wool I would sew with. Makes complete sense and I can imagine the plumper finisehd fabric. Great idea, and cute pin cushions. Thanks.