
I'm excited to have Leanne here again as a guest contributor to share a fun tutorial to make a 3D Prairie Point Pinwheel quilt block and baby quilt. The 3D blocks provide some great tactile elements for babies too. And you'll be amazed at how quick and simple this technique is. Leanne also has a really great sewing machine tip for sewing through bulky layers that you can use on any project!
Hello! I’m Leanne from Devoted Quilter. I’m a quilter and pattern designer living in Newfoundland, Canada. You can find my patterns and my new quilty notecards in my shop. I love to share my quilts and the beautiful Newfoundland scenery on my blog, Instagram and Facebook. I hope I get to virtually meet you there!
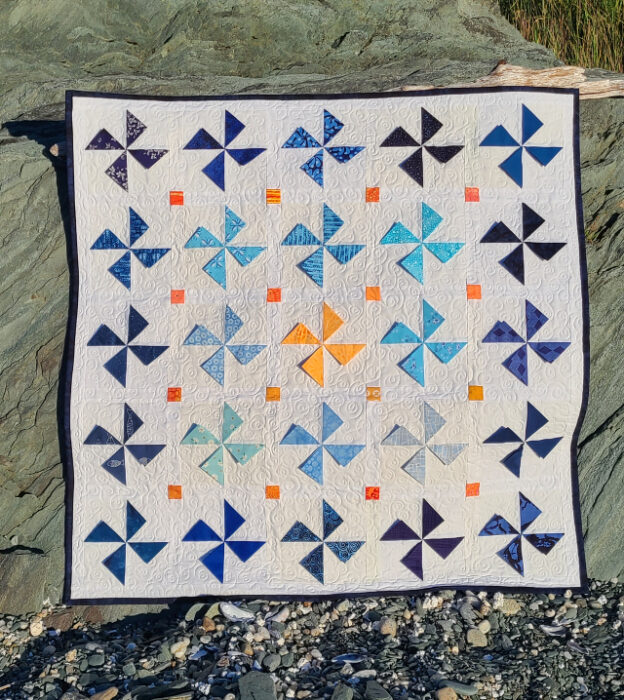
I love making baby quilts! They’re cute and they’re so much faster than making a bed sized quilt or even a throw quilt. It feels great to actually finish a quilt, doesn’t it? Today I’m excited to share the Prairie Points Pinwheel baby quilt pattern with you.
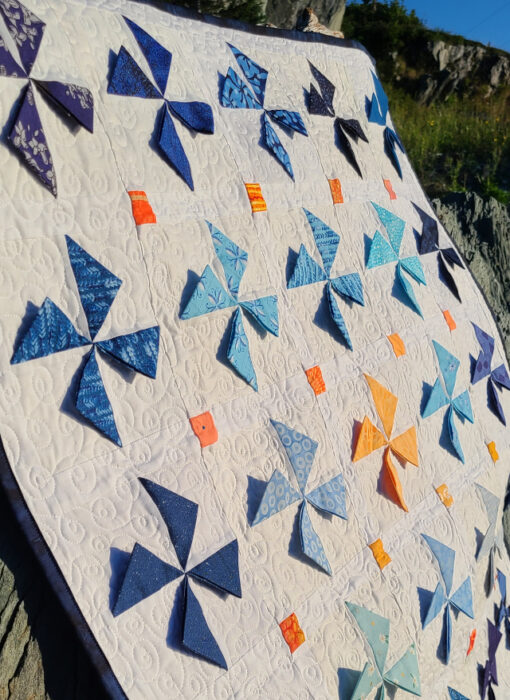
This quilt is not only cute and quick - it’s also 3D!
Have you ever made prairie points before? They’re super simple to make and they add such a fun element to the classic pinwheel block. I keep thinking about a curious little one playing with the flappy pinwheels, which definitely added to my enjoyment while working on the quilt.
As a bonus, the Prairie Points Pinwheel baby quilt is stash friendly. In fact, I cut almost all of the white pieces for the background from my white scrap box - everything except the borders. There are at least three different brands of solids represented, so there is some variation in the whiteness of the pieces, but it all reads as white.
There are so many colour possibilities with this pattern! Being a blue-lover, I chose to use shades of blue, with a pop of orange thrown in, but I couldn’t resist including a few other versions for you to consider.

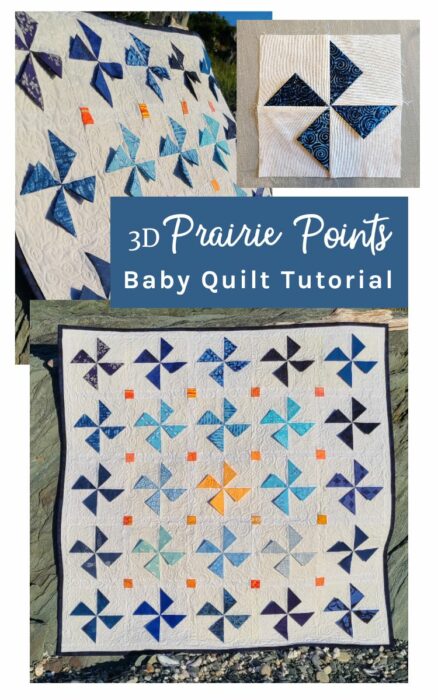
How to Make 3D Prairie Points Pinwheel Baby Quilt
So, let’s make a Prairie Points Pinwheel baby quilt! The full pattern is in this post, but if you want a PDF version to print out you can get that here.
Fabric requirements:
Finished Quilt Size 36" x 36"
- White Solid - 1½ yards
- Dark Blues - 16 pieces at least 7½″ square or 3½″ x 14″
- Light Blues - 8 pieces at least 7½″ square or 3½″ x 14″
- Orange - 1 piece at least 7½″ square or 3½″ x 14″, plus 16 scraps at least 1½″ square
- Backing - 1¼ yards (this will give you about 2″ extra on each side. You’ll need 2½ yards if you need more on the sides.)
- Binding - ½ yard
- Batting - Approx. 40" square
Cutting Instructions
White solid fabric
- 100 3½″ squares
- 40 1½″ x 6½″ rectangles
- 2 1½″ x 34½″ rectangles
- 2 1½″ x 36½″ rectangles
Dark blues
- 16 matching sets of 4 squares 3½″ x 3½″
Light blues
- 8 matching sets of 4 squares 3½″ x 3½″
Orange
- 1 matching set of 4 squares 3½″ x 3½″
- 16 squares 1½″ x 1½″
Binding
- 4 strips 2¼″ x WOF
How to Make the Prairie Points
Fold a dark blue 3½″ x 3½″ square in half along a diagonal, to form a triangle as shown. Press.
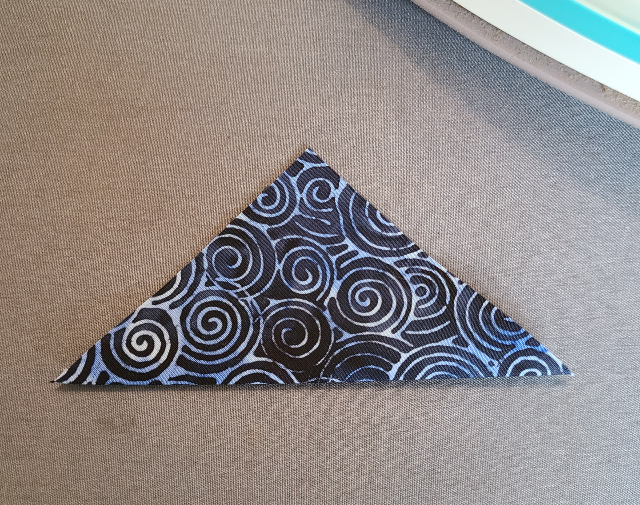
With the folded edge towards you and the point of the triangle at the top, take the right corner of the triangle and fold it over to meet the left corner, to form a smaller triangle. Press. That’s it - you’ve made your first prairie point!
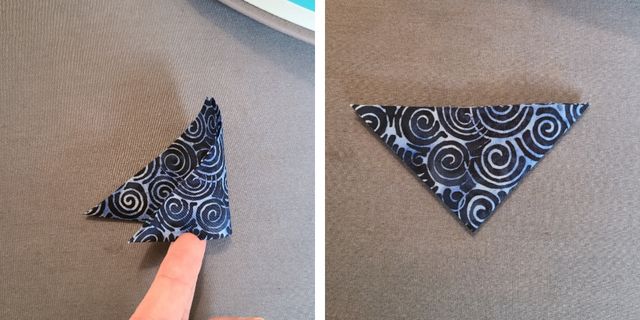
Repeat the folding and pressing with all of the dark blue, light blue and orange 3½″ squares to make 100 prairie points.
How to Make 3D Prairie Point Quilt Blocks
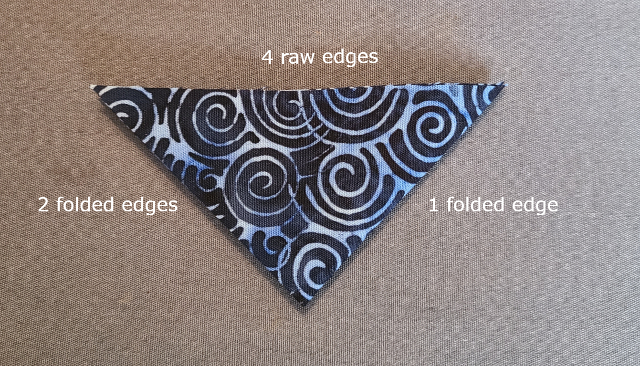
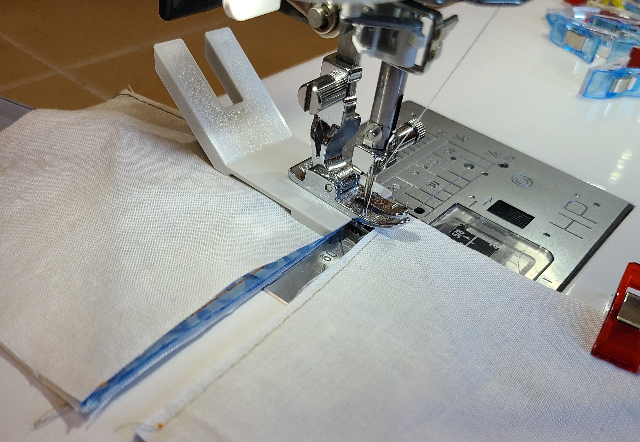
Align the long side of a prairie point (with the 4 raw edges) with the edge of a white square and clip it in place. Using a long basting stitch, baste the prairie point to the square about ⅛″ from the edge to make a pinwheel unit.
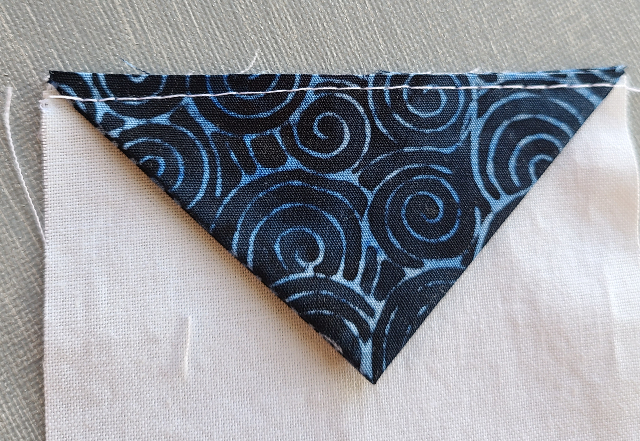
Repeat with all of the prairie points and white squares to make 100 pinwheel units.
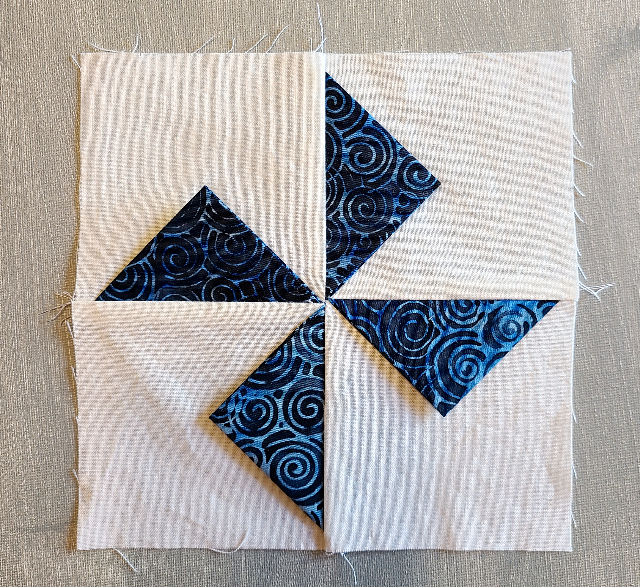
Arrange 4 matching pinwheel units in a 2 x 2 layout, with the prairie points forming a pinwheel. Stitch the units into pairs. In each pair there will be one prairie point sewn into the full length of the seam. Press the seam away from that full prairie point.
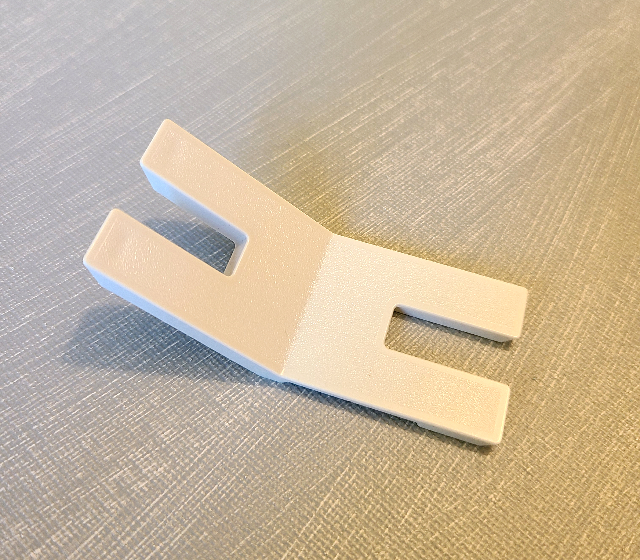
Stitch the pairs together to form the prairie point pinwheel block. I have a few tips for this seam. First of all, have you ever heard of a hump jumper? Crazy name, I know, but it’s this little doodad that might have come with your sewing machine. It’s designed to help the machine sew over humps, like the thickness of this seam.
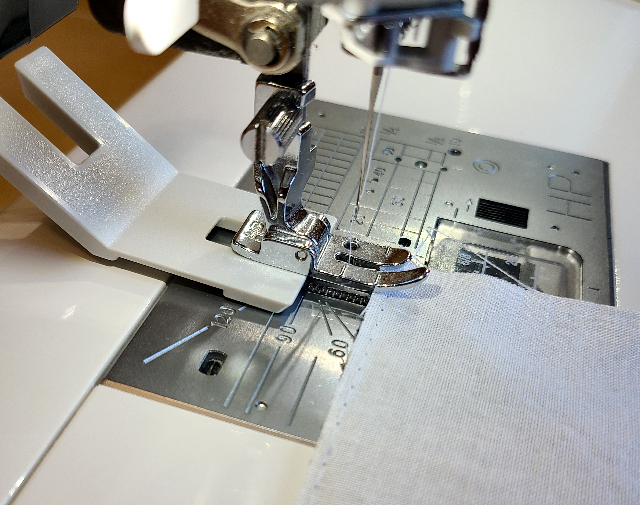
Place it behind your needle, under the presser foot, as shown here, when you start the seam and the machine will have no trouble with all that bulk. If you don’t have one, a folded piece of cardboard will work just as well.
I chain pieced my blocks, so for the start of each seam I simply put the hump jumper right on top of the previous block. Everything still stitched through smoothly.
My second tip is to spin the seams at the center, to help the finished block lay flat. I found it helpful to release the basting stitches right at the center, to help the seams spin. It takes an extra minute for each block, but it makes a huge difference to how flat that block lays when it’s done.
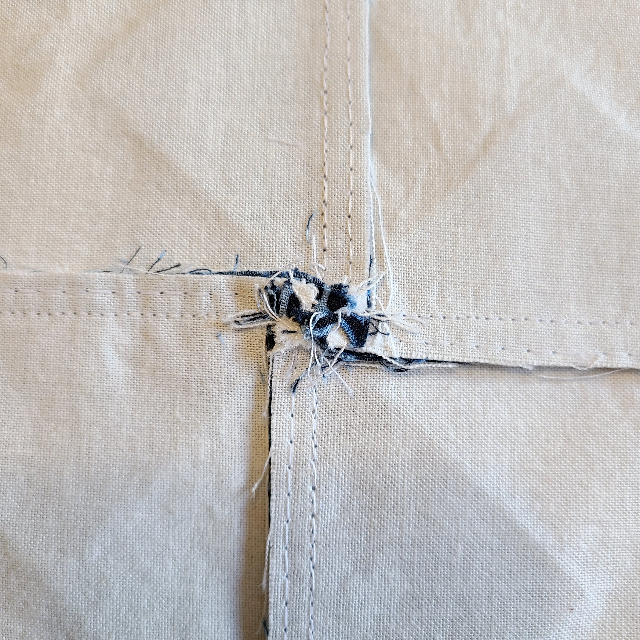
This picture shows my first spinning seam, when I hadn’t yet realized that releasing the basting stitches would help it look even better. So, yes, you can spin the seam without releasing the basting, but I recommend you take the extra bit of time to get it really nice and flat.
Repeat that process to make all 25 blocks.
Assemble the quilt top
Sew 5 blocks together in rows alternating with 4 white 1½″ x 6½″ rectangles as sashing strips in between the blocks.
Sew 5 white 1½″ x 6½″ rectangles alternating with 4 orange 1½″ x 1½″ squares as cornerstones. Create 4 of these rows.
Arrange the blocks in a 5 x 5 layout as shown with block rows alternating with sashing/cornerstone rows.
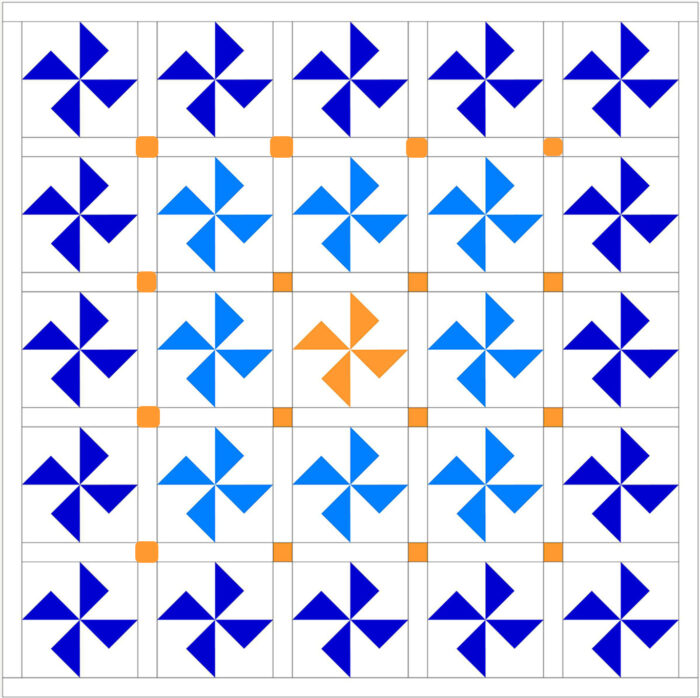
Stitch the rows, pressing the seams towards the sashing strips.
Stitch the rows together to complete the quilt top center, pressing these seams open.
Stitch a white 1½″ x 34½″ rectangle to the left and right sides of the quilt top. Press the seams towards the border.
Stitch a white 1½″ x 36½″ rectangle to the top and bottom of the quilt top. Press the seams towards the border.
You now have a finished quilt top, so take a moment to celebrate. And, if you’re anything like me, run your hand over the pinwheels, flipping the prairie points back and forth!
Finish the quilt
Layer your quilt top, batting and backing, then quilt as desired. To preserve the 3D nature of the prairie points, I flipped each one back while I quilted the area under it. I thought I’d have to pin it to hold it out of the way, but I found it easy enough to just hold it with my hand.
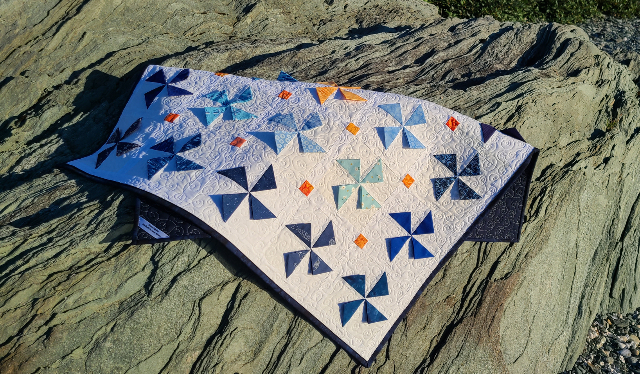
I chose to quilt my quilt with an all-over double loop design. It makes me think of wind swirling and blowing the pinwheels.

After quilting, trim the batting and backing even with the quilt top. Join the binding strips into one long strip, then machine stitch it to the quilt and finish either by hand or machine. Check out my machine binding tutorial to learn all the tips and tricks I’ve picked up over the years.
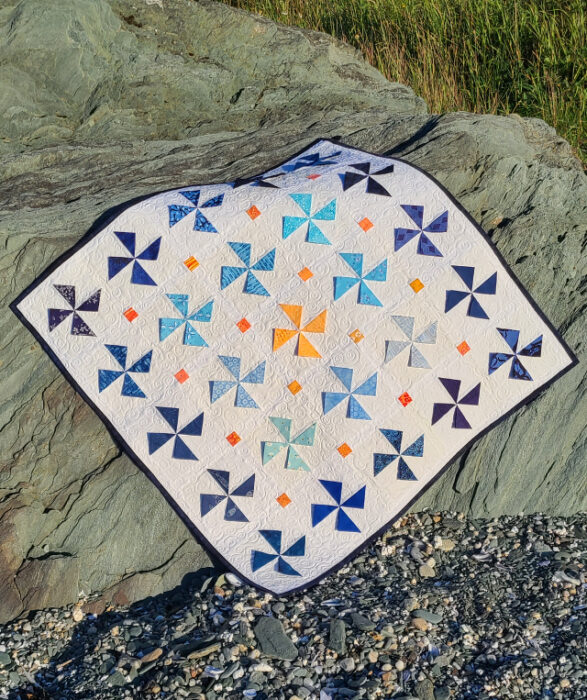
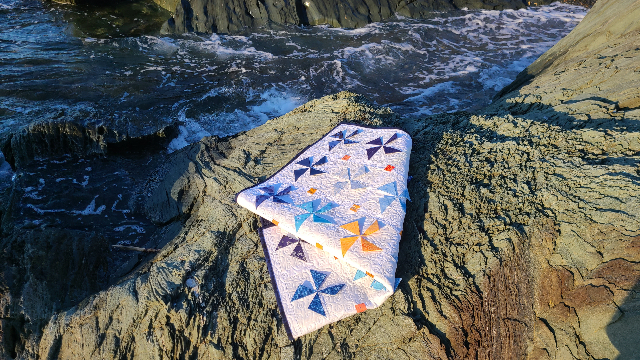
For a totally optional, but fun, last step, take your newly finished quilt to the beach for a photo shoot! Or the forest, or the mountains, or the farmer’s field…whatever pretty location you have near you.
 Don’t forget you can download the PDF pattern here. I would love to see your finished Prairie Points Pinwheel quilt! If you share it on IG, use #prairiepointspinwheel and tag me (@devotedquilter) so I won’t miss it.
Thanks so much for sharing this tutorial with us, Leanne!
You can also check out Leanne's scrappy Ticker Tape Quilt Block tutorial here.

Jill DaviesJi
Thank you for the pattern to this beautiful quilt. I have always wanted to do one of these quilts and you make it look so easy with your clear instructions. I especially appreciated the 'tips'.
Shelley W.
Thank you for this quilt idea! I have leftover praire points from the border of a baby quilt I made several years ago in 1930's prints. Now I know what to do with them. I have more 1930's prints left, too. Fun, fun!!
Amy
Perfect!!