
Today I am going to share a simple variation on a traditional patchwork quilt, using a wide wedge shape traditionally called "tumblers". This Tumbler Quilt Tutorial is a great way to make something simple while at the same time add some diversity to the the typical squares of a one-block quilt.

The large-scale blocks make this a great pattern for showing off cute fabrics with a variety of scales of prints. This is also a perfect project for using 10" precuts (Layer Cakes or 10" Stacker) to get a variety of coordinating precuts.
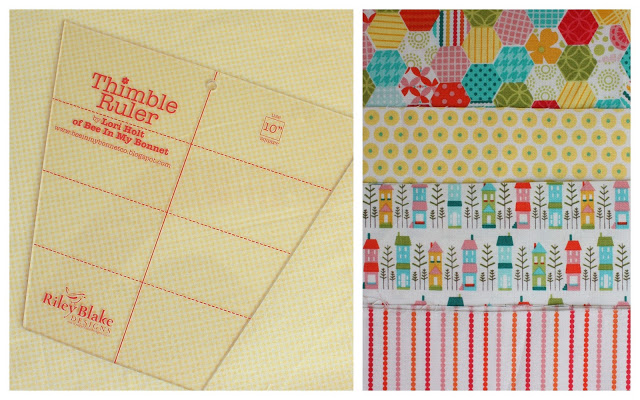
Cutting the blocks for this quilt is so much easier with a template. I used Lori Holt's large "Thimble" ruler for my blocks. She also has a set of Thimble rulers that include 1 large and 1 small (5") template. You can see Lori's other awesome rulers here.
Fabric requirements for this 58" x 72" lap quilt:
- At least 15 different ¼ yard cuts of fabric for the blocks OR 2 sets of 10" precuts (Layer Cakes)
- 3 ½ yards for backing
- ½ yard for binding (cut into 7 strips, 2 ½" x 42". Binding tutorial here.)
If cutting your tumbler blocks from 10" precuts, center Tumbler template and trim sides. You can stack 3-4 squares and cut multiple blocks at a time.
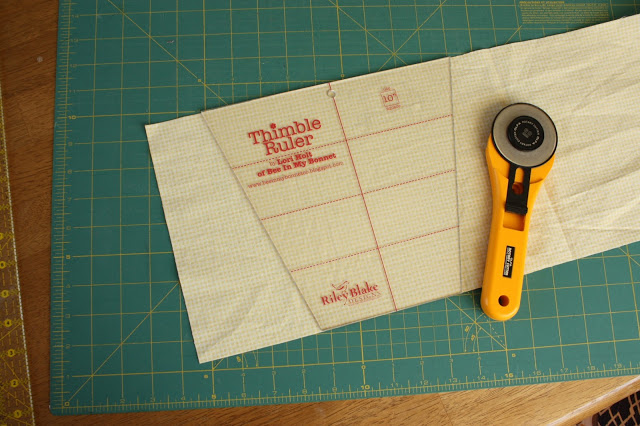
If cutting your blocks from strips of fabric, trim your yardage to the width of the tumbler template - in this case I cut it to 8 ½". Place the template about 2" from the outside selvage edge and cut on both sides of the template.
Now flip the template upside down and match the diagonal edge with the cut edge of the fabric. Cut again on the opposite edge of the template.
Continue flipping the template and cutting.
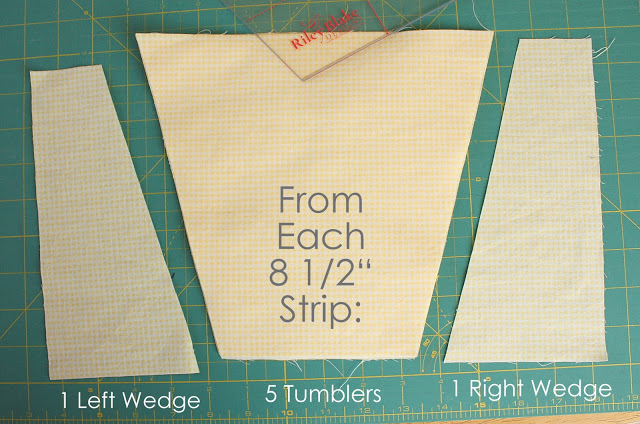
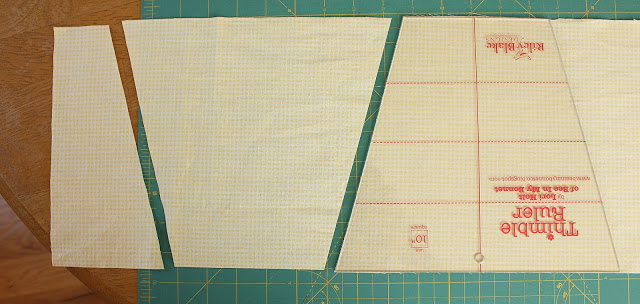
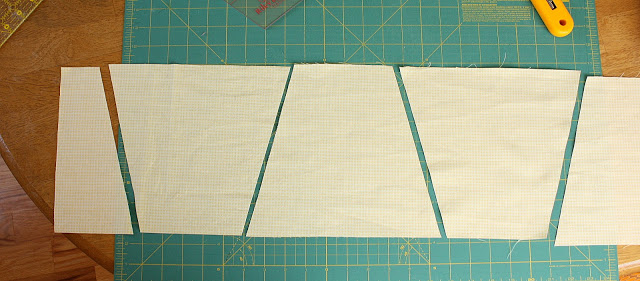
By using this method you will get 5 large tumblers plus a left wedge and a right wedge from each ¼ yard. Hang onto the wedge pieces as well. Use the same process to cut out tumblers from the remaining ¼ yards of fabrics. You will need a total of 72 tumbler blocks, 10 right wedge pieces, and 8 left wedge pieces.
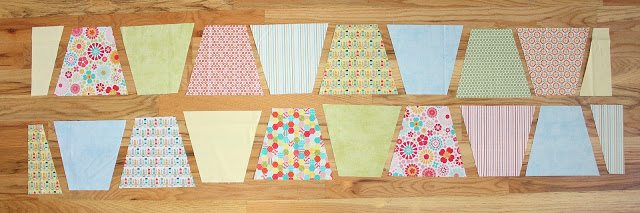
Lay out the first row of tumbler blocks starting with an upside down right wedge, and then 8 alternating tumbler blocks, finishing with another right wedge. For the second row, start with a left wedge followed by 8 alternating tumbler wedges going the opposite direction from the blocks in row 1. Repeat the process for next 7 rows - laying out 9 rows total.
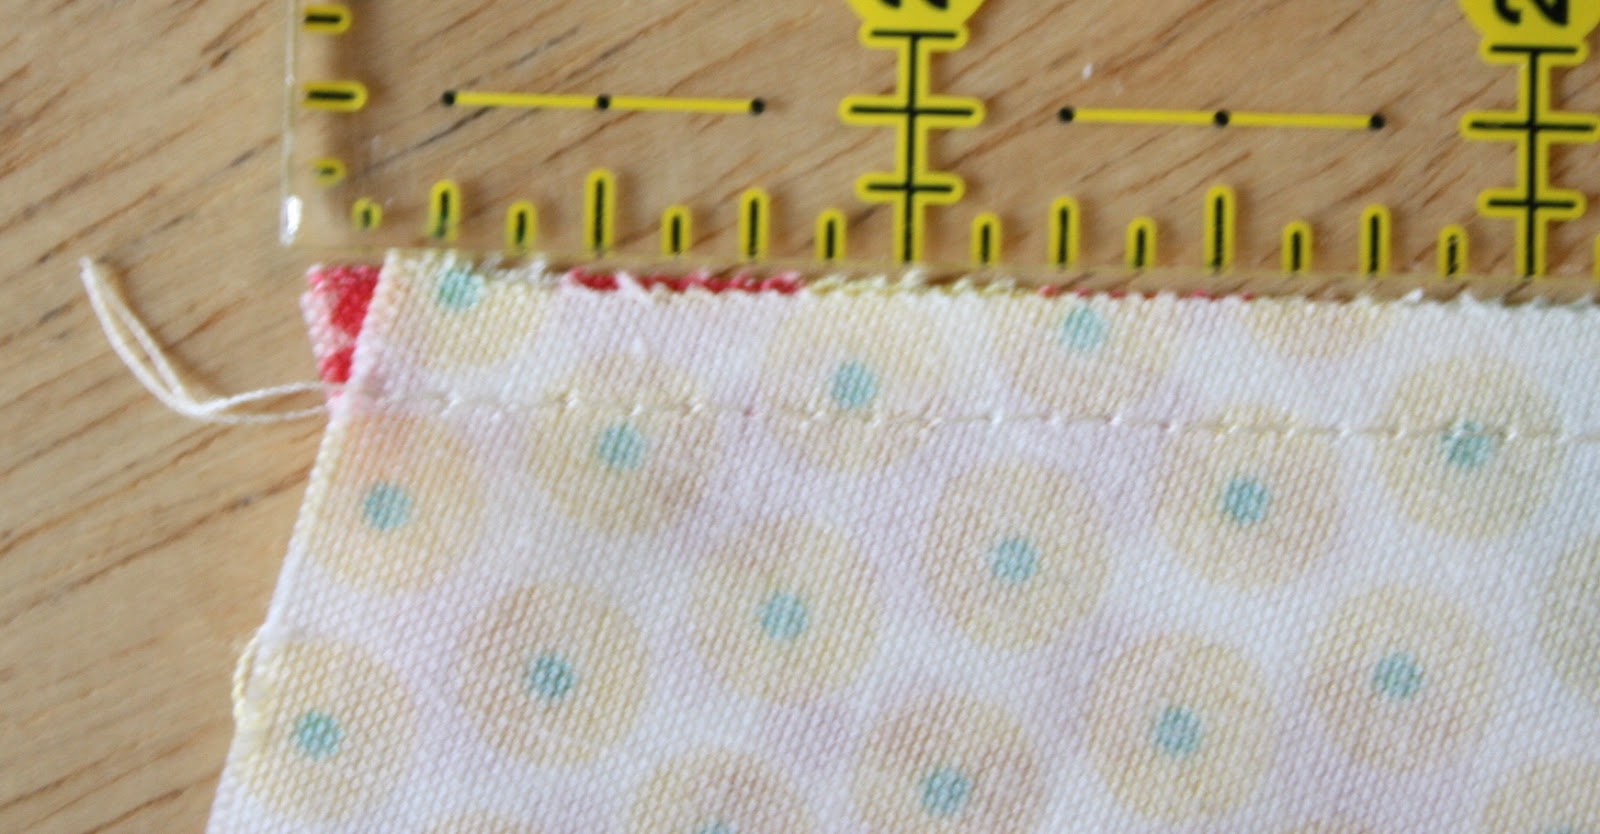
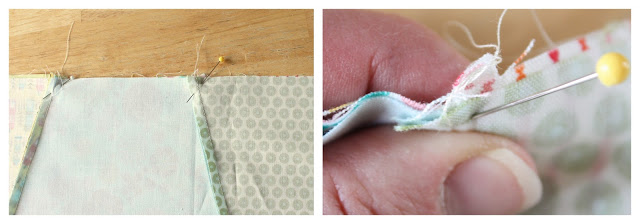
As you pick up blocks to sew together, match right sides of blocks together but leave a small point (less than ¼") hanging off the end of the bottom fabrics and a small point of the top fabric hanging off the other end. Sewing with a ¼" seam allowance, your seam should cut right through where the right sides meet (see threads above). This way, when you open your blocks the top and bottom edges will be aligned. It may take a little practice, but soon you'll be eyeballing and sewing quickly.
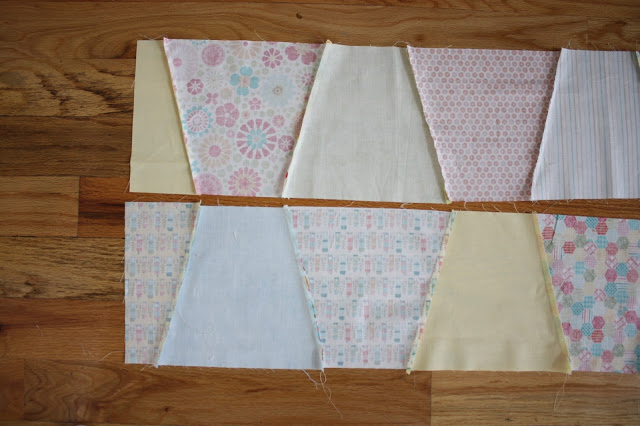
As you assemble your rows, press the seams to the left on the odd rows and to the right on the even rows.
When you go to sew the rows together, the seam allowances should butt up against each other, helping you match your corners. Sew rows together in order and press seam allowances all the same direction.
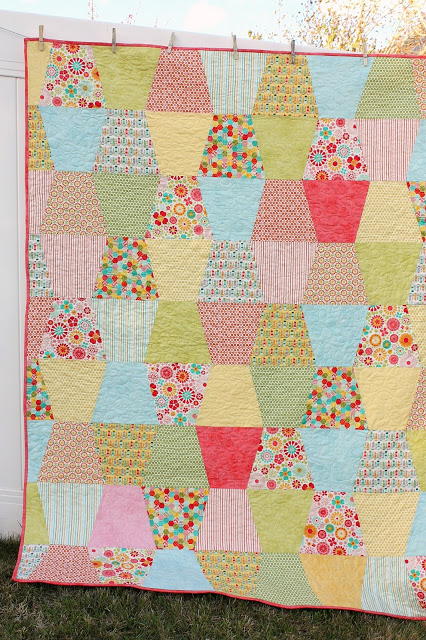
After the rows are assembled, add the batting and back and quilt as you desire. Mine was custom quilted by Melissa Kelley - I love the custom cabbage rose pattern she used to set off the springy prints. Here are links to tutorials if you need help with quilting or binding.
I hope that you'll enjoy creating your own Tumbler Quilt - a fun variation on traditional patchwork and very simple to put together. For other simple quilt tutorials, please visit my Tutorials Page.


Leave a Reply