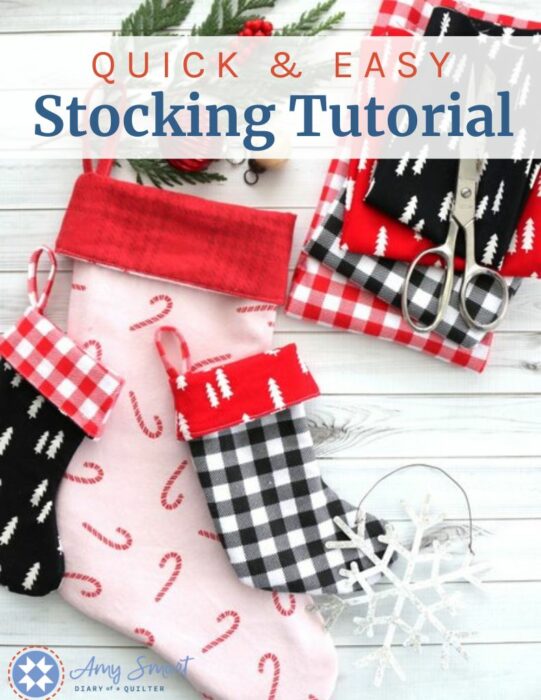
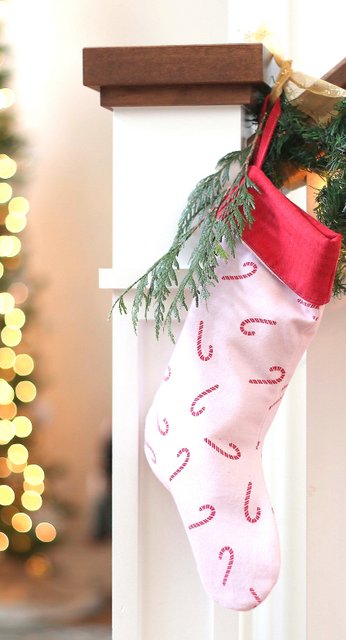
In this post I'm sharing a super EASY method for making lined Christmas stockings.
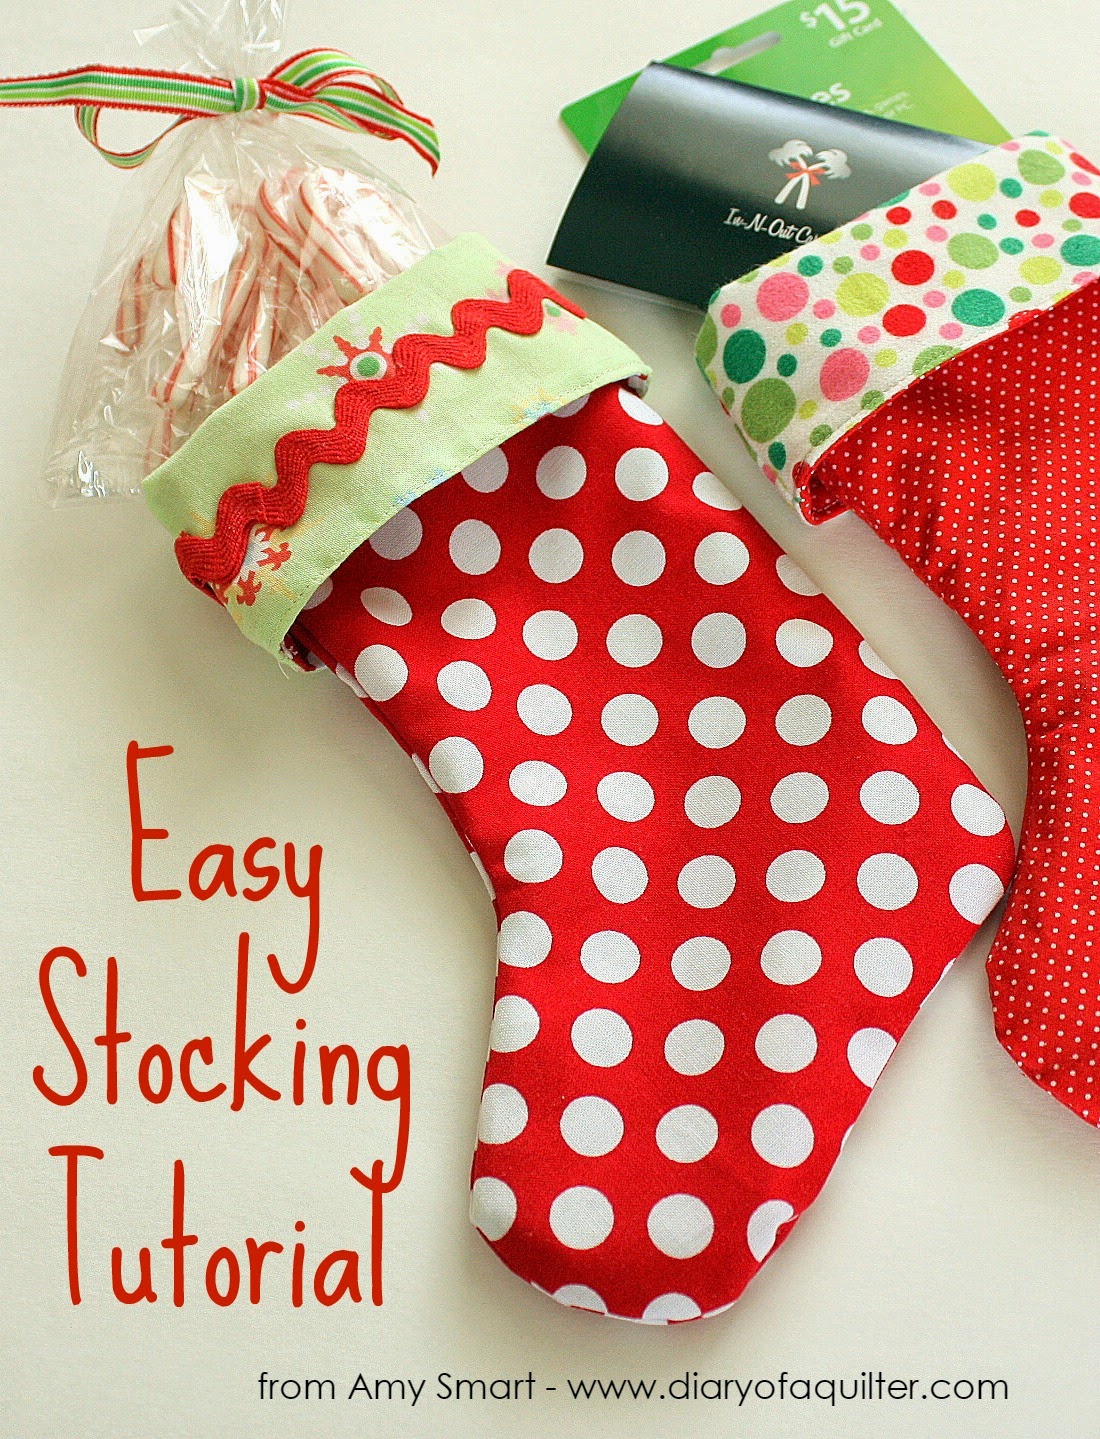
This little Christmas stocking pattern is a festive way to hold gift cards, some treats, or any other small gift you want to dress-up a little. The great thing about this method though, is that you can blow-up the Christmas stocking pattern and make stockings as big as you want by following the same, easy process. Every December this is one of my top blog posts - it's a popular proven-winner!
This Christmas stocking pattern is easy enough that you can make a bunch of stockings in an afternoon, either for yourself or a gift. (And who doesn't sometimes want new, hip stockings to impress Santa?)
I've also updated the tutorial to include a simple attached loop for hanging your stockings by the chimney with care. (Or anywhere else you want to hang them.)
Christmas Stocking Pattern & Tutorial
So start by printing the stocking pattern (click here for template) -or designing one of your own. (For the larger size stocking, I used the stocking template in this post.)
Fabric requirements need to be enough fabric to cut two stocking shapes from two different fabrics. Fabric options I recommend include cotton and flannel as they'll give you more shape, but you could use polyester, wool, or other fabric if you want. These stockings probably aren't going to take a lot wear and tear, or need much (if any) machine washing.
For the small size stocking you will need an 11" x 14" piece of fabric for front and back outside pieces and another 11" x 14" piece for front and back lining pieces. 1 Fat Quarter would be enough for all four pieces, but they would all be the same.
For the larger size stocking 2 different ¼ yards (not Fat Quarters) will work great.
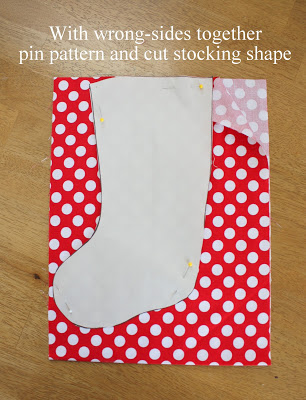
With wrong sides together, cut TWO stocking shapes of both your outside fabric and your cuff/liner fabric. IMPORTANT: make sure your toe faces both directions for each fabric. (This is why matching wrong sides together will help you get pieces facing both directions.)
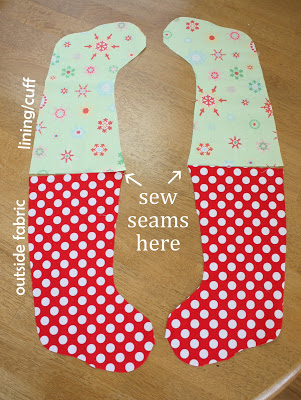
Now pair up one outside fabric with one lining/cuff fabric with the toes pointing the same direction like this. (See picture above.) Match the outside fabric and lining fabric from each set right sides together and sew a ¼" seam along the top of the two pieces. Open pieces up and press seam open. Repeat for back side.
Match front and back pieced units right sides together with outside fabrics matched up and lining fabrics matched up. Center seams should match up too. Pin to hold two sides together.
Sew all the way around the outside edge of the stocking pieces (where gray line is drawn). Leave about 2" unsewn in the lining fabric for turning right side out.
I sewed a ¼" seam allowance around the outside [polka-dot fabric] and ⅜" seam allowance around the green lining fabric, except the space left open for turning. This will help remove some of the bulk of the lining fabric. But if that's too confusing, just sew ¼" for all.
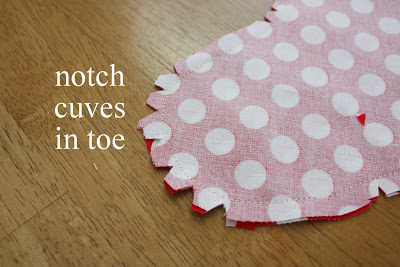
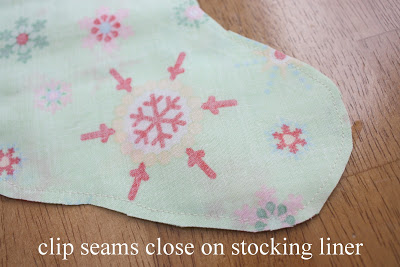
Before you turn everything right-side out, cut notches in the curves - especially the toe. This will help the toe look nicer when finished. Be careful not to clip through the seam.
On the liner side, clip the fabric close to the seam.
This will also help remove some bulk on the lining.
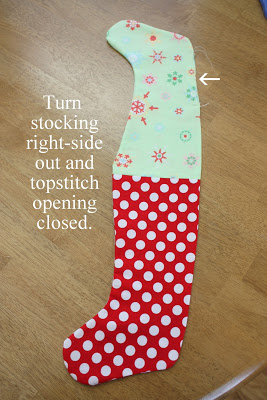
Now pull everything right-side out. Carefully shape the outside part until the curves look good and press. Tuck the open ends into the stocking and topstitch the opening closed.
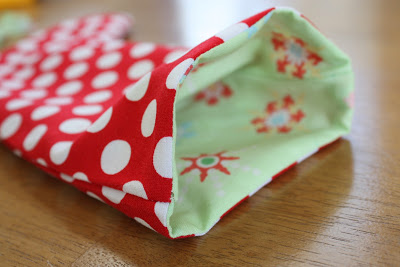
Now carefully tuck the lining inside the stocking.
Optional: Top stitch around the top edge for a more finished look.
Fold cuff down and carefully shape stocking.
Optional: add decorative trim if you want.
I just used Elmer's Craft glue to put on some ric rac.
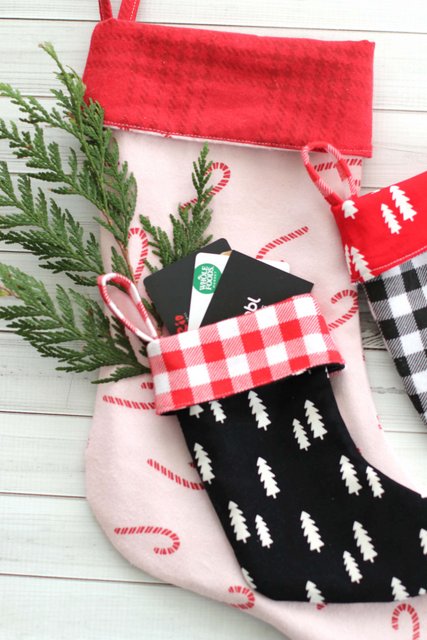
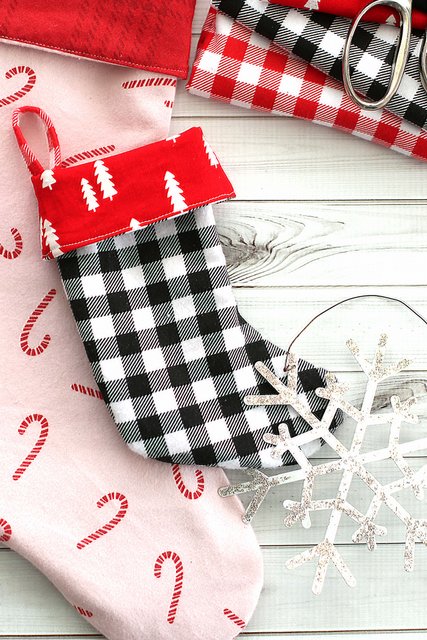
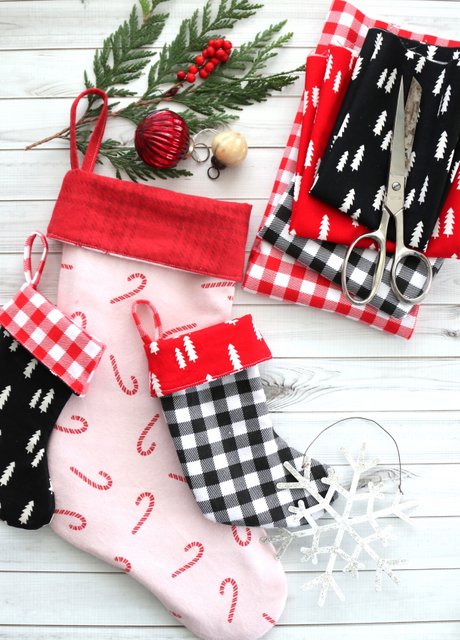
These mini handmade stockings are perfect for use as a small gift bag or festive gift card holder. (Fabric for these stocking includes Riley Blake Designs Wild at Heart collection, RBD Buffalo check flannel , Santa Claus Lane flannel candy canes, and Yuletide red plaid.
Make a Loop for Hanging the Stocking
Here is a simple technique for making a hanging hook loop for your stockings.
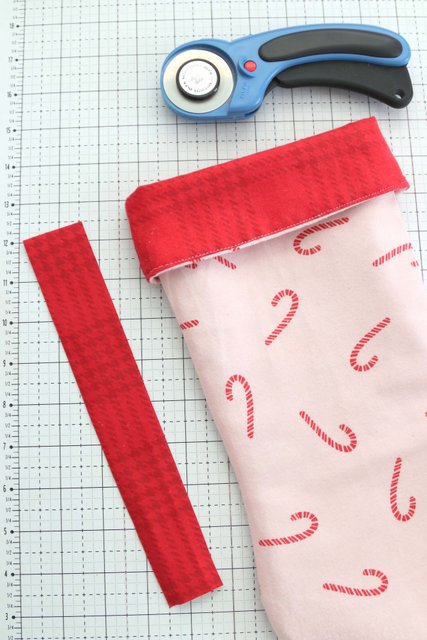
For the large size stocking, cut a strip 1 ½" x 9" (for the smaller version 1 ½" x 6" is plenty).
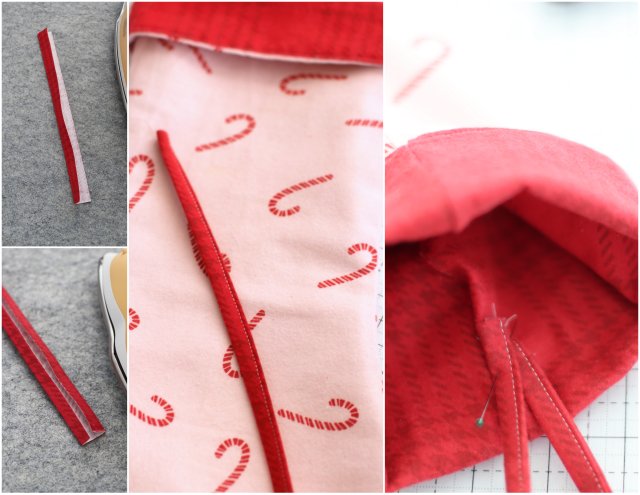
Fold strip in half length-wise and press. Open up and fold two sides in to the center fold. Press.
Then fold strip in half again. You should now have 4 equal widths stacked on top of each other and no raw edges.
Top stitch next to the two outside folded edges.
Fold loop in half and pin in place about 1" down from the top of the stocking (after you've folded the contrasting cuff over to the desired width.
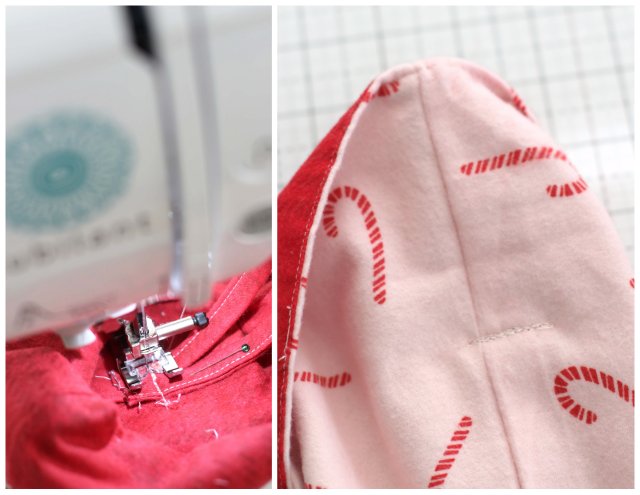
Unfold cuff again and take pinned loop to your sewing machine to stitch back and forth multiple times over the ends of the loop to secure them in place. Use a thread that matches the outside fabric of the stocking. (Although, once the cuff is refolded into place, it will most likely hide the stitching.
And you're done with your Christmas stocking!
I suggest making a practice stocking just to see how it comes together and I guarantee each stocking you make after that will get faster and easier. This pattern is super beginner-friendly, and if you're already confident with a sewing machine, you could easily make a bunch in one afternoon.
If you're looking for other Handmade Stocking Tutorials and Ideas, check out this post for a wide variety of styles and ideas.
Do you have any handmade stocking traditions? Or is this your first? I'd love to hear about them! Comment below.
Want a printable PDF copy of this tutorial sent directly to your inbox? Sign up here:




Annette
Great tutorial. I will absolutely try out this one. I will have visitors from home coming this Christmas, for the first time since I moved abroad ten years ago. To make a pretty stocking for everyone to bring home feels like a great idea. Thanks for sharing. I am so happy I found your blog. You have helped me a lot getting into this wuilting and sewing world.
Annette
oh, and I did make a table runner just like yours, teh stripy one, for Christmas that I just blogged about. But I did the top layer seperate, didn't quilt it together at once. I was to scared to try it... Silly me. Next time I will.
Quiet Quilter
Such an easy tutorial! I've made stockings before with linings and had to go almost word by word when sewing and making the lining. This is so much clearer! Thanks!
ktquilts
Thanks so much, I am going to try to squeeze in a few of these for Bath & Body gifts!!! Thanks so much!!
Kara
This is a great method for making stockings! And I love the fun fabric you used. Thanks for linking up, I have a feeling you're going to be featured. 😉
Trudi
This is a great tute! Thanks, I'm going to have to make a bunch of these for last minute gifties 🙂
snippetsandyarns
cute! cute! cute! & simple! I may have to use these to "wrap" my gifts in this year, rather than paper.<br /><br />Thanks for such a simple tutorial, you make it look so easy! :-)<br /><br />~ Meagan
natasha | sohobutterfly
Thank you!! I'm making some tonight!!
Andy
Just today I was thinking that I should make some new stockings for my family this year. You're right - this is an easy tutorial! Thanks for doing all of the brain work for me 🙂
Anna
woo hoo - right on time!!! I just started cutting out some mini-stockings for an ornament swap and was trying to figure out a quick easy way to put in the linings - thank you so much!!
Dena
These stockings are so cute! Thank you for the tutorial.
seaschell
I have been looking at stocking tutorials for several days, and this is the only one that makes sense to me. Thank you so much!
Diane H
Thanks for this great tutorial! Last year I attempted a stocking and it took forever!!!
sunny
Fantastic! I just made a lined stocking, but this looks so quick and easy. Can't wait to try it.
VickiT
What a great tutorial. Thank you SO much. I have a bunch of stockings I'm supposed to make and have been afraid to start because of the problems I've seen so many others have. I wanted to make really nice looking ones too with a lining so this is wonderful. <br />Have a wonderful holiday.
Mystica
Thank you for the very clear instructions re the tutorial!<br /><br />I am having my first giveaway on my blog. A gift card sponsored by CSN Stores. please do enter
SHEILA
This is such an easy tutorial for lined Christmas stockings. And no seams showing! I understand it completely and san't wait to make one. Thank you for sharing.
Cara
Great tutorial! I love your blog - so many great projects.
Nanette Merrill and daughters
cuter than cute. What a good simple tutorial.
Jenna (jennalynnsews@yahoo.com)
Thank you for the tutorial! I tried it out this weekend for a secret santa gift and it turned out SUPER cute! Thanks again! I will be using this one a lot!<br /><br />Jenna
emedoodle
I love this! When it was posted on Ucreate it was stuck in my head all day until I could get to the machine to make one! I'm not sure if mine turned out as well as yours... mostly because my printer is shot so I just winged it and drew it out about the size yours looked! It still turned out pretty darn cute for just a few minutes worth of sewing! 🙂
Brenda
Nice tutorial, easy to understand, got it in time for a new addition to our family.
Quiltstory
These are sooo cute, I love the idea of them as neighbor gifts! Thanks for sharing!!
Judy
What a great tutorial. I can't wait to try this. I linked over from finding fabulous. I am your latest follower. Can't wait to see what else you have. I'd love for you to come check out my blog and follow me back. http://www.diybydesign.blogspot.com. Thanks.
Mary
Thanks for this easy and fun tutorial! I made 5 stockings for my family in one night using this. It's so fast and they turned out very cute!
Jody of Because I'm Me
Easy and pretty. I love it and plan to put a few together ASAP! Thanks.
KaHolly
THANKS!
Kris
I am so happy to have found this! I just used it to make one, thank you so much!!
Ms Kate
What a neat idea, great tutorial, thanks!
Stephanie
Love this tutorial! Just made a practice stocking and it turned out perfect!! Plan on making a bunch more! Thank you!
Quiltomatic
What an ADORABLE tutorial! I just whipped one up, and have a few more cut, your stocking pattern is perfect :o)<br /><br />I have a question though, I want to make mine 'hangable' - but due a severe mind-block when it comes to spatial awareness and turning things right ways out etc. I couldn't for the life of me think when or where to stitch in a little loop into the lining or outer
Christian, Megan & Connor
Just made 10 stockings for the family this year, everyone is getting a handmade ornament and a gift card! Love the tutorial. I added a loop in the lining and it turned out so cute! Thanks!
Jamie
WONDERFUL! very easy to understand and makes the idea of making my own stockings less daunting 🙂 Will be doing this for sure!
Tina
This is a great tutorial, thanks! Emma, I too was trying to figure out where to sew the loop. I think I am going to sew them as is and then when they are finished I will sew a loop on with a button.<br /><br />Tina
amy smart
Great questions about the loop. The only way I've figured out to attatch a loop because of the fold down cuff, is so sew it right at the top of the lining after the stocking itself is completed. You should be able to hid the stitches on the outside underneath the fold down cuff.
Nell
I've attached the loop with a bit of twill tape and a button --love the tutorial also, thank you!
Annette Palmer
Someone shared this with me today online. Thank you, I love it!<br />
Lindsey
Thank-you SO much for this tutorial. I've wanted to make stockings for my family but it seemed so arduous and confusing. Today I made 6 stockings in no time! You are the best!
Sandie
wow! This tutorial was FANTASTIC and totally saved my bacon... tonight! On Christmas Eve! When we realized that our box of stocking things never got to the new house... And my poor kids were sad to think there would be no stockings to hang. We raided my fabric stash and had fun whipping these things out. Took about an hour to make 4 of them. THANK YOU so much! ♥
CraftyLady33
I just came across this blog for this the other day. I am so happy to finally find an easier way of doing stockings. I do a lot of craft fairs my mine one is around this time of the year especially in November. I find these so beautiful. I am just wondering if I could add some ribbon for it to hang or make one of out of fabric.
Crafting Kim
Hi Amy, I've been making stockings similar to this to sell at a craft fair and lining them with calico. I stitch a piece of cuff fabric in between the outer piece and the lining piece. This also means I can add a hanging loop, by stitching the ends in between the cuff piece and the lining - I have the two halves of the stocking side by side to do this step, then flip them right sides together
Judy Poll
I am having a hard time following your instruction on how to add a loop. Any chance you could post a picture?
Laura
Hi I too want to add some batting in to stiffen it up. Any chance you can share a picture? Thanks!
amy smart
Here is a link to a similar tutorial that uses batting and includes a loop: https://www.diaryofaquilter.com/2012/11/christmas-stocking-tutorial.html
Rebecca Grace
Just had to tell you that I did a Pinterest search for Christmas stocking ideas today and smiled when your tutorial popped up -- I know that girl! 🙂 Isn't it cool how these blog posts live out there on the Internet for years, continuing to inspire people? Thanks for yet another great tutorial.
Beads Braids And Bows
Such a great tutorial, thank you for sharing. I have linked back to here over on http://www.facebook.com/BeadsBraidsAndBows. Lor.xx
Sis
I love this tutorial! I have been making stockings,6 so far, and I was having a problem with the lining. This has really made it simple Thanks!!!
Brie'n Miller
This tutorial seriously saved my bacon! I was staring at my sewing machine trying to figure out how to line, and add a back to a cross stitched stocking front that a friend brought me, and I was at a total loss! Thanks so much!
Debra
This is great ! There's only one problem I have. I need to put piping at the top. Can you help me with that?
Amy Smart
The only way to do it with this construction method would be to insert the piping when you sew the seam between the two front and back pieces. But it will start and stop with the two side seams. If you want continual piping around the top, you'll need a different construction method.
Angela
Your tutorial was perfect. Just finished my first one and I can see making many, many more before Christmas with personalized fabric. Thanks for clear and easy to follow instructions.
DZ Dogs
Thank you!! This is perfect! Making stockings for the pups this year!
Gloria Westerman
I found you on pinterest and wanted to let you know even after 5 years of you doing this ...it's still helping people like me....thank you so much...it work prefect....
Lizette
I wanted to let you know that this DIY stocking is featured on my blog to inspire our Bee Creative Stocking Swap participants.
Amy Smart
Thanks Lizette!
Meadow
Thank you for this tutorial! I'm finally getting around to making the stockings I pulled fabric for last year. Your method is perfect and the final product looks great! I've made 2 already. 🙂
Amy Smart
That's awesome! I'm so glad to hear it was helpful.
Lisa
I just finished the cutest "Minions" stocking for a friend! Thanks for the easy to follow instructions! 🙂 I can see myself being very busy making more of these! 🙂
Amy Smart
Awesome! I'm so glad to hear!
Amaurine
Thank you so much, the shocking are wonderful!
Elizabeth
Oh my goodness you made this super easy! Thank you so much for this tutorial. I'm going to make my family stockings this year and blog about it so my readers can see this. I'll direct them your link to this tutorial too! So glad I found you:)
I'll let you know when I post it so you can see it too. If you like to take a look at my blog it's http://www.daintycottage.com
Can't wait to try this out!!
xoxo ~Elizabeth~
Amy
Awesome! I'm so glad it was helpful!
Trish
Thanks so much for this. You're right, the more you make, the faster and easier it gets. I'm presently making as many of these as I can for a fundraiser for paying veterinary bills for those that cant afford emergency care. I attempted a few others that werent as good before deciding on this one. So, thank you! And Merry Christmas!
Amy
I'm so glad!
jandsduncan
Hi Amy! I LOVE this tutorial! Thank you for sharing it with us all! My stocking came out perfect and is ADORABLE! I added a bit of fabric in a loop to hang it up, but when I do the liner lifts out of the shell a bit. Any suggestions for keeping the liner all the way down and in its rightful position? Thinking I'll have to hand stitch the seams together so its unnoticeable. Thanks!
Amy
Hmm, I think you would have to attach it through both layers to keep in the liner from lifting out. Your plan sounds like a good one - let me know how it goes!
Jennifer LynnHeyser
This was so easy and the end result is sweet! Thank you!
Heather G. Stoker-Peterson
Thank you!! Awesome pattern for Christmas stockings!! Very helpful. I'm making a bunch for a craft fair in Nov!
Felicia
Thank you for these great instructions! Love how the stocking turned out!
Emmanuel Ekanem
lovely stockings.. good ones
Chet
This is so easy to follow. I don't particularly like watching tutorials on Youtube because the host talks so lengthily and it gets so boring that instead of finishing it you stop watching and make it on your own ( nevermind if it doesn't resemble like the one you really like. Thank you for this tutorial.
Amy
Oh good! I'm so glad - you're welcome!
Nana K
Thank you so much for publishing this. Wonderful instructions. I have linked your tutorial to my blog post "10 ways to wrap with fabric". Hope you have a wonderful Christmas.
Amy
Thank you!
Gwen Van Kleef
Genius, so simple. Thanks for posting this!
Jean Lucas
I've made several stockings for family members. So glad I found this. Simple, easy to follow pattern! Thank you!
Amy
Hooray! I'm so glad!
Tisha
I’m so glad I found this tutorial. I’m not a very patient seamstress, but I feel like this is something I can handle. I’m giving it a try tomorrow, but plan to make them full size. Wish me luck!
Tisha
I finished all 3 stocking in a single day. Unheard of for this procrastinator. Haha. Thanks again for this great tutorial.
Kate
Late to the party, I've made a few of these stockings recently - but I think I'm doing something wrong with the first seam bit. When I turn my stockings right way out and turn the cuff down I have a rough edge. Quite the beginner here so can anyone post a pic of exactly how the seams should go - from front side and backside if possible. Im presuming that I have to overlap the material initially to sew together? Thanks.
Dori
This is now my FAVORITE way to make stockings! Thank you so very much, Amy, for this tutorial. Holiday blessings to you and your loved ones! 🙂
Amy
I'm so glad!! Thank you, Dori!
Lynette Caulkins
Thank you so very much for taking the time to make this terrific tutorial!
amylynnbq
10 years after your original post - thank you! I bought my first sewing machine a few months back to start making face masks and these stockings are so much easier for a novice like me. So cute and fun to play around with patterns and fabric textures. The instructions are very easy to follow.
Amy
I'm so glad!
Yuko Cunningham
I wanted to thank you for this post. I've been making these for years to hand out to the kids at our community neighborhood party. This year I've made around 250 of them. Some of them are for the neighborhood kids and some are for my daughter's softball team. Everyone loves them. I make cookies to stuff the stockings along with mini mints in the toe area. These are a huge hit!
Amy
That is amazing! I love it!
Caro
i have to try this!
Natalie Sosoxy
I will try to do such socks with my daughter, we love to sew!
Deb Saulsbery
Thank you for this wonderful tutorial. I last made stockings from a Simplicity pattern in 1975. I still have the pattern, but your method is straight-forward and clear, and much simpler than the steps from that old pattern, and other tutorials I see posted.
Amy
You're welcome! I'm so glad to hear!
Anja
Hallo! Dir hutt dës Socken super gemaach. Ech kann och trauen sou ze maachen, am beschte Gréiss 🙂
Joy Rosales
Best stocking pattern ever! I found your pattern 2 days before Christmas and after making one, I made 5 more in one day (I'm just a bit above beginner level sewer). Love how the lining becomes the cuff AND the stocking could be turned inside out for a different look! Genius! For a hanger, I made them, but attach them with a tie tack/butterfly clutch set so the recipient can change their stocking's look and not worry about the hanger being on the wrong side. Thanks for a great idea!
Amy
Awesome! That is so great to hear! xo