
For the past month I've been sharing the Riley Blake tutorials for the Meet the Makers quilt blocks. Today I'm sharing a tutorial for a coordinating Irish Chain block I'm using to finish up my project using those Meet the Maker Blocks.
Alright! I'm ready to share this final block as part of my Meet the Makers quilt project. (You can find links to all 5 of the other blocks here.)
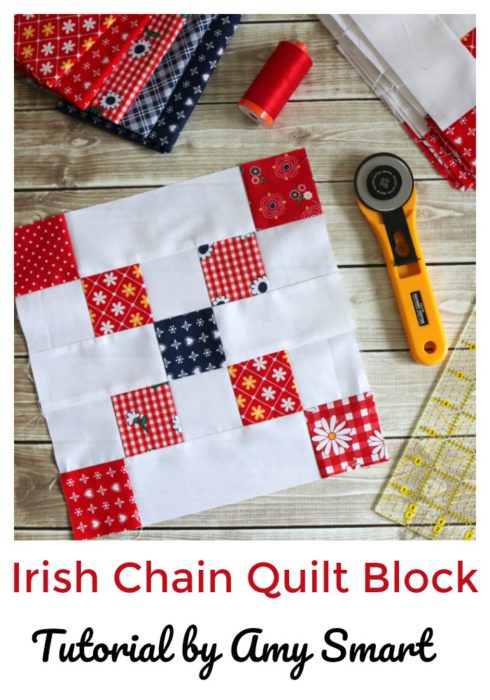
I'm making a slight variation on the original Meet the Makers pattern. This is another pattern for a 10" x 10" (10.5" x 10.5" unfinished) block called an Irish Chain block. For this design you'll need 17 10" x 10" feature blocks (I made an assortment of the previous 5 designs) and you'll need 18 of this Irish Chain block.
Like the 5 other blocks, I'm sewing all of my blocks with a combination of my Gingham Girls and Sunnyside Avenue fabric collections.

I'm making 18 of these blocks so I'm using strip-piecing techniques to make them come together quickly, without having to cut dozens of 2 ½" x 2 ½" squares. Before you start cutting and sewing strips together, I recommend reading the tips in this Strip-Piecing 101 post to help make sure your strips are square and straight and to help you sew them together without the strip-sets 'bowing'.
Here are the fabric requirements for these 18 blocks:
From assorted red fabrics cut:
- 9 strips 2 ½" x WOF (width of fabric)
From white fabric cut:
- 3 strips 6 ½" x WOF
- 3 strips 4 ½" x WOF
- 8 strips 2 ½" x WOF
From navy fabric cut:
- 2 strips 2 ½" x 21"
- 1 strips 2 ½" x 5 ½"

Strip set A: Using four of the red 2 ½" strips and two of the white 6 ½" strips, sew a red strip to the top the bottom of the two 6 ½" x WOF white strips. (For a total of 2 strip sets.) Press seams toward the red strips.
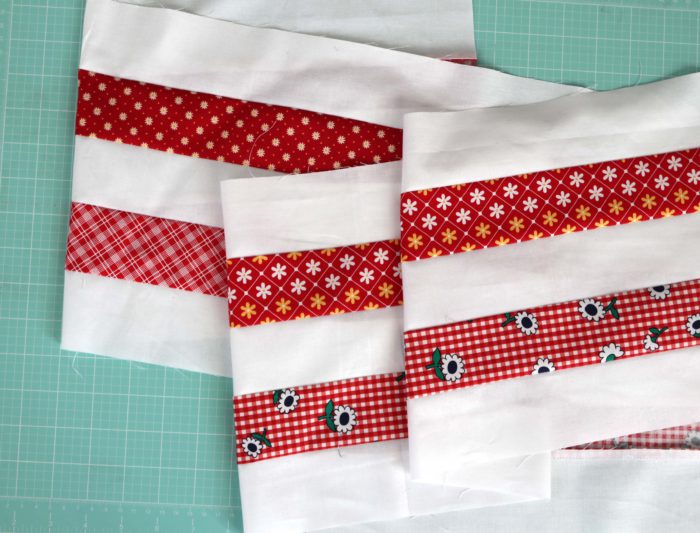
Strip set B: Sew two strips sets with three white 2 ½" strips alternating with two red 2 ½" strips. Press seams toward the red strips.

Strip Set C: Cut 2 white 4 ½" x WOF strips in half to make 4 strips 4 ½" x 21". Sew a white 4 ½" strip on either side of a navy 2 ½" strip and press seams toward navy strip. (If you would like all of your navy blocks to be the same fabric, you can just use the full width of fabric for the 4 ½" and 2 ½" strips.)
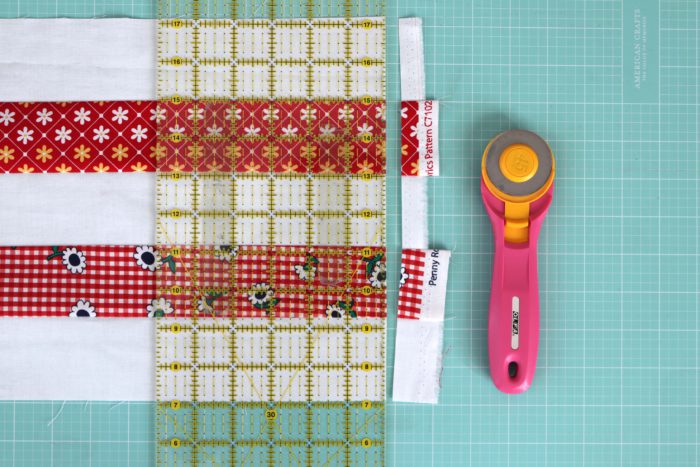
After strip-sets are sewn together, you're ready to cut the smaller strip units. Begin by squaring-off the edges with the selvages. Use the tips in the Strip Piecing 101 post for cutting as well, including lining up the lines on your ruler directly on the seams of the strips to help keep them straight.
Measure 2 ½" from the left edge (if you're right handed. Reverse positions if you're left-handed.) I like to use my ruler for measuring the units (rather than the cutting mat) for extra accuracy.

Cut 2 ½" wide units, carefully moving down the strip set.
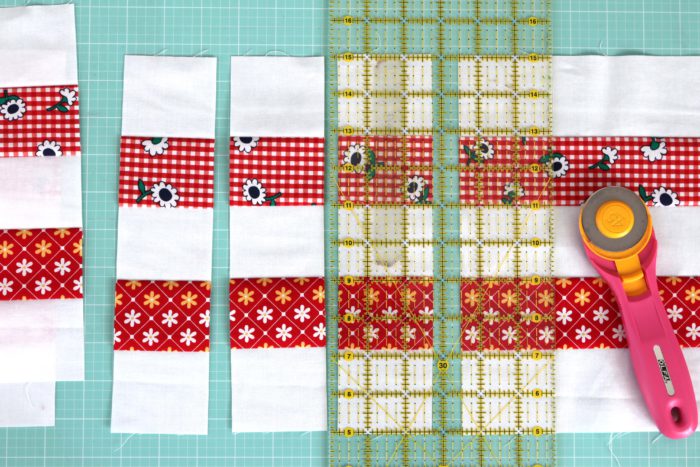
You can get 16 units 2 ½" wide per strip set.

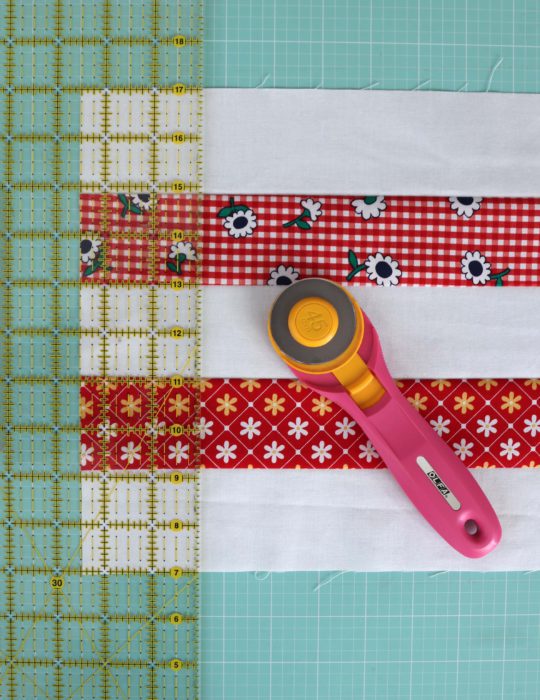
Repeat the process with the other strip sets, cutting more 2 ½" wide units.
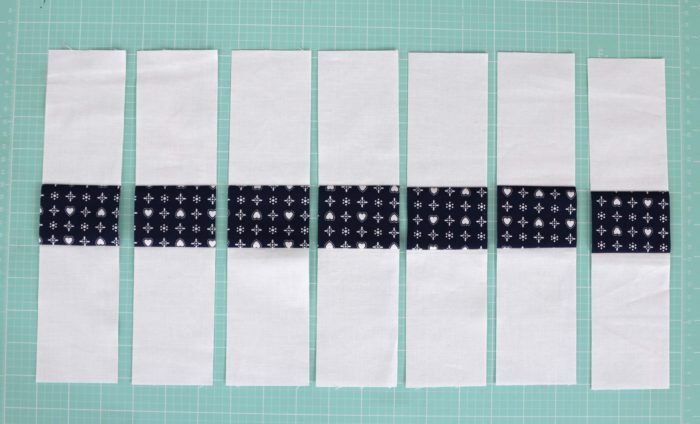
You will need a total of 36 units of Strip Set A, 36 units of Strip Set B, and 18 units of Strip Set C.
This will mean you will need to piece a few additional units using the remainder of your fabric strips. (4 each for Strip Set A - use 4 rectangles 2 ½" x 6 ½" and 4 red 2 ½" x 2 ½" squares. 4 units for Strip Set B - cut 12 white 2 ½" x 2 ½" and 8 red squares 2 ½" x 2 ½". And 2 units for Strip Set C - cut 4 white 2 ½" x 4 ½" rectangles and 2 navy 2 ½" x 2 ½" squares.)
Tip: these additional units are a good opportunity to mix up the fabric placements if you're making a scrappy variation.
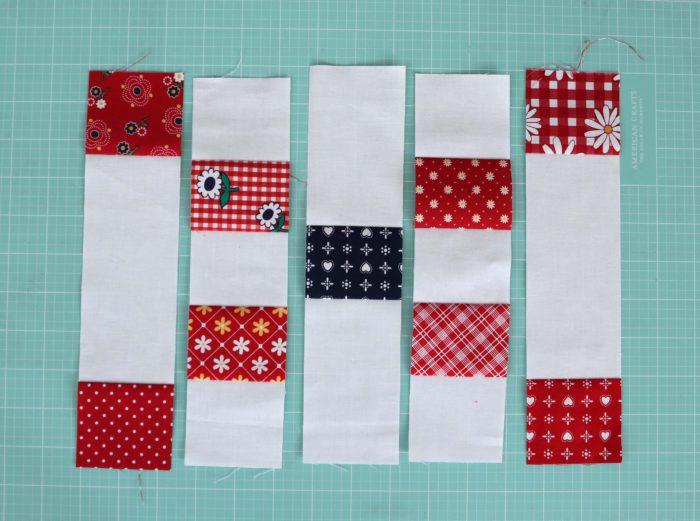
Lay out the different units in this order and sew them together. The seams all pressed toward the red should help to match up points of squares. Press seams away from the second and fourth units.
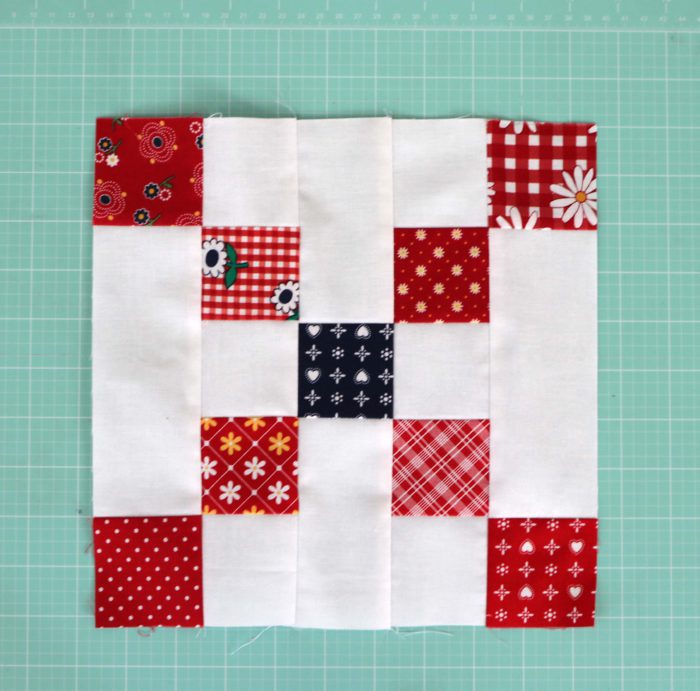
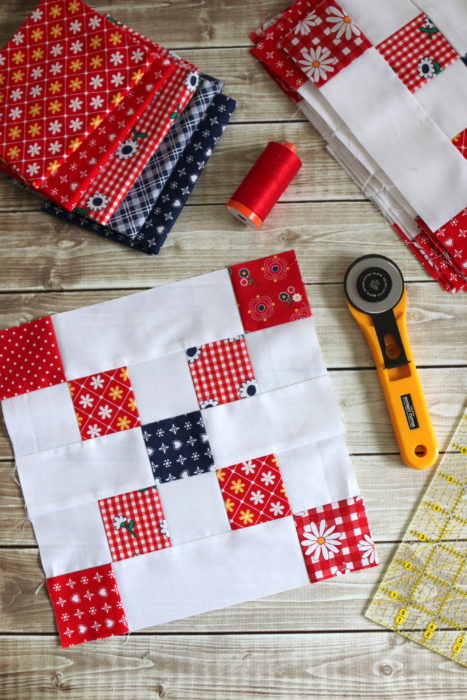
And here is the finished block. This will measure 10" x 10" finished (10 ½" x 10 ½" unfinished).

Here are what the blocks look like if you want to make a quilt using only this block. I love the scrappy patchwork look. (Plus, I'm always a sucker for red and white with a little bit of blue thrown in!)
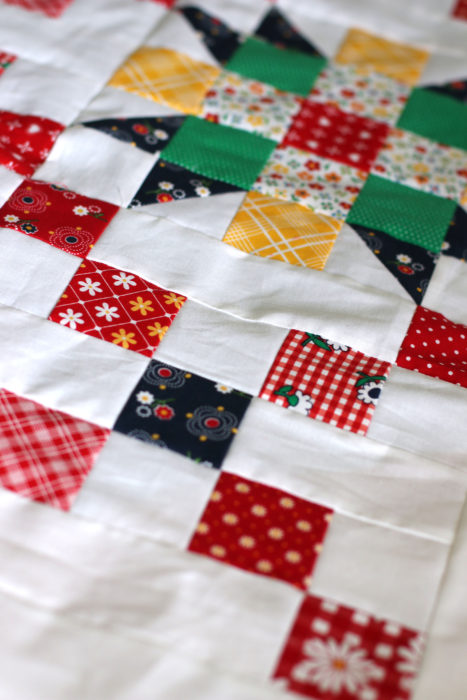
I'm assembling my blocks now and getting the quilt off to the quilter. I'll reveal the finished quilt and the finishing instructions in a couple of weeks, but here's a little sneak peek to tide you over. 🙂
POST EDIT: To see the finished quilt + links to all of the quilt tutorials CLICK HERE.


Barbara
Is there a video or tutorial for block number 4?
Amy
Yes! I just updated the post with the new video.
(Thanks for the heads up! I didn't realize the embed wasn't working!)
Shadow
I always love your fabric lines. I have to convince my local quilt shop owner to get a Riley Blake rep.
Amy
Yes! Please do! 😉
And thank you. xo
Lea A. Brummett
Cute quilt! Love the new line. I have your other two lines. I love that you've added a touch of pink to Gretel.
Amy
Aww, thank you Lea!
Daisy Dianne Bromlow
ABSOLUTELY LOVE that block !
Daisy Dianne Bromlow
P. S. I drooled over the fabric, love it.
Rosemaryflower
Amy, this is the cutest fabric ever. I can't wait to buy a bundle
This block is adorable and I do love irish chain quilts
Cheryl B.
Omgosh the fabric is just darling. As a grandmother to three little girls, I can pretty much bet I will be buying some of this!
Mommaknowsbest
I am THE BIGGEST sucker for Irish Chain Quilts!!! And I adore the one you’ve shown today!
Can’t wait to see Gretel in person - looks awesome!!
Merrilyn
Can you please tell me where in Australia can I purchase your fabric?
Amy
I know it's distributed in Australia by Millhouse Fabrics, but am not familiar with specific shops. Let me see what I can find out!
Patricia
Dear Amy, I have just discovered your fabric line, Gretel and I LOVE it! Here it is the middle of July 2019 and I was wondering if I can find any of it to make your Gingham Girl Stars pattern. ( Looks like you used some of it in that quilt
too.) Any suggestions as to how I go about looking for it? I love your blog, your patterns and your fabrics (which I just discovered).
Amy
Thanks Patricia! I know of a few online shops that still have it including Bear Creek Quilting Company: https://www.bearcreekquiltingcompany.com/shop/search/?keywords=gretel and Lou Lou's Fabric Shop: https://loulousfabricshop.com/search?type=product&q=gretel