
This little quilted Christmas Tree ornament is such a quick finish - and makes a really fun, simple gift or handmade gift tag.
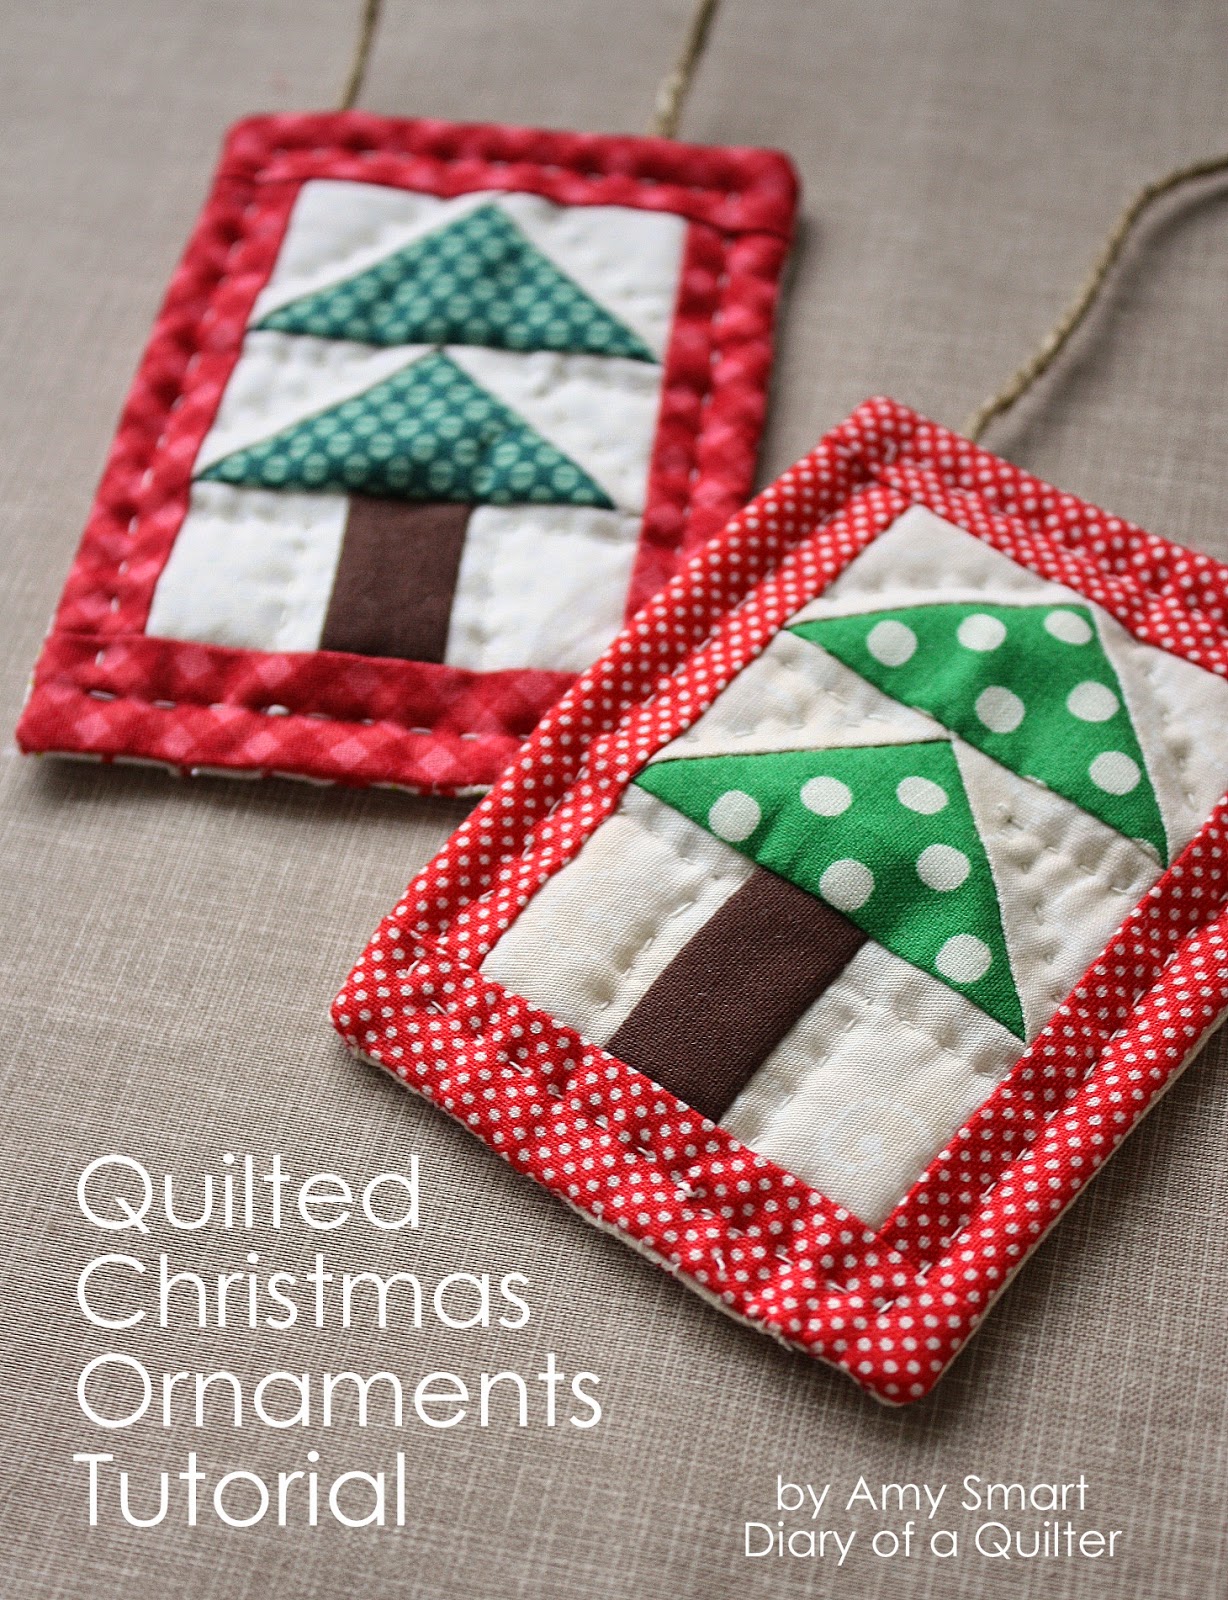
Here's a simple tutorial for making a bunch, incase you're bored (hah) during the holiday season or looking for a quick-finish project during your limited time. 😉
This is a great little project for using up extra fabric scraps and is a fun way to play with a variety of prints and colors.
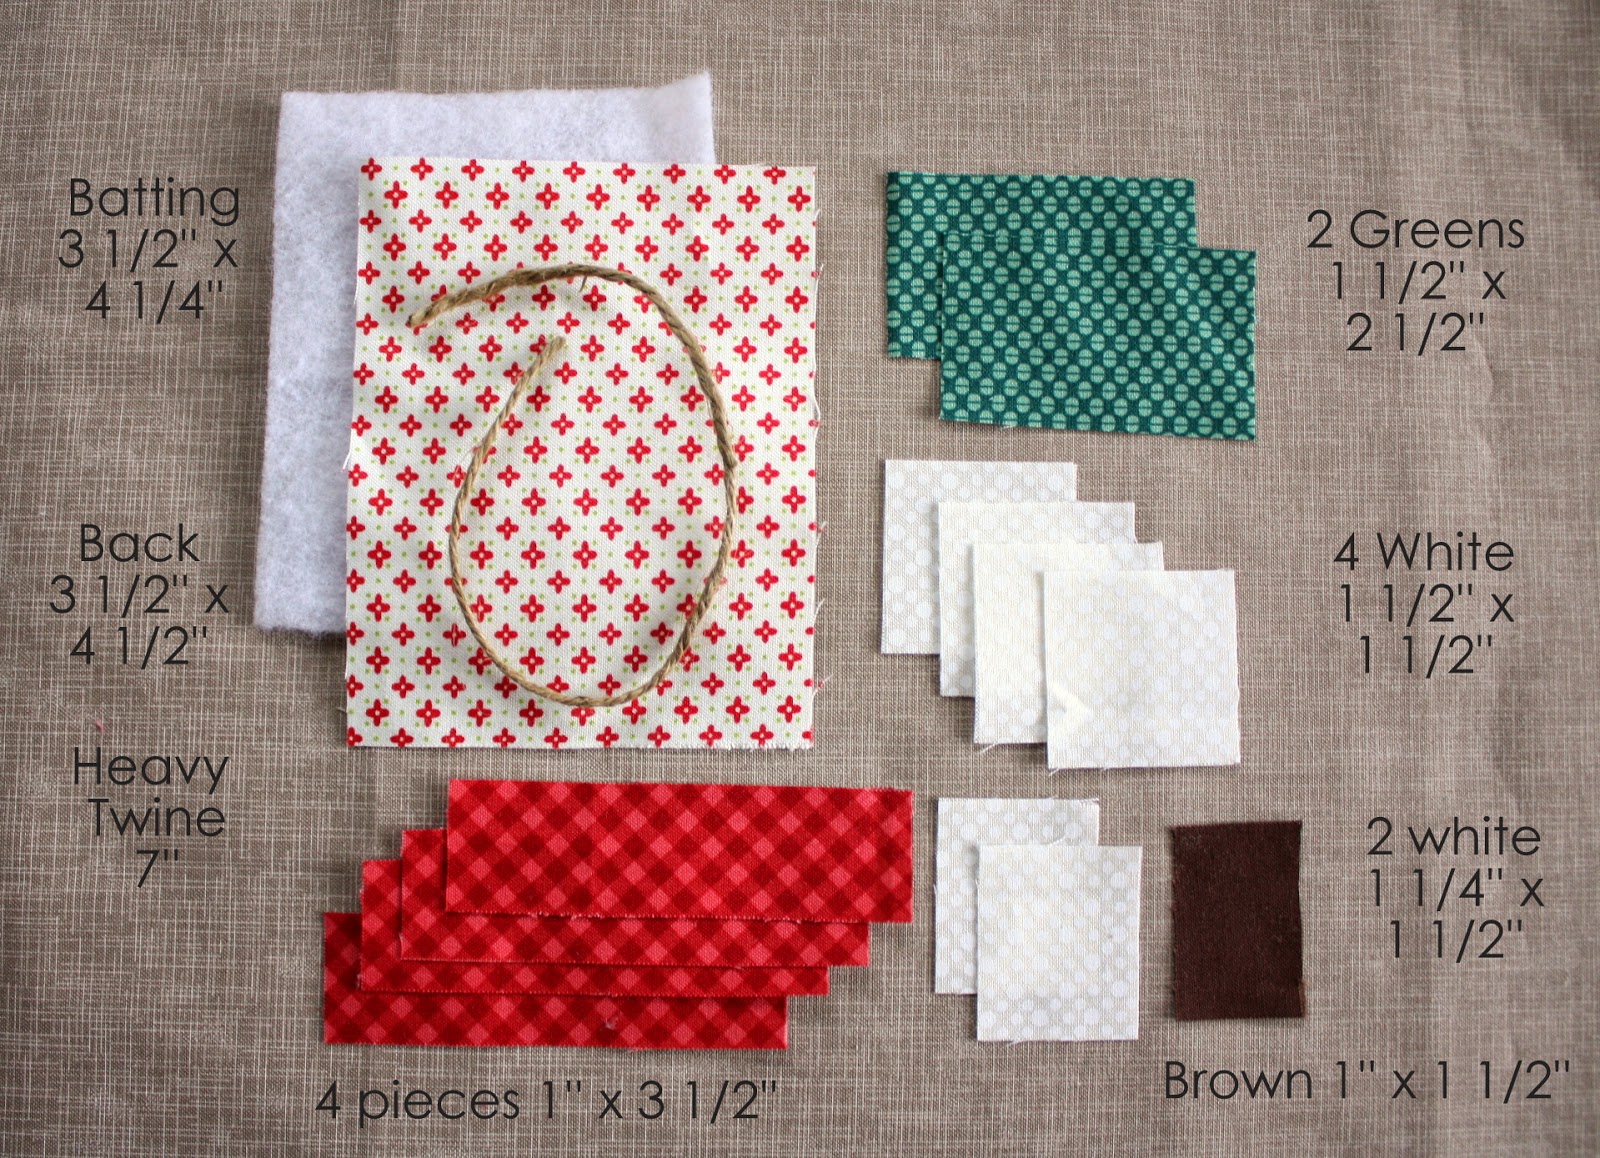
Fabric requirements for each ornament:
- 2 green rectangles 1 ½'' x 2 ½''
- 4 white squares 1 ½'' x 1 ½''
- 2 white rectangles 1 ¼'' x 1 ½''
- 1 brown rectangle 1'' x 1 ½''
- 4 red rectangles 1'' x 3 ½''
- Batting 3 ½'' x 4 ¼''
- Back 3 ½'' x 4 ½''
- Jute Twine 7''
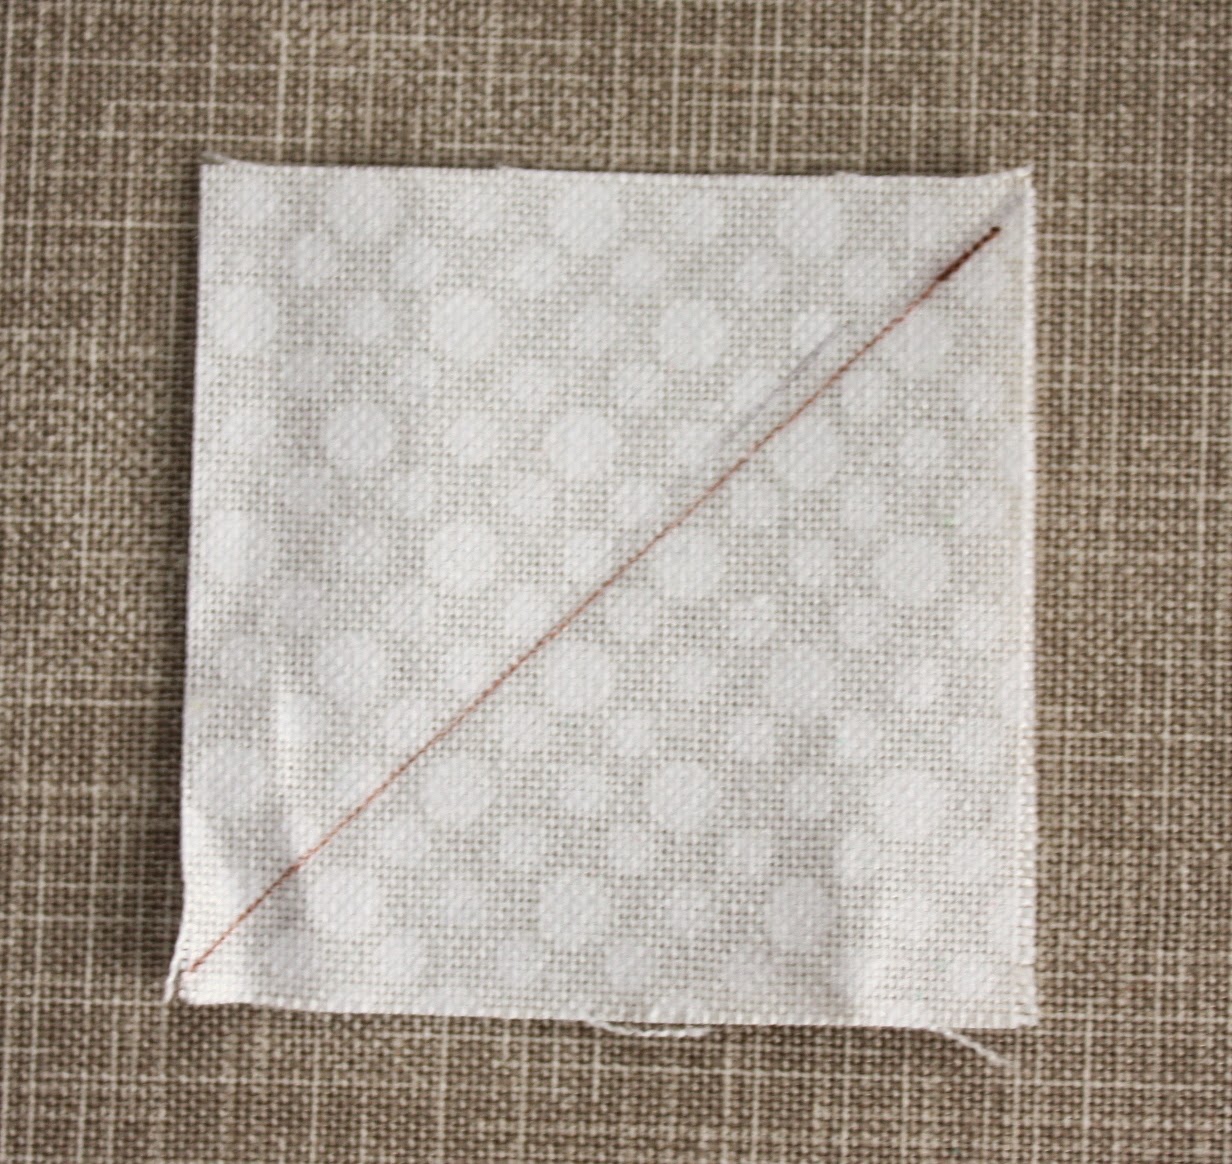
On the back of the four 1 ½'' x 1 ½'' squares, draw a single diagonal line.
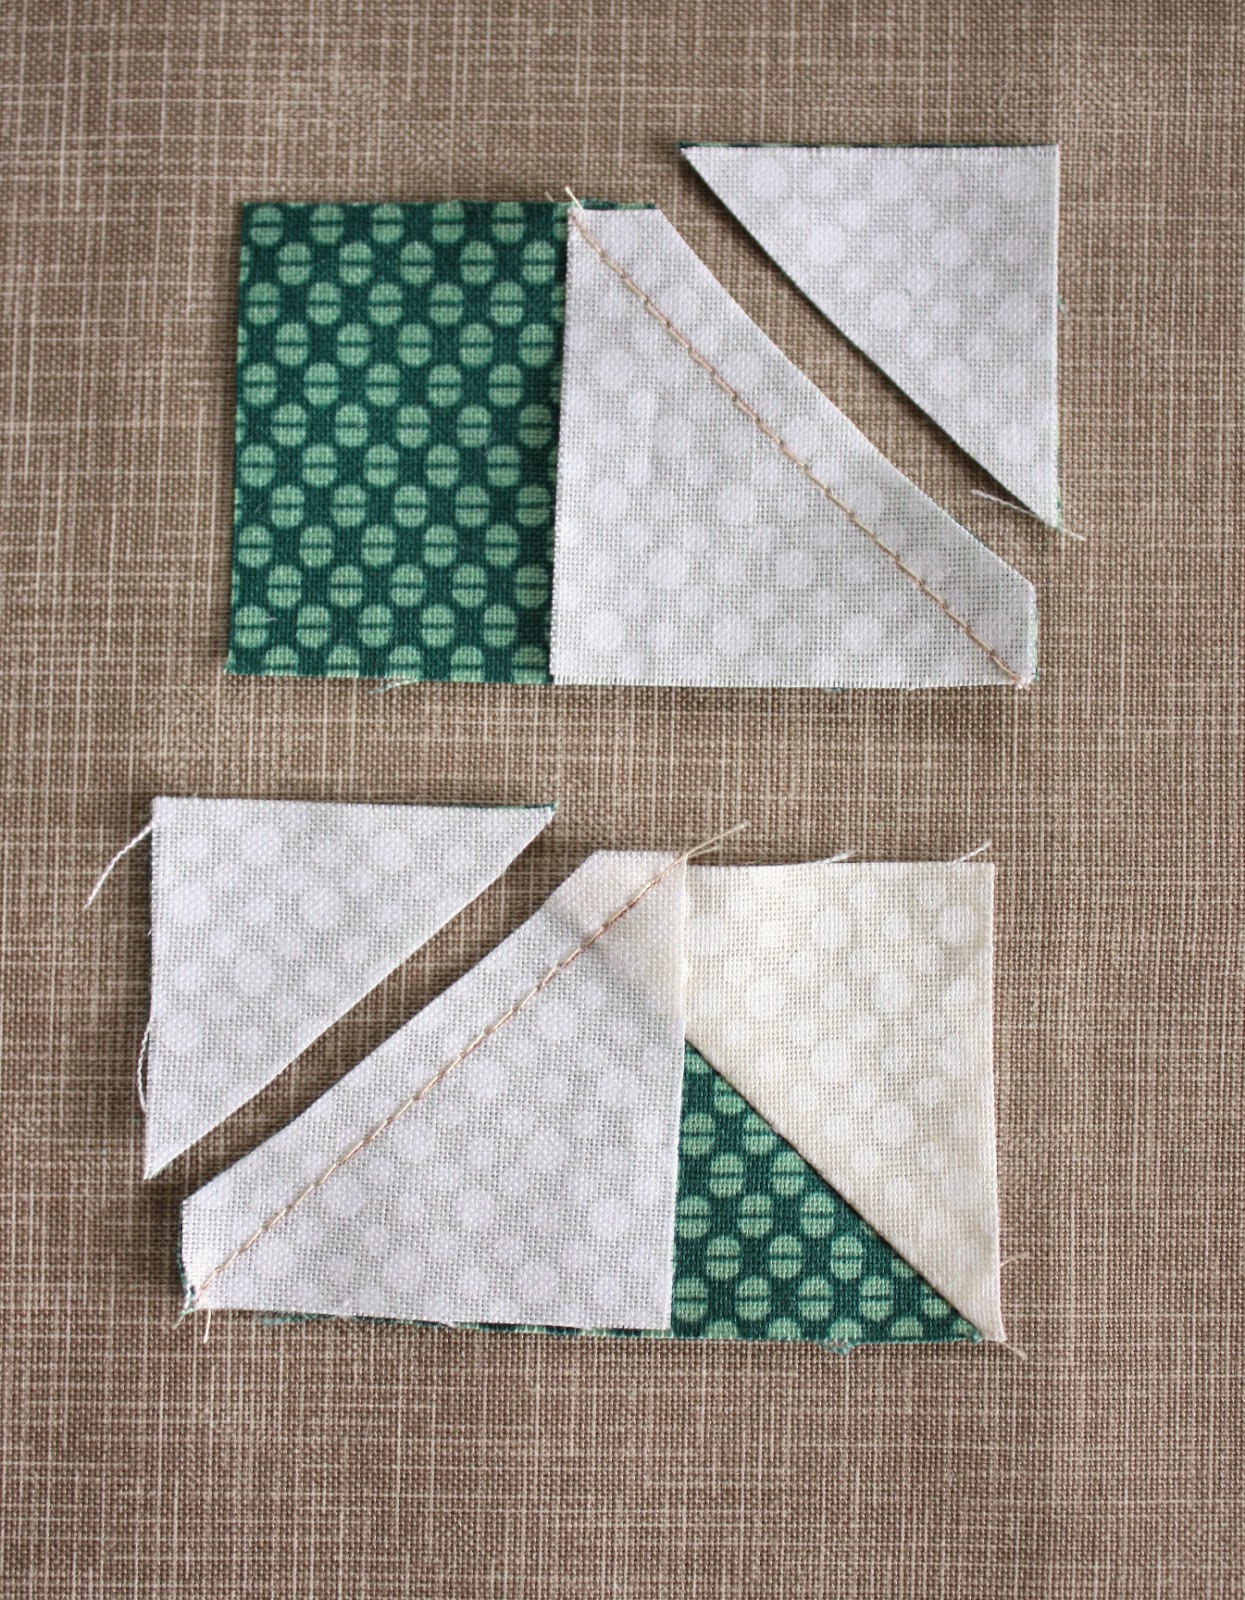
Place one square on the right side of a green 1 ½'' x 2 ½'' rectangle. Sew seam directly on drawn line. Trim corner ¼'' away from the seam open up the white triangle and press seam toward the white. Place a second white square on left side of green triangle, overlapping with first white triangle. Sew seam directly on the line. Trim corner ¼'' away from seam, fold white triangle open and press seam toward the triangle. Repeat with second set of white squares and green triangle.
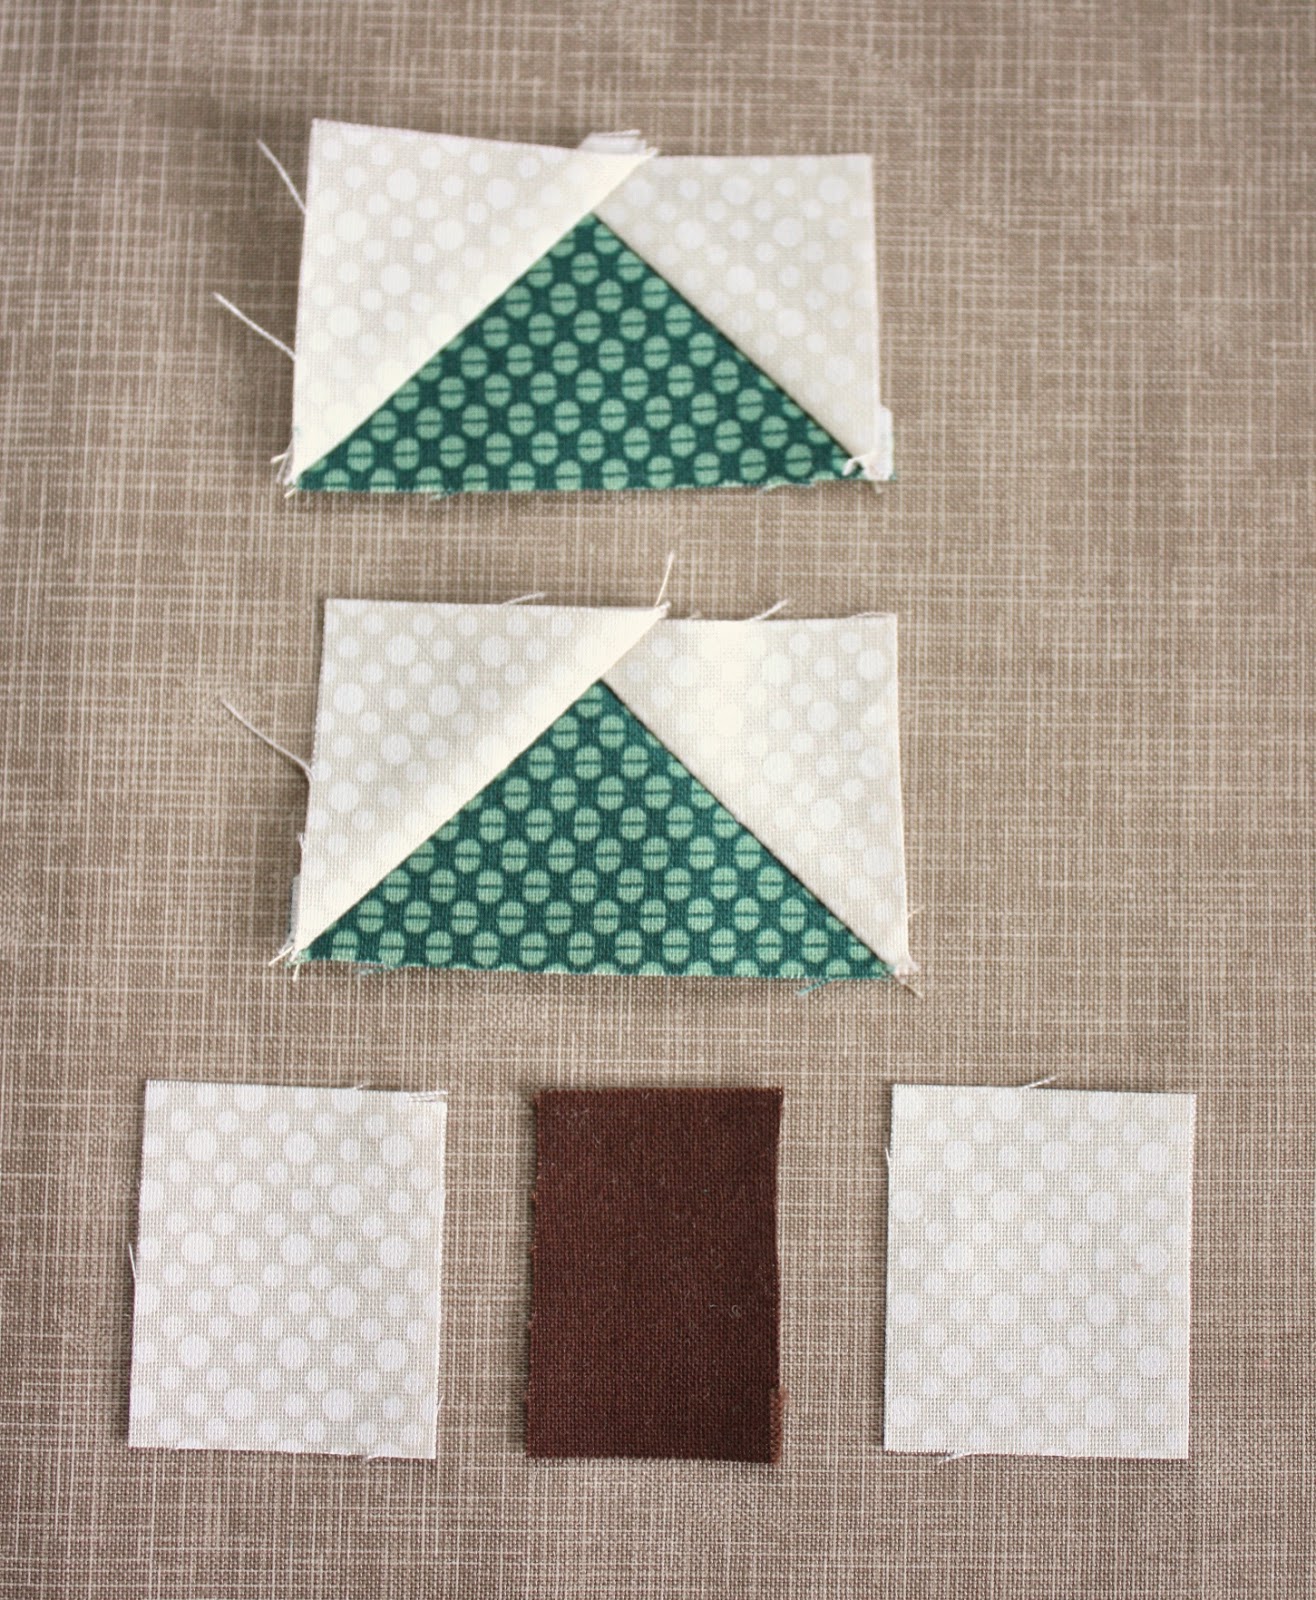
Using ¼'' seam allowance on the remaining seams, sew one green triangle block on top of the other triangle block to create tree. Sew 1 ¾'' x 1 ½'' rectangles to either side of brown 1'' x 1 ½'' rectangle. Press seams toward the brown. Sew this unit to the bottom of the 'tree' triangles to create trunk. Press seam toward the green.
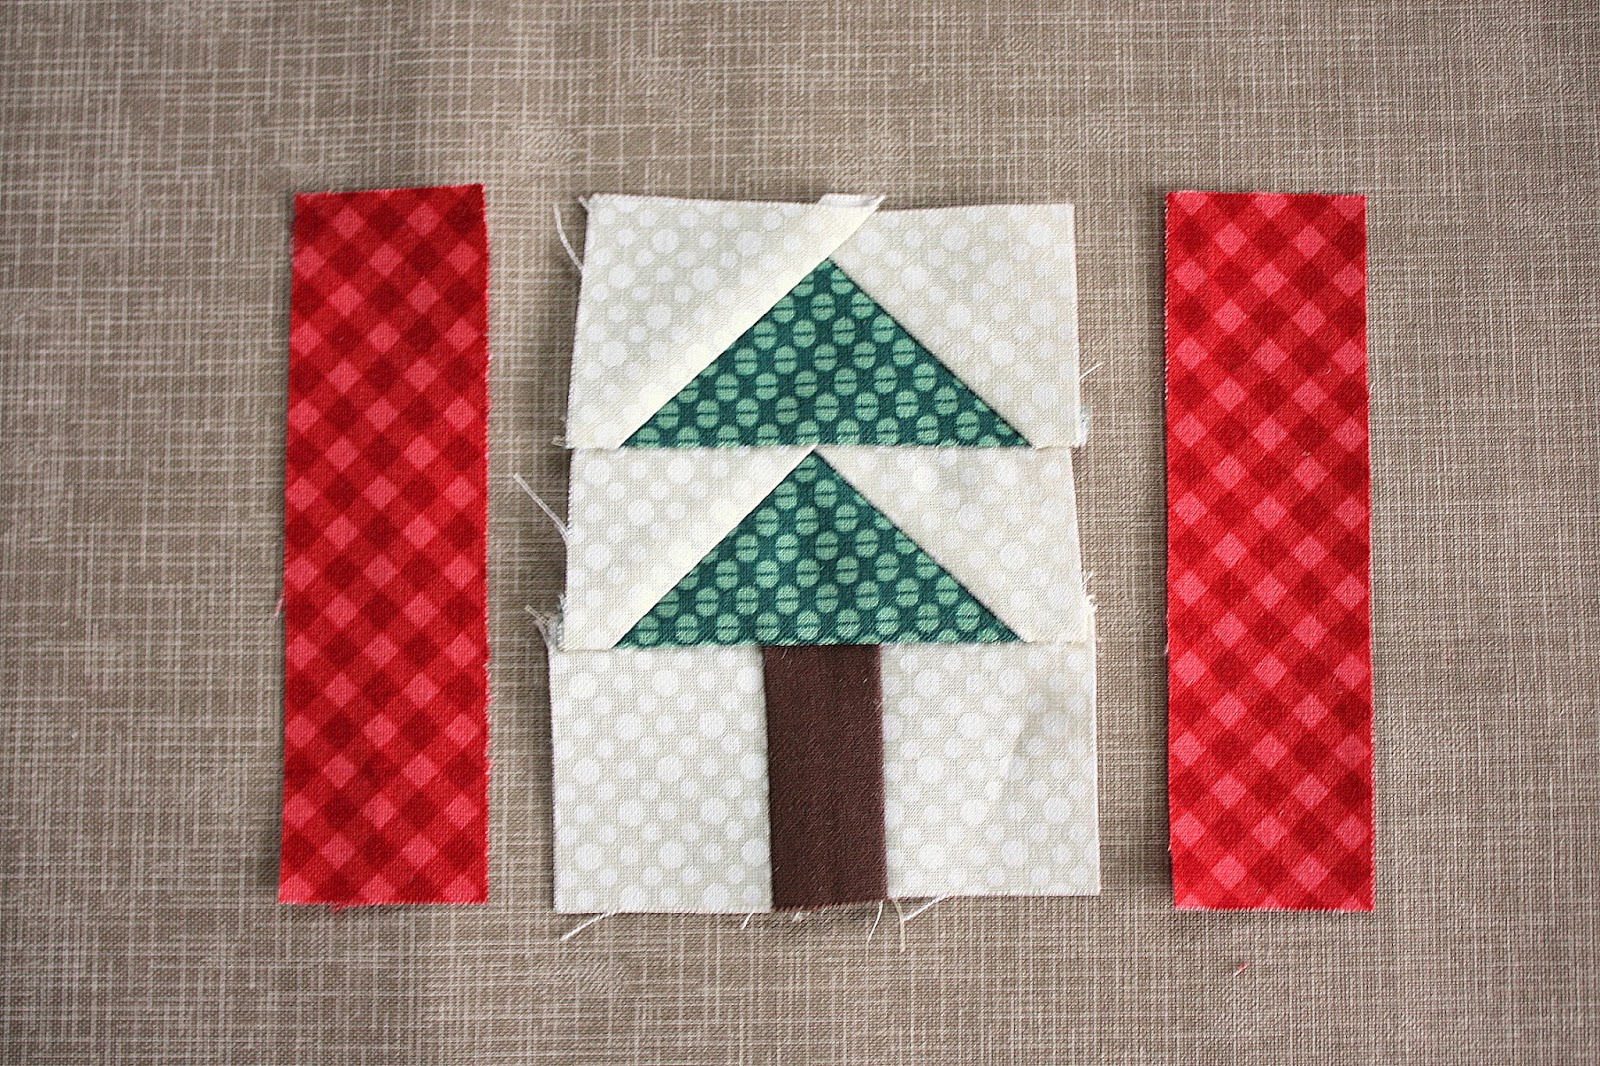
Sew two 1'' x 3 ½'' strips on either side of the tree block (continue to use ¼'' seam allowance). Press seams toward the red strips.
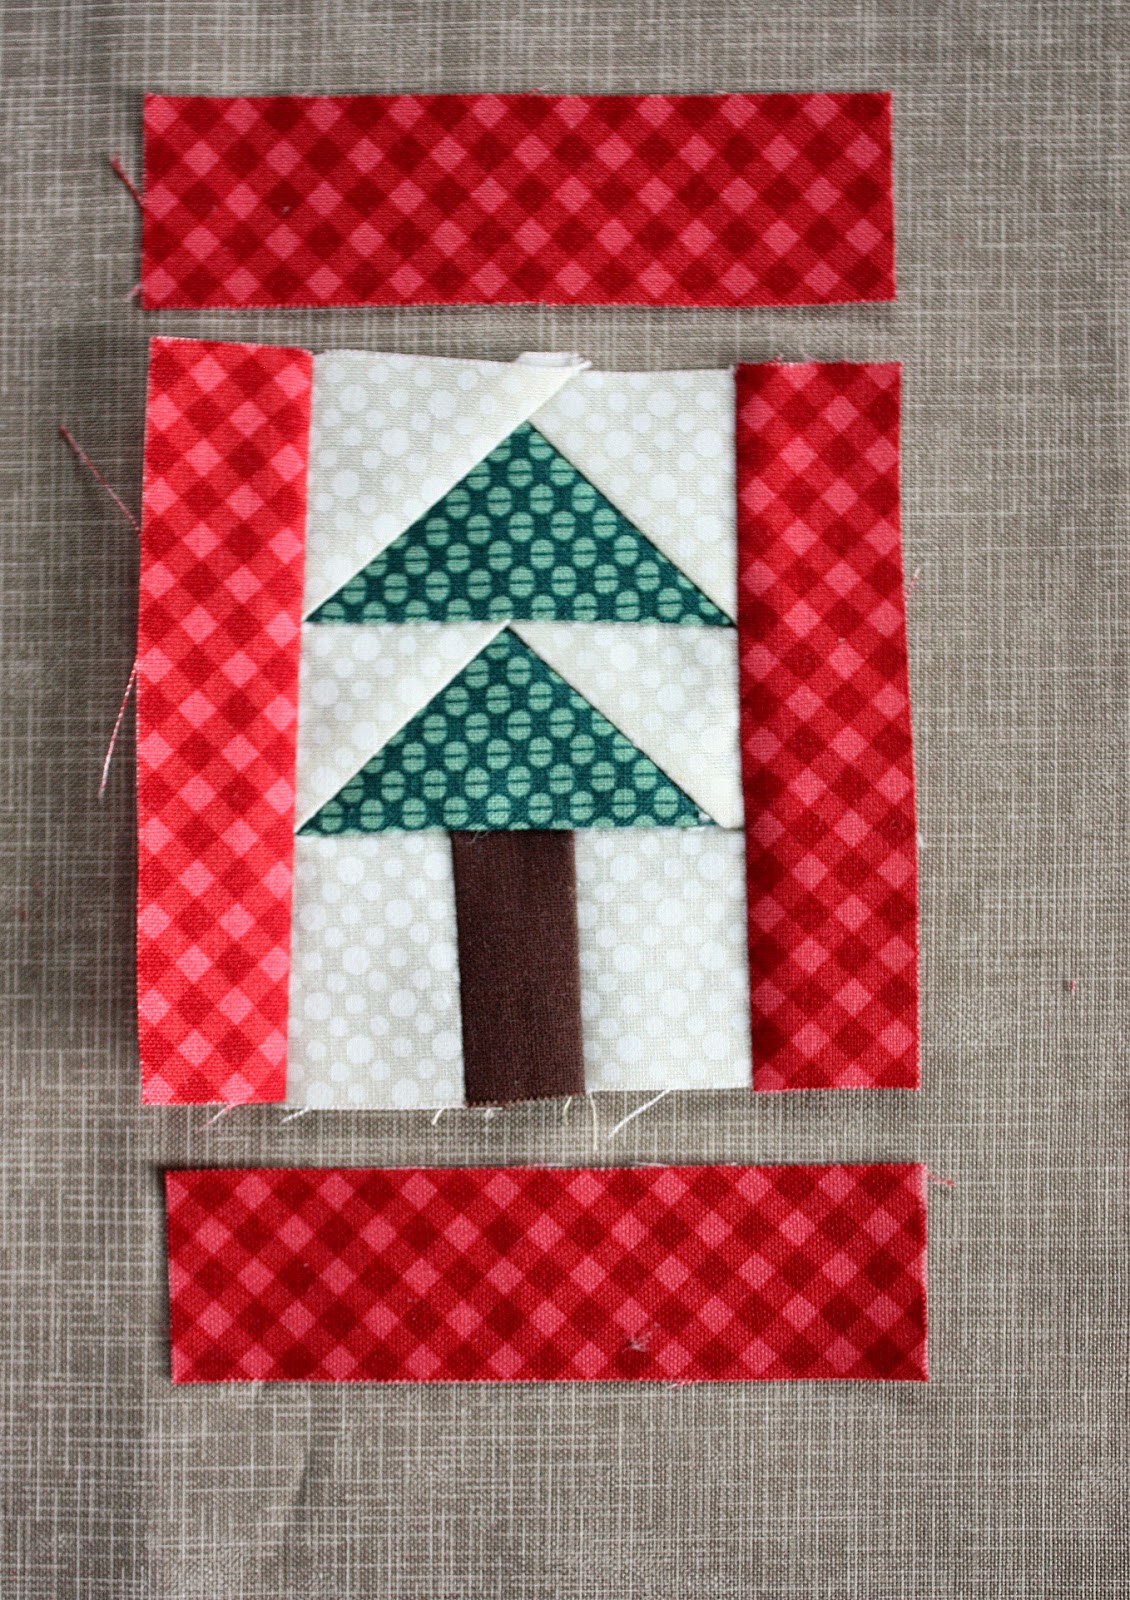
Sew remaining strips to the top and bottom of the tree block. Press seams toward the bottom strips.
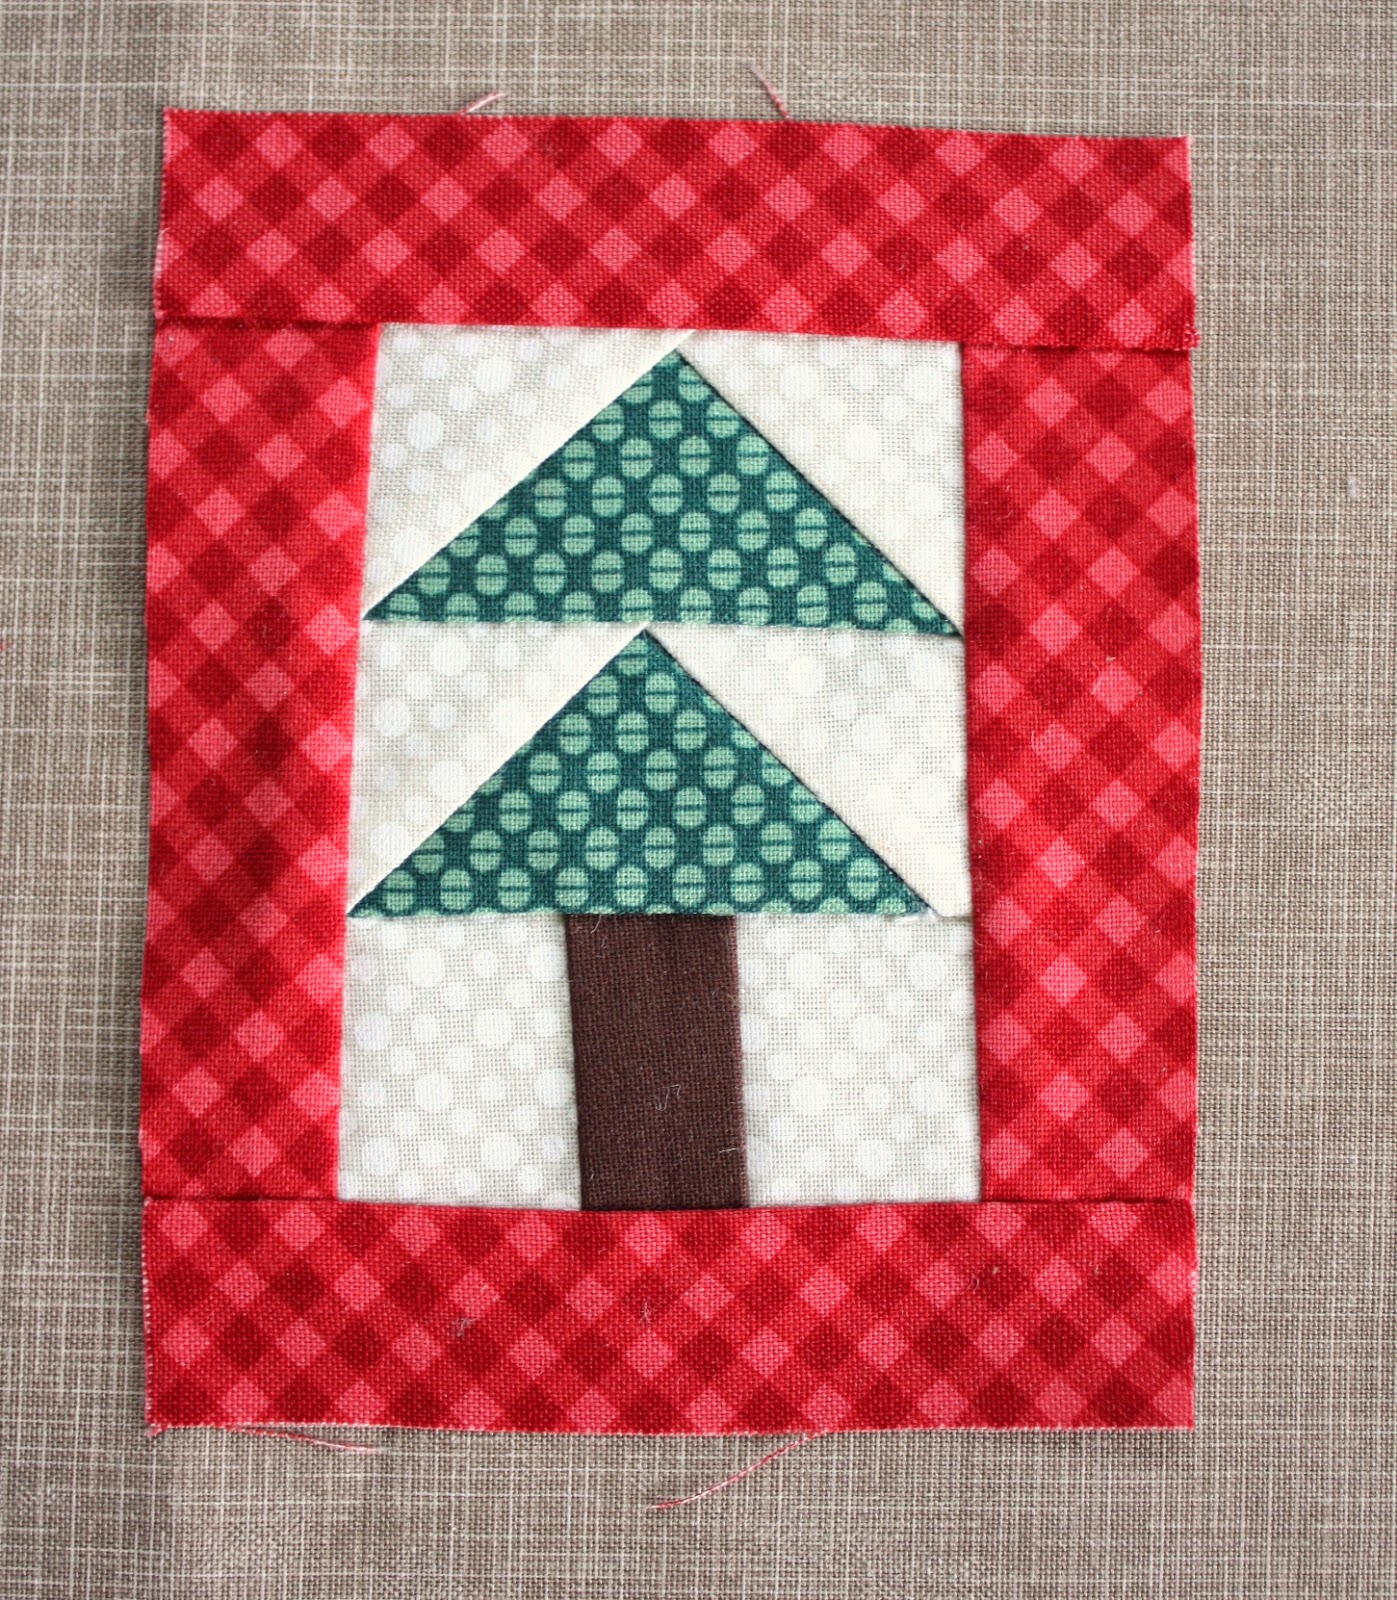
Press block well to give it a nice, crisp appearance.
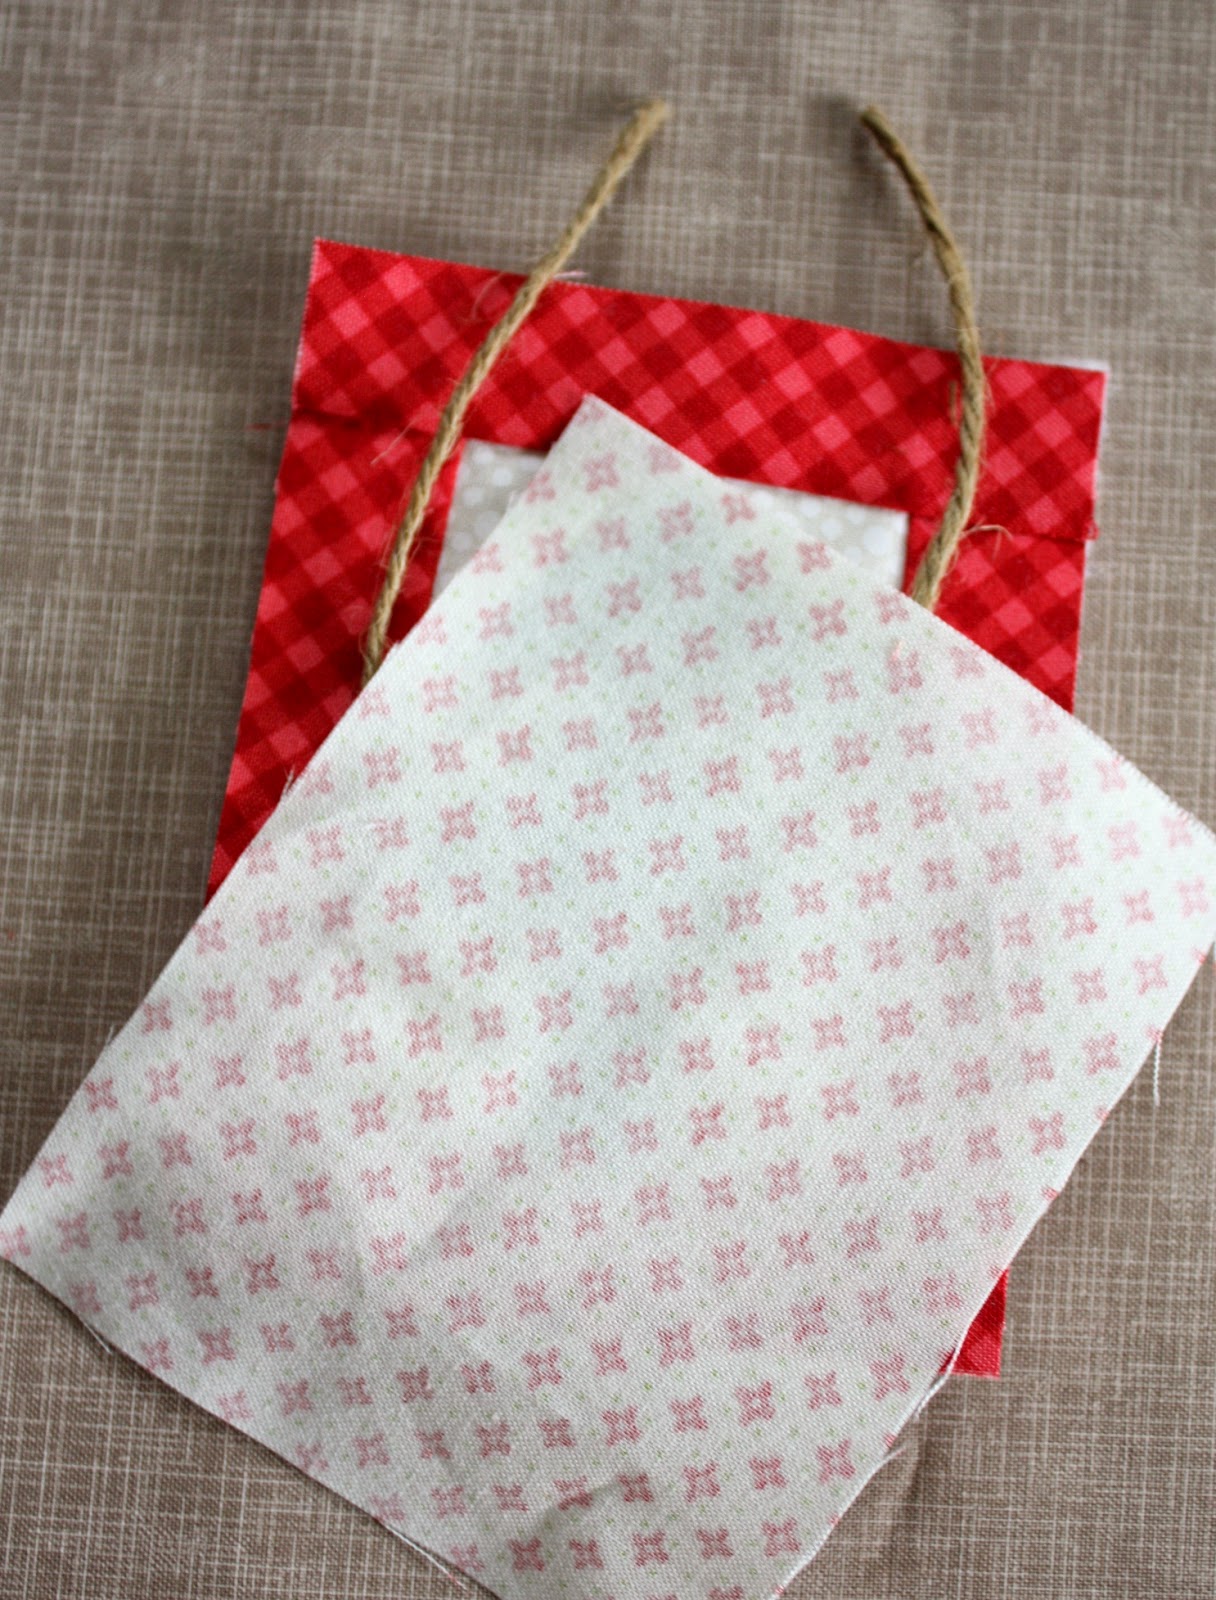
To add batting and backing, layer the batting on the bottom, the tree quilt block (with the top edges lined up - there will be ¼'' less batting at the bottom), the piece of heavy twine in an upside down 'U' with the ends about ¾'' in from each side and with about 1'' of ends sticking out from the top. Then place backing piece wrong-side-up on top of everything and pin layers together.
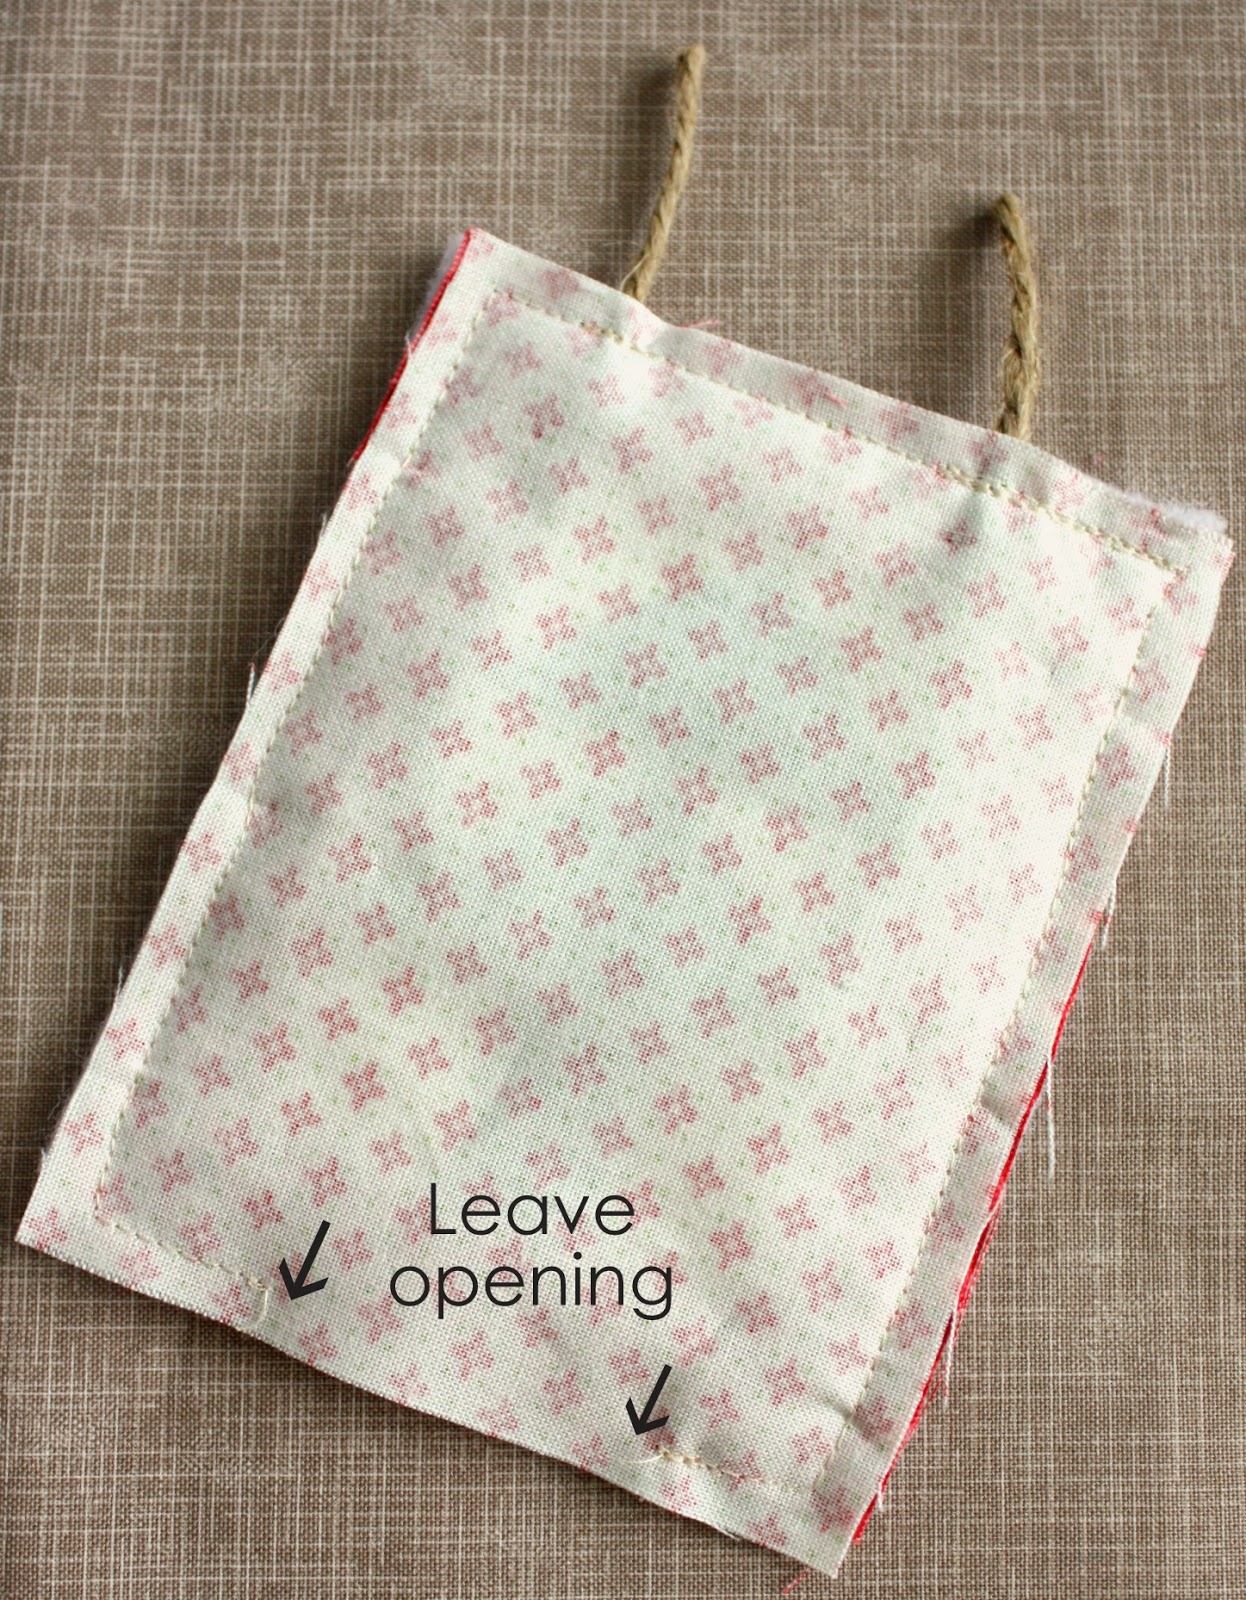
Sew layers together using a ¼'' seam allowance. Start 1'' from the side at the bottom edge, back stitching first, and sew all the way around, finishing about 1'' from the other side on the bottom edge, backstitching again when you finish. This will leave a 1 ½'' opening at the bottom for turning right sides out. Be sure to sew back and forth a few times over the twine to secure it in place.
Clip ends of twine and clip corners before turning right sides out.
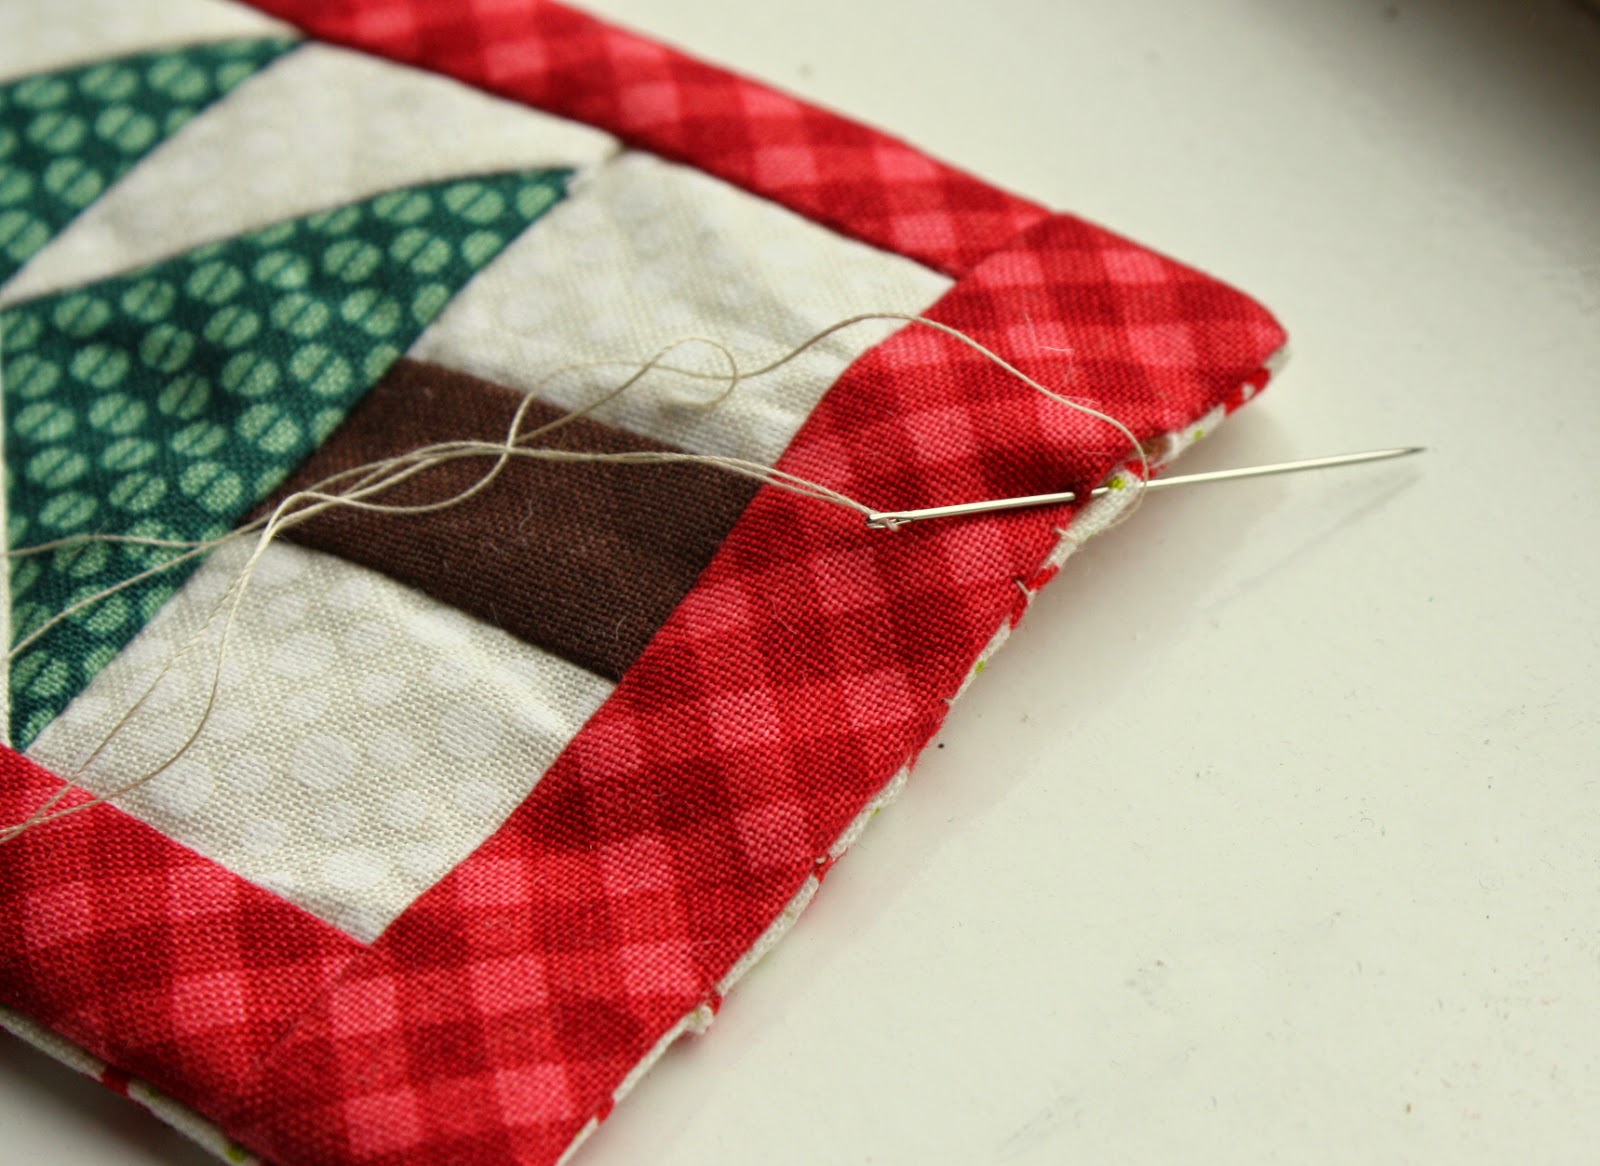
Tuck bottoms ends inside and using a blind stitch, whip stitch the bottom edges together.
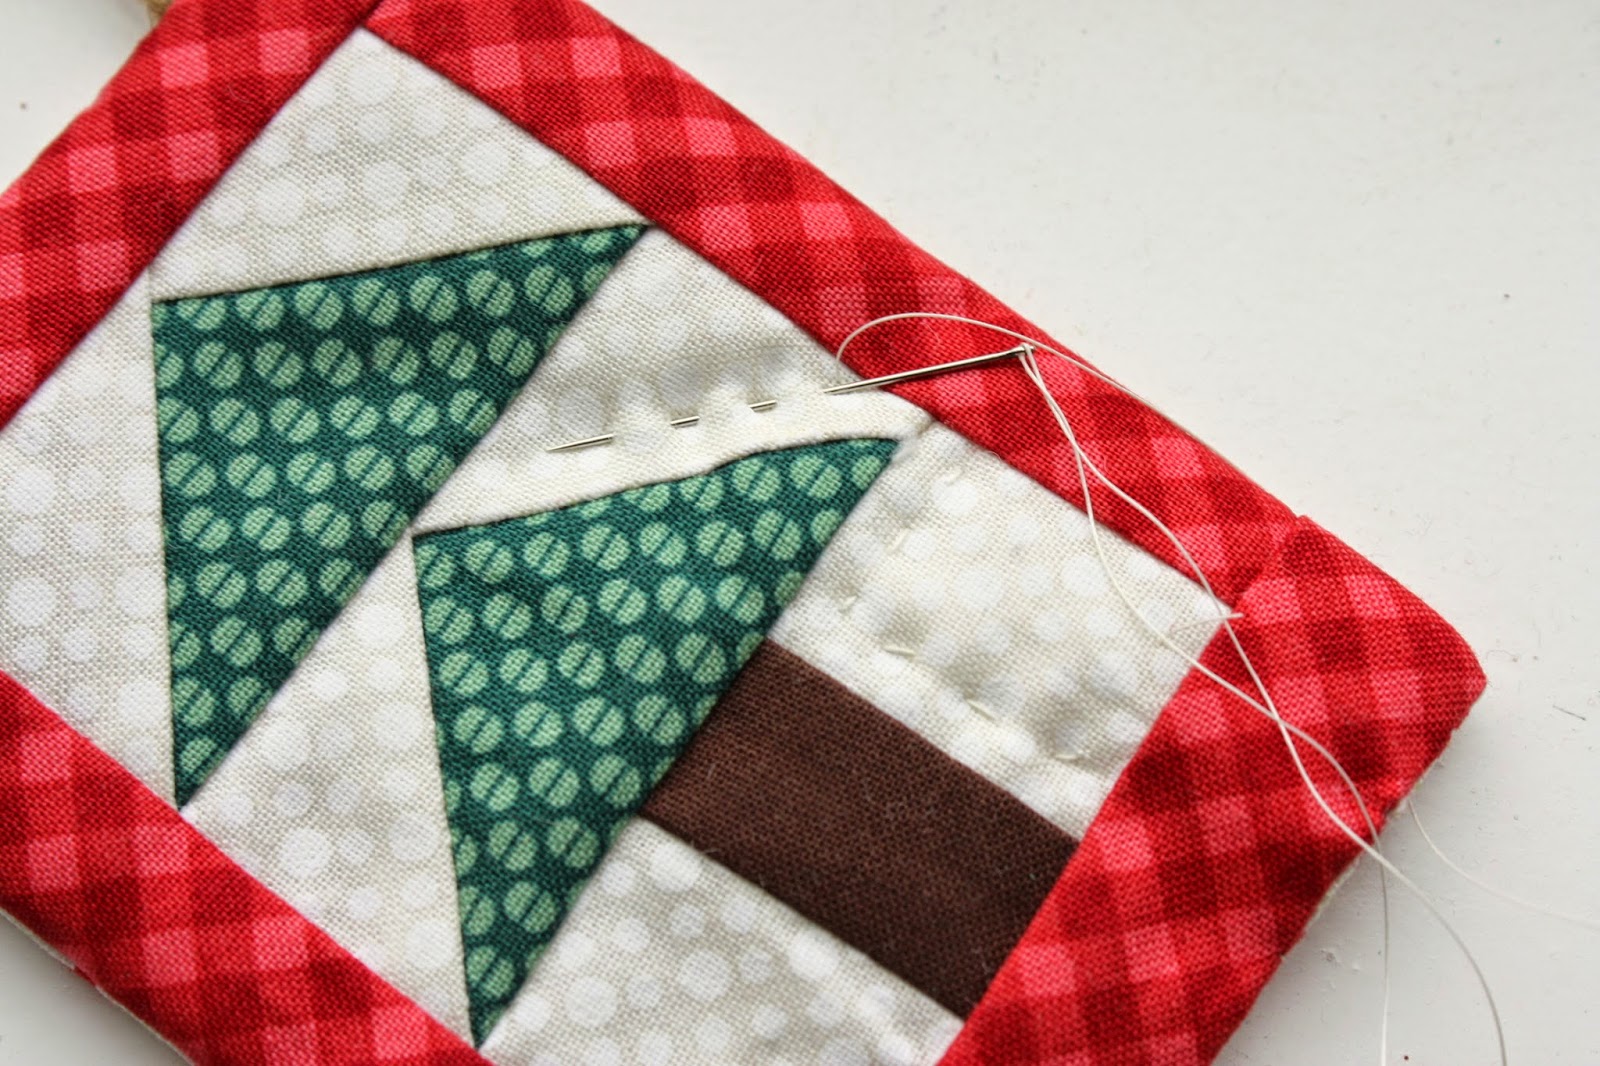
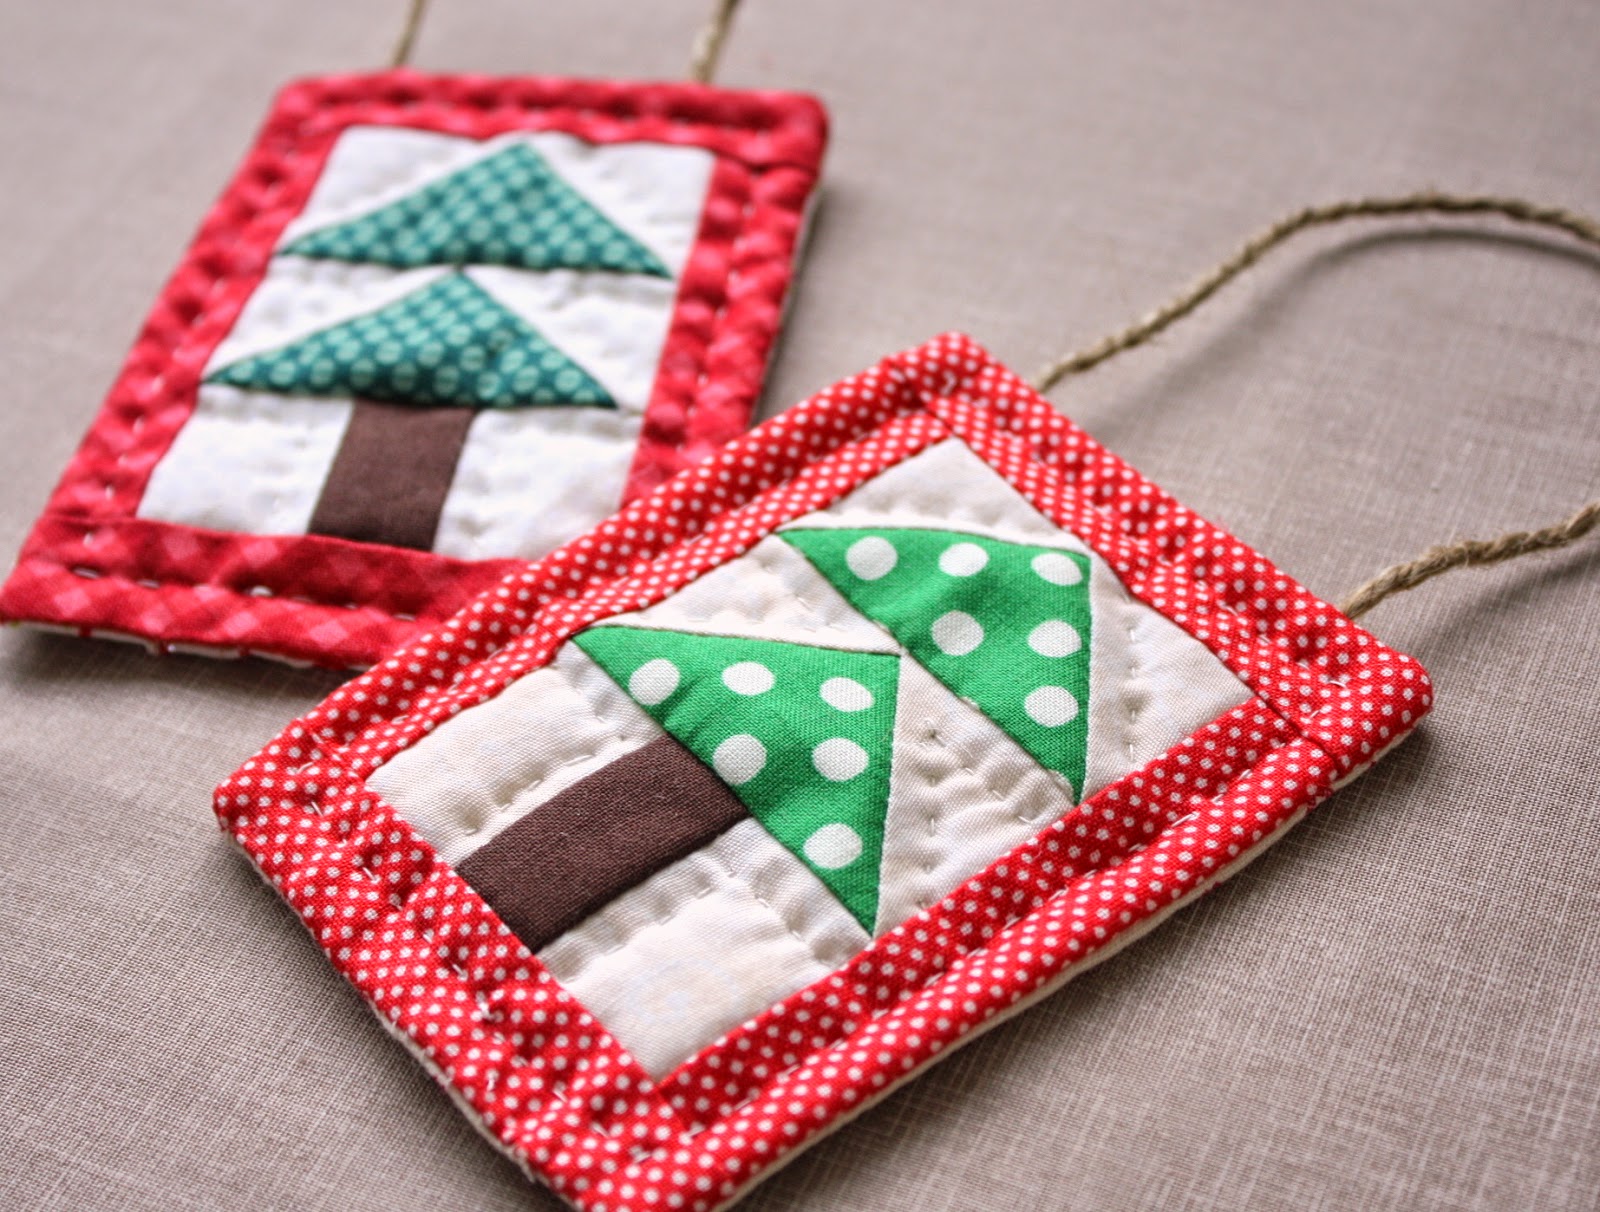
You can leave the ornament/tag as is at this point, if you like. I like to add a little bit of hand-quilted stitches outlining the tree to give the ornament just a little bit of texture.
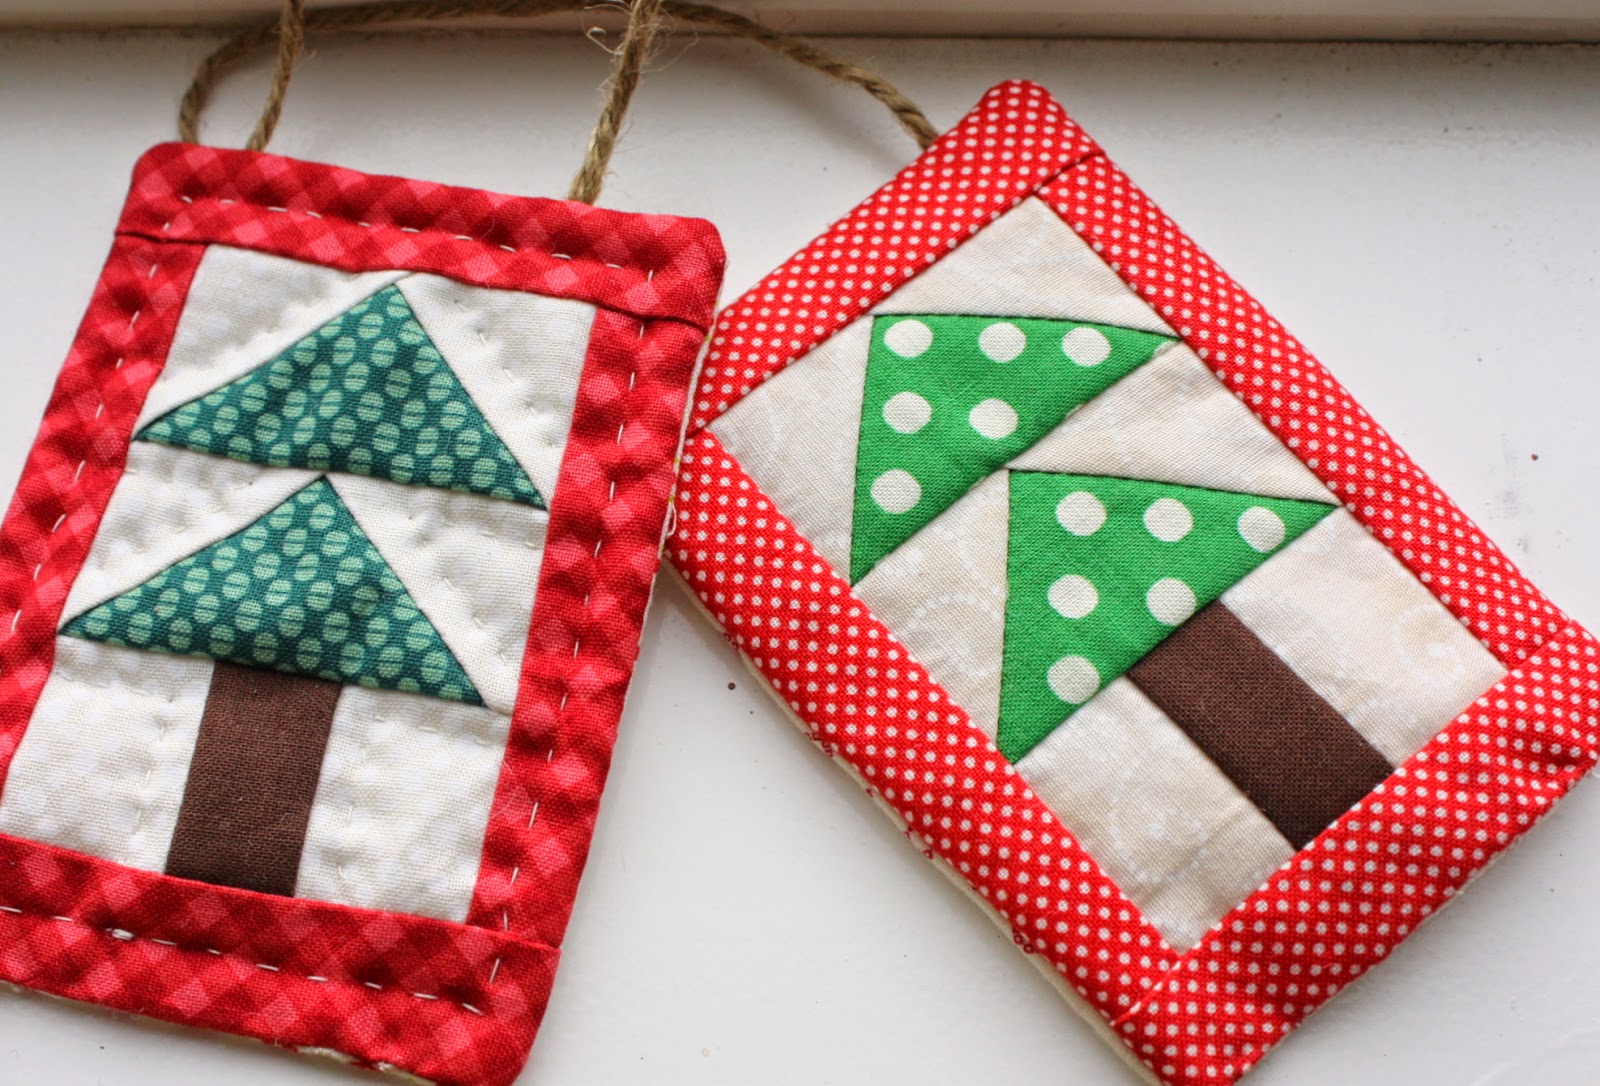
Here is how the ornament looks quilted and not-quilted, just to show the difference that little bit of stitching makes. You can do whatever suits you best!
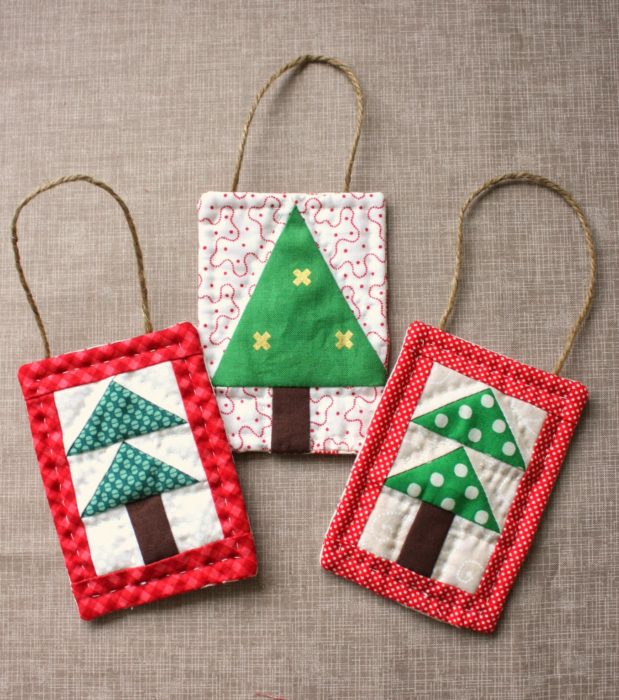
And that's it! A simple mini-quilt ornament. Perfect for a quick little personalized project or just for using up some favorite scraps.
If you're looking for the middle pine tree ornament tutorial, go here for the Improv Patchwork Tree block tutorial.
And go here for lots more ideas for Handmade Christmas Ornaments tutorials. There's something for every skill level!


Trisch
Thanks for the tutorial. I was going to take some goodies over to the neighbors and friends and wanted something else to take along. This is just the ticket!!! Thanks!!!
dolores
I faved this for next year's ornament exchange!;)<br /><br />Merry, Merry to you and yours dear girl!! xoxo
Cheryl
Wonderful tutorial and cute ornament, thanks for sharing.
Ginny
So cute! Thanks for the tutorial these are perfect little gifts for coworkers!
Lana
Merry Christmas Amy...I wish only a wonderful time with your sweet family...<br />
Niechelle Wade
Yes, I've already started whacking a few of these off, they ARE addicting! 🙂
Mrs.Pickles
very cute thank you for sharing i have pinned it for next year
Tracie
Where/how do you knot the thread for the handstitching? I'm never very good at hiding knots, but usually can find a spot. I'm stumped on this one... ?
amy smart
When I'm hand quilting, I gently tug the knot through the front fabric so that it's buried between the layers of the quilt. Perfect hiding spot!
Irene spiezio
That is so cute!
Thimbleanna
So Cute! Merry Christmas Amy!!!
jzygail
Thank you for this! I made one for each of my grandkids and the ornaments were a big hit. I think I've found a fun new little stocking stuffer tradition!<br /><br />Merry Christmas!
Hannah Taylor
Nice picture.I would like to share a little write.This decoration is based on Christmas quilts which have vast trees comprised of triangular patches of a wide range of sorts of green fabric. A trunk of tan is added alongside white and red fringes. The green strings ought to be for the most part strong or variegated with just slight changes in shade. Tweeded strings include investment while not
Paula Collins
I don't do much sewing to afraid! But this is small and the directions look easy. I am going to attempt this one. Very excited!
Priscilla Cooksey
WOW! Those Christmas tree ornaments are really sweet! Thank you so much for the detailed tutorial. That little bit of "echo" hand stitching adds an extra dimension that is missing in the plain ornament!
Adri Mayo
This cute little tree ornament was too good to pass up!
So went ahead and sewed one up!
This on line tutorial had great directions.
Have to sew more!
Saartje
I just made one of these as a little quilting therapy after a very tiring night and day with my mother in hospital with some strange kind of memory loss ... I feel a lot better now (she is doing well, too, apart from a gap her memory of a few hours and shaken nerves she is back to normal). Thank you for this cute tutorial. I think I will be making a bunch of these, as gift tags.
Amy
I'm so glad you enjoyed this little project after a stressful time. I'm hoping your mother is improving! Best wishes to all. xo