
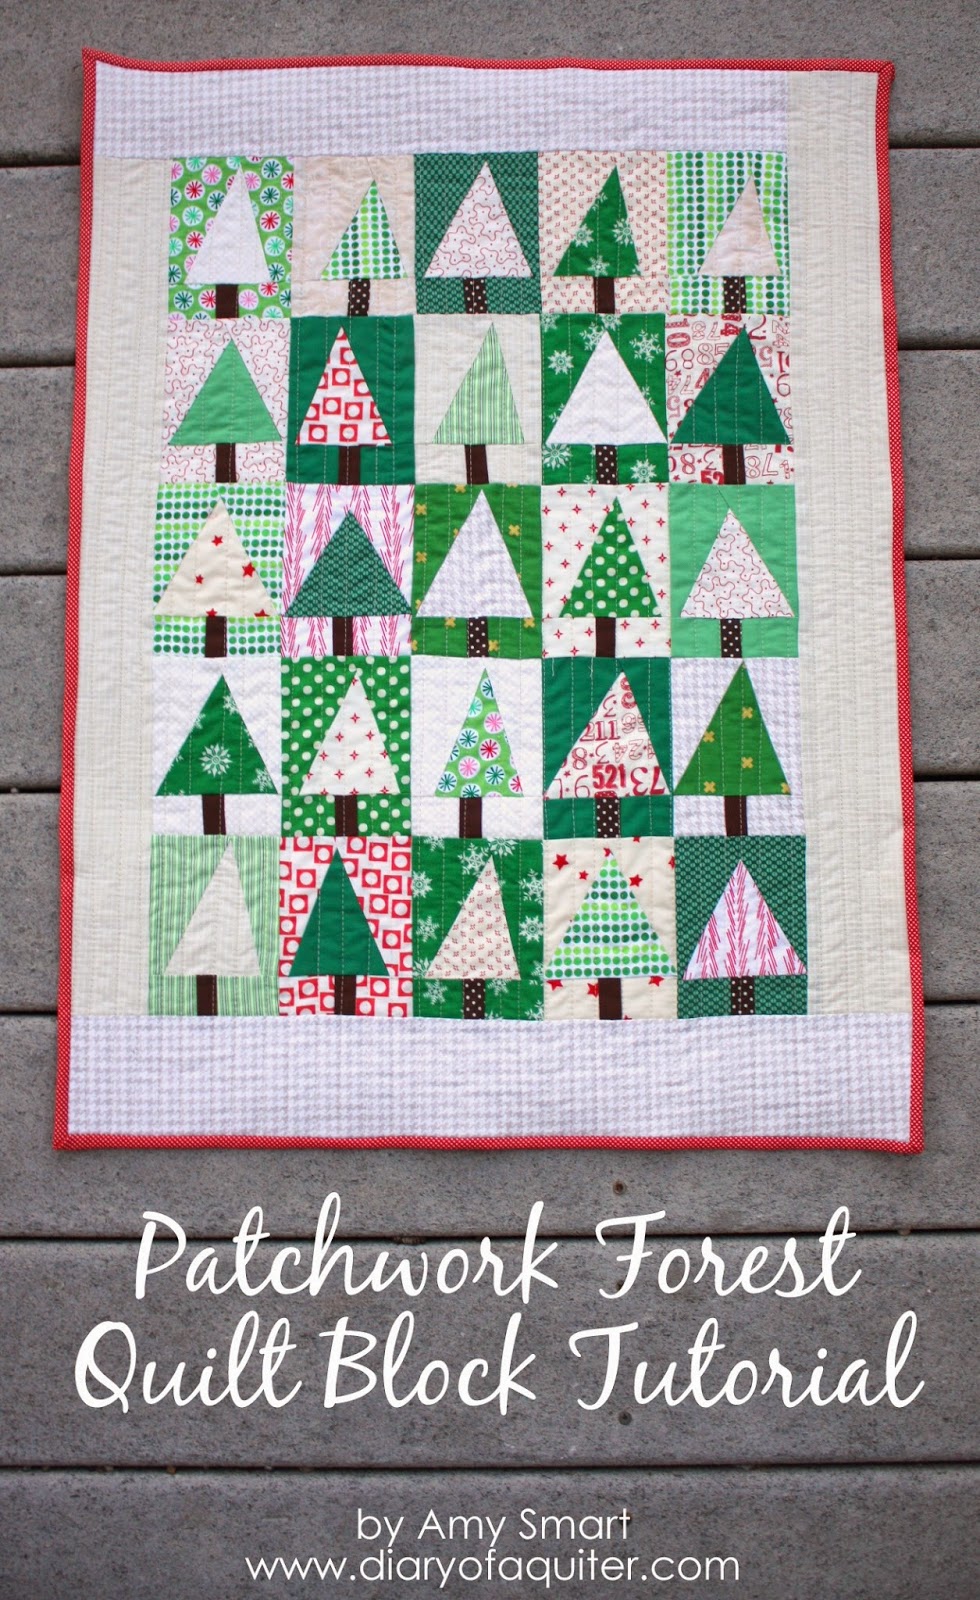
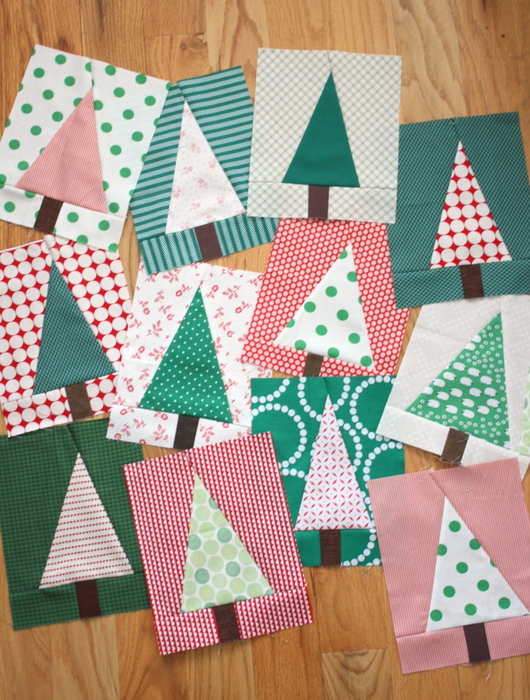
Earlier this week I shared some little patchwork Christmas tree quilt blocks I'd been making. I loved sewing them together into this little patchwork Christmas forest mini-quilt. The method for making this Christmas tree quilt blocks is quick and fun and I'm going to show you how right now! (How exciting can life get?)
How to Make Christmas Tree Quilt Blocks

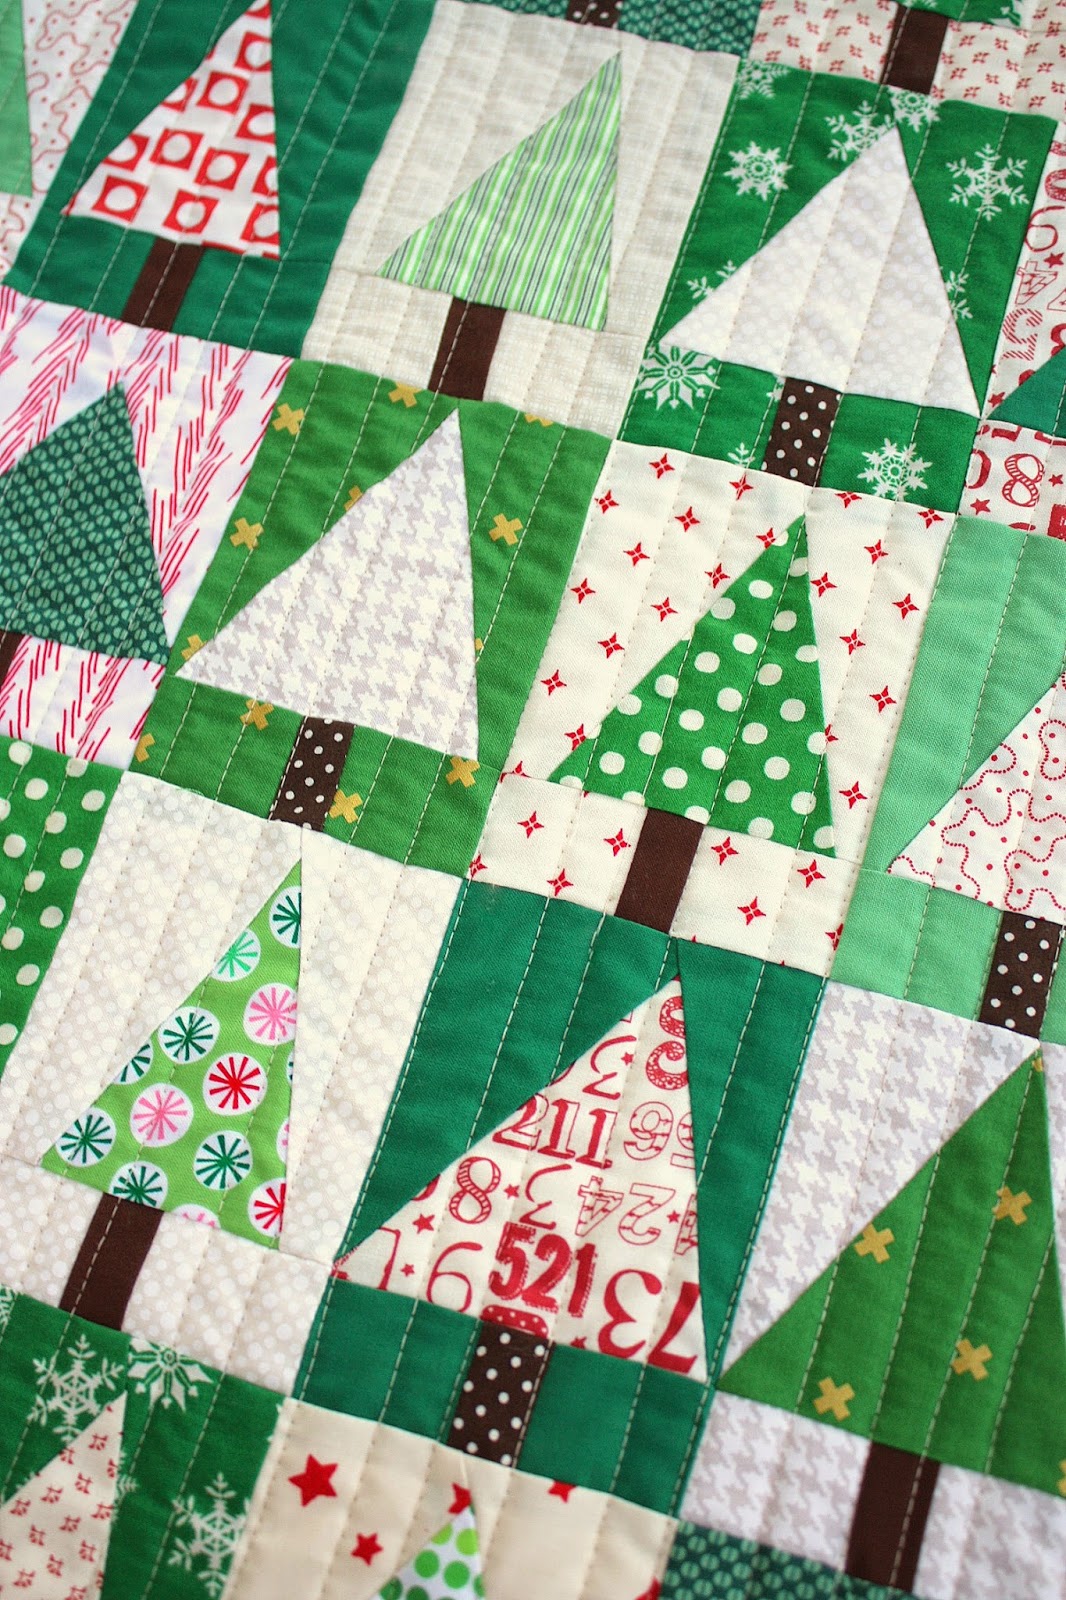
For my palette I chose a variety of greens in different shades and scales, to create interest and depth. I paired the greens with white-background prints and pulled in just a little bit of red. I like that it gives a hint of Christmas, while still letting the green and white be the dominant colors. You'll also need a few scraps of brown for the trunks.

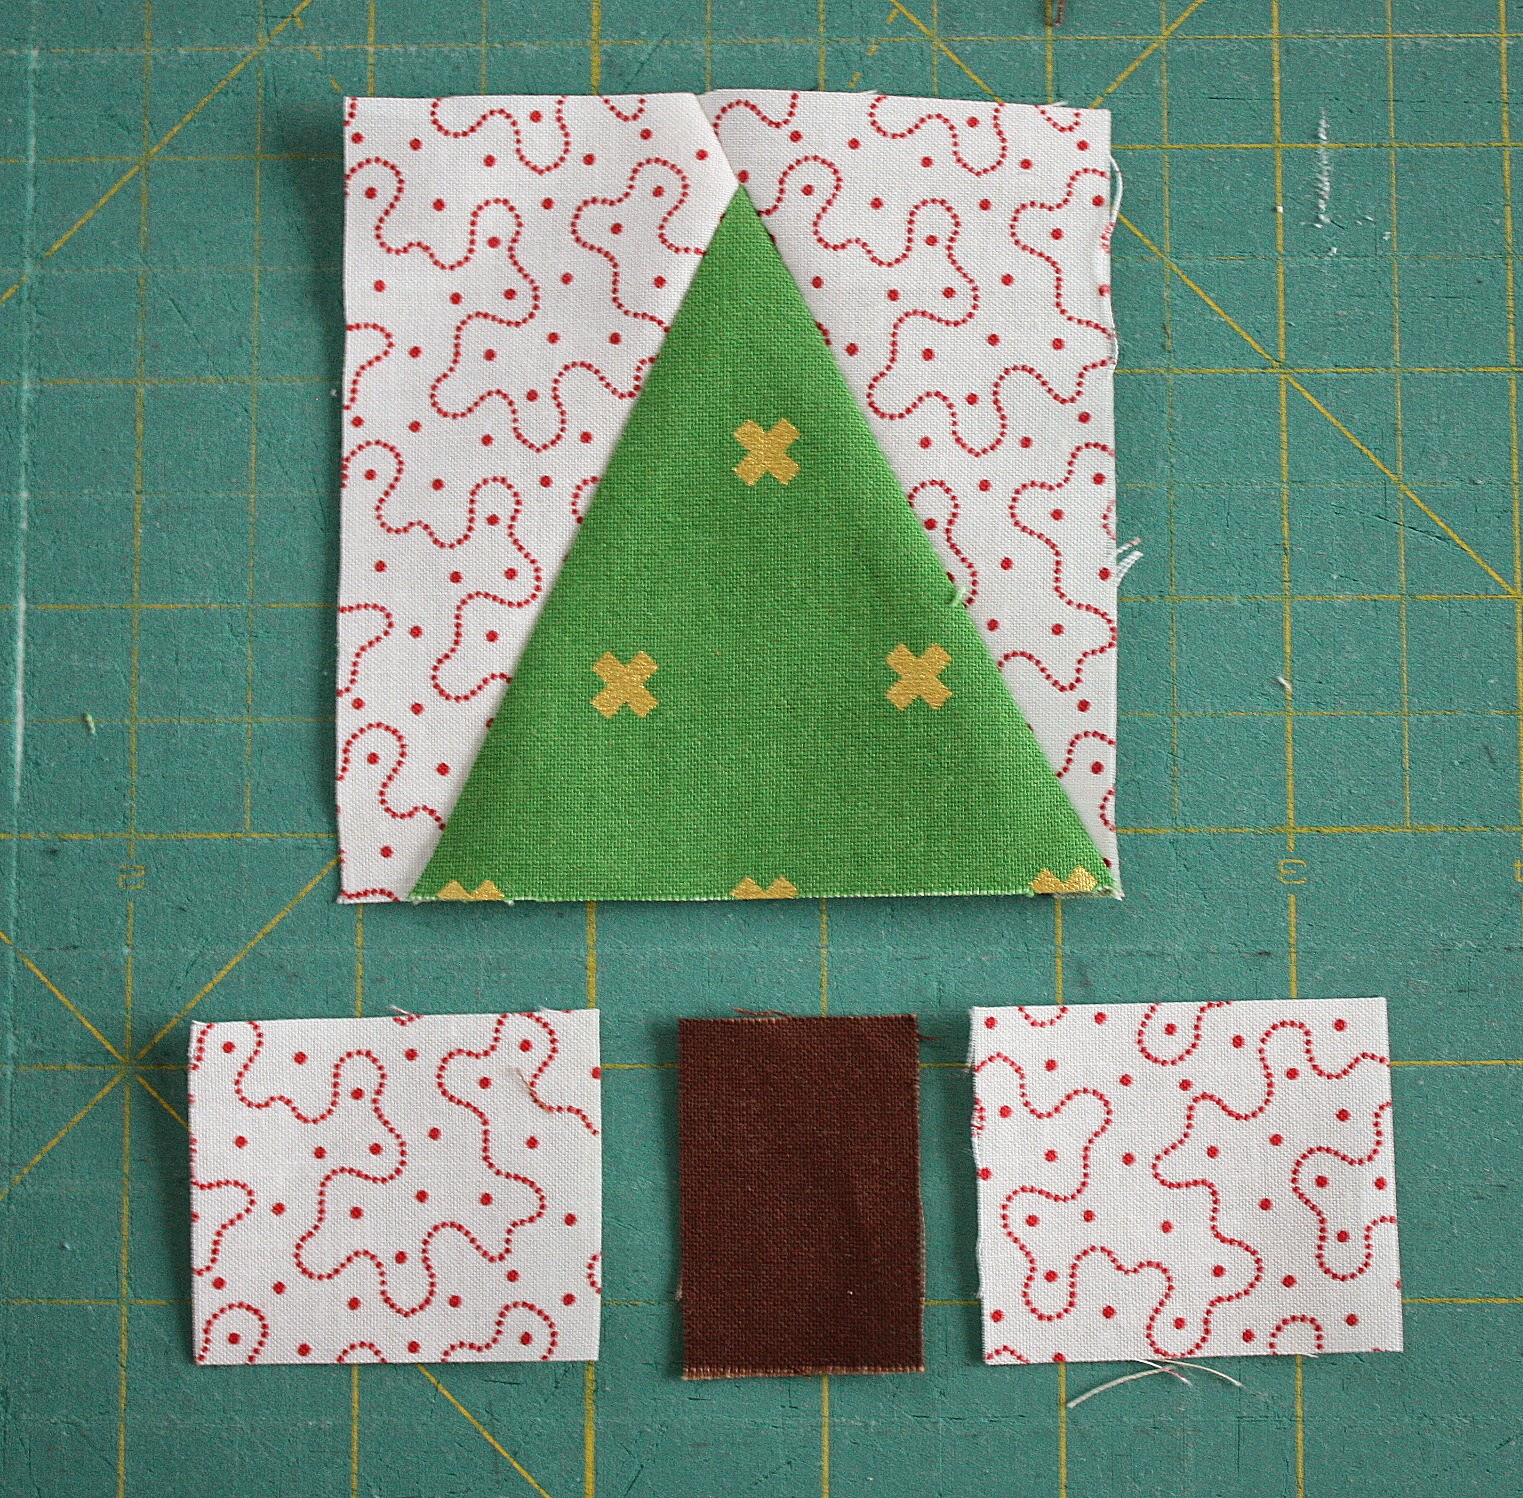
Using this method you'll be making two tree blocks at the same time. First pick two contrasting fabrics. From each fabric cut a 4 ½'' x 4 ½'' square and two 2'' x 1 ½'' rectangles. From the brown scraps cut two 1'' x 1 ½'' rectangles.
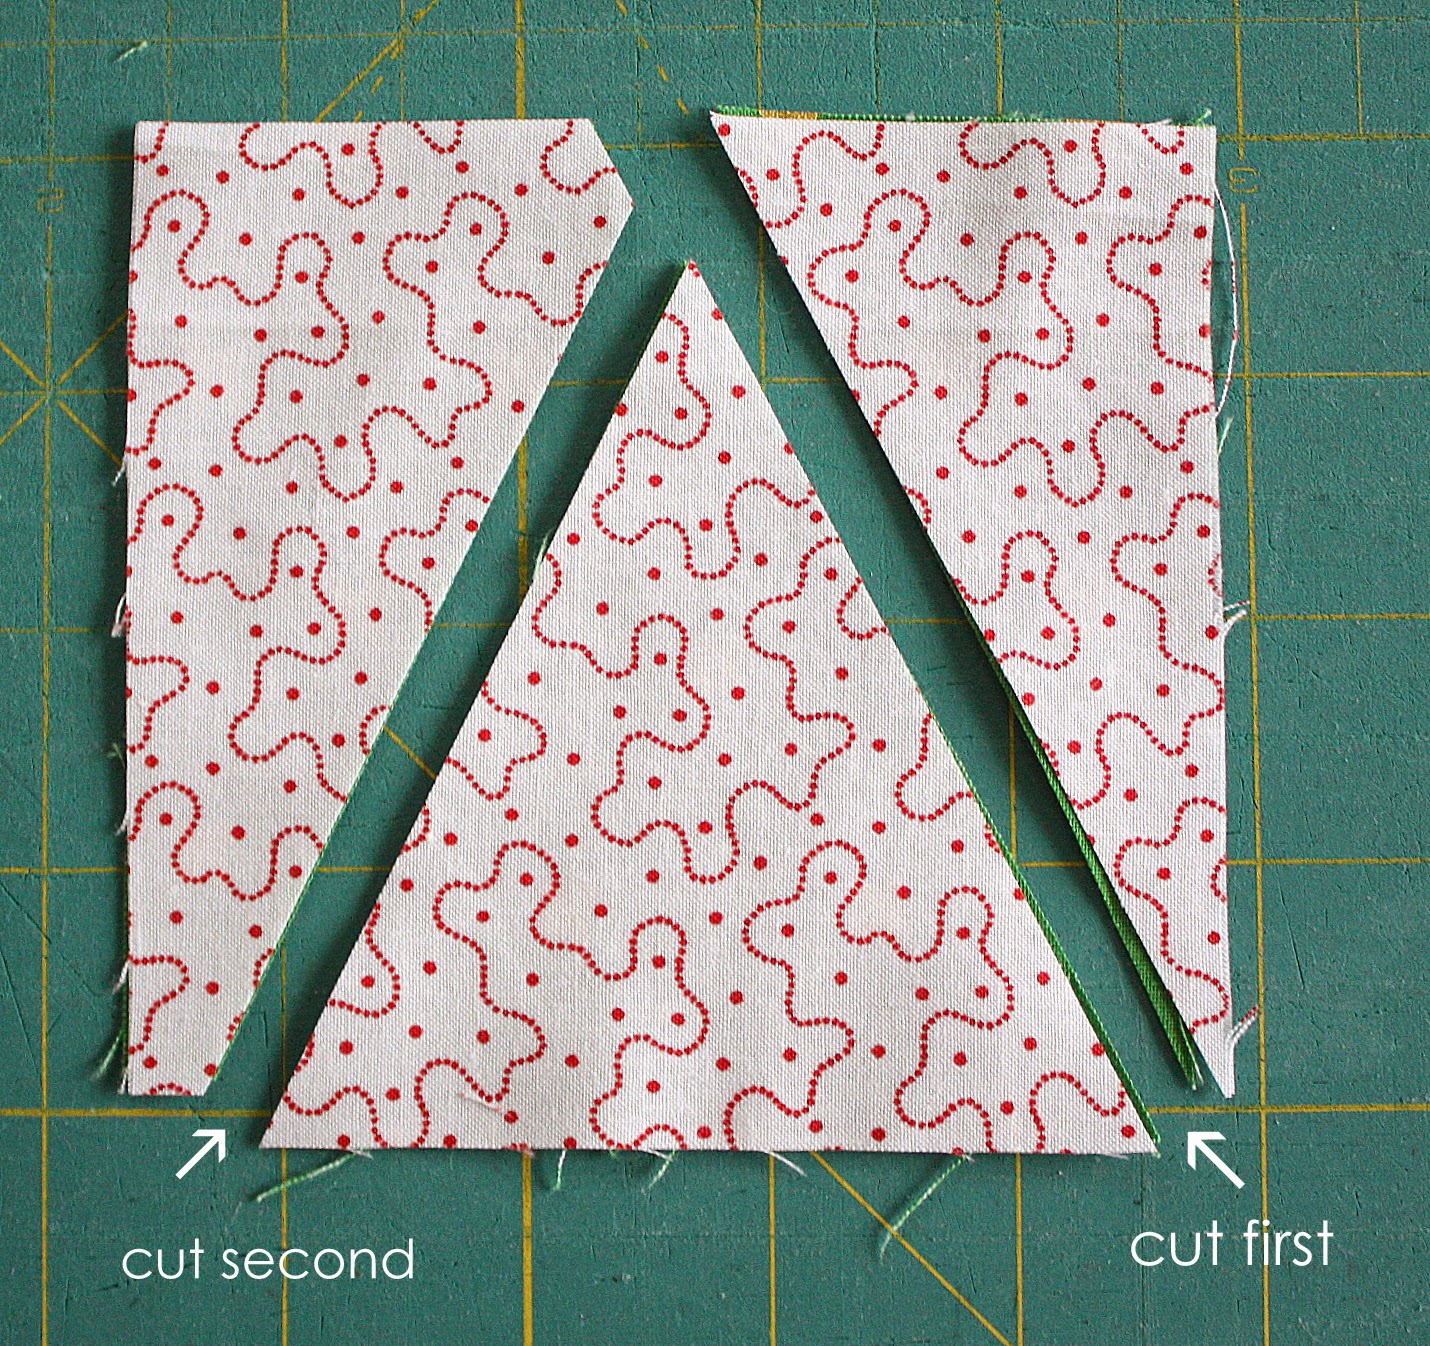
Stack the two 4 ½'' x 4 ½'' squares on top of each other, with both right sides facing up. Using a ruler and a rotary cutter, cut one side of your 'tree shape. Pull the right side away and make a second diagonal cut to create a triangle 'tree' shape. Keep these pairs together, if you are mass-cutting your blocks at once.
You can cut all of your pairs the same way (such as 60 degree triangles) or you can cut each pair slightly different by cutting the triangles at different heights, angles, etc. I really loved giving the trees a little bit of personality and making them all different. This project is very 'improv' inspired, so have fun experimenting!
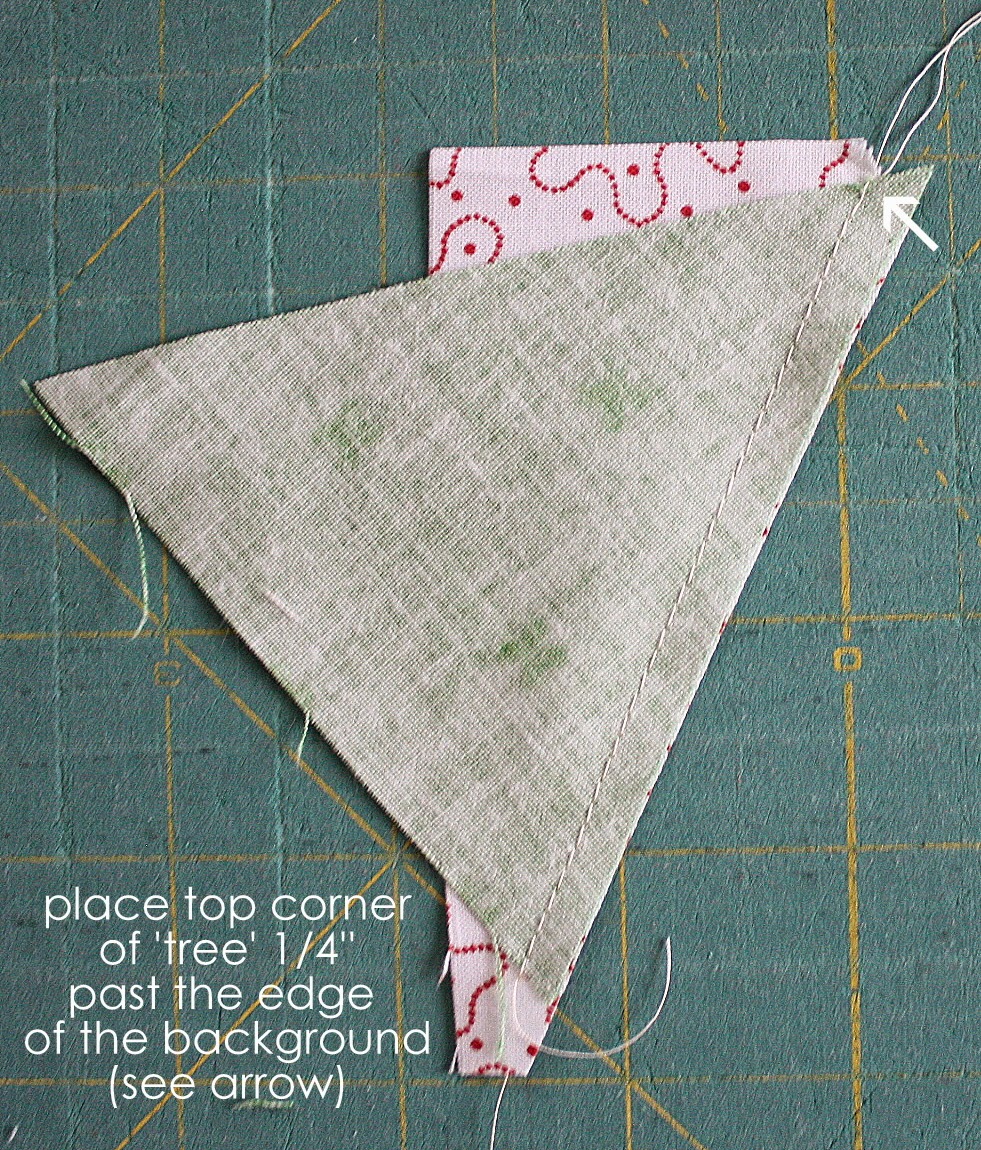
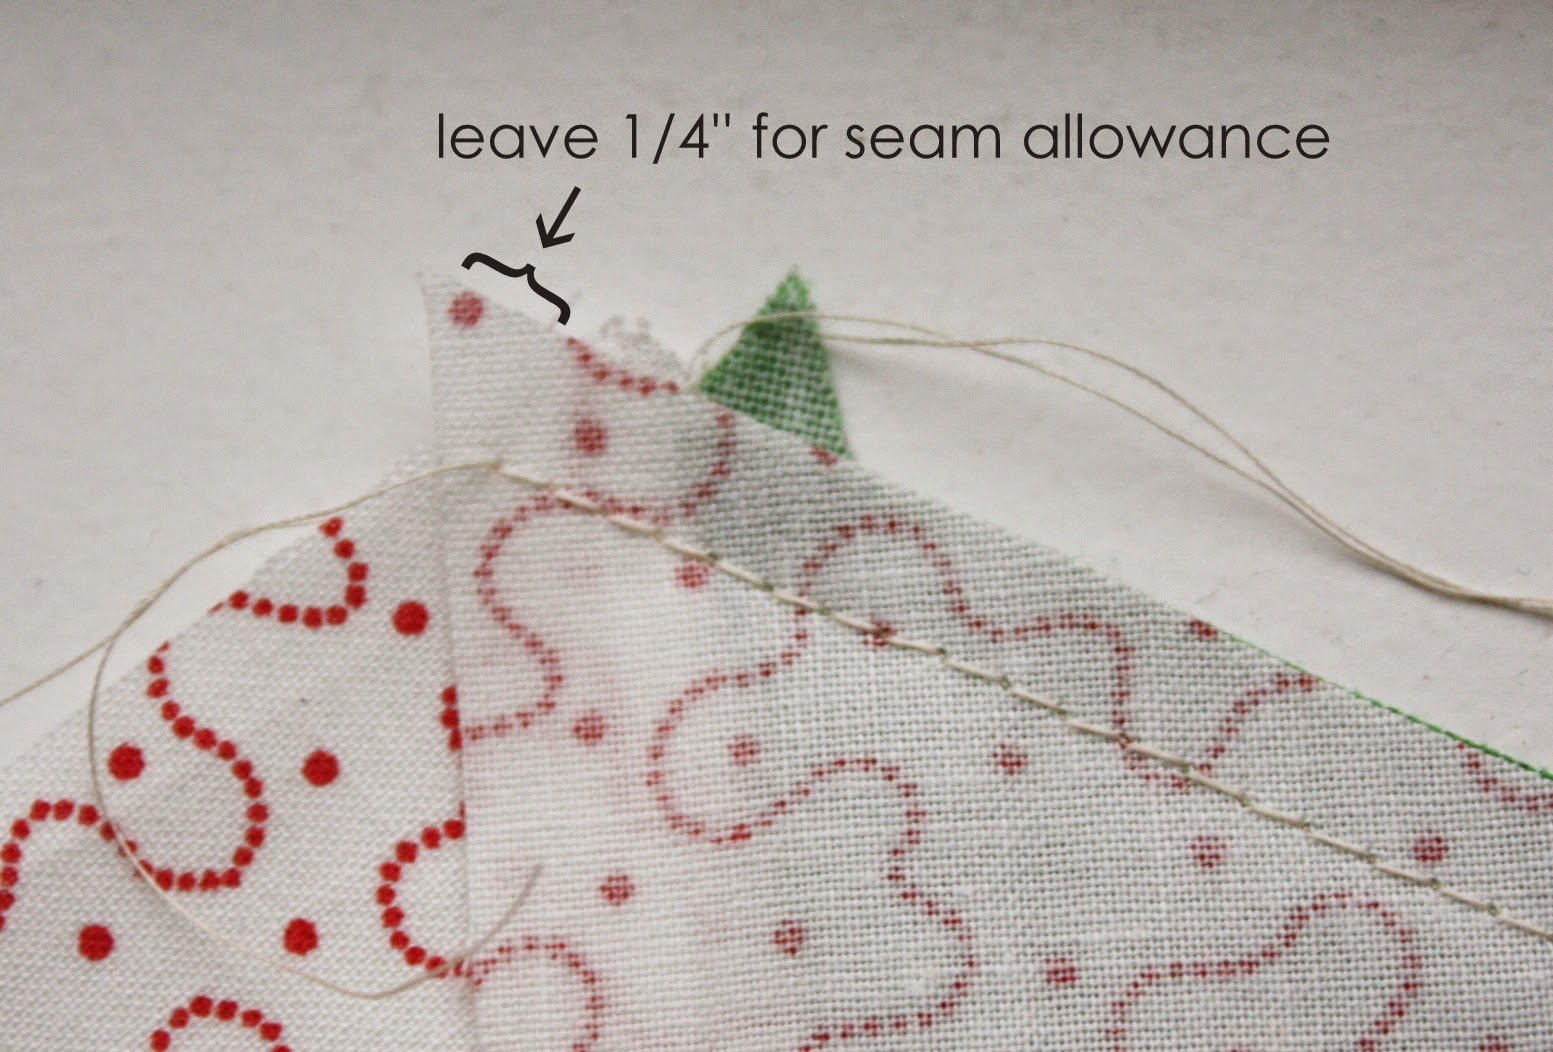
Using the original pair of squares, mix the white sides with the green 'tree' and the green side triangles with the white 'tree'. Lay the contrasting 'tree' triangle, right sides together and sew it to the left-side triangle. (Your first seam will always be the line of your second cut.)
Make sure that the top tip of the 'tree' triangle extends ¼'' beyond the top edge of the side triangle and sew a ¼'' seam. Open up 'tree' piece and press seam allowance to one side.
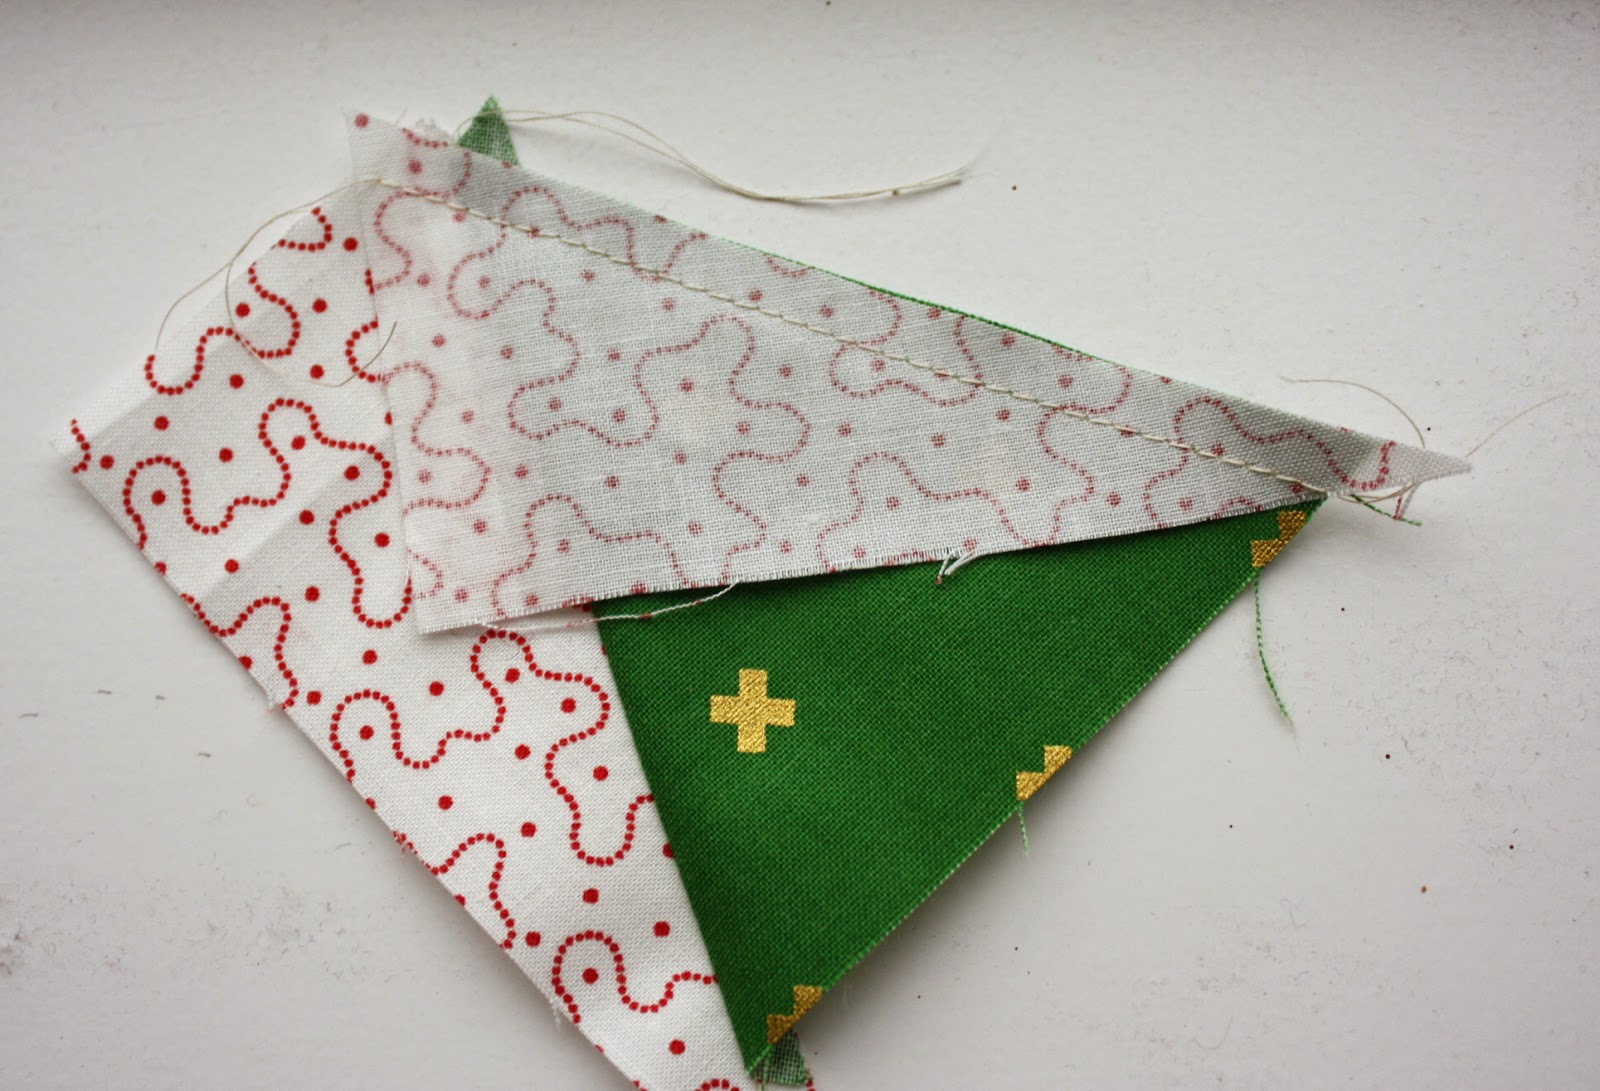
Sew the second side-triangle to the other side of the 'tree' triangle.
Again, make sure the top triangle extends a ¼'' beyond the top edge of the pieced block. Press seam to one side. Square-off the top edge of the block and the bottom edges of the background triangles so that they are even with the 'tree' bottom.
To add the trunk, sew the brown 'trunk' piece in between the two coordinating background prints. Press seams toward the brown.
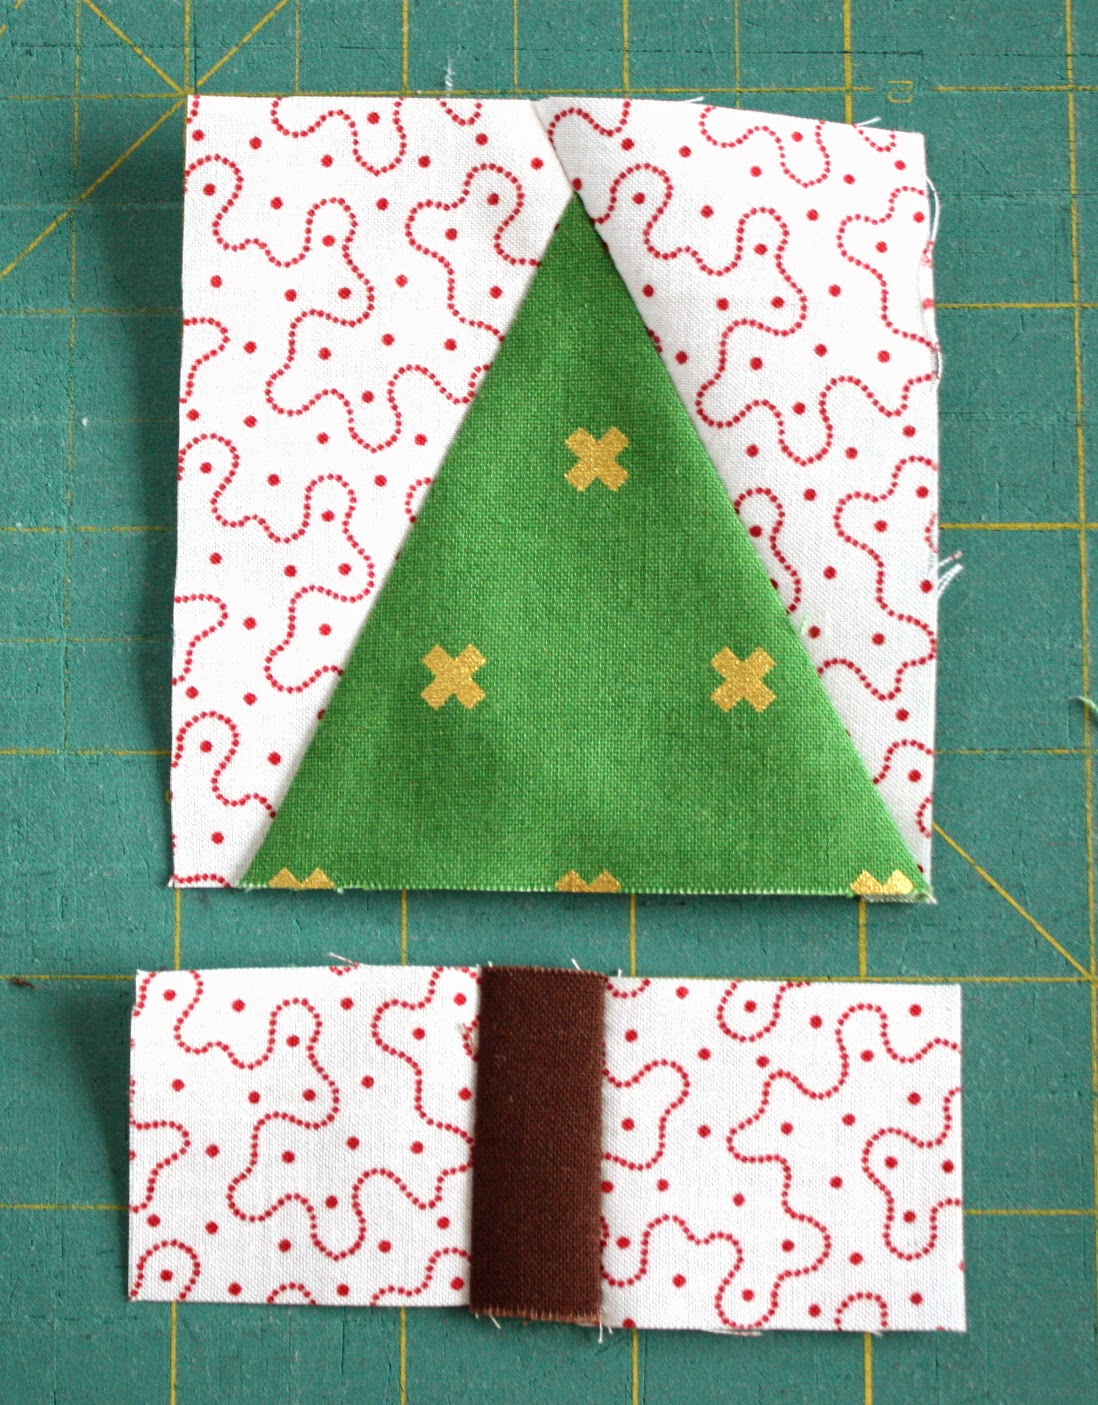
Sew the trunk unit to the bottom of the tree unit. The trunk unit might be wider than the tree unit. That's okay- just center the trunk under your tree and sew it in place. Then square off sides of the finished block to make them straight edges. My blocks were squared to 3 ¾'' wide by 5'' long. Yours might be different. All that matters is that all of you blocks are the same size.
You could change the scale on these Christmas tree quilt blocks as much as you want by starting with bigger or smaller pieces of fabric. The versatility is endless and it's such an easy one to personalize.
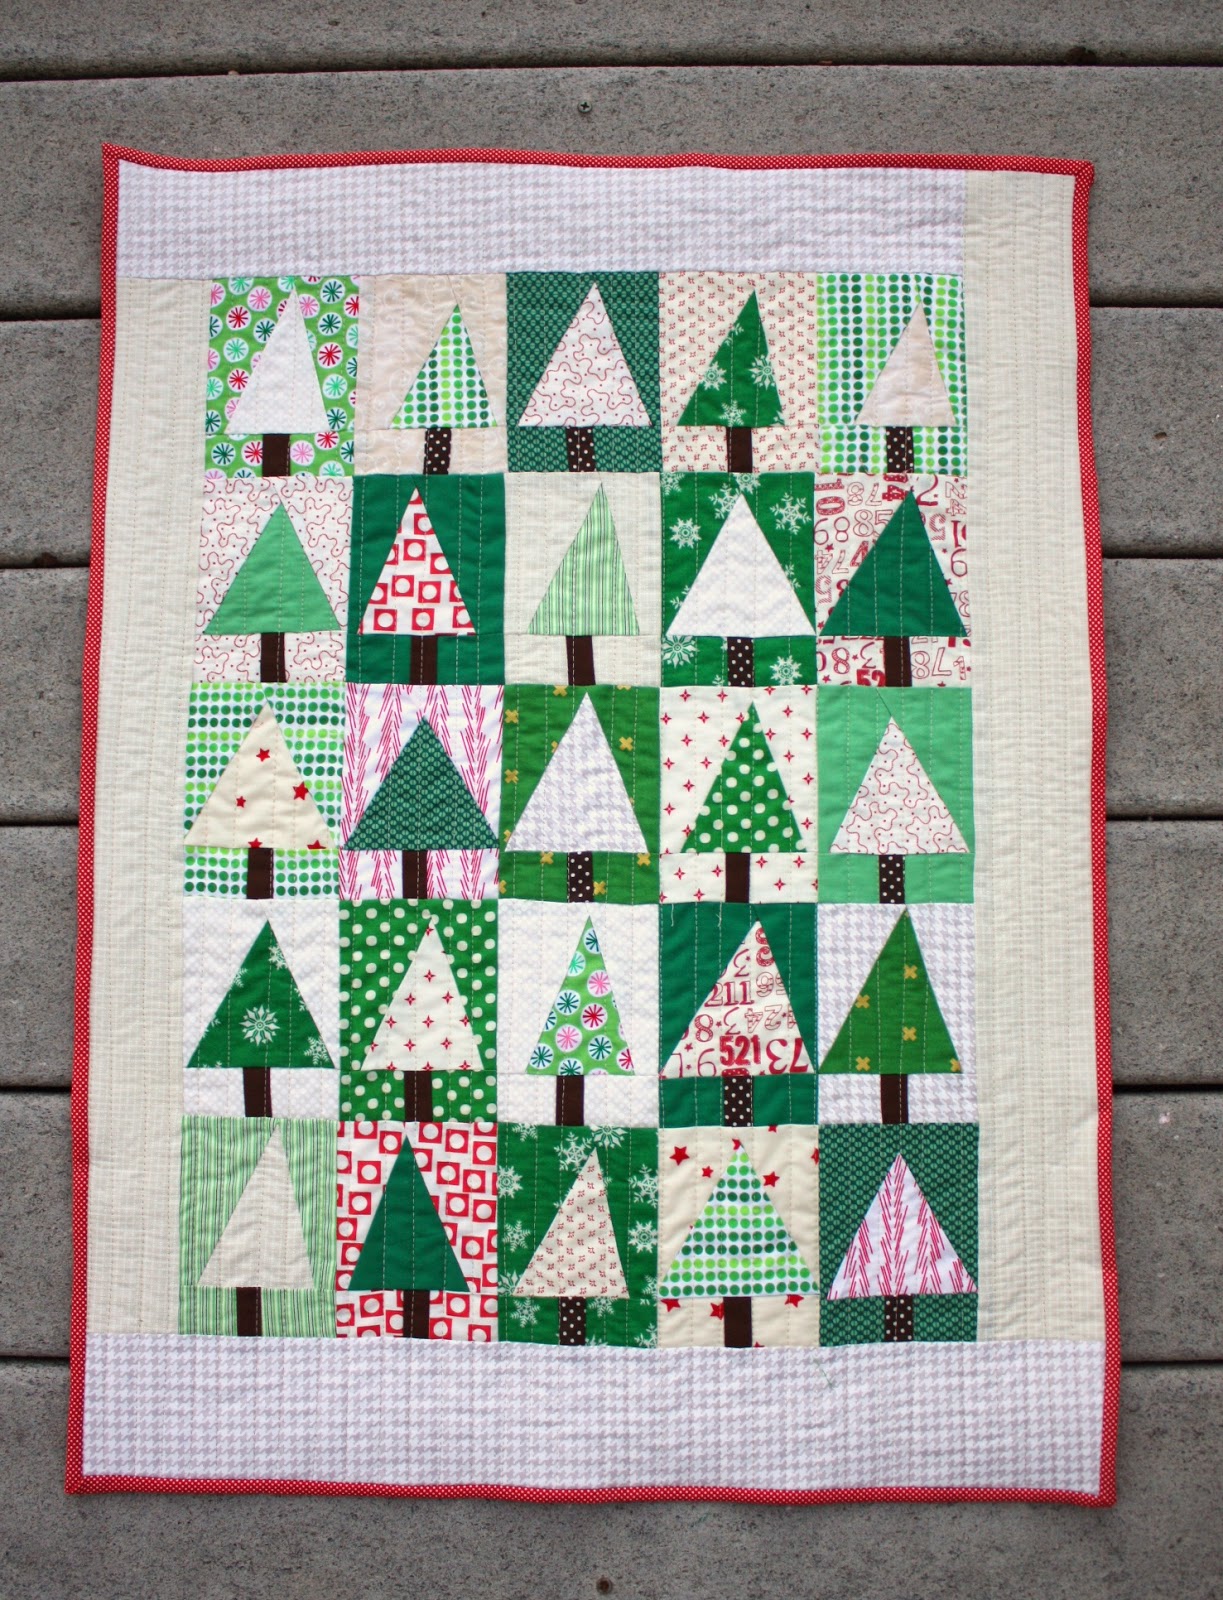
I sewed 25 Christmas tree quilt blocks into a mini quilt. My borders are 2 ½" wide finished, but you can certainly make yours however you so desire. Remember, this doesn't need to be perfect. A little bit wonky and a little bit improv-y makes a statement too. Feel free to make it your own.
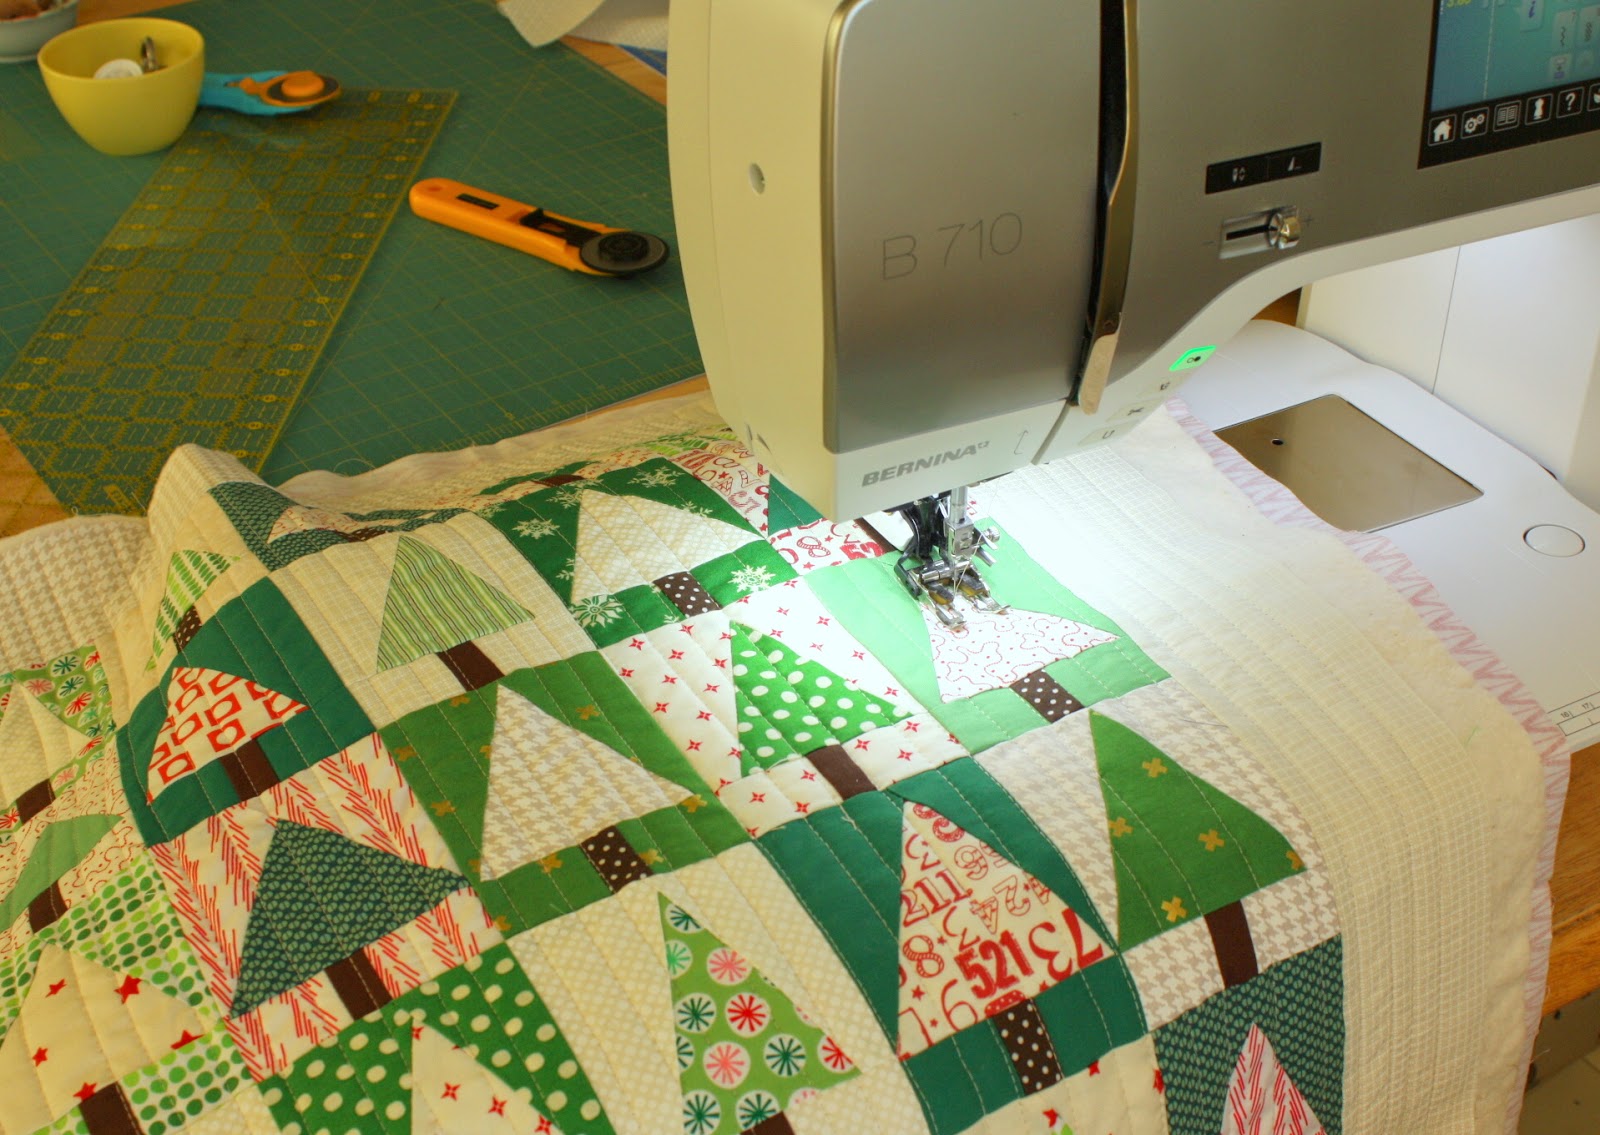
I quilted very simply just using straight lines to give the quilt texture, but not distract from the trees. (And because straight lines is all I really feel confident doing.)
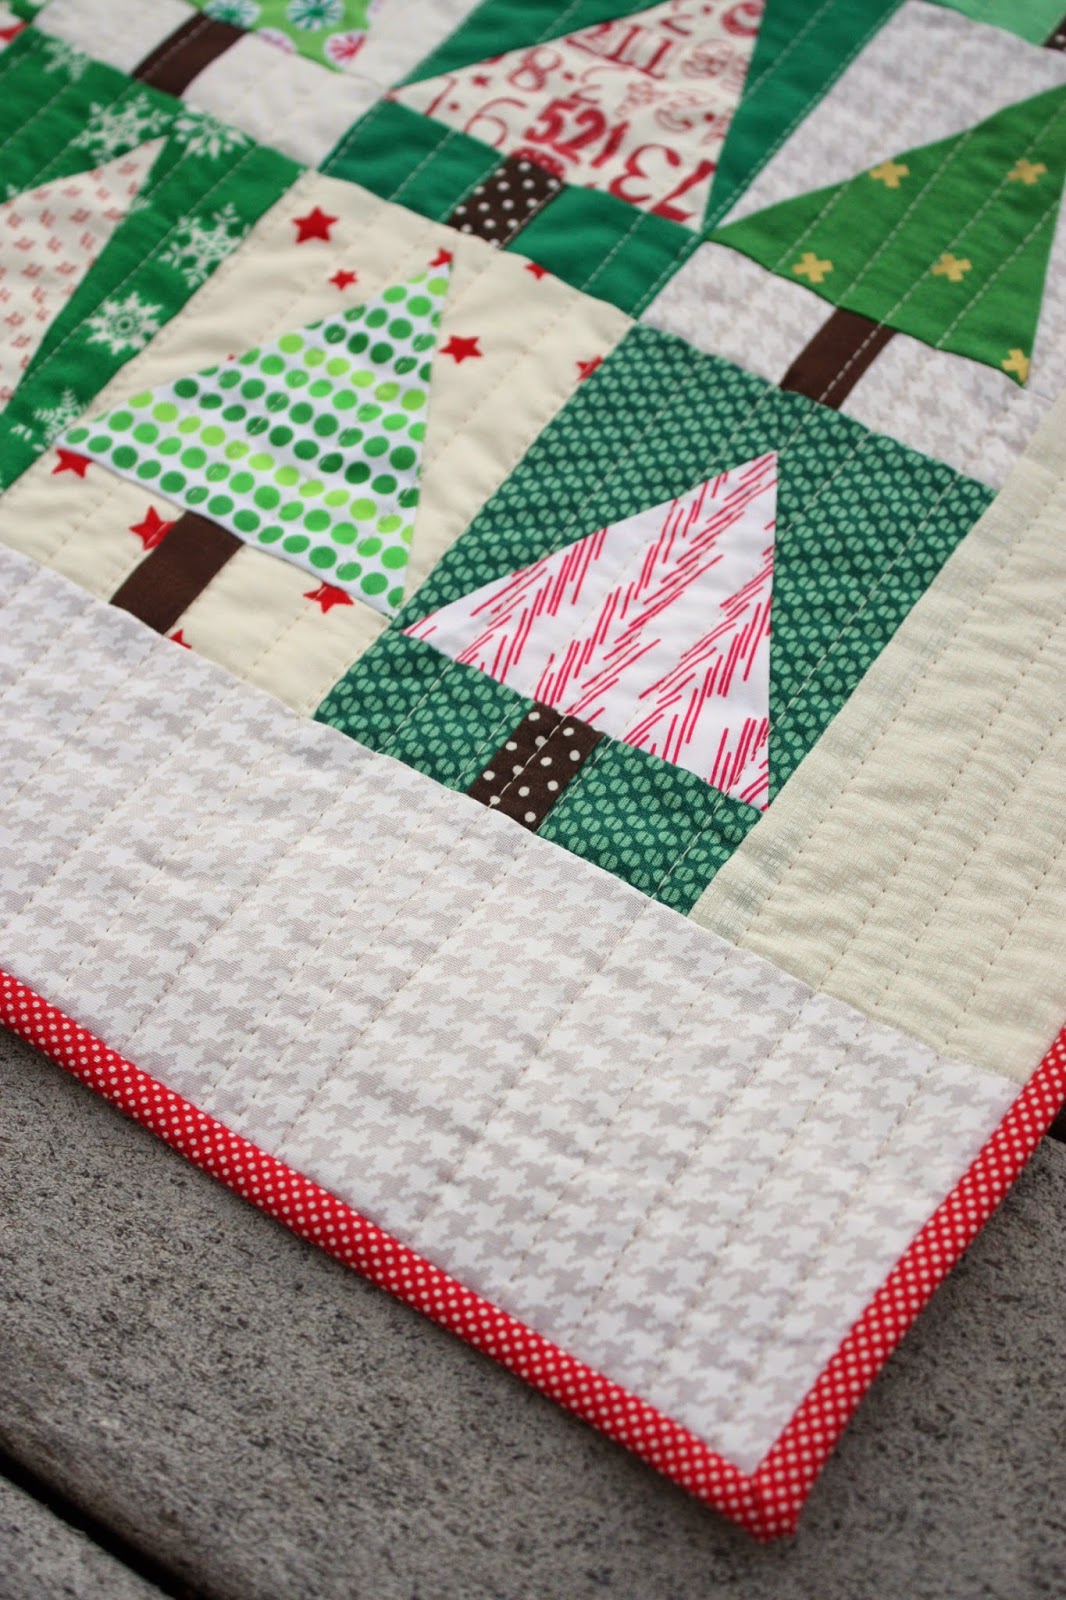
I used a red micro-dot as the binding for this quilt to give a tiny bit more red to the design. I purposely made the binding small though, to keep it minimal.

These Christmas tree quilt blocks could be used in all kinds of ways. They're SO quick to assemble that you could make a whole forest really quickly. I plan to make a couple more pillows or a table runner. I also made a block into a little mini patchwork tag/ornament.
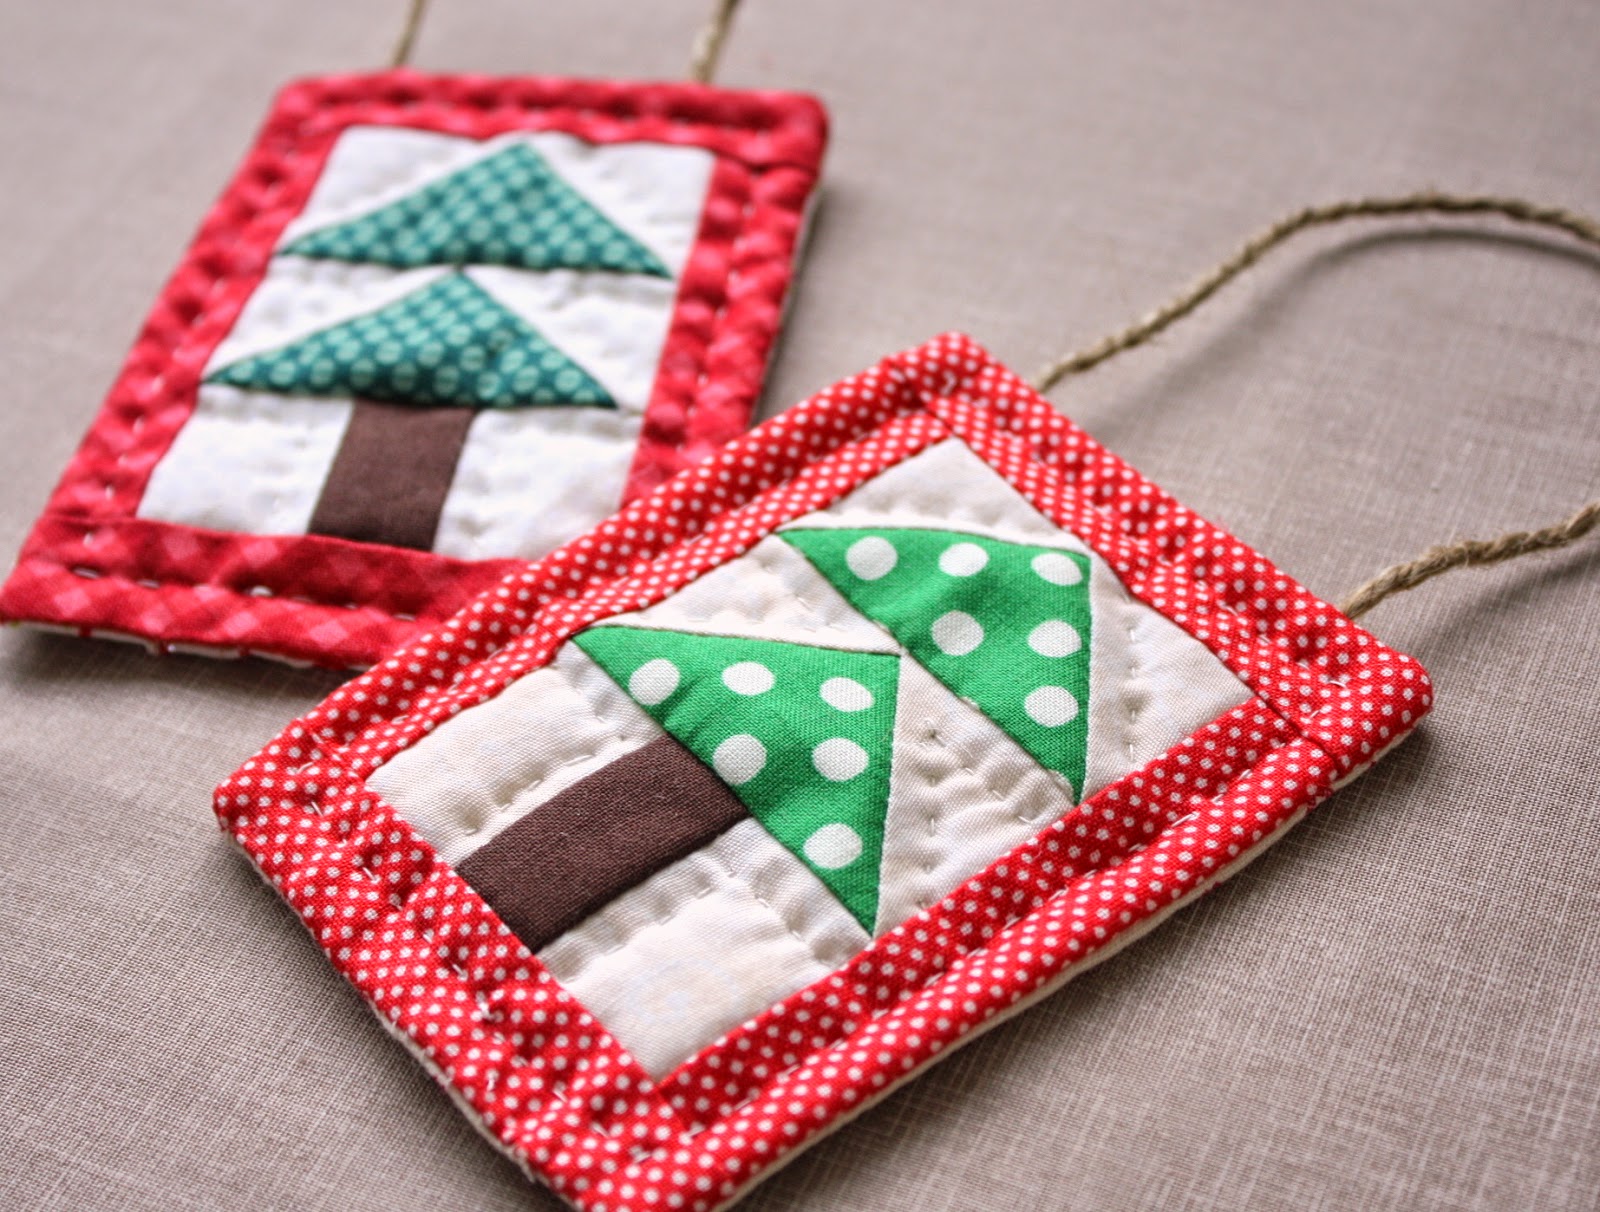
I have a tutorial for the ornament assembly, as well as another little tree block over at the U-Create blog this week. Patchwork Tree Ornament tutorial here.
Since making mine, I'm noticing other little triangle trees pop up on Instagram and blogs. (Great minds!) Like this beautiful Fall Forest pattern and quilt-along at Little Blue Bell.
Have fun making your Christmas tree quilt blocks! And if you make some of your own share them on my Facebook page or tag them with the hashtag #holidaypatchworkforest. I'd love to see all the variations!
I also have a tutorial for a larger-scale version of this wonky-tree block here.

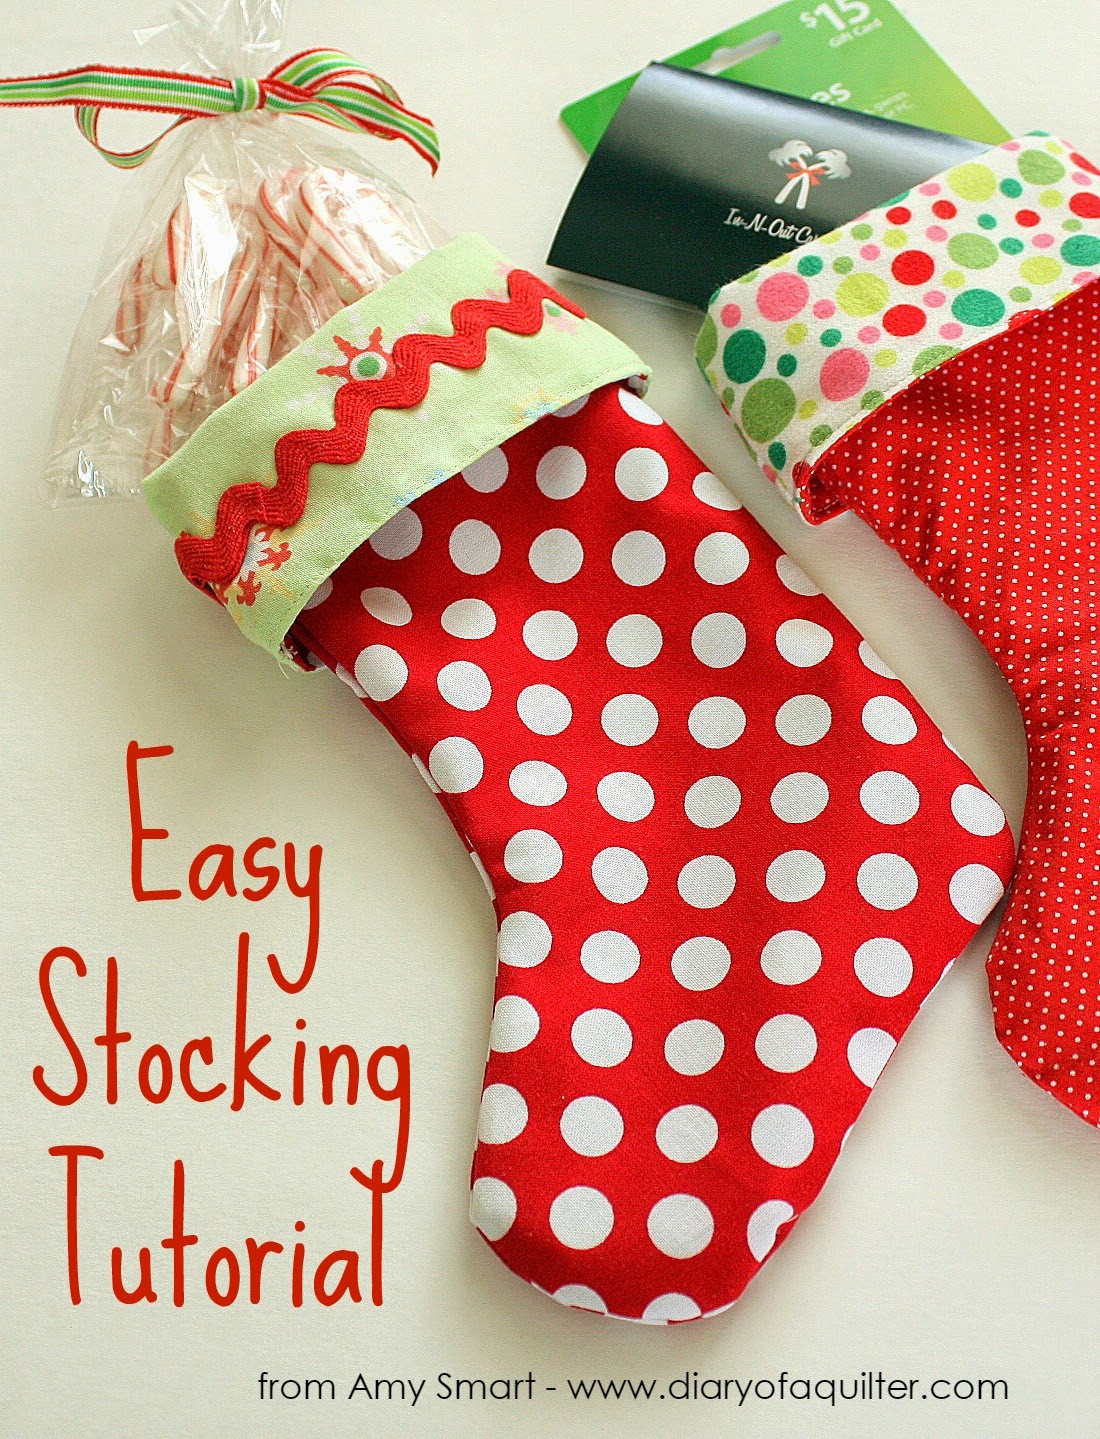
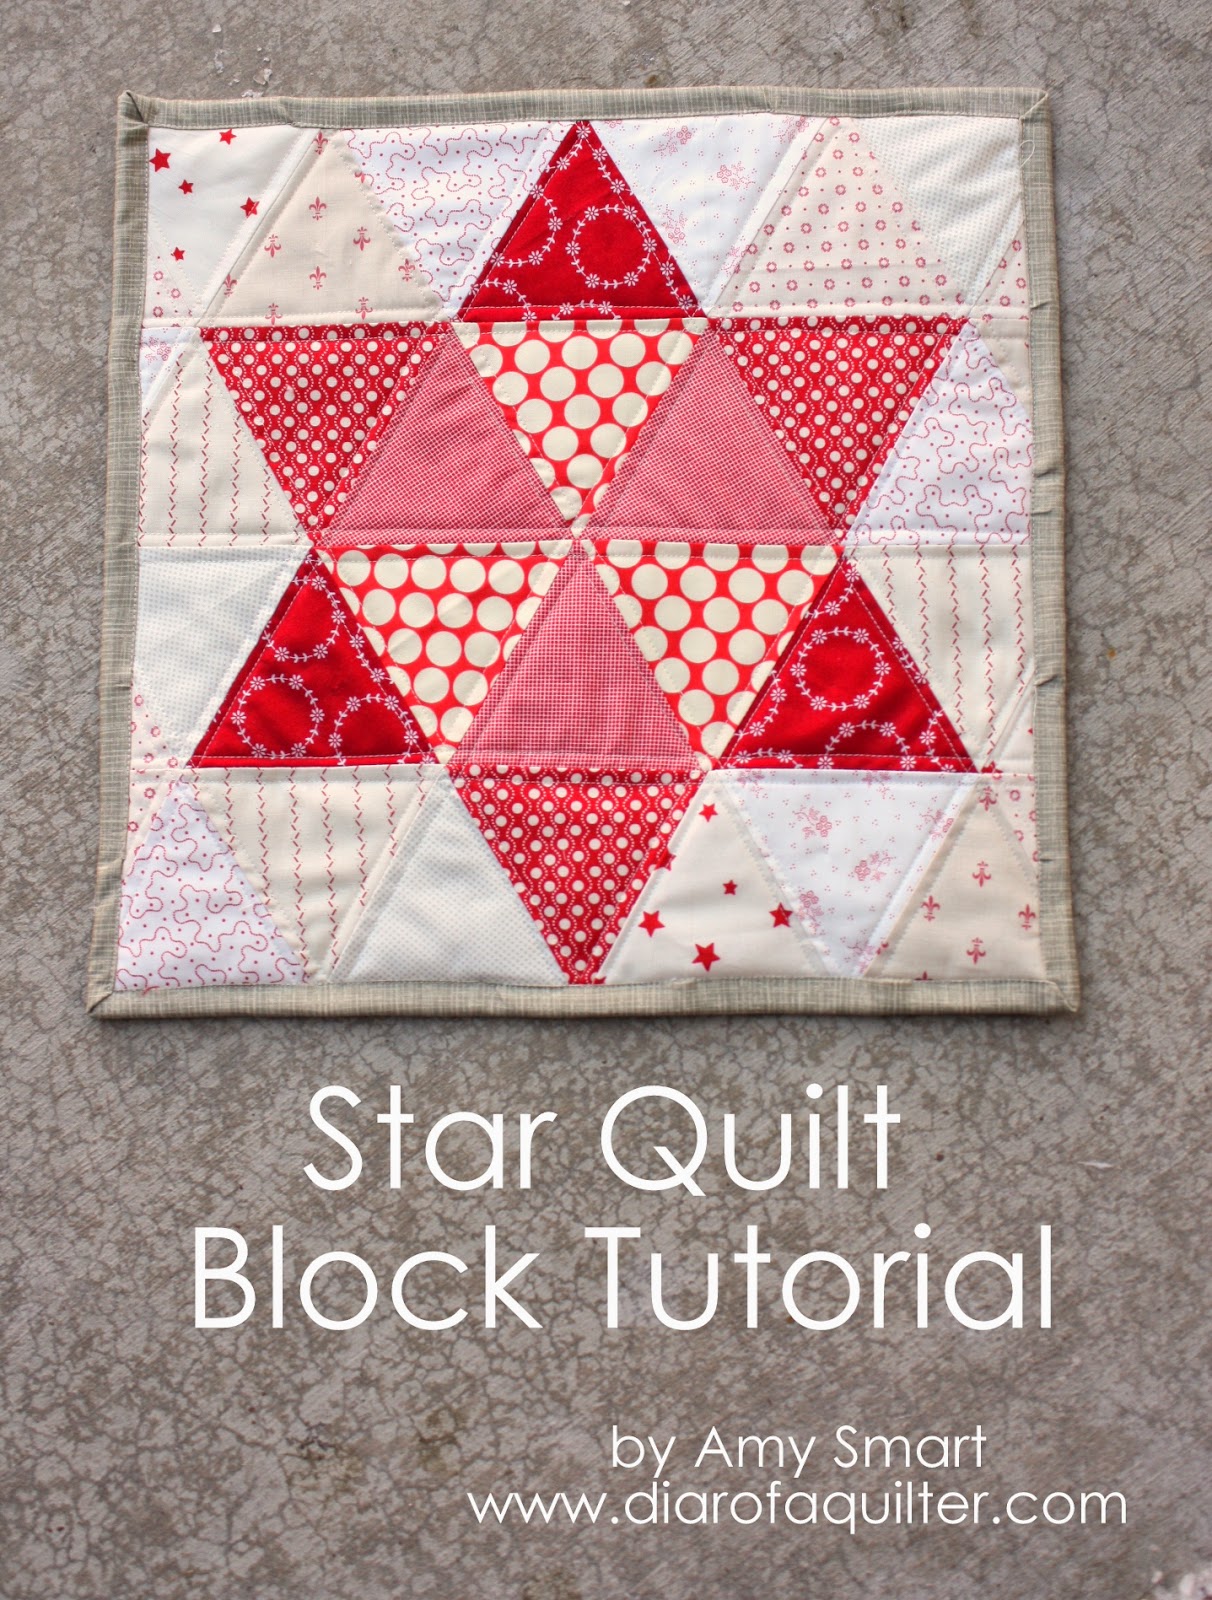
If you are looking for other simple sewing projects for Christmas you might be interested in one of these: Felt Snowflake, Easy Stocking, and a Star Quilt Block.

magistra
I Love this little tree quilt! I got excited and bought way too much Christmas fabríc so I better get sewing! This looks like so much fun! And a great skill builder for newbie me 🙂 thank you very much for going through the time and trouble of sharing it! Magistra13 at yahoo dot com<br />Beth
tina
Thank you for this tuto. Love your tree quilt!
gigi
SUPER CUTE!
Jill
Such a cute and simple Christmas tree quilt pattern. I am going to buy some reds, greens, and whites. Thanks!
Lucy Daniel
Thank you for your WONDERFUL Christmas Tree tutorial - LOVE IT, LOVE IT, LOVE IT!!!! Will start now. Working on preemi quilts for donating.
Rachel
This is so cute!
Darcy
I really don't need to another another project to my to-sew list but this is so adorable - I think it needs to happen! Thanks for writing this up 🙂
Jem-fl
Thank you for sharing this tree block, so many possibilities! <br />It's going on gift list for hot pads! ♥
Casandra
So sweet! Thanks for the tute.
Betsy
Amy, it is adorable!
Mary Pat Callihan
Oohhhh Amy! Thank you for this post! I have been trying to think of something a little different to make for my book club Christmas cookie giveaway. We have to make a container for the cookies and I think a small bag with the trees on it would be perfect! Thanks!
Muselle
the cutest and easiest little project i've found yet this year! love it... I'm seeing trees in my future!
The Cozy Pumpkin
What a darling little forest! And I like how the fabrics are Christmas-y in color, but aren't screaming Christmas at you. If that makes any sense whatsoever.
dolores
Ack! So cute! Wish I had seen this a couple weeks ago when I signed up for an ornament swap...storing this idea away on my looooong list of "Hope to Makes"!:)<br /><br />I still need to think of an idea for the Christmas fabric I got from you...I'm thinking one from your book would be a great idea....full circle huh?:) xo
Nedra
Very cute Amy! Makes me want to play with my Red, Greens and Whites!
elnorac
Oh, Amy, your little trees are adorable! Thanks so much for sharing this well-written tutorial (said the retired teacher, who appreciates good writing;)! And thanks for sharing the triangle trees, too. Somehow it never occurred to me to use flying geese as trees.
KMSC
So cute, Amy. Thanks for the tutorial!
Tawnie Duckett
I love these trees and simple way to cut and sews! I also love the little ornaments!
✾Jamie Lee Cooley✾
So pretty! What a clever way to make them. I'm doing the forest quilt along but of course I am not on Instagram so I can't share my progress there. I need to get on there!
Lesley Gilbert
Loving this mini quilt - it's going in my 'to-do' list. Thanks for taking the time to make this tutorial 🙂
elletaylor
I love these!!
Karen
I love it! Thanks for the tutorial.
elletaylor
Could you please clarify the sizes of the 3 pieces of the tree trunk area
amy smart
Hi! The sizes to cut for the trunk portion are in the photo with all of the pieces to cut - third photo down. I hope that helps!
Suze
Oh, thank you for a great tutorial. After I read your tutorial, I thought I'm not much of an improv type person and then I had an aha moment. I took a Liberated Basket class with Gwen Marston last year at the Green Country Quilters Guild's Quilt Show in Tulsa. It was so much fun. I guess that was improv and I didn't even think of it that way. I can do this, too. Thanks, thanks,
I am Just One Mom
Wonderful tutorial for darling projects! Those ornaments are on the list, now! Thank you!
Elsa
Love all the trees and the ornaments are so cute! Thanks so much for a great tutorial!
diane
Thanks for the tutorial Amy. I hope to make a few of these when I return. Maybe even a whole quilt.
tbear
Thank you so much for the Patchwork Forest tutotrial..I've been procrastinating on finding one I like. This one I'll make! I love the simplicity of this design Thx again~*
Amber
Lovely! Great tutorial
Irene Foss
I love your cute little tree quilt and also the small one tree cuties. Wouldn't some tiny one tree cuties be cute hanging on the Christmas tree. I wish I had time to make these. <br />I'm in the midst of making 5 twin sz. quilts for the great grandkids. Not for Christmas but just trying to get them all put together and ready to layer.<br />I'm Crocheting a pair of wristies and a
Vicki H
I love the mini quilt. Thanks for sharing your tutorial. I am adding this to my list for next year.
Barb
Hi Amy,<br />Am I missing something? The picture showing your cut pieces have sizes on your rectangles (the pieces that attach to the sides of the tree trunk) that don't match your printed instructions. Could you clarify please. Thanks!
amy smart
Whoops! Thanks so much for catching that Barb. (Just when you think you proofed something 10 times...) The measurements in the picture are the right ones. I fixed the text. Thanks again!
Barb
Ha, yes I definitely know what you mean about proofing! Another thing I noticed is that if you look closely at the dimensions printed under the green rectangles in the photo it is incomplete. It says 2" x 1 /2" instead of 2" x 1 1/2". Sorry that my crazy brain sees all this stuff- it drives me nuts!!! Just didn't want there to be any confusion in such a great tut! I love
amy smart
Thank YOU!! Fixed again. Um, can I hire you?? lol
Barb
You're too funny! Now I need to get to it and make some trees!
SewPsyched!
So cuuute!! I am going to have to make this in all red and white, and Wonky!! XX!
QuiltCandy
Such an adorable Christmas tree quilt!! Thanks so much for the tutorial and lots of inspiration 🙂
Anina
So cute! I love the straight line quilting on your quilt.
Mrs.Pickles
love it totally pin to my to do list!
Jan
LOVE, LOVE, LOVE! Thank you for posting the instructions!
PersimonDreams
adorable!!!!
blogger
This is so cute! It's going on my to-do list.
Amy DeCesare
Somehow I almost missed this sweet tutorial - thank you so much for sharing how to make this awesome quilt! I'm lucky that someone put it on Pinterest, and now I've added it to 2 different boards of my own. I really want to make a fun quilt like this!
Maggie
Thank you for this beautiful tutorial- may I ask what is the finished size?
Amy
Great question. This mini quilt finished at 21.5" x 28"
Shasta Matova
Thank you so very much for this wonderful tutorial. I have been making a quilt of my own using Christmas fabric. It isn't finished yet, but you can see my progress on my blog. I have also pinned it to my Pinterest board.
Shasta Matova
Hi, I'm back to tell you that I finally finished my own Christmas tree quilt and have posted it on my blog. Thank you again for this wonderful tutorial.
Lucie
Easy! Love it❤️❤️
Pat Hurdle
This is really a nice quilt. I think it would be really unique done in the rag type quilt or a SAYG quilt.... What do you all think?
Adreanna
I am so in love with your quilt!! Just bought a some Christmas inspired fat quarters. I've always wanted a Christmas quilt, so maybe if a start now, ill have it done in time!! Thanks for the tutorial. The trees will also make great Christmas bunting!!
Julie Andrea Drevinskis
Thank you so much for sharing all these lovely patterns with us. btw .. pinned ya! 😀
Amy Smart
Thank you for sharing!
Barbara McDonald
How did I miss this?? I must have been sleeping or something! Just wanted to say how much I adore this quilt and the one you posted today - I just may have to start hoarding some modern prints to make one of these in the next year or two. I'm just not sure if my Civil War prints and 30's prints will be able to find room for some modern stuff . . Talk about your culture shock!!
Peggy Adcox
Love the Christmas Tree Quilt! I got out all my Christmas prints and greens & reds. I was able to make 20 blocks and think I have enough leftover fabric for backing in my stash. Thanks so much for this tutorial. I love the challenge of not buying anything new. Can't wait to sew everything together and machine quilt my sofa throw. Merry Christmas!
quiltsquiltsquilts
Thank you Amy for all the wonderful posts. Hoping to maker a Patchwork Forest of my own one of these days.
Helen
Hi, I just bought your $3.00 tree pattern .. may I ask, you mentioned you made different sizes of block .. how do I do that? I love trees
Amy
Here is a link with instructions for some mini trees: https://www.diaryofaquilter.com/2014/11/patchwork-tree-quilt-block-tutorial.html
I also have a pattern with multiple tree sizes included here: https://www.diaryofaquilter.com/2019/08/new-patchwork-forest-pattern-pine-hollow-version.html
murphyblossomfergus
How do I find this adorable pattern? I see the tutorial but no pattern. Thanks much!
Amy
Hi Thank you! You can find the printable pattern here: https://diaryofaquiltershop.com/search?q=Patchwork+Forest 🙂