
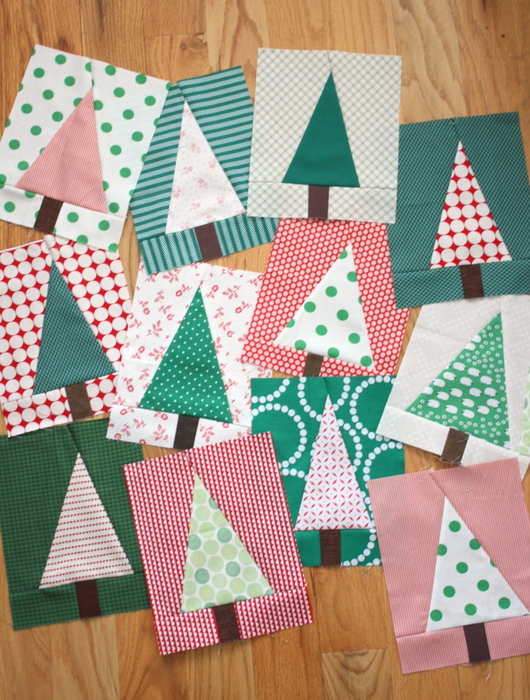
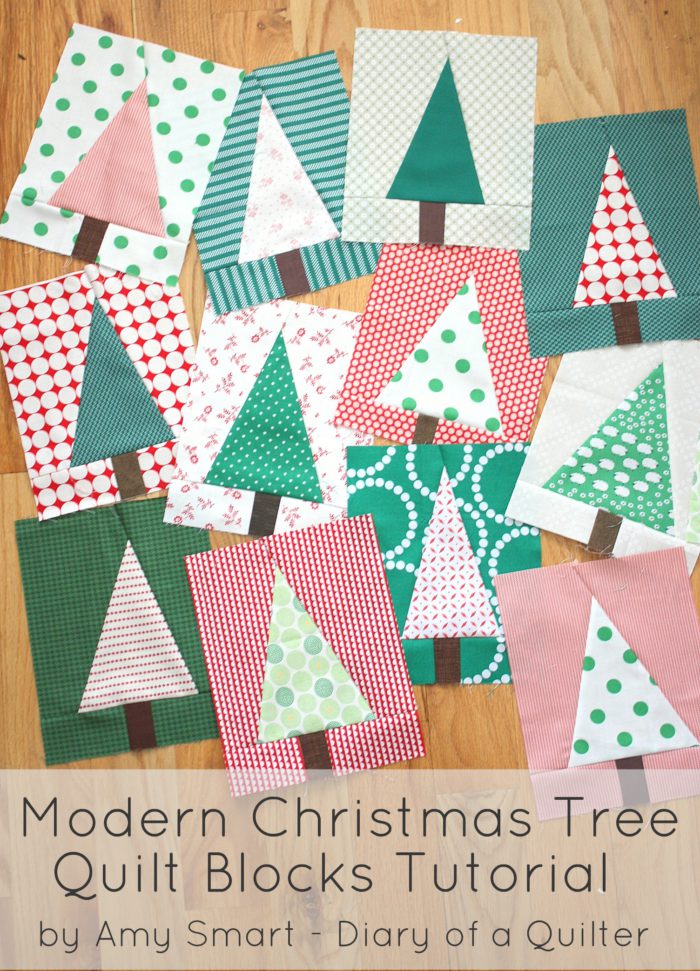
My pile of modern Christmas tree quilt blocks is growing. Today I'm going to share a quick tutorial for these fun and super fast blocks. (This post was updated in 2019)
(If you would prefer a printable PDF version, there is one available to buy for $3.00 here).
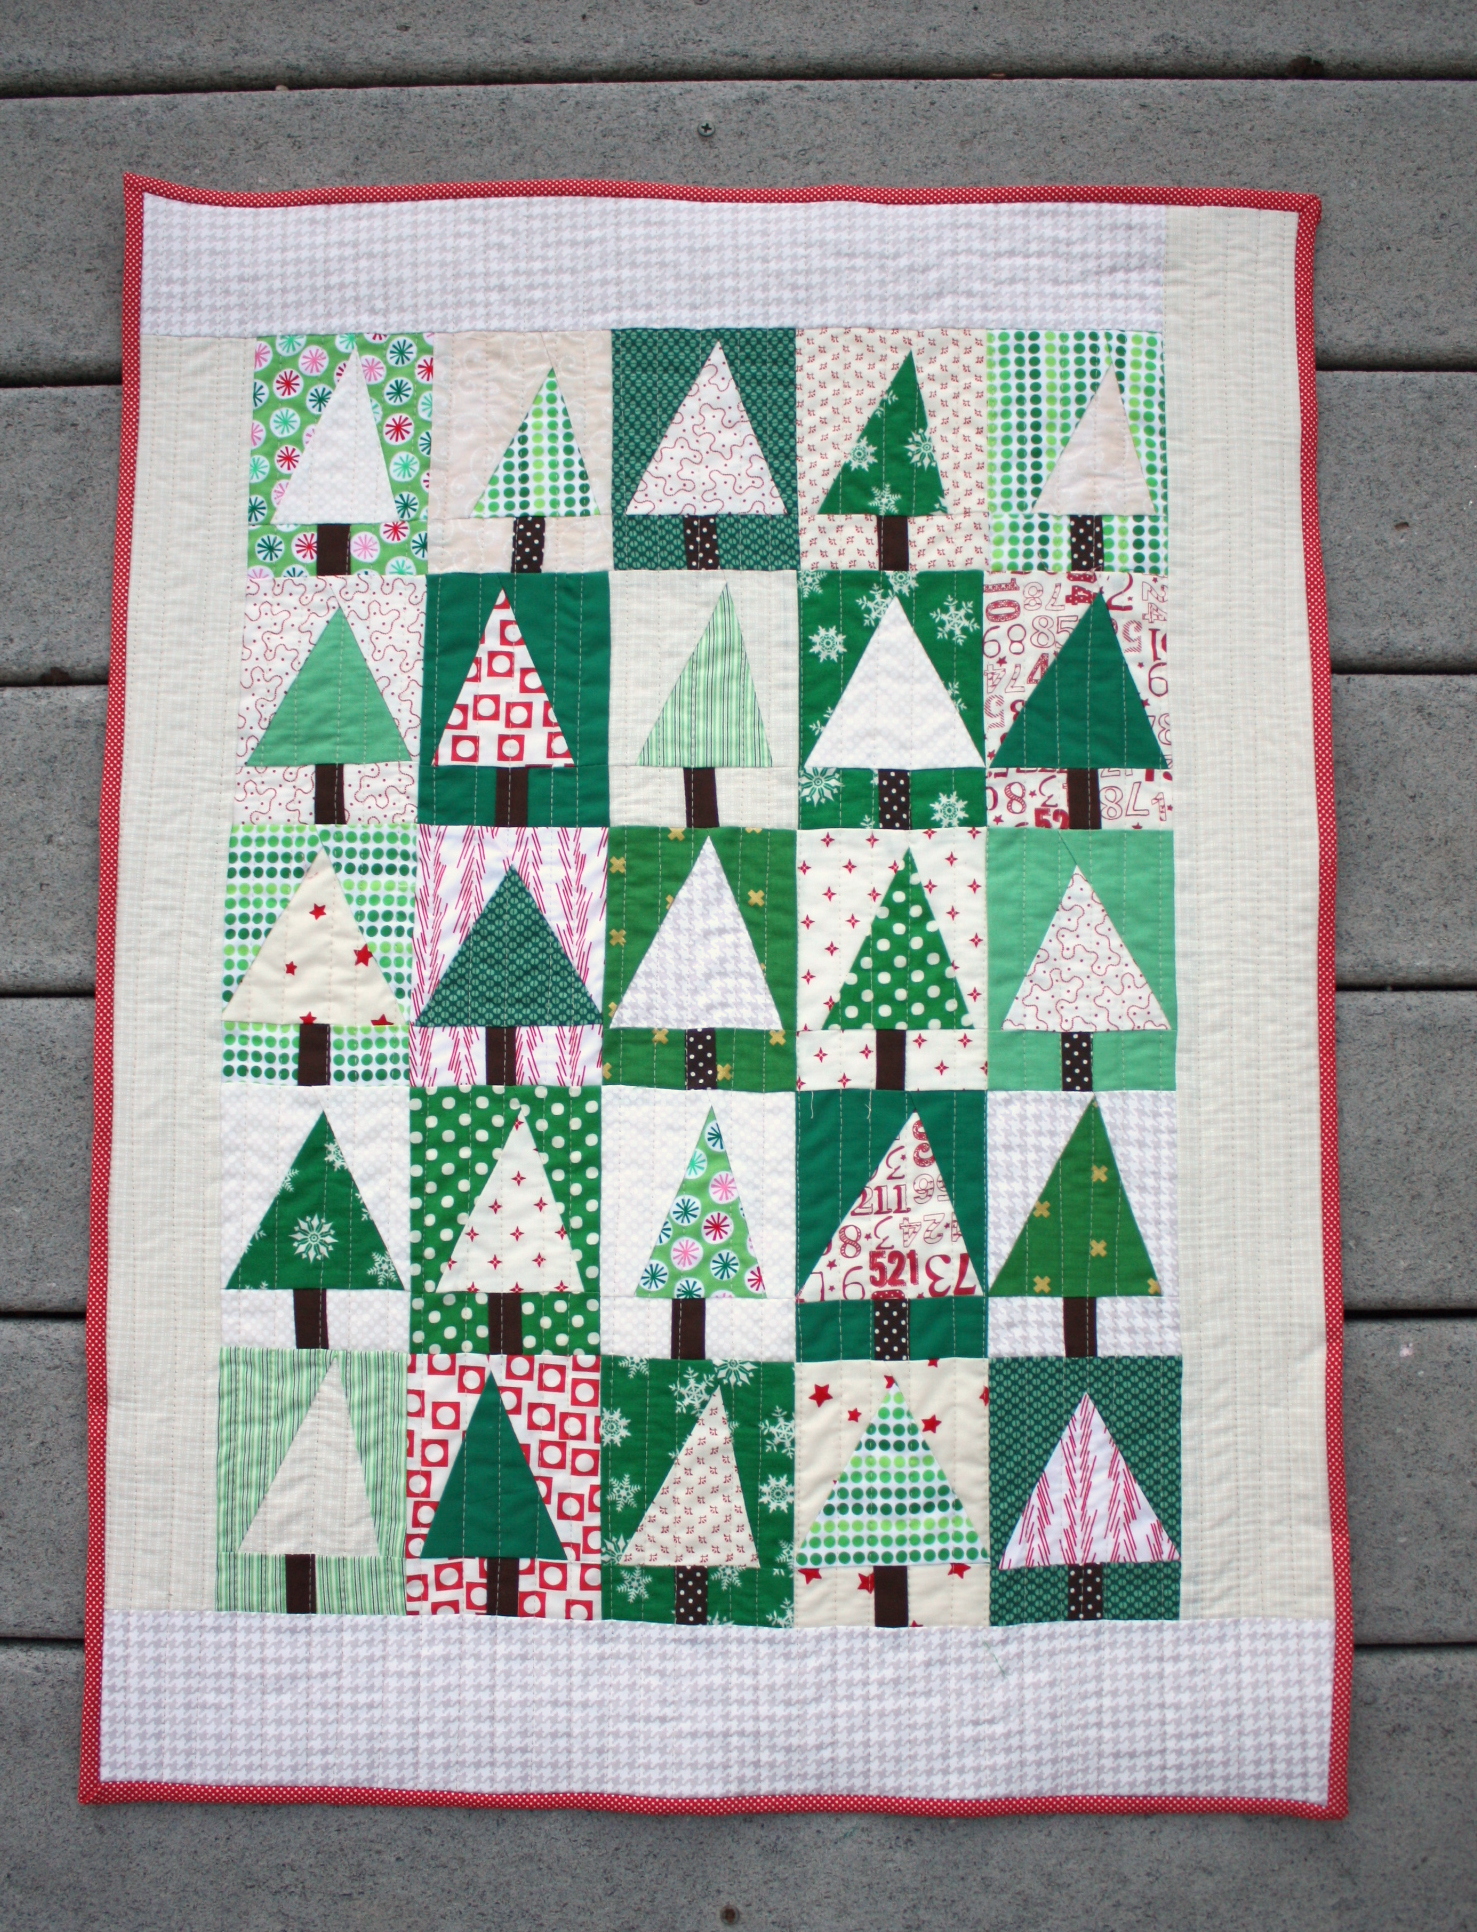
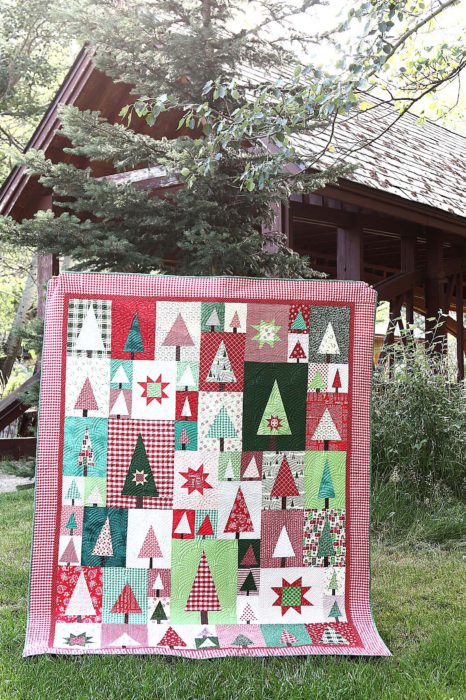
Last year I made this mini quilt and shared a tutorial to make your own. These blocks finished at about 3 ¼" x 4 ½". If you search the hashtag #holidaypatchworkforest on Instagram you can see some of the versions other people made with the tutorial. I was inspired by the versions that used a little more red and decided to make another one this year.
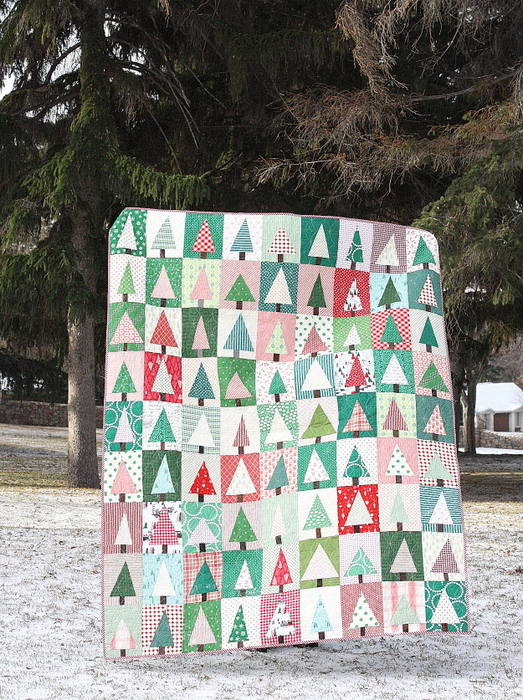
I also decided to make a bigger version with bigger trees and and quilt blocks.
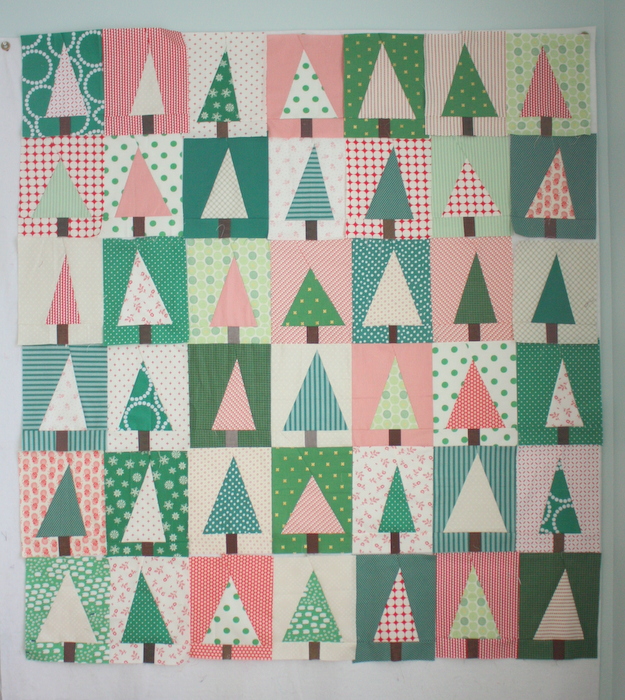
Here's where it's going so far. And I'm not going to like, I am LOVING where this Christmas tree quilt is going! So today I'm going to share some quick instructions to make your own larger version of this fun, modern Christmas tree block! I've also updated this post with a video tutorial walk through for those who prefer video learning!
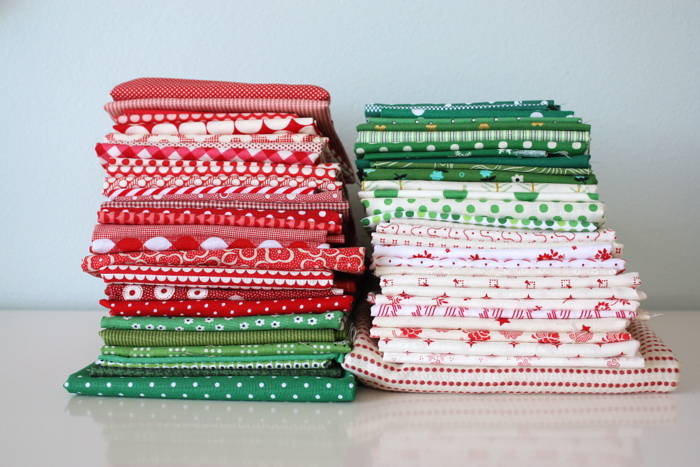
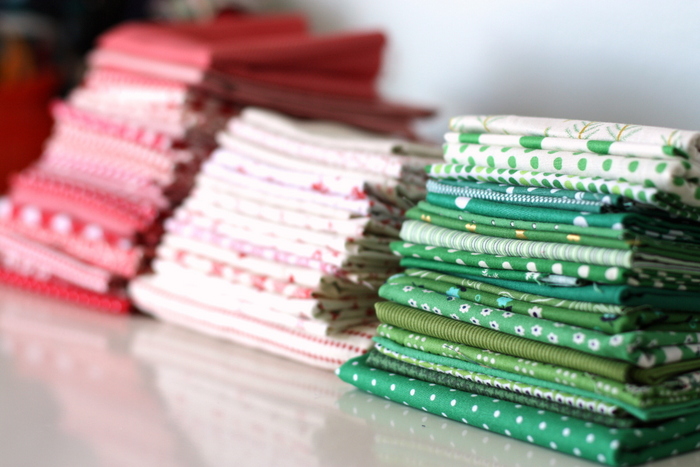
Here is the pile of fabric that has been sitting in my sewing room for the past few weeks. They make me so happy. This project is a great one for busting through a lot of fabric stash. And they don't necessarily need to be Christmas fabrics. Just pull your greens and reds together for a very Christmas-y look.
A few thoughts on choosing fabrics for your own quilt. It's fun to see the pictures of the two versions above. They each have a different look and I really like them both. This quilt is a fun exercise in choosing a color palette, using scraps (especially the smaller version), but you can't go wrong as you make it your own. Choose what you love. Here are a few tips that I used.
I love scrappy and using up favorite fabrics that I've been hoarding collecting for the past few years. I've finally reached the point where it feels so good to just USE those favorites. For this quilt I raided my greens, reds, and white backgrounds with red or green prints. I personally chose to emphasize Kelly and darker greens because I wanted this to have the feel of an evergreen forest. So I didn't use any lime greens, but I still threw in some warmer, mossy greens too, because the variety of shades gives the quilt some interest.
I went in planning to use reds in this Christmas tree block quilt too, but ended up weeding out the really dark reds. Instead I focused on red fabrics that also have a lot of white in them, to keep the reds looking lighter. I even threw in a few reddish-pinks to again, give some depth and interest.
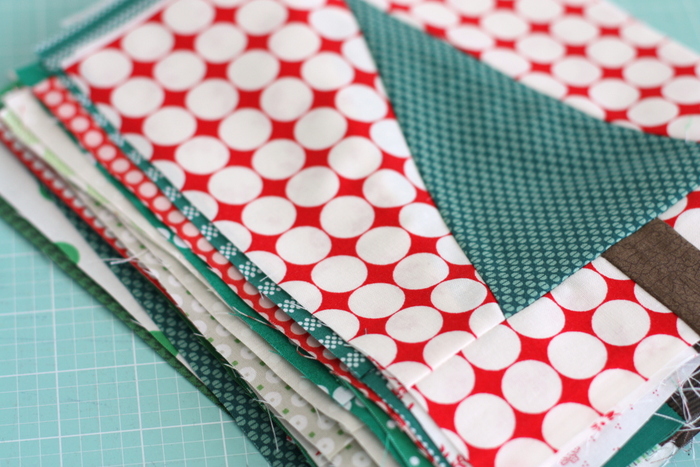
Finally, keep scale in mind too. Since I am using a wide variety of prints and I want it to have a scrappy look, I'm also trying to incorporate big scale prints where I can - especially because these are bigger blocks and they have a lot of space to show off prints. I tend to have a lot of medium and small-scale prints - which I love, but can look more jumbled if everything is the same scale. Throwing in some big prints - like the polkadots, stripes, pearl bracelets, etc - can give the quilt a lot of visual texture. Using solids as well can also provide good contrast to the prints.
You don't need to use any of this - I thought I'd just throw it out there for the heck of it, since people often ask me about choosing fabric for a quilt. Those are some basic guidelines that can make any quilt visually interesting - especially when you're going scrappy.
If you prefer watching a video, scroll down to the the video version of this tutorial. (It doesn't include fabric measurements, but I do walk you through the method for making these blocks.)
Okay, so here's the cutting and piecing instructions for these larger version of my Holiday Patchwork Forest - or modern Christmas tree blocks. These blocks will end up about 7" x 9" finished. You are going cut and piece the blocks in pairs. This eliminates fabric waste and makes the blocks come together lickety-split.
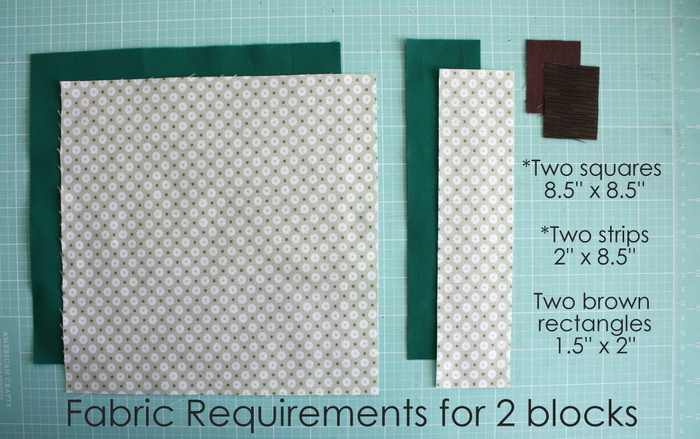
The fabric requirements for each pair of Christmas tree quilt blocks are:
- Two squares 8 ½" x 8 ½"
- Two strips 2" x 8 ½"
- Two brown pieces 1 ½" x 2"
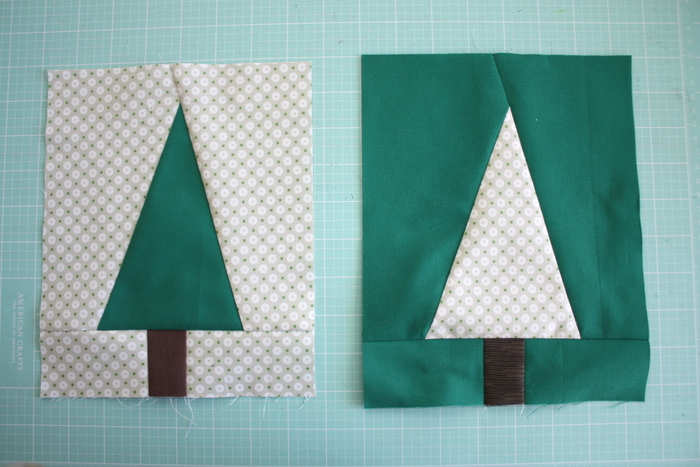
I recommend choosing two fabrics with a lot of contrast (color and scale) so that your trees will really pop.
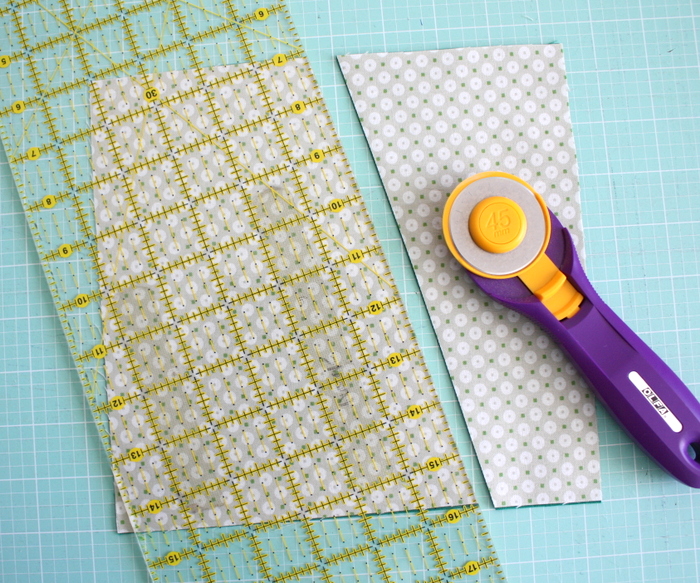
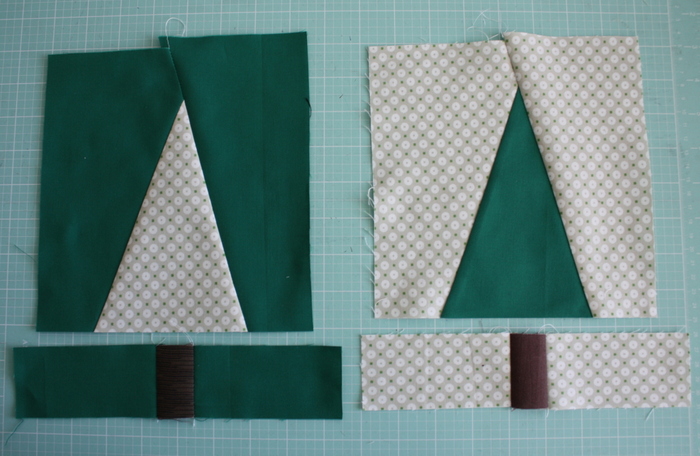
Stack your two 8 ½" x 8 ½" contrasting squares on top of each other. Place a quilting ruler at an angle and make a diagonal cut. Pull the fabric from the first cut away, and make a second diagonal cut the other direction to get your tree shape. Important: Don't cut your triangle point right at the top of the block - leave lots of room above the point so that there's room for squaring up and for seam-allowance.
TIP: I love cutting my trees in lots of different shapes and sizes so that they all look a little different. I think it gives the quilt more visual interest.
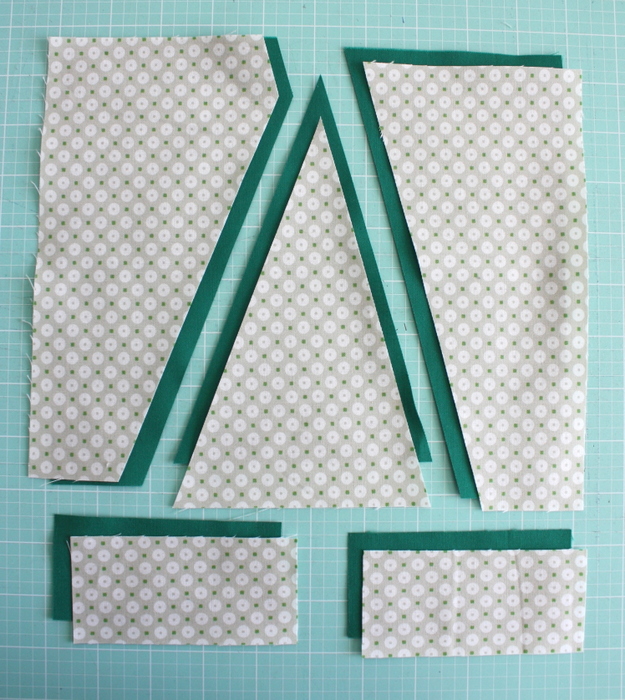
Cut your two 2" x 8 ½" strips in half to make two sets of 2" x 4 ¼" strips.
You will now have a matching set looking like this.
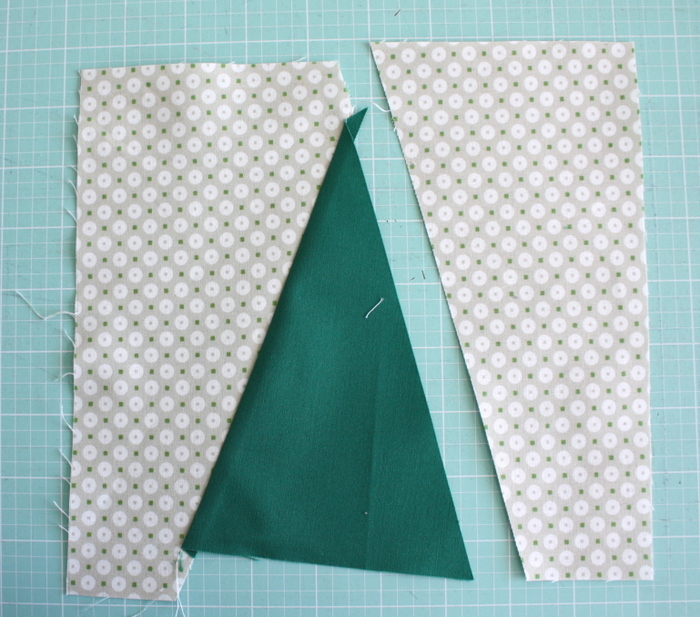
Swap out the 'tree' piece and match it up with the contrasting background pieces. Sew the tree piece to the background side pieces starting with the side of the second cut. Press seam and add the side from the first cut.
(The original mini tutorial has a few more in-depth pictures about the cutting and sewing-back-together parts of this step if you need more visuals.)
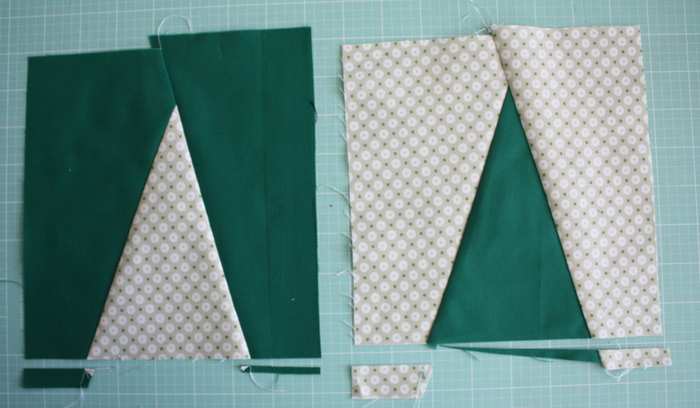
Once your sides are pieced, square off the bottom so that the edges are straight across.
Sew the two sets of 2" x 4 ¼" strips on either sides of a brown 2" x 1 ½" 'trunk' piece.
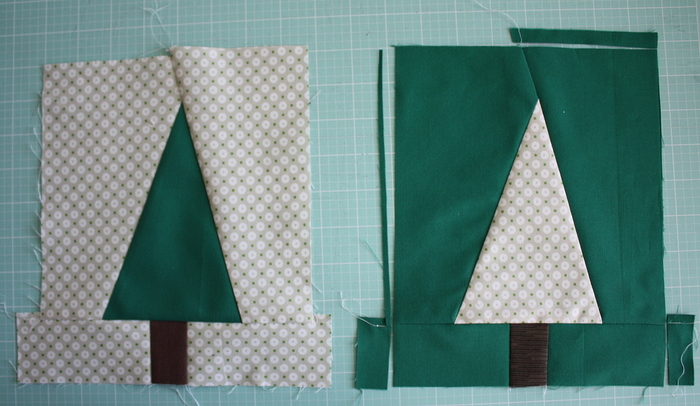
Sew the trunks to the bottom of the blocks. (The trunk strips are purposely wider than the tree parts so that you have wiggle room to center the trunk under the wonky trees.)
Square up the sides and top edge of the blocks to all the same size. Mine were roughly 7 ½" x 9 ½" unfinished (7" x 9" finished). But it honestly doesn't matter exactly what size they end up, as long as they are all the same. (This is roughly improv piecing. Let go of the perfection and enjoy the freedom. 😉 )
Click here to see a video demonstration of how these patchwork forest tree blocks come together.
For a throw-size quilt (about 56" x 72" + a border) I figure I need 64 blocks. But maybe I'll get carried away and my quilt will be bigger. 🙂
Here is the video step-by-step for making the Patchwork Forest Tree Quilt Blocks:
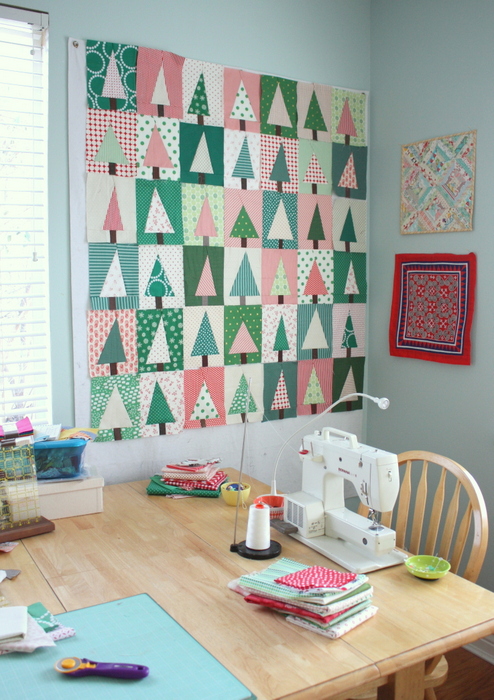
Here's how my Christmas tree quilt block pattern is looking on my design wall so far. I am totally smitten! I know this quilt is not going to get finished this year (I still have quilty gifts to bind!) but maybe I can get all my blocks pieced this year and then all I have to do is assemble the blocks quickly and get it quilted in time to use next year.
Enjoy! And if you make anything with this Christmas tree quilt block tutorial, tag it #holidaypatchworkforest on Instagram, or send me a link or a picture. I love seeing all the variations. And if you're like me with lots of other Christmas gift sewing still to do, feel free to Pin this post for next year!
Reminder, if you'd prefer a printable version of this Christmas tree quilt block pattern you can find it there is one available to buy for $3.00 here).
Post edit: See the finished this Christmas tree quilt block here!
AND! I've designed a new quilt pattern with more sizes of funky improv tree blocks with a few wonky stars thrown it too. This version is called Pine Hollow and you can find the pattern info here!


Patricia Cash
Cute quilt, thanks for the tutorial
Karin H.
LOVE this quilt block!! There is something so refreshing about scrappy and wonky - time to start collecting red and green fabrics! 🙂
Corrie tollett
These trees are my favorite both sizes. I started the mini year and will finish it someday! Thank you for great tutorial!
Mary ann
I so do not need another project right now! But this is so cute Amy it might find its way into my schedule. Thank you for taking the time to do a tutorial in this busy season.
Elizabeth McDonald
This is wonderful! Thank you for taking the time in this busy season!
Angie
You are the most generous soul, Amy. Thank you so much for sharing this tutorial. I am definitely making one or three of these as gifts, maybe mug rugs. 🙂 Thanks bunches.
Amy Smart
Aw, thanks for your kind words. xo
Suz
I'm definitely pinning this for next year! Thanks your sharing your talent with us! This is a very cute idea!
Christine sherman
LOVE this, thank you!!
GeminiJen NZ
Wonderful tutorial - this is totally on my to-do list, and thank you for the tips re fabric/colour selections.
lisa m
I would love to add some icy blues. Thanks for sharing!
Amy Smart
I was thinking about blues too. I think it would look great!
Toni
I spotted this in the background of the photo in the last post and was smitten and then when you posted this I realized I had loved it last year and wanted to make one then! Thanks for the reminder about it! I will try again! It is gorgeous!
Ellen
I totally 100% love this idea and quilt! I hope it is as easy as it looks 'cause I just put it on my to-do list.
Sherrill
I don't remember if I used your tutorial or someone else's but I made a wallhanging size of the trees last year and it's hanging in my foyer this year. I don't have a lot of people coming over but did have the ladies from church over last week for game day. They LOVED it and I do too. Thanks for the new bigger tutorial..just may jump in again!
Amy Smart
Oh that's so great! I love that the ladies from church loved it too!
Nancy poorbaugh
So fun! I hope to get my "have to do" sewing done so I can make this. Thank you for sharing. I pinned it in case I don't get to it soon. Happy Christmas!
kathyinmn
wow-I keep coming back to this because its so out of my wheelhouse that its completely intriguing! I'm a cut and measure girl, but this slice here and there looks like fun. Thanks for the tutorial.
Amy
For those who celebrate Hanukkah instead of Christmas - turn these upside down & you've got some mighty fine dreidels!
Amy Smart
Yes! Love it!
Nicole @ Mama Love Quilts
Very cute Amy! Thanks for sharing the tutorial. I love all the different fabrics you used. It looks like a great scrap buster!
Lara B.
These blocks are so charming and I adore the quilt you've made with them Amy!
Rebecca Grace
Your Christmas tree blocks are ADORABLE!! I must have missed it last year! Merry Christmas to you and to the whole Smart family!
Lana
I love this! So visually beautiful. Thanks for the inspiration. Can't wait to start one of my own.
Jodie
Just found this from PInterest and then searched your #. I am so excited to make this. I have always wanted a tree quilt but didn't like the traditional looks. I so love this wonky look, so very fun. Thanks, Jodie
Gayle Vaughn
I loved your ideas, Amy ... I used 10" Charm Packs and cut them 8" and 2" for the bottom ... 7.5 X 9 finished ... Did trees facing each other for table runner but not sure yet if I will put a stripe of plain material in the middle to separate ... Want pictures?
Amy Smart
Sure! I'd love to see. Email me at amy@diaryofaquilter.com
RJ
Stumbled across this looking for inspiration for my sister's Christmas gift - so cute! I'll probably switch up the colors and do purples and silvers with a few green "accent trees". Can't wait to get started!
lindaspears
Thank you Amy! Love this!
from the Bellfry
I so love this quilt! Thanks for the tutorial on your larger tree blocks. Your explanations are always so helpful! Merry Christmas, Amy! Stay warm under that fun quilt!
zelda
Just saw your darling little tree quilt. I'm going to use up some of my stash, and make one for next year. Thank you very much.Have a warm Christmas.
Marly
Thanks for the fun project tutorial. I shall be making a few to use in Christmas mug rugs.
Teje
Super fun! Thank you! x Teje
ML
Thanks for the tutorial! Looks like i'll have an excuse to shop the year-end fabric sales 🙂
Amy Smart
Glad to provide a good excuse to shop. 😉
Trudi
Wow! I think I see my first attempt at quilting! I am an absolute beginner and this just made me smile! I cannot wait to hit the end of the year sales. Directions look like I can understand them! Thanks for sharing! Love your quilts!
Colleen
Love this! I have some lovely red/white/black Christmas prints I'm going to try this with.
Dottie K
Oh my goodness! These trees are the cutest and can't wait to make some for this year. Thank you so much.
Chris
Very nice Amy. Think about reaching out to all your blogger friends and getting someone to set up a giveaway tab like Melissa had at MissouriMel. I loved it. Found so many interesting bloggers this way.
Janis
Our quilt group did this as an exchange. The resulting quilts, wall-hangings, table runners,etc. were wonderful!
Amy
Oh, that makes me so happy to hear! Thank you for letting me know. xo
Heather
This is adorable, can't wait to try my hand at it this weekend, thank you! <3
Brenda @ Songbird Designs
HI Amy! I'm just finding this post. Quick question. Do you place the fabrics right sides together or both facing up? I'm thinking RST? but it appears yours are both right sides up. Thanks!!
Amy
Good question. When you're cutting, place them all right sides up so that you have identical pieces for swapping.
Teri
Amy
Wanted to let you know I’m using your quilt as inspiration for a hand painted card. Wanted to check and make sure you are okay with this.
Amy
Sure! I'd love to see what you create!
annette
Hi Amy, I found your quilt a few days ago and am piecing trees together, thought I’d make some cushion covers too with this design as they will definitely add more Christmas to our home and are a great gift size to put in the mail. I’m using traditional colours in bright bold fabrics. Am enjoying sewing them very much. Thankyou for wonderful ideas.......
Anne Arnold
Any I have just made your wonderful modern Christmas tree quilt pattern and put it up on Facebook and got over 700 likes overnight and I think you will be getting lots of requests for the pattern. Trying to work out the best way to quilt it in a modern way, maybe just straight Lines?
Amy
Thanks so much for sharing my pattern, Anne. I'm so glad you enjoyed making it! I think straight lines would look great - definitely give it a modern vibe.
Nanthi
Thank you for the easy method of piecing the trees. Absolutely beautiful.
Adry De bruijne
I was very glad to get an answer on my question and I will make the quilt for the christmas 2023, gr adry de bruijne
Dawn fisk
how do i order the pattern for the christmas tree quilt i went to the order place i didn't know if i could send in with a money order
im new at quilting but want to try it
Thank you
Dawn
Amy
You can find the pattern available in my online shop: http://www.diaryofaquiltershop.com
Thanks so much for your interest!