
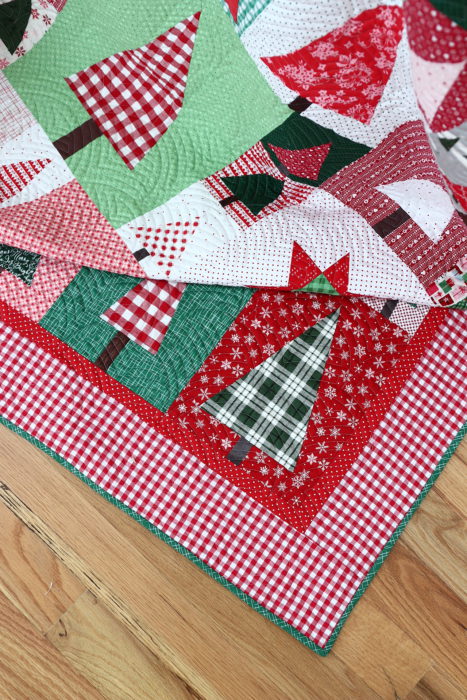
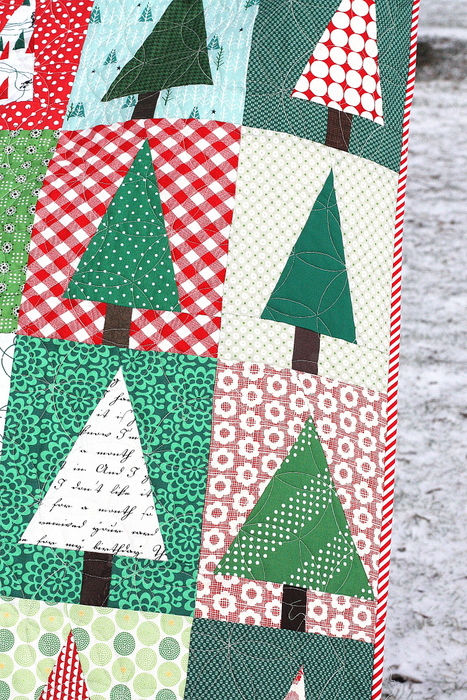
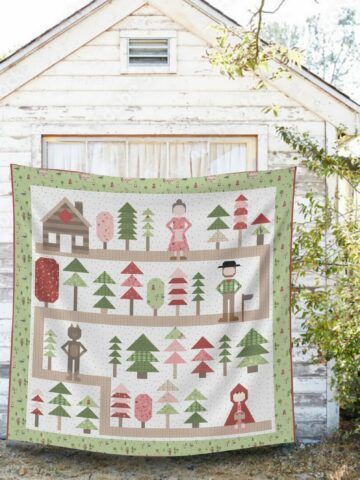
Hi everyone! Welcome to Week 2 of the Pine Hollow Patchwork Forest Quilt Along!
Wow, I'm a little blown away by the excitement and participation in this event! Woohoo!
So here's how it goes - each week for the next 5 weeks I'll be breaking down the Pine Hollow Patchwork Forest Quilt pattern into bite-size pieces as well as sharing tips and tricks for piecing your quilt. If you want to quilt along, you will have a finished quilt top put together by the beginning of December!
If you missed the Week 1 and the introduction you can find that here as well as tips for choosing your fabric.
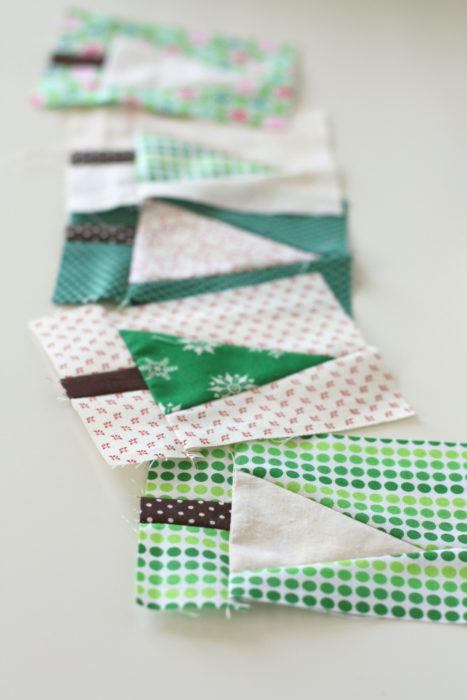
This week your assignment is to create the 28 Small Tree Blocks in the Pine Hollow Pattern.
That might sound like a lot, but these little blocks come together super fast.
If you are using the original Patchwork Forest Quilt Tutorial, choose a set number of blocks (at least 12?) you want to make to go towards your finished quilt.
To help you along, I've created a video demonstration of how I cut and piece my Patchwork Forest quilt blocks.
This demonstration will apply to any size tree block. I've wanted to create a simple video demo of this technique for a while, and this finally motivated me to do it!
(Confession, this is not the most professional video you've ever seen. My tech crew [aka, my 15-year-old and I] are still figuring out this whole video stuff. And the tools I'd used through YouTube previously to brighten and reduce shake for some reason are no longer available. 🙁 So, I'm afraid you'll have to take it as it is.)
I know that some of you are better visual learners through video, so I hope this helps. I also know that improv cutting and piecing can threaten to melt some people's brains when doing it for the first time.
My best tips:
-
Use some fabric you don't care about to make a few practice blocks first. This will help you get a feel for the technique.
-
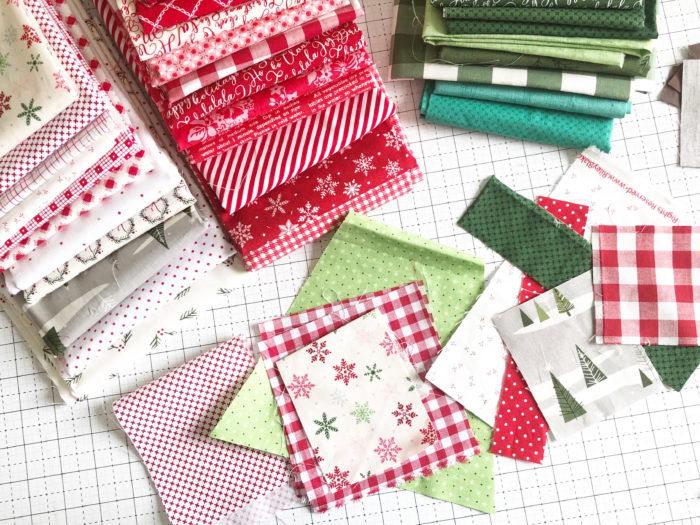
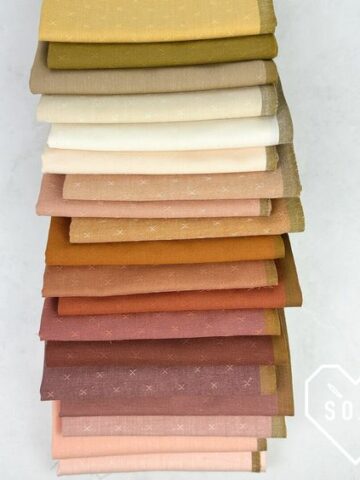
To help your trees pop, use contrasting fabrics, colors, and print scales. (This post on choosing fabric for a quilt will help explain.)
-
Cut up to 5 or 6 layers of fabric at a time to save time.
-
Cut the strips that will frame your tree trunks a variety of heights to give your trees more personality.
-
Don't cut the tips of your tree triangles too close to the edges - leave lots of space at the tops and sides for squaring up.
-
Vary the sizes and shapes of your trees as well as the heights of your tree trunks to really give your quilt some quirky personality and interest.
-
Have fun!! This technique is supposed to be liberating, not stressful or constricting.
There you go!

Kathleen OGrady
Thanks you for the video, t was great to get a visual for the blocks. Looks like a lot of fun. I can't wait to start cutting fabrics to make my tree forest!
Deb Wolfe
Amy - question- watched the video and I have cut and sewn my small tree blocks. I am confused at how big the small blocks should be squared to? I cut 7x9 squares and after sewing they are @ 6x8 1/4.
Thx for your help,
Deb Wolfe
Amy
Hi Deb! Yep, you'll need to trim them down. (I make the starting rectangles generous because everyone pieces this block differently.)
Check the pattern - halfway down on page 5 will give you the measurements for squaring up the small blocks. I hope that helps!
Debra White
For those of us that don’t use social media is there another way to enter and post photos?
Amy
This has been the tricky thing that I've been trying to figure out. I can't come up with another way for people to share photos. Any suggestions?
Deb
Thanks so much for your help! ?
Debra
All my fat quarters include the selvage in the 22” measurement which messes with the curing diagram. Any suggestions on layout? When I do the block trimming will there be enough to cut it away? I’m having a very slow start and a bit frustrated.
Amy
You'll be fine - don't stress about it too much. All of the rectangles (both for the small trees and the medium trees that are cut from the FQ's) are generously big so that there's lots of room for squaring up. Just cut them as close as you can. You could even leave the selvage on because it'll just get squared off when you trim down the blocks.
Before you cut up all of your fabric though, just cut two sets of blocks and make those to get a feel for how they come together. I always recommend making a few practice blocks if this is your first time making these trees. I hope that helps!
Debra White
Thank you Amy! Things have improved since I sent the previous comment. I have my 28 little trees completed, even figured a way to chain piece making things go so much more quickly. It’s all good now.?
Amy
Hooray! I'm so glad to hear! It's always those first few that melt people's brains, but once you've got a few under your belt, your unstoppable. 🙂
Barbara
Thanks Amy, for the tree tutorial, and also the Missouri Star Birthday Bash video. You are so nice to take us along on this fun trip to Hamilton.
Ramona Johnson
Great video, Amy. Anxious to start cutting and creating!!! ?
Maria
Thank you very much for the video, Amy. I loved it.❤️❤️❤️
Janie
The little trees are so much fun!! They’re quick and as cute as can be!!!
Barbara
I love tree quilts, this one is so sweet. Where can I get the same iron you are using? Looks like a mini.
Amy
Yes! It's a new mini iron made by Oliso and I love it! You can find them directly from Oliso: https://shrsl.com/1v9rp or Amazon: https://amzn.to/2VnVhdO
Barb Mckinlay
Your video was wonderful. Thank you!!
davidcindywebbCindy
Amy, there seems to be many quilts of this pattern in different colors, however, my favorite is the one pictures at the top of this post. Is there a full size photo of it? https://www.diaryofaquilter.com/2019/10/pine-hollow-patchwork-forest-qal-week-2.html
Amy
Yes! Here is a full post about that quilt: https://www.diaryofaquilter.com/2019/08/new-patchwork-forest-pattern-pine-hollow-version.html
Peggy Melfi
Dear Ann---Fun fun fun fun FUN!!!!!!! This is what I needed to get going on a couple of Christmas quilts for my two kids and their families!!!!!! Spontaneous, quick, kind of a MYSTERY, and FUN!!! I can't thank you enough. Christmas fabrics, here I come. (There is absolutely NO need to apologize, PLEASE. your video is just great, you're relaxed, you show every step, and it is certainly "professional" enough for me. Some that I've heard just talk and talk and ramble, plus you can't understand them, so ACCEPT THE APPLAUSE and please appreciate our appreciation of YOU. 🙂 Sincerely!! Peggy
Peggy Melfi
AAAGGGGHHH! I said ANN not Amy! Please forgive! And it was too late to edit, dang it!! 🙁 Peggy
Amy
Haha! No worries! (I've been called worse. lol And I've done the exact same thing SO many times.)
Thanks so much for your kind and encouraging words. Happy Quilting!
Donna
This is a little late in the game but did you do a video on the stars? I loved the video tutorial on the tree blocks...I’m excited to make this quilt and I am sometimes better as a visual learner....
Amy
I haven't done a video on the stars - that is a great suggestion! I can't guarantee how soon I can get to it, but I'll add it to the list!
Jan
Thank you so much for these very clear directions. I can’t wait to get started on my trees!