
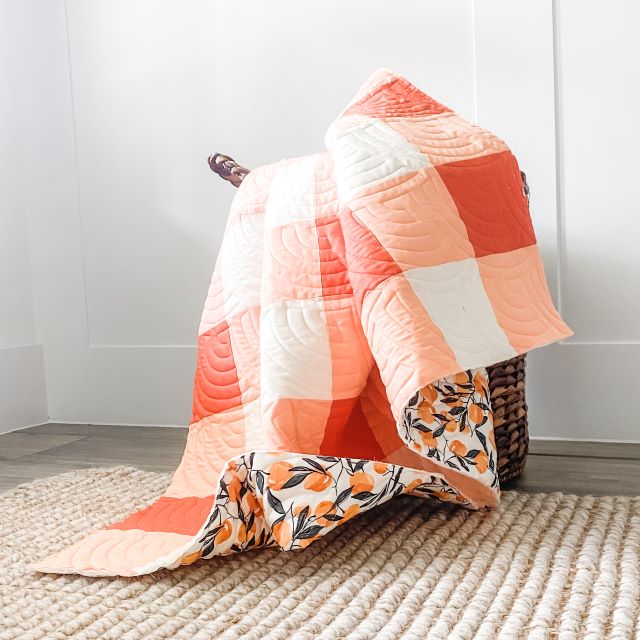
I'm excited to have a guest writer today. Elizabeth Chappell from Quilter's Candy. Has a super fun tutorial and free pattern for a simple Patchwork Gingham Quilt. Sometimes this style is called Buffalo Check. Either way, it's a classic look that comes together easily. It's perfect for using solid or woven fabrics. This design would make such a great gift for a friend. Or yourself. 😉
My name is Elizabeth Chappell, and I am the owner of Quilters Candy. I write quilt patterns, am offering a course on how to sell and write quilt patterns, and I host an online modern quilt guild. I am excited to share this tutorial and free pattern on Amy's blog.
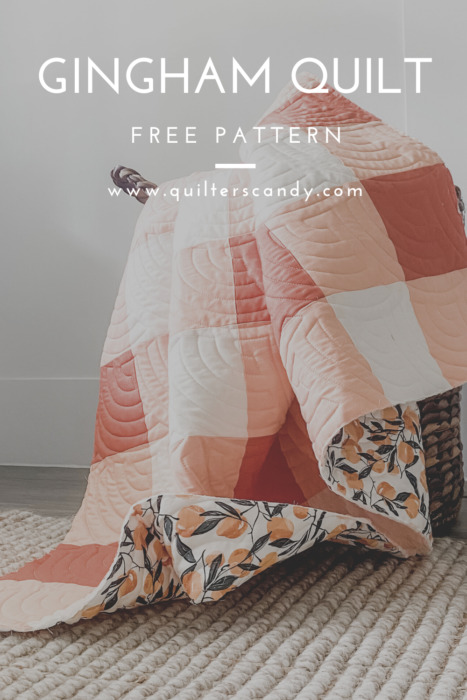
Do you want a free gingham quilt pattern and tutorial? I am sharing how I made this pattern a little different from other gingham quilt patterns, and also sharing a FREE PDF printable for the quilt pattern. GET FREE PATTERN HERE.
GINGHAM QUILTS
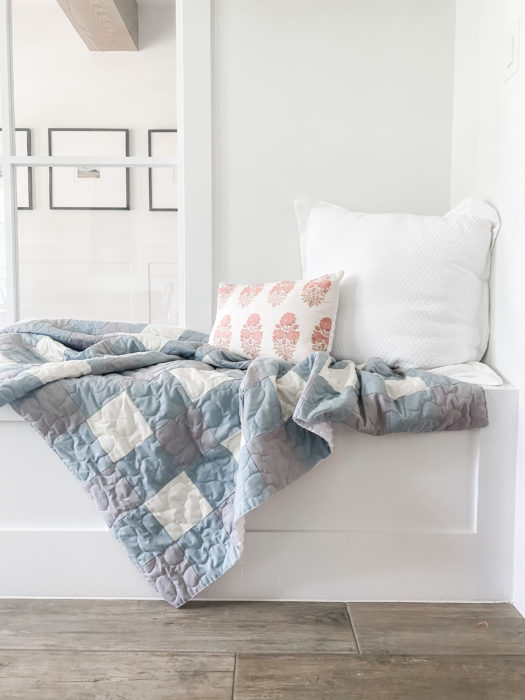
Every other gingham quilt pattern I found had a border that didn't make my OCD tendencies happy. If you notice most Gingham Quilts have a border with mis-matching fabrics. That is why I created this new pattern with a border that has matching fabrics on all sides. Note the difference in these two photos:
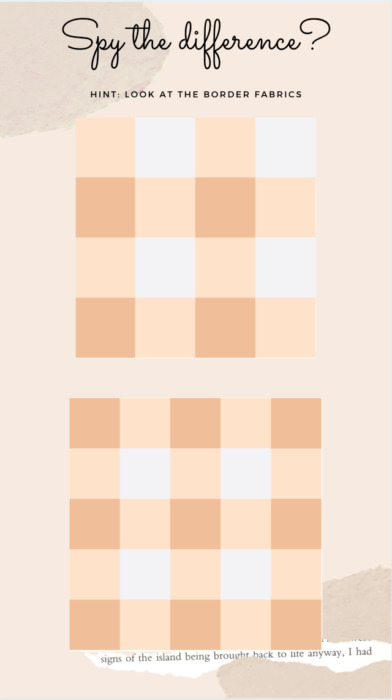
I wanted a Gingham Quilt pattern that looked like the quilt on the bottom. I wanted a border that had matching fabrics on all sides. Yet I couldn't find a gingham pattern (for free or for purchase) that had that. So I decided to write one, using the simplified strip piecing method. Get the free pattern HERE. (The pattern PDF will be emailed to you instantly.)
The PDF lists all of the fabric requirements, cutting, pressing, and sewing instructions. I'll walk you through some of the steps here.
Strip Piecing your own Gingham Quilt
To make a gingham quilt, there is an easier way than cutting each square and sewing them together. This easier method is called Strip Piecing. This is what strip piecing entails:
- Cutting strips of fabric
- Sewing those strips together
- Cutting the strips into new strips made up of squares
- Sew those newly cut strips (with squares) together
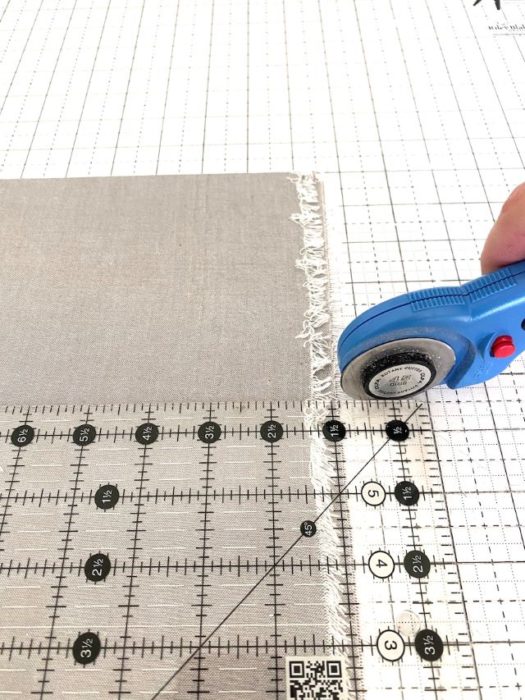
Amy has some helpful advice for accurately cutting straight strips and other tips for strip-piecing here.
Steps to Making Free Gingham Quilt
Cutting Fabric Strips. My version of the pattern calls for cutting strips 5 ½" x WOF.
Pin and sew alternating fabric strips together. You will want the free pattern printable PDF for this step, as it tells you how many and which color strips to sew together.
Sew matching strips together, alternating rows so it goes Fabric A, Fabric B, Fabric A, Fabric B, and so on.
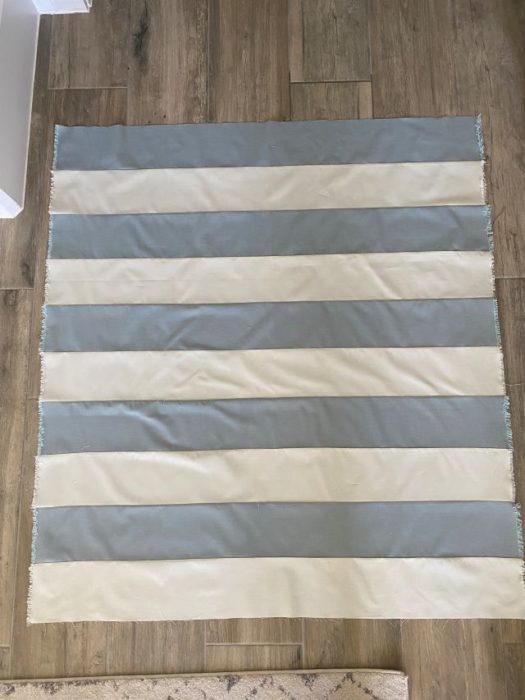
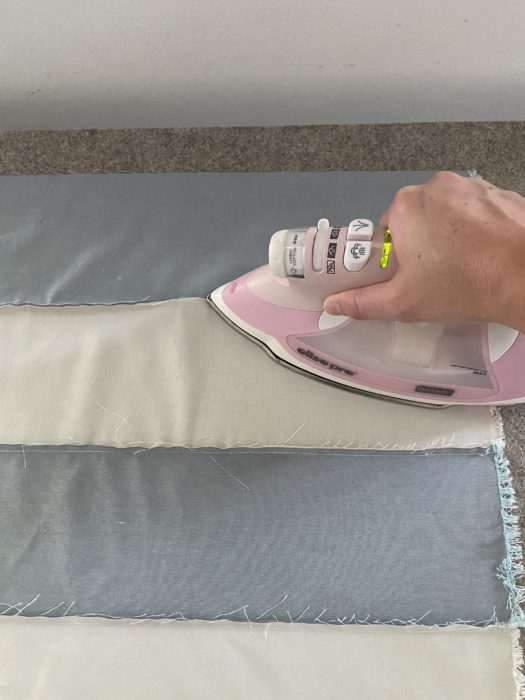
Press seams all in one direction.
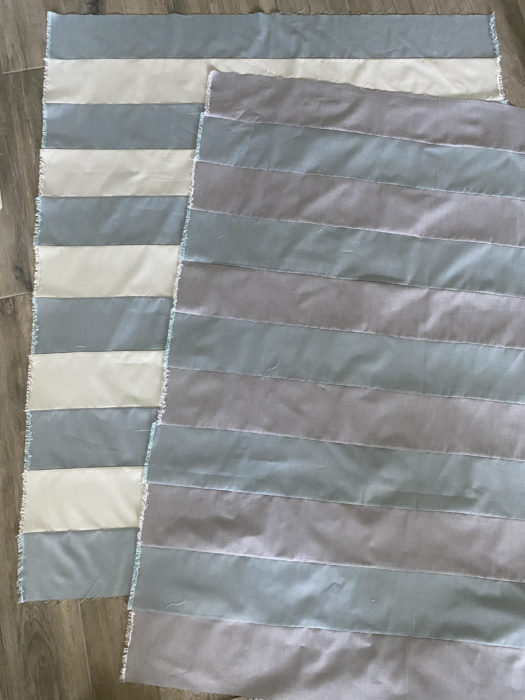
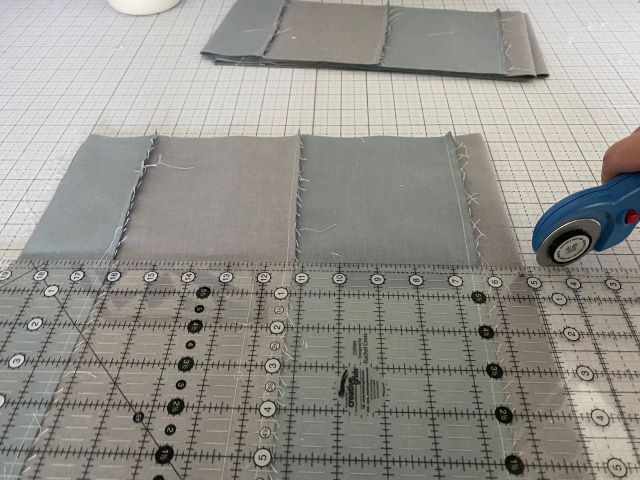
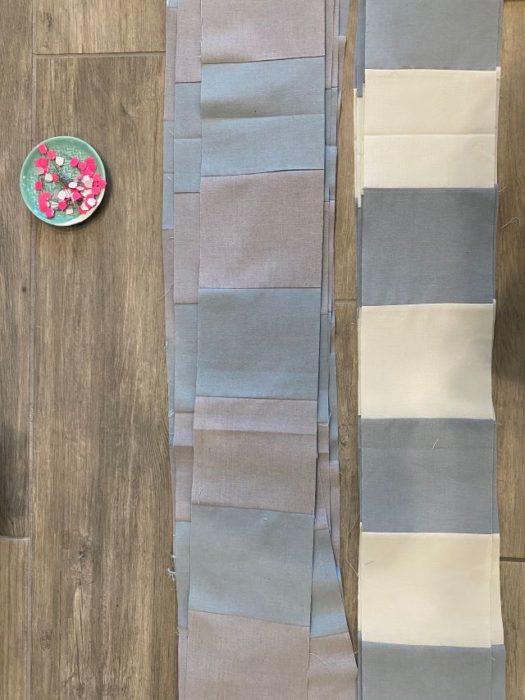
Cut your sewn together strips into new rows. This step will give you strips with alternating colored squares.
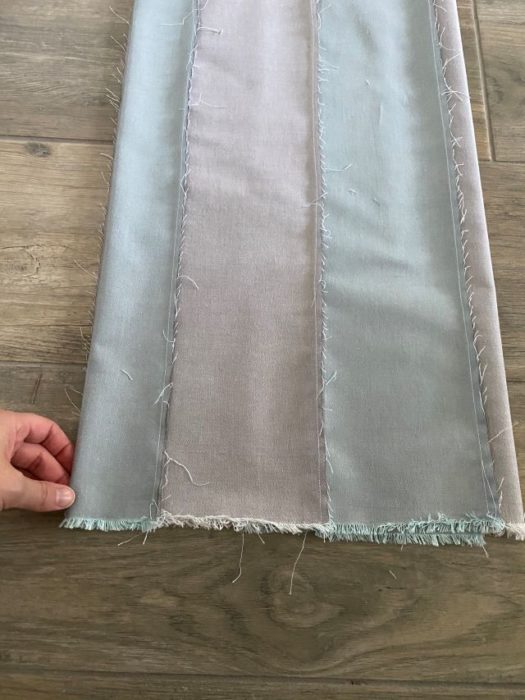
NOTE: Because your fabric is too large to fit on a cutting mat, I carefully fold my sewn together strips in half. I then press it with an iron and fold in half again.
Make sure your seams line up on top of each other and are straight. This way you can cut you fabric easily. If you do not fold your fabric carefully in this step, your squares will be wonky.
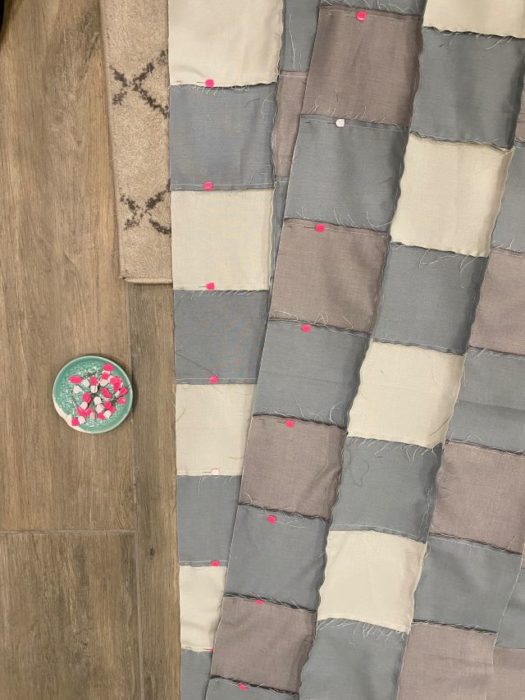
With your new strips that have squares in them, sew alternating rows together. Continue to make sure the seam lines are straight using the lines on your ruler as a guide.
NOTE: Be sure to pin at each corner so the corners match and the seams nest.
Sew all rows together. Press seams in one direction, and your quilt top is ready to be quilted! That's it. This can be done in a matter of hours.
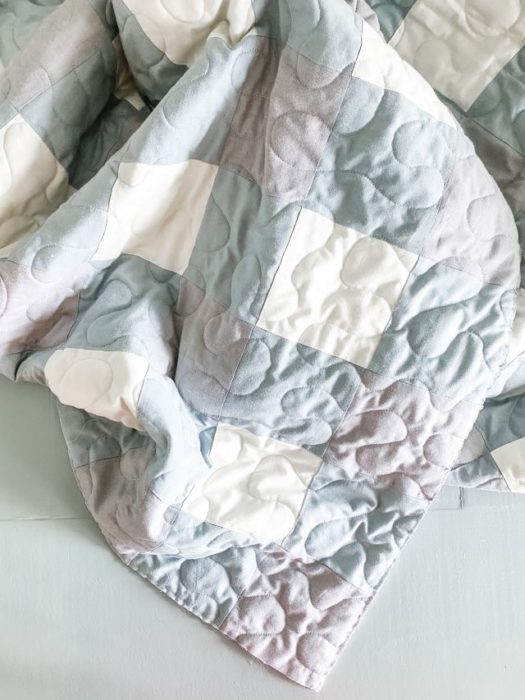
Quilt in your desired method. I, personally, love to use a minky backing when I can, and send it to a long arm quilter. I consider it treating myself. 😉
PRINT FREE PATTERN HERE
(Trouble shooting: if you have any issues with this pattern PDF, please email Elizabeth directly at hello@quilterscandy.com.)
All you need to do now is decide what fabrics you want to use to make your gingham quilt! Be sure to use the hashtags #QuiltersCandy and #GinghamLove so we can see your finished quilt.
If you like this tutorial, be sure to visit my other free tutorials, like this one on DIY Spray Starch. Not to mention using spray starch to make your quilt will help your points to match!
Fabrics Used in the Quilt
More photos of my two versions, one with orange fabrics, the other with blues.
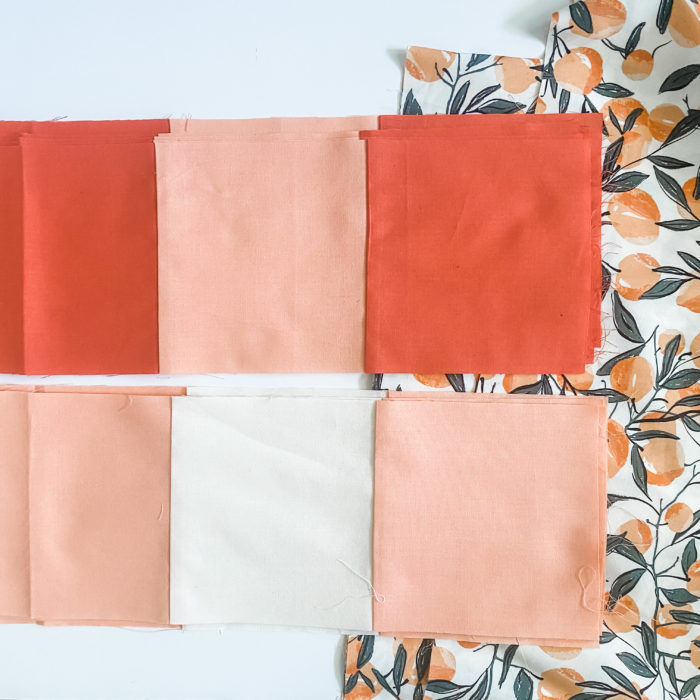
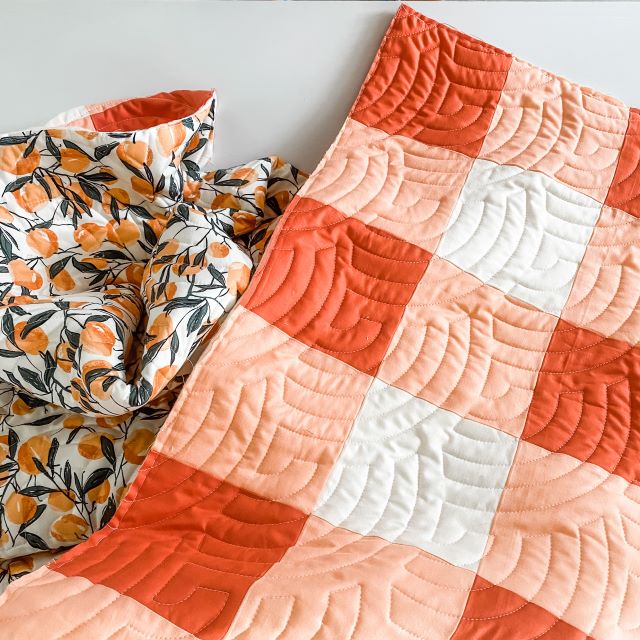
Orange fabrics: Warp and Weft by Alexia Marcelle Abegg for Ruby Star Society. Colors: Warp Weft Wovens Persimmon, Warp Weft Wovens Dahlia, and Warp Weft Wovens Natural. Backing, Leos Orchard by Bonnie Christine for Art Gallery Fabrics.
Blue Fabrics: Peppered Cotton by Cottoneer in the following colors: Lake, Fog, and Oyster.
Thanks Elizabeth! I'm feeling inspired to make one of these Patchwork Gingham quilts myself! I think the color combinations are endless. I also love the pop of that botanical print on the back!
Be sure to visit Elizabeth's site Quilter's Candy for some beautiful modern quilt inspiration.
Elizabeth also created this darling free printable Quilt Care Instruction Card as well as printable quilty Gift Tags.
This large-scale gingham quilt is such a perfect 'on-trend' accessory for home decor. Here are some tips for showcasing textiles like quilts in your home.
Looking for more free quilt tutorials? I've got a whole list of Free Quilt Tutorials Here.
Rosemary B
THANK YOU for sharing this pattern. I want to make a lot of these gingham quilts!!
<3
Brandk
I’m new to quilting and I’m wanting this to be my first pattern… I have no idea what fabric to use can you give me some examples
Amy
I would definitely start with quality quilting cottons. You can get a nice palette of solids for less money. This is a good quilt to start with as this quilt only calls for three fabrics. I would pick a color that you love and then get a light, a medium, and a dark shade of that color.
The Joyful Quilter
What a great quilt!! Thanks for sharing the pattern link here on your blog.
Jacqueline Elam
The .pdf is downloading in its computer code rather than in English words, diagrams, pics. Any chance it can be fixed? Thanks!
Amy
Hi Jacqueline,
Darn - that's so strange! It might be an issue with your PDF reader? I can't say for sure - I'm not as tech savvy as I'd like to be. Definitely reach out to Elizabeth at Quilter's Candy. Here email is quilterscandybox@gmail.com
Thanks for the heads up - I hope that will help!
Amy
Little Quiltsong
Thank you for sharing this free pattern. Love that it has a 'finished' edge, like you mentioned in this blog post. Perfect!
adriene
So clever. Thank you for this pattern. Your peach one is stellar and the fog & oyster one is lovely. I don't always trust my eye for color selection, but you have a great eye.
Patti
What a wonderful tutorial! I love the edge finish and really appreciate having a free pattern to give this a try.
Beth Stoller
Hi Amy,
I’m very new to quilting and I’m excited to start learning all about it. I know this is a silly question but how do you get the sewn on pattern that I’m seeing in this quilt. I’m sure it’s not done by hand.
Amy
Really great question, Beth. The stitching that holds the three layers (front, batting, and backing) together is the actual quilting. It can be done by hand or by machine. This design looks like an allover pattern done by a longarm quilting (sewing) machine. There are lots of professional long-arm quilters who provide this service.
This post will give a lot more information about this process: https://www.diaryofaquilter.com/2010/10/machine-quilting-basics.html
Gwyn
Strip piecing - duh!
mtp
We must have the same OCD tendencies! Last year I made a red & black buffalo plaid quilt for my husband (his wiffleball team's colors) and that off-balance configuration drove me nuts. I was in a time crunch and didn't want to go through the effort of re-calculating and didn't have enough fabric to add a row/column, so I left it because I knew he wouldn't care. I'm saving your pattern right now. I love your taupe and blue colorway. So peaceful.
https://sewenthous.wordpress.com/2019/09/02/wiffleball-quilt/
Econ
Yes! I had also converted making gingham quilts that have a balanced layout, but always appreciate your versions for your tips. Thank you!
Melissa
Thank you so much for creating this pattern! I feel exactly the same about the “unfinished” look of most gingham patterns. Since I’m not very good at figuring out the math, I usually just buy extra fabric and add another row and column. This will be perfect!
Patty Baptiste
Hello Amy! In the worst way I would love your pattern called Rainbow Connection. I’m not able to find a way to purchase it though. Could you point me in the right direction?
Many Thanks
Patty Baptiste
pattyjbaptiste@gmail.com
Amy
Hi Patty! Good news - I'm releasing the newly updated pattern next week! Hang tight - I'll have a blog post with the announcement middle of next week. 🙂
Lea
Love the evenly laid out blocks! I agree that it otherwise looks unfinished - great pattern,
Lea
Toni
Is there an easy way to size down this pattern to make it as a baby quilt?
Amy
I haven't tried it so I don't know, but I think it would be fairly simple using graph paper to map out the size you're interested in. Or reach out to designer Elizabeth at quilterscandybox@gmail.com to see if she has a simple suggestion.
Donna
In sub cutting the darker fabric strips(it says 7 rows) is it possible there’s an error as with the lighter fabric strips only calls for 6 rows.
The measurement are the same so how can we get 6 rows from one lot and 7 rows from the other lot.
Am I getting it wrong?? Thanks,
From a learner quilter
Amanda
I am trying to calculate how to convert it to a queen size! But this will be my first quilt and I'm nervous! (I typically sew apparel so I have the sewing skills but not the quilting knowledge!)
S
I can’t really see how you have blinded this quilt. I thought maybe the pattern would help, but it suggests to bind as desired. In the photo above, the edges look raw. Do you have instructions for your matching binding? Indeed it would look so much better. Have I missed something?
Marianna
I suggest looking up on how to face a quilt A faced binding is flipped to the back and doesn't show up in the front at all. Otherwise any other type of binding will show. And yes I believe the quilts in the photos are displayed with raw edges.
Amy
Yes, it looks like the binding was not attached to the quilt made by Elizabeth before the photos were taken. If you want to add a binding, it's really simple. I have a tutorial here for adding a binding to a quilt: https://www.diaryofaquilter.com/how-to-finish-and-bind-quilt/
amay
Hello, do you sell quilts? I’m interested in the orange gingham quilt with the peach background.
Amy
This quilt was made by guest writer Elizabeth Chappell - you can contact her at: quilterscandyquilts@gmail.com 🙂
Annmarie
Thank-you for sharing this beautiful quilt pattern - sew many possibilities!
Karen
Thanks so much for the free pattern!
Can you give me the name of the fabric collection you used?
Amy
Hi Karen - scroll down toward the end of the post and there's a list of fabrics used under the heading Fabrics Used In The Quilt 🙂
Taylor
I’ve tried to download the pdf but it won’t come into my email. I’ve tried different emails but something isn’t working. Can you help me please?
Thank you!
Amy
Hi! I'm so sorry about the download issue. Since this pattern comes from Elizabeth at Quilter's Candy, reach out to her directly for help at hello@quilterscandy.com
Karen
I would love this pattern and the name of the fabric but the link is not emailing it.
Help? Lol