Diary of a Quilter - a quilt blog

  • Home
  • Tips + Tutorials
  • Shop
  • FAQ
  • Subscribe
menu icon
go to homepage
  • Home
  • Tips + Tutorials
  • Shop
  • FAQ
  • Subscribe
    • Amazon
    • Facebook
    • Instagram
    • Pinterest
  • subscribe
    search icon
    Homepage link
    • Home
    • Tips + Tutorials
    • Shop
    • FAQ
    • Subscribe
    • Amazon
    • Facebook
    • Instagram
    • Pinterest
  • ×

    Riley Blake Block Challenge - Maple Leaf Quilt Block Tutorial

    Modified: Feb 3, 2021 · Published: Jun 15, 2020 by Amy Smart · This post may contain affiliate links · 5 Comments

    It's week 12 - and the final week - of the Riley Blake quilt block challenge. For the past 12 weeks we've been making a sample of classic, traditional quilt blocks - part of a fun, simple challenge during these 'stay-at-home' months. This week we are going to make a Maple Leaf quilt block. Below you will find links to each of the quilt blocks over the past 12 weeks.
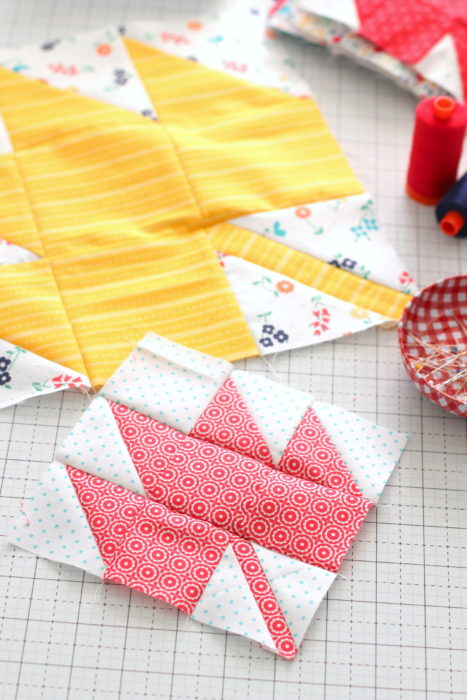
    As with weeks past, I'm making blocks in 6" x 6" and 12" x  12" sizes using my Sugarhouse Park fabric collection.

    Last fall I wrote a tutorial for the Maple Leaf quilt block with instructions for the block in multiple sizes.

    Click here for the Maple Leaf Quilt Block Tutorial.

    Here are the 12 blocks we've made as part of this challenge. These are my 6" blocks. If you are looking for the previous blocks for the quilt along you can find all of them linked below  If you're sharing on social media use the hashtag #RBDBlockChallenge. 

    And here are my 12" x 12" blocks. I don't have specific fabric requirements for this challenge, but it's a good one for using up scraps or favorite Fat Quarters. For my blocks quilt I'm sewing with my Sugarhouse Park and coordinating Riley Blake woven ginghams.

    Week 1 - Churn Dash 

    Week 2 - Log Cabin

    Week 3 - Friendship Star

    Week 4 - Economy Block

    Week 5 - Nine Patch

    Week 6 - Shoo Fly Block

    Week 7 - Sawtooth Star

    Week 8 - Bear Paw 

    Week 9 - Maple Star

    Week 10 - Bow Tie

    Week 11 - Pinwheel

    I'm excited to start playing with my finished blocks this week and figure out how I'm going to put them all together! I'll be sharing my quilt as soon as I've got it sewn up!
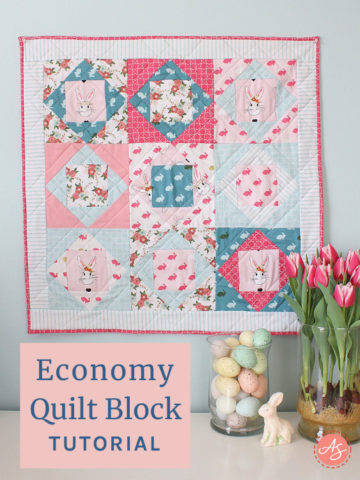
    UPDATE: Here is the wild, scrappy assembled quilt top + lots more ideas for laying out the blocks for this sampler quilt.

    More Quilt Blocks

    • Best Short Cuts for making Half Square triangle quilt blocks
      Half Square Triangle Quilt Short Cuts and Easy Square Up
    • Checkered Garden pastel spring quilt blocks
      What's on my Sewing Table April '25
    • Valentines Quilts and block patterns
      Valentines Day Sewing Projects
    • Scrappy crib quilt made with FPP Woven Star Quilt blocks.
      Scrappy Woven Stars Finished Quilt

    Comments

      Leave a Reply Cancel reply

      Your email address will not be published. Required fields are marked *

    1. Helen Jackson says

      June 21, 2020 at 1:52 am

      Thank you Amy for the lovely quilt block ideas, I am a beginner quilter and your instructions were easy to follow I am in the process of making 12x12 placemats for our outside table

      Reply
    2. Maggie Harline says

      July 11, 2020 at 8:51 pm

      The link to the masks you made won’t open.

      Reply
      • Amy says

        July 11, 2020 at 11:29 pm

        Doh! I hate when I do that. Thank you SO MUCH for letting me know. (You were the first to tell me!) I just updated that post with the right link. Here it is: https://www.madeeveryday.com/fabric-face-mask-free-pattern/

        Reply
    3. Connie Matter says

      July 11, 2020 at 9:58 pm

      I had a difficult time cutting stem block to size. I did not know where to begin sizing the stem block. Use the Eleanor Burns ruler the for half square triangles but was stumped cutting to size the stem bloc.
      Any help would be appreciated. Connie

      Reply
      • Amy says

        July 23, 2020 at 6:59 pm

        Hi Connie! Using a ruler with a 45 degree diagonal line will help. Center the diagonal line on the diagonal stem and trim equally on both edges to cut down the block to your desired size. Then rotate the block and trim the remaining edges.

        I hope this helps!

        Reply

    My name is Amy Smart and I'm a quilter, pattern and fabric designer, wife & mom. Excited to have you here!

    more about me →

    THE PERFECT PLACE TO START

    I SEW WITH

    Baby Lock Sewing Machines

    MY FABRIC COLLECTIONS

    Fabric Collections by Amy Smart for Riley Blake Designs.

    FAVORITE FABRIC SHOPS

    COME SEW WITH ME CRAFTSY CLASS

    Pre-cuts Shortcuts Video Craftsy Class with Amy Smartma

    SEARCH

    Most Recent Posts

    • Some Special Scandi Love For a Special Scandinavian Friend
    • Finding Quilt Inspiration in Southern Italy- No Fabric Store Required
    • How to Save Time and Improve Accuracy with Strip Piecing
    • What I'm Working On - July 2026
    • Summer Bunting - Fast Fat Quarter Quilt

    ARCHIVES

    Footer

    ↑ back to top

    PRIVACY POLICY

    DISCLAIMER

    TERMS & CONDITIONS

    CONTACT

    FAQ

    ACCESSIBILITY POLICY

    This site uses affiliate links:

    I make a small commission on some purchases with no additional cost to the reader.

    As an Amazon Influencer, I earn from qualifying purchases.

    Copyright © 2026 Diary of a Quilter - a quilt blog