
15 years ago I made my first patchwork flag quilt to hang on my wall for the summer season. Recently, I’ve been thinking I wanted to make an updated version in brighter colors. And since it’s Flag Day (June 14) here in America it feels like the perfect day to share this tutorial. It’s a super quick project and you can easily put one together before the 4th of July, if you want to!
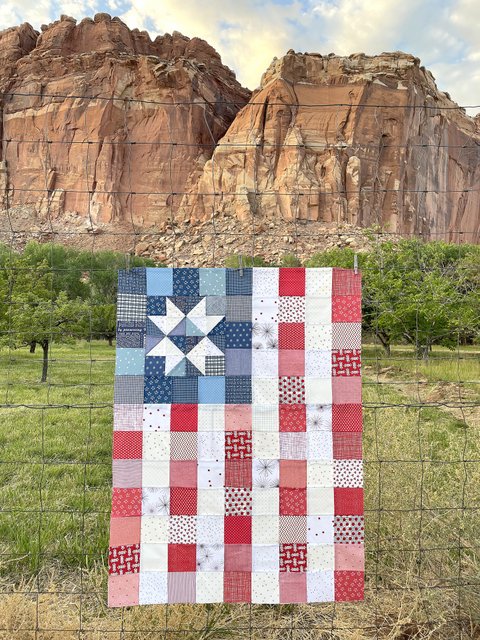
As I was working on the this quilt I also decided it would be fun to make a scrappy star option for the blue field. You can include the star, or just use blue patchwork blocks to keep things simple.
This is a great project for using scraps. It's also a great time of year to find red, white, and blue fabrics on sale.
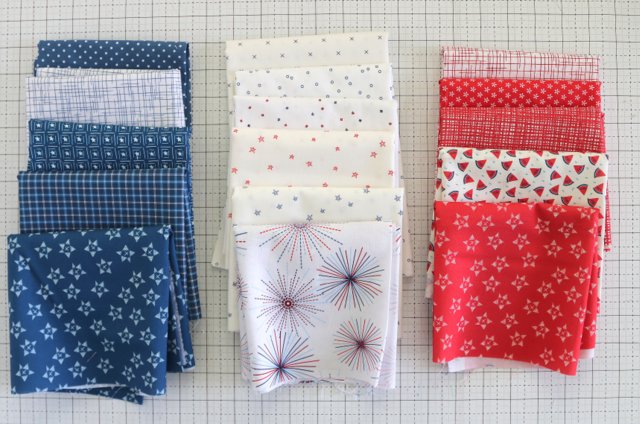
I did a little bit of both. I got some new prints from Riley Blake Designs collections Red, White & Bang, Picadilly, + Lori Holt Basics, and mixed them in with assorted red, white, and blue prints from my stash. I personally think the scrappier the better for this quilt. You can get your blocks from yardage, fat quarters, precuts or leftover scraps.
First, I’ll give the instructions for making a simple patchwork flag version of this quilt (without the star block). Below that I’ll add the star block instructions if you want to add one too.
I've also got a free printable page with fabric requirements and patchwork layout and instructions.
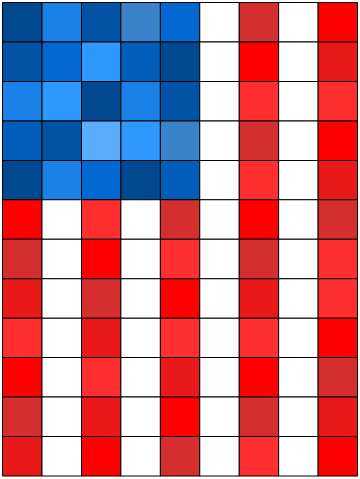
This quilt measures 36” x 48”and is made of 4″ x 4″ finished (4 ½″ x 4 ½″ unfinished) squares.
You can always make the quilt bigger by adding a border or two. (I kept it this size to fit my wall space and so that I didn't need to piece a back.)
OR cut your patchwork squares bigger and use the same layout. You might need a calculator and some graph paper, but the basic dimensions are 9 squares x 12 squares – just multiply those numbers by the size of your finished squares to change the size of the quilt. (Remember to cut squares ½” bigger than the desired finished square size to leave room for the seam allowance.)
Or check out the Maker Valley Yankee Doodle quilt pattern for a Twin Size flag.
Fabric requirements:
- 25 blue 4½″ x 4½″ squares (at least 3 different ⅛ yard cuts if cutting from yardage)
- 45 red 4½″ x 4½″ squares (at least 5 different ⅛ yard cuts if cutting from yardage)
- 38 white 4½″ x 4½″ squares (at least 5 different ⅛ yard cuts if cutting from yardage)
- 1½ yard backing
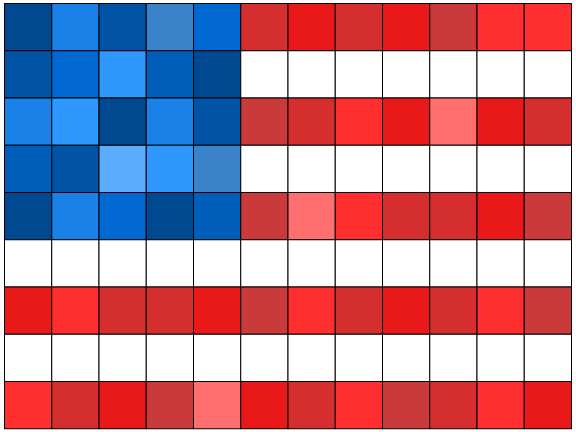
Layout the red, white, and blue squares using the diagrams below for color placement.
US Flag trivia: did you know that US Flag etiquette states that flags should be hung with the blue star field in the top left-hand corner?
I hang this quilt on a stair landing in my house, so the vertical flag works perfect for my space.
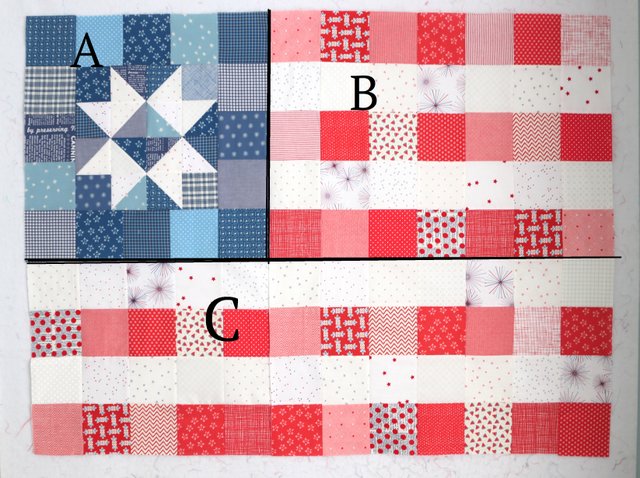
Here are the layout instructions for a horizontal flag. Both flags take the same amount of squares/fabric.
Click Here for a FREE PRINTABLE PDF PATCHWORK FLAG PATTERN including fabric requirements and block layout
Once you've got the colored blocks laid out, from there it’s just simple patchwork-squares quilt assembly: sewing the squares into rows and then sewing the rows together.
If you’d like more details, click here for a simple squares patchwork quilt tutorial. Just stack up your squares into rows (label the row) and then sew the squares to each other in order to form a long strip.
Press seams alternating directions and then sew the rows together. Again, this tutorial will walk you through the step by step process (with pictures) if you want more details.
Star Flag Quilt Variation
Half Square Triangles:
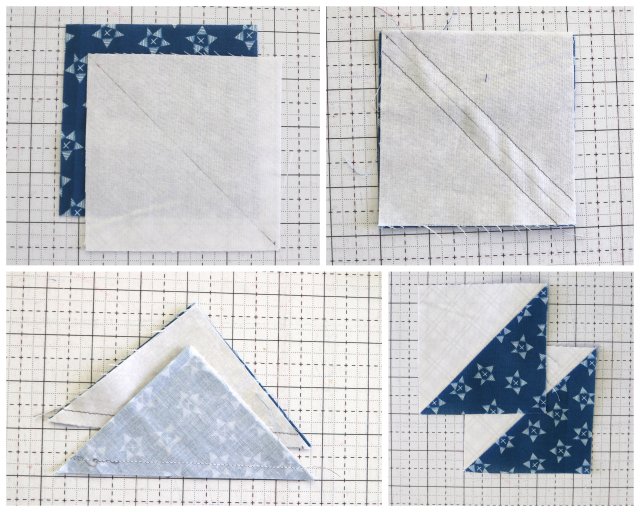
Match up 6 Blue 4" x 4" squares right-sides together with 6 White 4" x 4" squares. Draw diagonal line on the back of white squares. Sew a ¼" seam allowance on both sides of drawn line. Cut in half on the drawn line. Press two blocks open and square up HST blocks to 3½″ x 3½″.
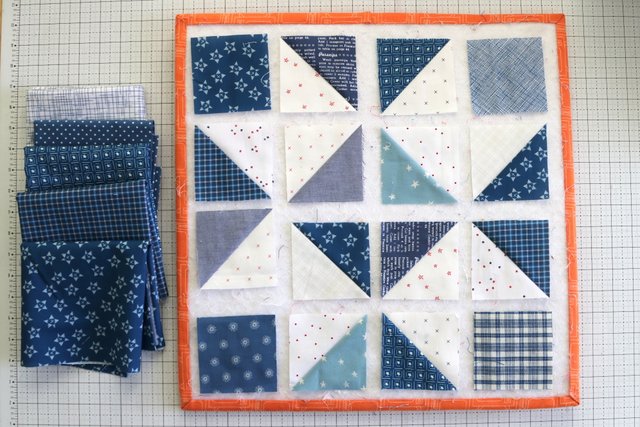
Use diagram above to layout 12 blue and white HST blocks with 4 blue 3½″ x 3½″ blocks in each corner. Sew blocks into 4 rows and and sew rows together to get a 12½″ x 12½″ Star quilt block.
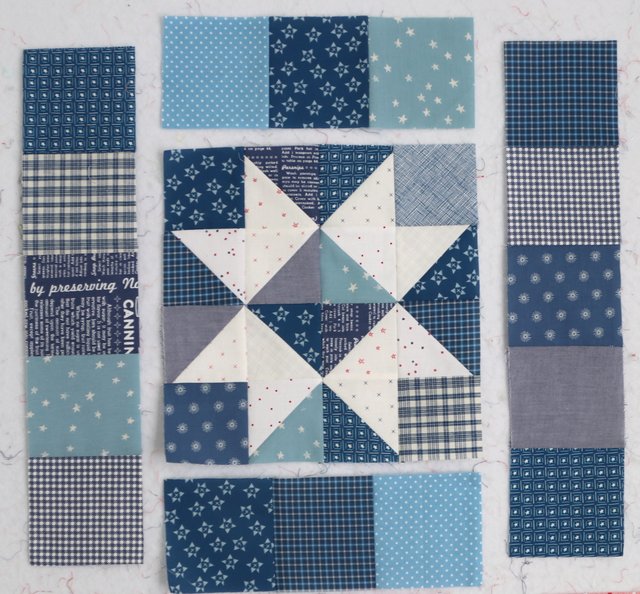
Sew 2 sets of 3 blue 4½″ x 4½″ blocks together in a row and sew them to top and bottom of Star Quilt Block. Sew 2 sets of 5 blue 4½″ x 4½″ blocks together in a row and sew them to top and bottom of Star Quilt Block.
Using Diagram for lay out, Sew sections A, B, and C separately (for either Vertical or Horizontal version)
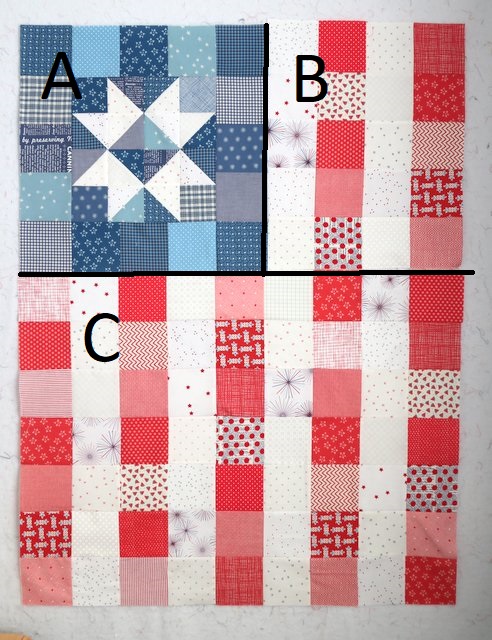
Sew section A to Section B.
Then sew AB section to section C
Click Here for a FREE PRINTABLE PDF PATCHWORK FLAG PATTERN including fabric requirements an block layout
Adding Borders and Finishing the Quilt
If you'd like to add borders, check out the original tutorial for an example. Sew the borders to the two short sides of the quilt first – this way you won’t have to piece them. Then sew the remaining border strips together end to end to add side borders. There is an additional tutorial for adding borders here.
If you are using unwashed fabric, your backing yardage should be just wide enough for this quilt. (If your backing yardage is pre-shrunk you may need additional yardage.)
Finishing a Quilt: Quilting and binding tutorials here.
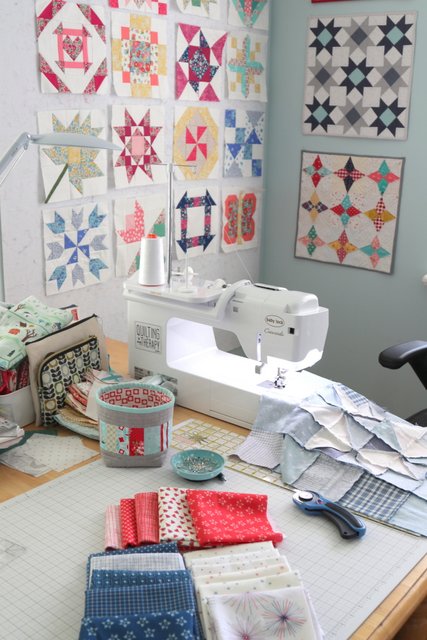
This tutorial is sponsored by Baby Lock Sewing Machines. I’ve been working with Baby Lock for a few years now and love every single machine that I’ve worked with. They’ve got something for every maker, level or budget. (You can read more about How to Choose a Sewing Machine here.)

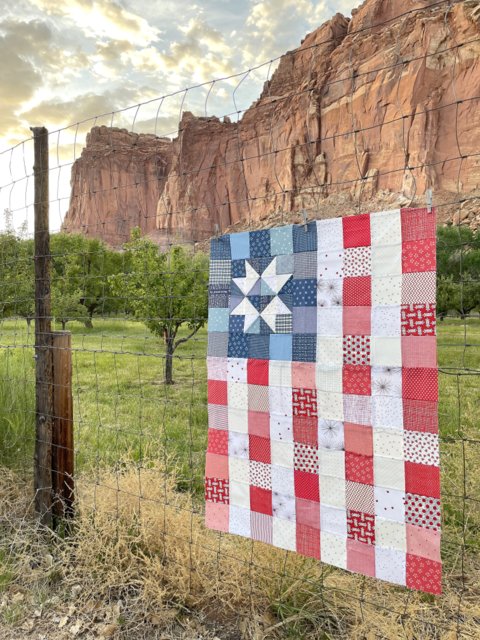
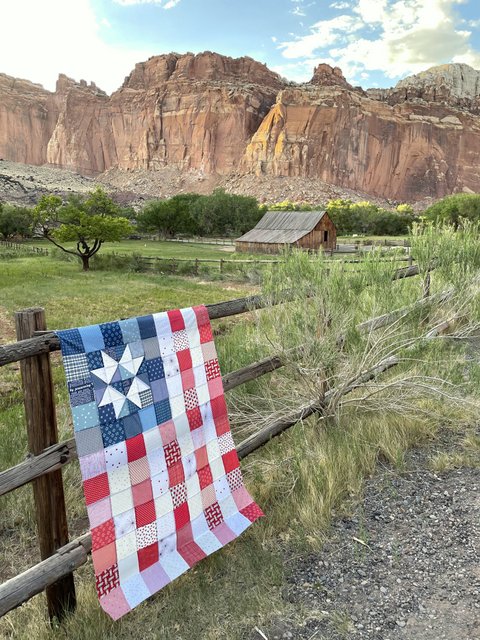
Photos on location shot at Capitol Reef National Park - one of my favorite spots in Utah and a good slice of scenery that is uniquely American.
I still need to get my quilt top to the quilter and get it finished before the 4th. If you make a patchwork flag quilt, I'd love to see it! You can tag it with #PatchworkFlagQuilt on Instagram.
Happy Sewing!
Dot
Thank you for the pattern, Amy. And thank you for your blog.
Kathy R.
Thank you for the US Flag Quilt download. It looks like an easy quilt to sew up and should be good for the group I sew for. They donate quilts to the Veterans home nearby. Thanks again!
Danna
Thank YOU!!!!!! Love it. Will definitely be making this.
Karen Anderson
Where did you take the photos? I have a oil painting that looks like the background!
Amy
They are in Capitol Reef National Park in Utah - it's such a picturesque spot!
Kay Patterson
Thank you, beautiful pattern.
Lucky LucyCheryll
Thank you dear Amy, you always inspire.
Kimberly Rae Jones
Thank you for this! I want to make a fourth of July quilt and this is perfect!
Laura Bair
I looooove red, white and blue quilts! And I’ve needed a perfect size to hang on my fence at the beach for July! I can’t wait to get started! Thank you for the pattern and happy fourth
Kathleen Shortell
Thank you so much fir th free pattern
Joann
Thank you for the pattern. Looks easy to do. Have a great Fourth of July
Kristie
Gorgeous. Thank you for sharing. I have way too much red white and blue. It's about time I start a quilt.
Ronni
spectacular photos! Come to think of it, all your quilty photos are pretty amazing, Amy.
Amy
Aww, thanks Ronni. I helps when the backdrop itself does the heavy lifting. 😉
Jen Graham
Thank you so much for this pattern. I love it!
Amy
You're welcome. I'm so glad!
Barbara Barnett
Thank You You are inspiring!!
Maggie Cooper
It appears that the A & B blocks are reversed in the pattern. The blue block should be in the upper right position to make this a correct representation of the American flag. Thank you for making this quilt; it can easily be maneuvered to the correct position.
Adriene Grzenia
Thank you for the pattern--just finished this today on the 4th. Fun and fast with outstanding results.